Stopper knots are essential for preventing the end of a rope from slipping through an opening or unraveling under tension. They create a secure barrier that keeps the rope from moving and adds extra grip. Whether securing gear, climbing, or sailing, these knots provide the stability needed for safety. Knowing the right stopper knot for the job ensures reliability in any situation.
1. Overhand Knot
The Overhand Knot is one of the simplest stopper knots, often used to prevent a rope from fraying or passing through a hole. It’s easy to tie and untie, making it a versatile choice for many applications.
To tie an Overhand Knot, start by forming a loop by passing the tag end over the standing part. Then tuck the tag end through the loop and pull it out completely. Pull both ends to tighten and complete the knot securely.
2. EStar Stopper Knot
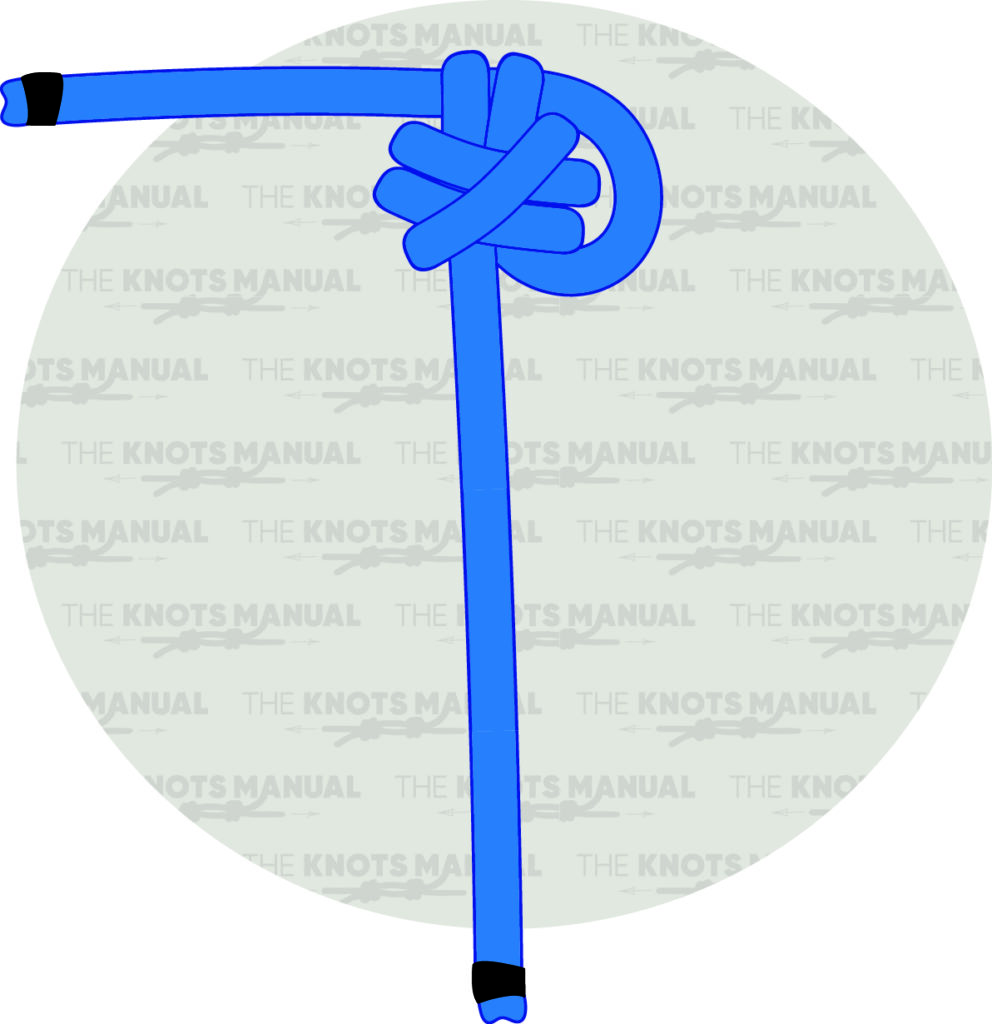
The EStar Stopper Knot is a compact and durable knot designed to prevent the end of a rope from slipping through a hole or pulley. It creates a thick, symmetrical knot that holds firm under tension while remaining easy to untie when needed. This makes it useful for sailing, climbing, and other applications requiring a reliable rope end stopper.
When tying an EStar Stopper Knot, begin by creating a loop at the end of the rope and wrap the tail end around the standing end and around itself. Then continue around the standing end and then under itself to make a Buntline Hitch. Next, pass the working end from the top, parallel to the standing end to create two top loops. Finally, bring the working end through both top loops to finish the knot.
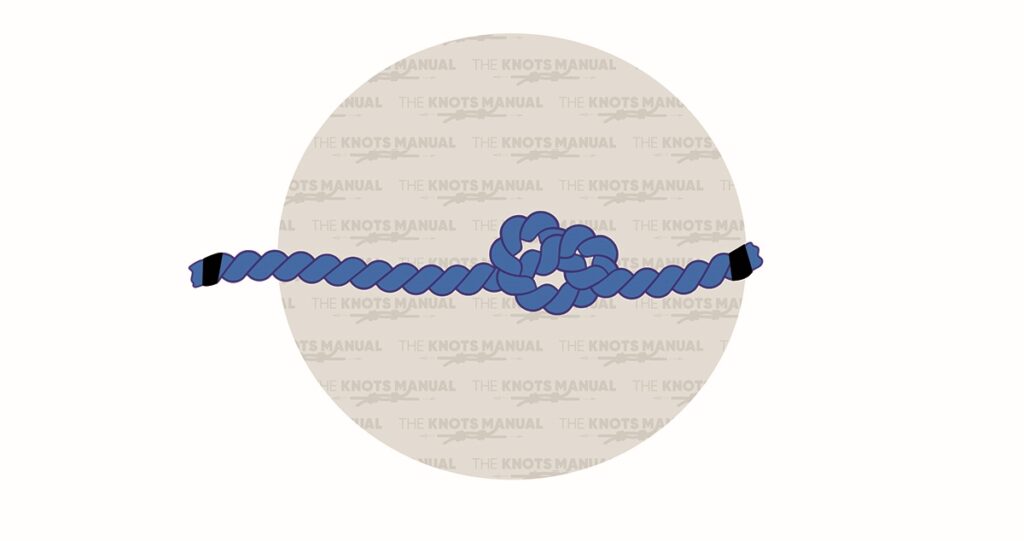
3. Ashley Stopper Knot
The Ashley Stopper Knot forms a bulkier end knot than the Figure-Eight, providing a stronger and more secure stop. It’s particularly useful when a larger stopper is needed to prevent slipping through wide openings.
To tie an Ashley Stopper Knot, start by making a long, wide bight close to the end of the rope. Next, fold the bight to form two loops, with the smaller of the two loops being closer to the working end and the larger next to the standing end. Then pass the larger loop through the smaller one and bring the working end of the rope through the formed loop. In order to secure the knot, first tighten the half knot on the left side, and then pull the standing end of the rope, which will tighten the larger loop around the working end. Continue pulling the standing end until it is snug, and complete the knot by pulling the working end. The finished knot should have three separate lobes.
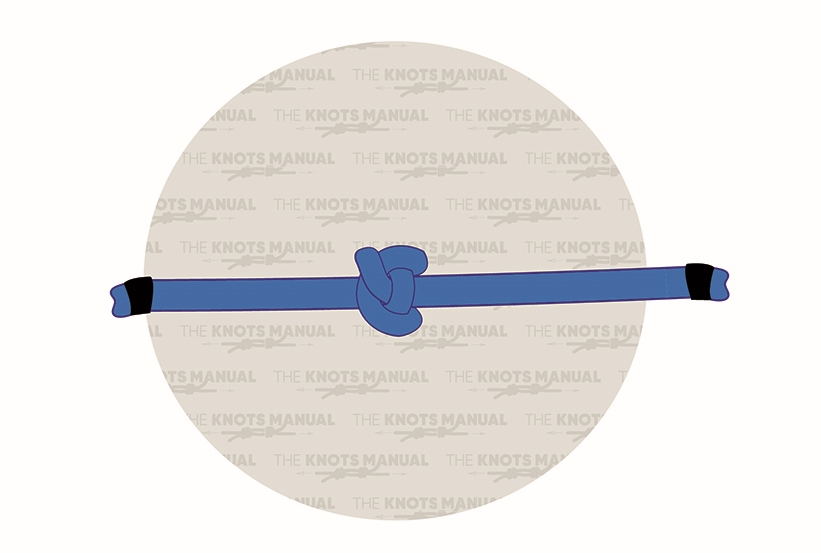
4. Double Overhand Knot
As the name suggests, this Double Overhand Stopper Knot is a more secure version of the Overhand Knot. The knot’s bulk and friction make it more secure and difficult to slip through small openings. It is commonly used in climbing, fishing, and general rope work to prevent rope ends from unraveling or passing through hardware.
To tie the Double Overhand Stopper Knot, begin by forming a loop with the working end. Pass the working end through the loop to create an Overhand Knot. Then wrap the rope around another time and tighten it by pulling both ends.
5. Stevedore Knot

The Stevedore Knot is a larger, bulkier stopper knot that prevents a rope from pulling through a block or hole. It is often used in sailing and cargo handling for its reliability.
To tie a Stevedore Knot, make a loop with a rope and pass the tag end up from behind the loop. Bring the tag end down from the front and then pass it up from behind the loop again. Thread the tag end through the loop and pull both ends to tighten and complete the knot.
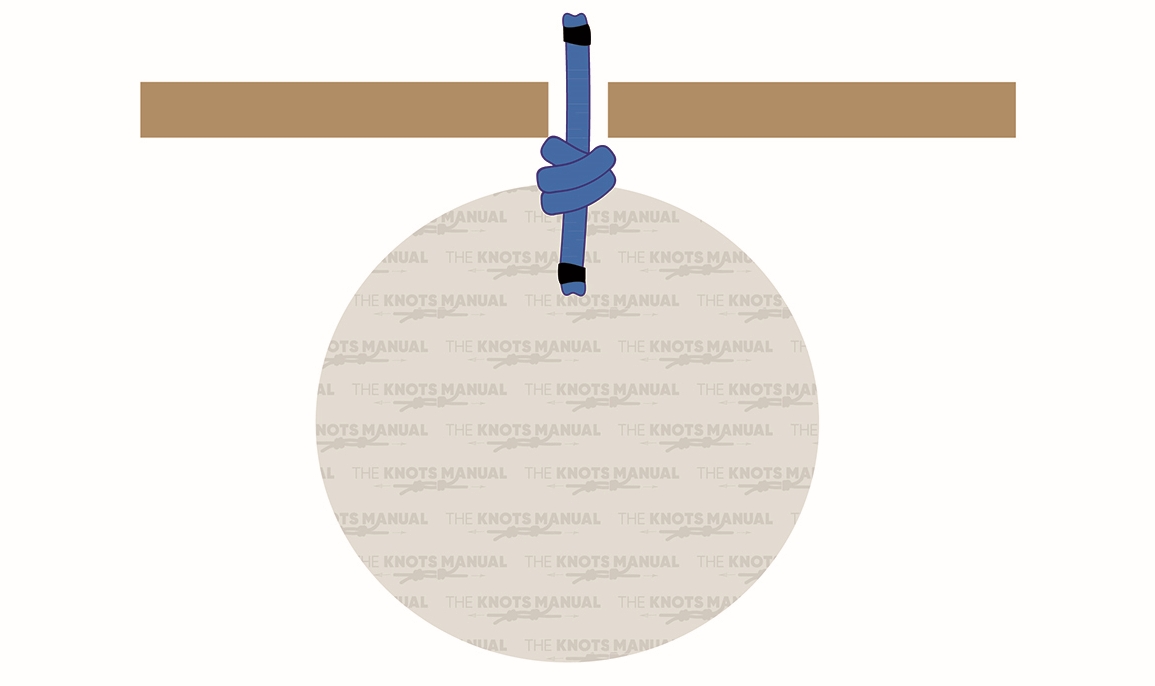
6. Heaving Line Knot

Designed to add weight to the end of a rope, the Heaving Line Knot is useful for throwing a line over a distance. It forms a bulky knot that ensures the rope doesn’t slip through small gaps.
Tying a Heaving Line Knot starts by making two bights next to each other in opposite directions at the end of a rope. Ensure the bights are approximately the desired size of the finished knot and leave plenty of rope for the working end to make the wraps needed. Next, pass the working end through the top bight and wrap it around both strands of the bight only. Continue forming the wraps, but start encircling all three strands working down the ropes. Pass the working end through the opening of the bottom bight, and pull up on the top loop and down on the standing line to tighten and finish the knot.
7. Monkey’s Fist
The Monkey’s Fist is a decorative and functional stopper knot, forming a weighted ball at the end of a rope. Often used in boating and rescue operations, it ensures a secure grip and easier handling.
To tie a Monkey’s Fist Knot, begin by making three turns around your fingers and wrapping the rope end around horizontally. Repeat the wrap two more times horizontally, and pass it through the loop. Next, wrap it around the horizontal section three times. Insert a ball to give the knot a spherical shape, and pull the ends to tighten and complete the knot.
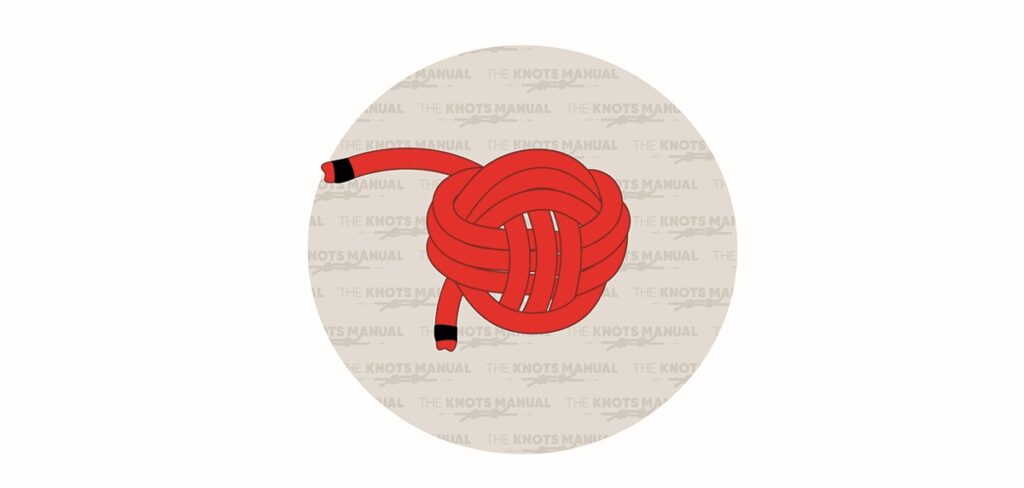
8. Double Matthew Walker Knot
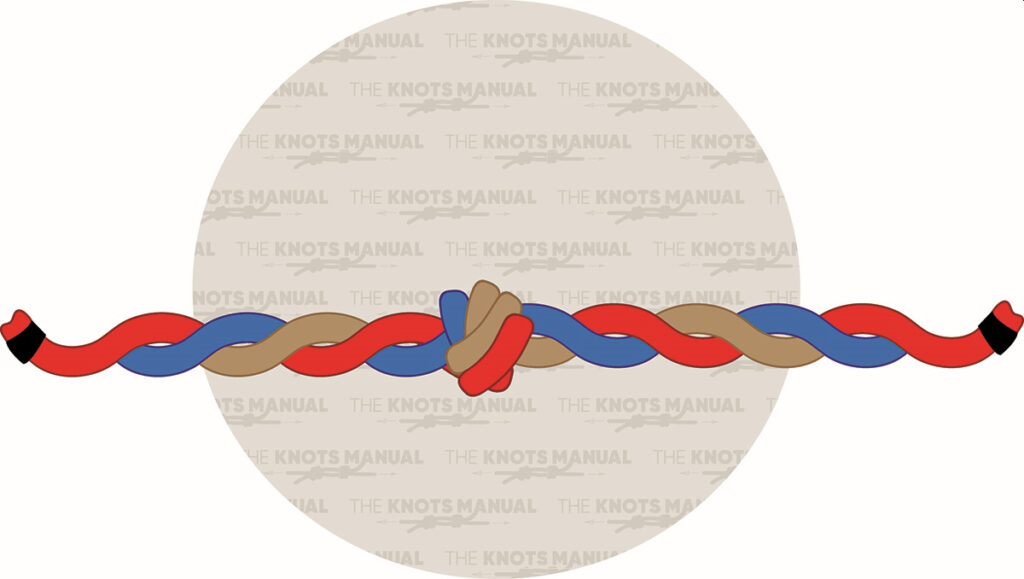
The Double Matthew Walker Knot creates a secure, medium-sized stopper that cannot be untied without unraveling the rope. It’s used for decorative purposes, as a stopper knot, or to keep a twisted rope from unraveling.
When tying the Double Matthew Walker Knot, start with a three-strand rope and intertwine each strand with the next one clockwise to create a Wall Knot. Position each strand near the one to follow. The first one follows the next under the other and up through itself. Then repeat following the same pattern and tighten carefully.
9. Bobber Stopper Knot
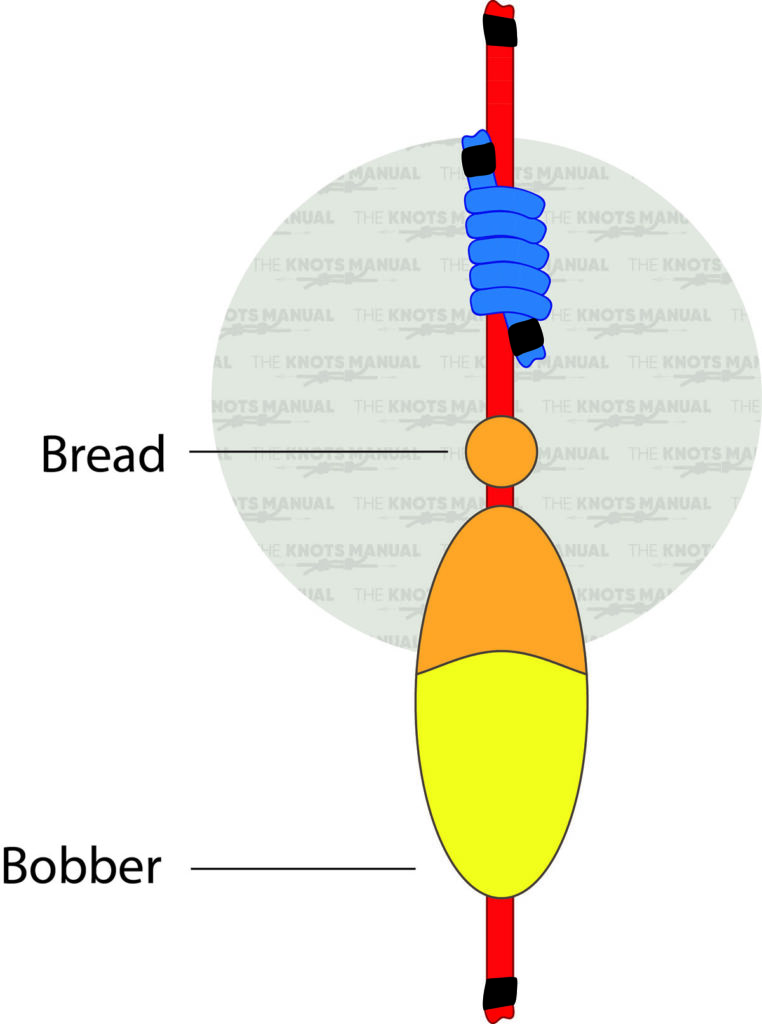
The Bobber Stopper Knot is used in fishing to create an adjustable stopping point on a fishing line, preventing a bobber from sliding too far. It holds securely under tension but can be easily moved to adjust the depth of the bait. This knot is typically tied using a short piece of thread or monofilament wrapped multiple times around the main fishing line.
To tie a Bobber Stopper Knot, begin by cutting a short piece of fishing line approximately 12 inches (30 cm) long. Next, place one end of the short fishing line next to the main line and make a loop with it. Then wrap the other end around it five times, making sure to pass the end through the loop after the final turn. Tighten the knot by lubricating it with water or saliva and cut both tag ends short.
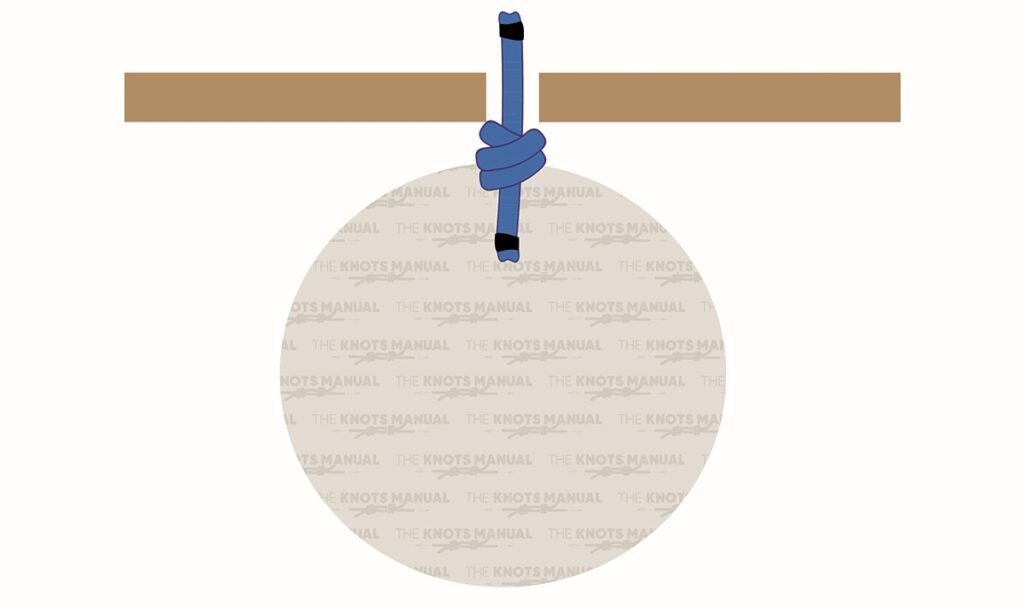
10. Barrel Hitch Knot
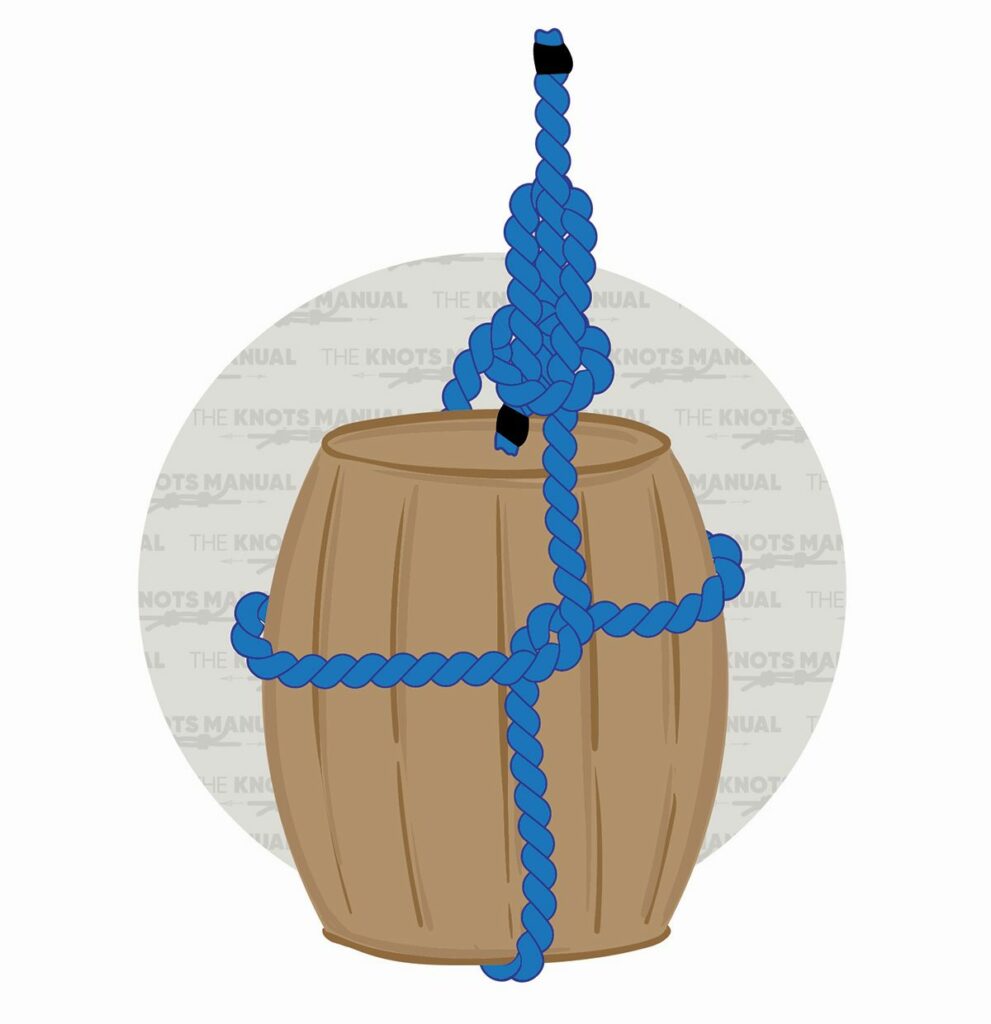
The Barrel Hitch Knot, also known as the Blood Knot, is a secure and bulky knot used to prevent a rope from slipping through an opening. Its cylindrical shape provides a strong hold under tension, making it ideal for applications where a reliable stopper is needed. This knot is commonly used in maritime and rigging tasks to ensure stability and security.
To tie a Barrel Hitch Knot, start by wrapping the rope around the barrel, lengthwise, creating a loop above the barrel. Ensure that the standing and working ends meet at the same height above the barrel, so the rope is equal, and the standing part of the rope is sitting centered underneath the barrel.
If the rope is too close to either side of the barrel’s edges, the rope could slip and be potentially dangerous.
Next, pass the working end of the rope through the loop to form an Overhand Knot which creates a large loop above the barrel. Pull the ropes forming the loop apart to create a larger loop that can fit around the width of the barrel. Then slide the barrel through the loop by pulling the loop down over the sides.
The loop needs to be situated correctly, far enough from the top and bottom to prevent the barrel from tipping over or slipping off. Form a bight in the standing end of the rope and wrap the working end around the bight and then through it.
Finally, pull the working and standing ends simultaneously to tighten and complete the knot.