Scouting knots are a fundamental skill emphasized by organizations like the Boy Scouts of America and outdoor survival experts that every scout should master, as they play a crucial role in various outdoor activities. Learning these knots is not only a core scouting requirement but also an essential skill for camping, hiking, and emergency situations. From securing tents to ensuring safety during climbs, these knots are indispensable tools in a scout’s repertoire. Understanding and practicing these knots ensures both safety and efficiency in the wilderness.
1. Square Knot
Scouts often use the Square Knot for joining two ropes or simple binding tasks. Also known as the Reef Knot, it is a foundational knot for many scouting skills and is commonly utilized in first aid to tie bandages, pioneering to secure bundles, or general binding to hold objects together or in place. Since this knot can slip under tension, it cannot be trusted with heavy loads and should only be used when holding secure under load is not critical.
In order to tie a Square Knot, cross one rope’s working end over another rope’s working end. Pass the working end of the first rope through the loop created by the second rope. Then, pull the working ends and standing ends of both ropes simultaneously to tighten the knot.
2. Two Half Hitches
Two Half Hitches is used by scouts to temporarily attach a rope to a post, tree, or ring. This versatile knot is particularly useful for tying guy lines to tent stakes or securing boats to docks. Valued for its reliability and ease of tying and untying, even after being subjected to tension, the knot is adjustable and can move along a rope. Scouts frequently use Two Half Hitches in camping scenarios to secure shelters and tarps.
To tie Two Half Hitches, wrap the rope’s working end around a support, like a pole or post, and pass it over the top of the standing end and through the loop. Pull tight to create a half hitch. Then pass the working end through the second loop and pull tight to create a second-half hitch and complete the knot.
3. Taut-Line Hitch
In scouting, the Taut-Line Hitch is used to create an adjustable, sliding knot that maintains tension along a rope. Ideal for securing tent guy lines that may need periodic tightening, it slides easily when not under load but holds firm under tension. This adjustability makes it a favorite among scouts for tasks requiring variable tension. Mastering the Taut-Line Hitch enhances a scout’s ability to adapt to changing conditions in the field.
When tying a Taut-Line Hitch knot, wrap the working end around the support and then around the rope’s standing part. Next, take the working end and wrap it around the standing end again, starting inside the loop.
Then, pull the end of the rope upwards so that it’s outside the loop. Wrap the working end around the standing end again, outside the original loop.
Tighten and complete the knot by holding the standing part on either side of the support with one hand and pulling both ends of the rope with the other hand. Slide the knot across the rope to adjust the tension.
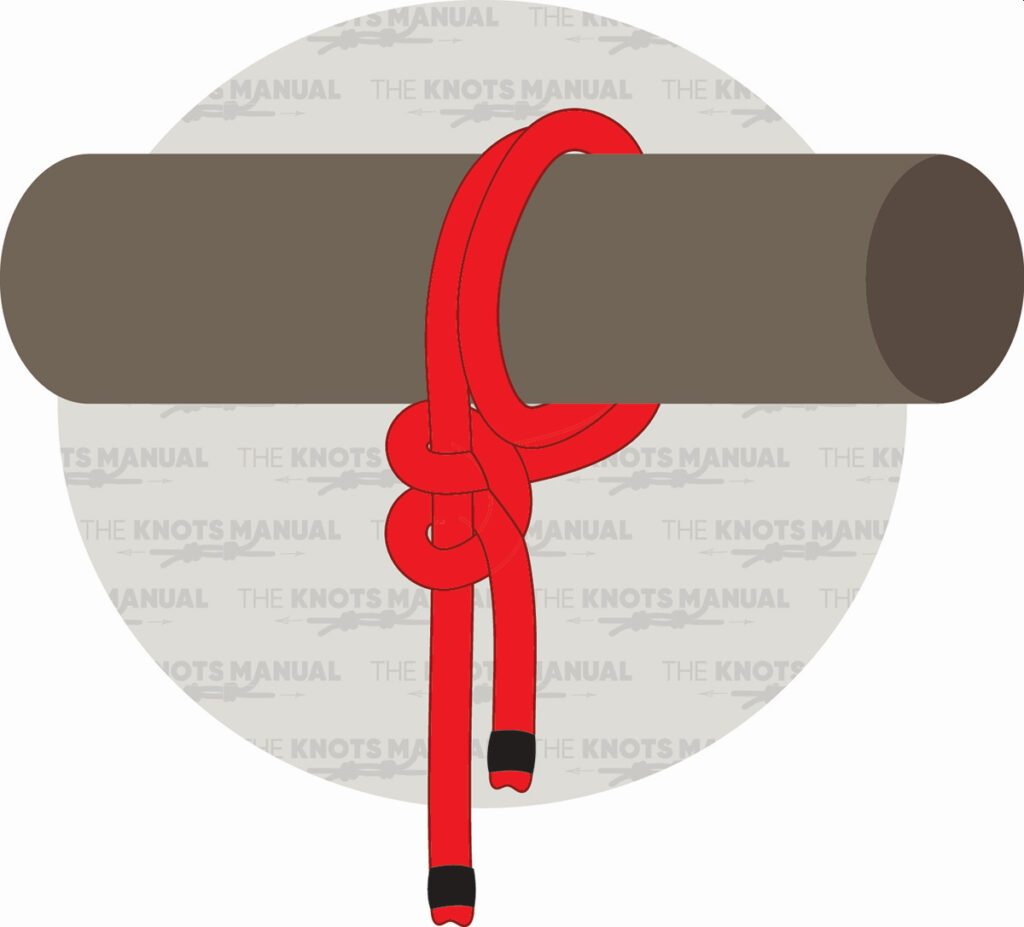
4. Rolling Hitch
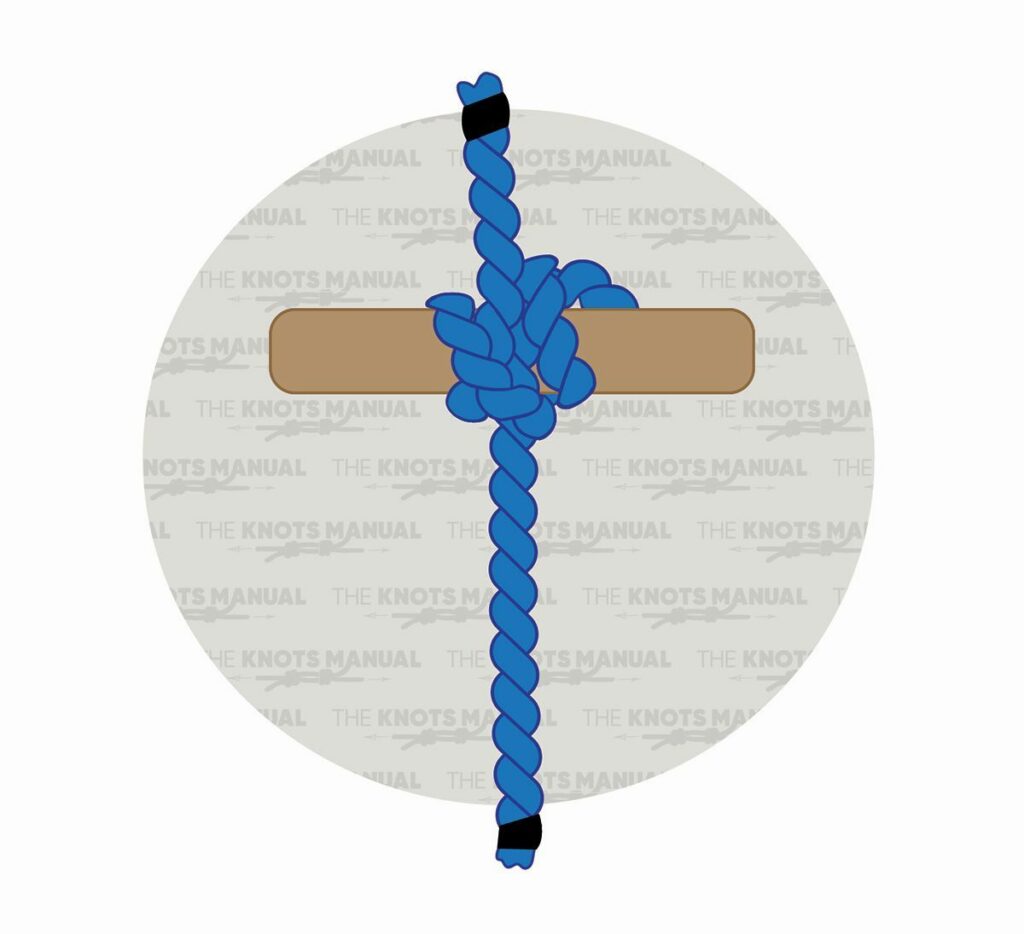
The Rolling Hitch is used in scouting to attach a rope to a pole or rod, allowing it to slide along the object when needed but hold firmly under load. This knot is particularly useful for adjusting the length or tension of a rope without untying the knot. Scouts might use the Rolling Hitch when setting up shelters or when a rope needs to be adjusted frequently. Its ability to grip and release makes it a practical choice in various scouting activities.
To tie a Rolling Hitch knot, loop the working end of the rope around a post, bringing it down from behind the post. Bring the working end back up and wrap it around the post. Then, pass the working end under the post and underneath the first wrap, pulling it upwards from between the two wraps. To tighten and secure the knot, pull the working end and standing end simultaneously.
5. Timber Hitch
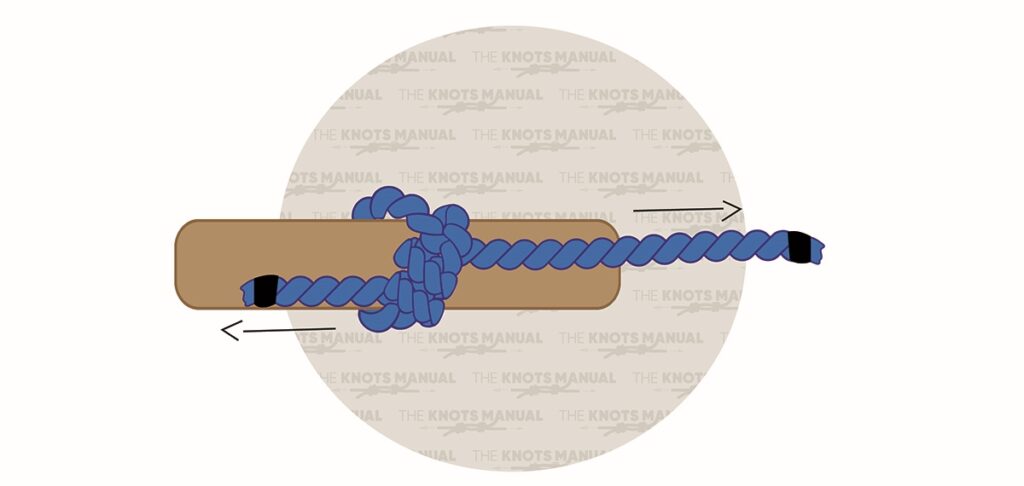
Scouts primarily use the Timber Hitch to secure a rope to a cylindrical object, like a tree or post, and to help with hauling heavy loads, such as the dragging or lifting of logs. It’s a reliable knot that tightens under tension and is easy to untie after use. A valuable knot for scouts to learn, its simplicity and effectiveness of securing loads without slipping make make it especially useful in pioneering projects or camp construction.
When tying a Timber Hitch knot, wrap the rope’s working end around the support and pass it around the standing part. Pull the working end toward the leftward from the loop formed, passing it under the standing part. Next, pass the working end under the standing part two more times. Then pull the working end and standing end simultaneously to tighten the knot.
6. Clove Hitch
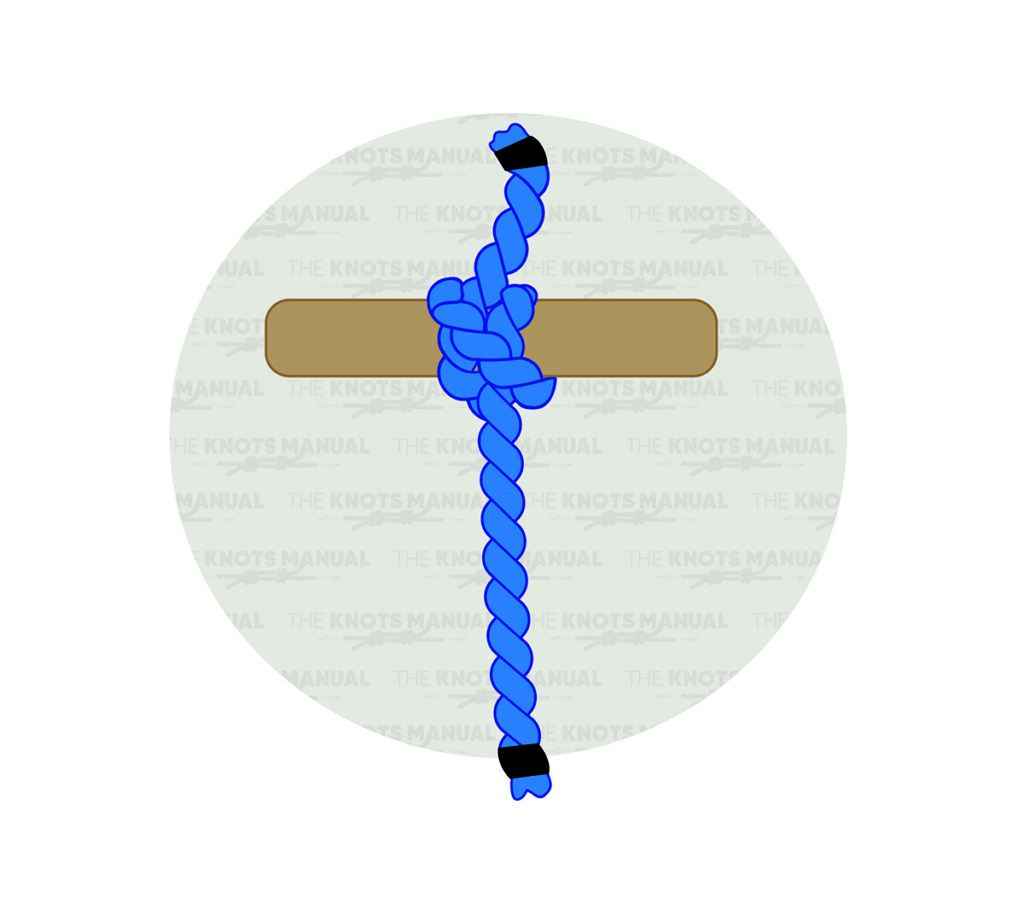
The Clove Hitch is a simple knot used by scouts to attach a rope to a pole, post, or tree and is particularly useful when setting up camping structures. Often the starting or finishing knot in lashings, this knot can be easily adjusted but may slip under heavy loads or when tied with certain types of rope, so caution is advised.
To tie a Clove Hitch, start by hanging the rope from a support object, and then loop the end of the rope around the object, passing the end of the rope from behind the rope. Pull both ends of the rope to tighten the knot. Pushing both ends of the rope together will cause the knot to come apart easily, and simply pulling the standing end and working end of the rope in opposite directions will loosen the knot and allow it to untie.
7. Figure Eight Follow-Through
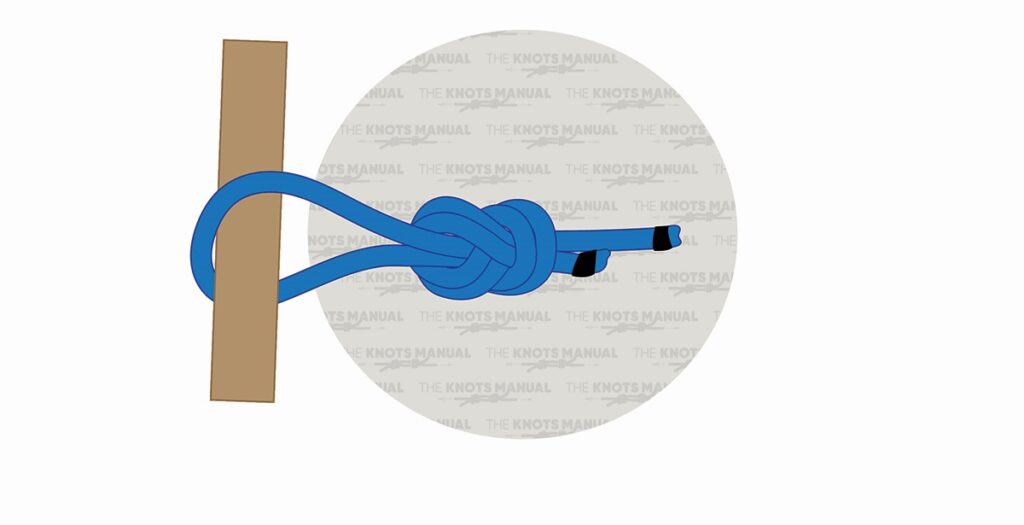
In scouting, the Figure Eight Follow-Through provides a strong knot used to create a secure loop at the end of a rope, commonly used in climbing and rescue operations. The dependable loop is easy to inspect and unlikely to slip, making it a reliable choice for critical applications when safety is needed.
When tying a Figure-Eight Follow Through Knot, start by loosely forming a regular Figure-Eight Knot near the rope’s end. Then wrap the working end around the object and pass it through the loops of the figure eight. Next, bring the working end behind the big loop and pass it next to the upper line. Take it out parallel to the standing part and pull the ends to tighten.
8. Water Knot
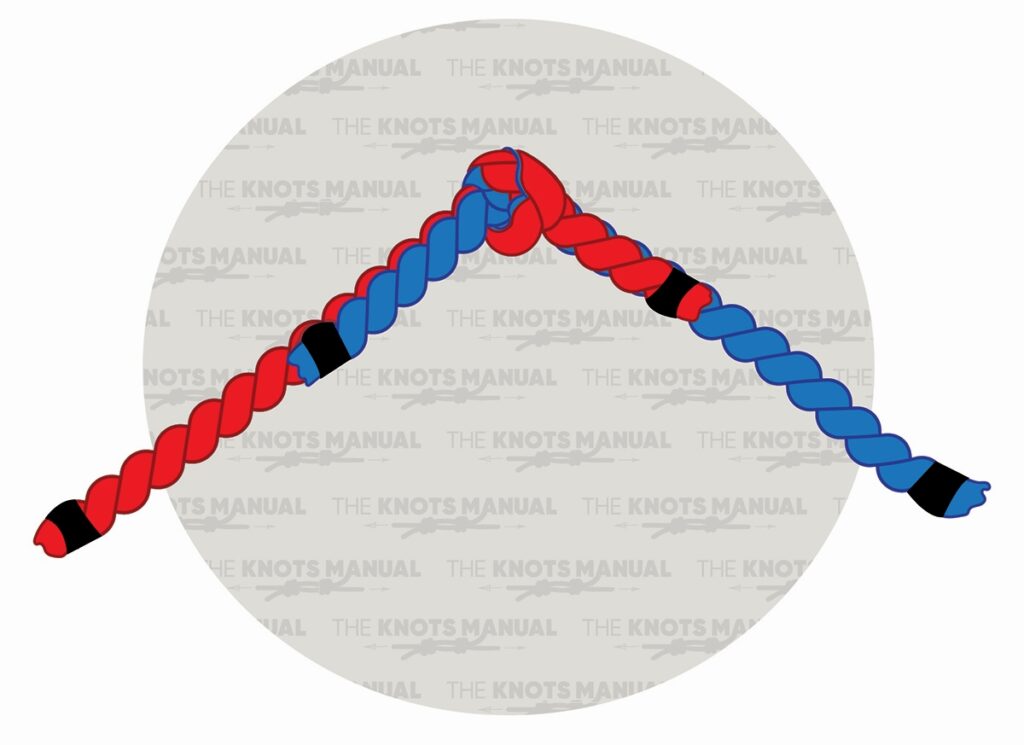
A Water Knot is primarily used by scouts to join two ends of webbing together, forming a continuous loop that works well when constructing harnesses and securing gear. Providing a secure connection between webbing, this knot is simple and strong, making it a valuable knot for various applications.
To tie a Water Knot, start by tying a simple Overhand Knot by making a loop with the first rope, and passing the end through the loop. Then, with the other rope, retrace the steps but in the other direction by passing it through the knot of the first rope, with both ends exiting in opposite directions.
9. Improved Clinch Knot
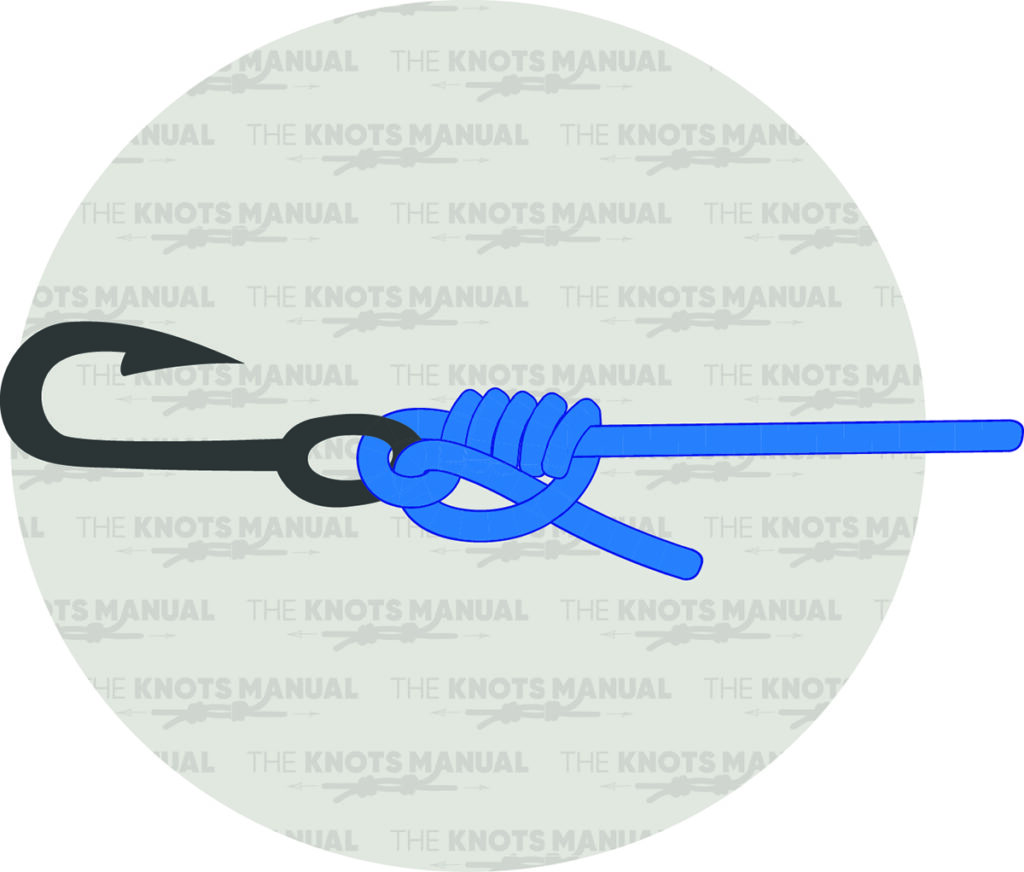
While not traditionally a scouting knot, the Improved Clinch Knot is useful for scouts interested in fishing, as the knot secures a fishing line to a hook, lure, or swivel. This knot provides a strong and reliable connection that resists slipping. Learning to tie it can enhance a scout’s fishing experience by ensuring gear is securely attached.
To tie an Improved Clinch Knot, first, pass the end of the line through the eye of the hook and start wrapping it around the standing end. Complete five full turns around the standing end, and then pass the end through the loop near the eye of the hook. Then, pass the end under itself and tighten the knot.
10. Palomar Knot
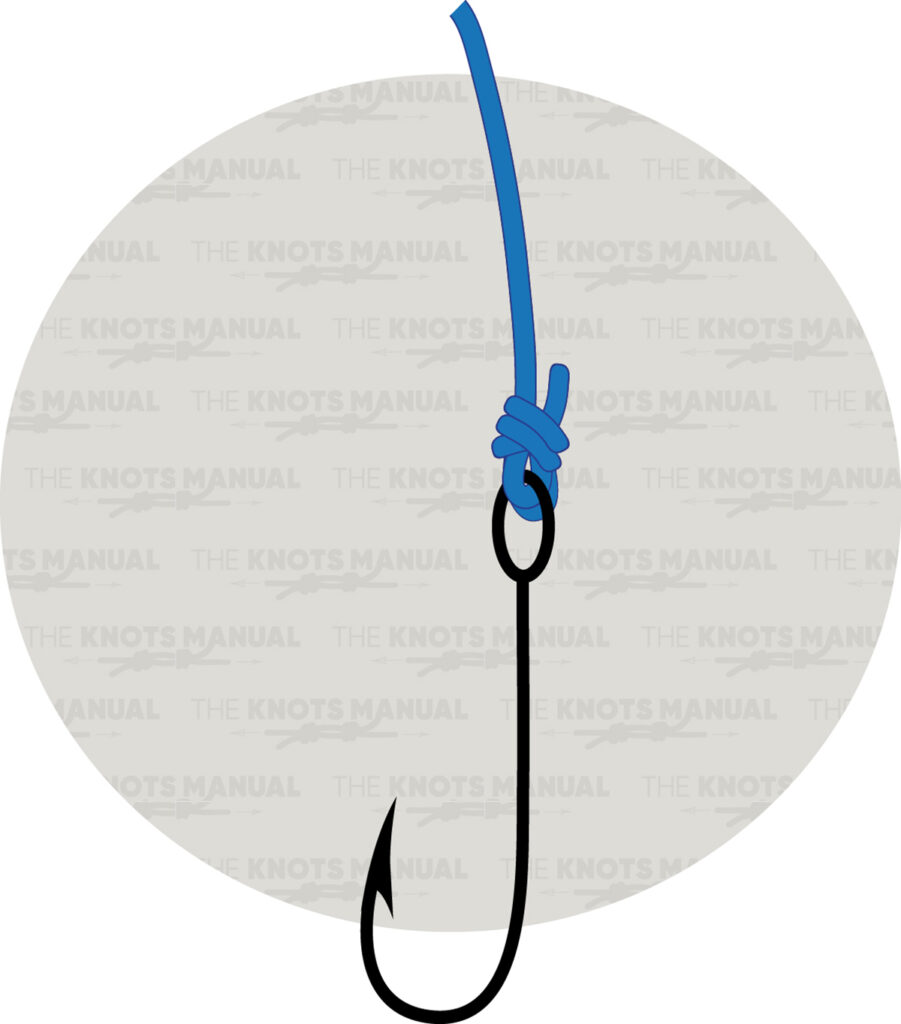
Another knot commonly used by scouts when fishing is the Palomar, which securely attaches a fishing line to a hook or lure and is known for its strength and simplicity. Scouts who fish can benefit from knowing that this knot is less likely to slip and maintains a high breaking strength with various types of fishing lines, making it a favorite among anglers.
Tying a Palomar Knot begins by creating a bight near the end of a fishing line. Pass the bight through the ring of the hook and behind the standing end. Wrap it around the standing end and bring it through the formed loop to make an Overhand Knot. Next, take the end of the bight, spread it open, and pass it over the hook, bringing it up. Then, pull the standing part to tighten the finished knot.
11. Loop to Loop
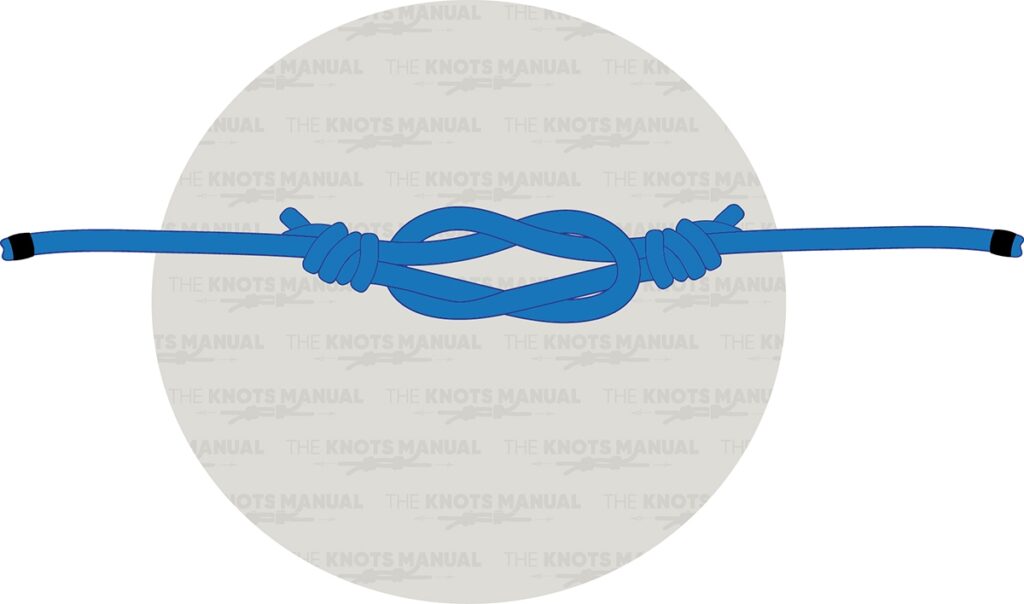
Scouts find the Loop to Loop knot useful for connecting two loops, such as joining a leader to a fly line in fishing. It works well for changing leader or tippets efficiently and allows for quick and easy attachment and detachment without compromising strength. Mastering the Loop-to-loop connection improves a scout’s adaptability in fishing scenarios.
To tie a Loop to Loop Knot, start by overlapping the two loops—one from each line. Pass one loop through the other, then pull it all the way through. Next, take the tag end of the second loop and thread it back through the first loop. Pull both lines tight to secure the connection, ensuring the loops stay interlocked.
12. Bowline
A required knot for several different scouting merit badges, the Bowline is a versatile knot used to create a fixed loop at the end of a rope. commonly used in rescue situations and for securing ropes to objects. It is easy to tie and untie, even after being subjected to a load. Scouts use the Bowline in various situations, such as securing tents, creating loops for hauling, or in emergency rescues. Its reliability and ease of use make it an essential knot for all scouts.
In order to tie a Bowline knot, form a small loop near the end of a rope and pass the working end through the loop. Then, go out of this loop on the left side of the standing end and bring the working end around the standing end. Next, pass the working end through the original loop in the opposite direction. Pull the working end opposite to the fixed loop to tighten.
13. Round Turn with Two Half Hitches
The Round Turn with Two Half Hitches is used by scouts to secure a rope to a post or ring, offering a strong hold under load. This knot is particularly useful for securing boats, tying up gear, or fastening ropes to trees or poles. In situations where a firm grip is necessary, scouts appreciate this knot’s stability. Its ease of tying and ability to handle strain without slipping make it a dependable choice for outdoor adventures.
In order to tie a Round Turn and Two Half Hitches knot, place a rope over the support and feed it around. Bring the rope around the support again to complete the loop. Then, wrap the end of the rope around the main rope. Form the first half hitch by tucking the end of the rope through, and then wrap the end of the rope around the main rope again in the same direction. Tuck the end of the rope through to create the second half hitch, and pull the main end of the rope to tighten the knot.
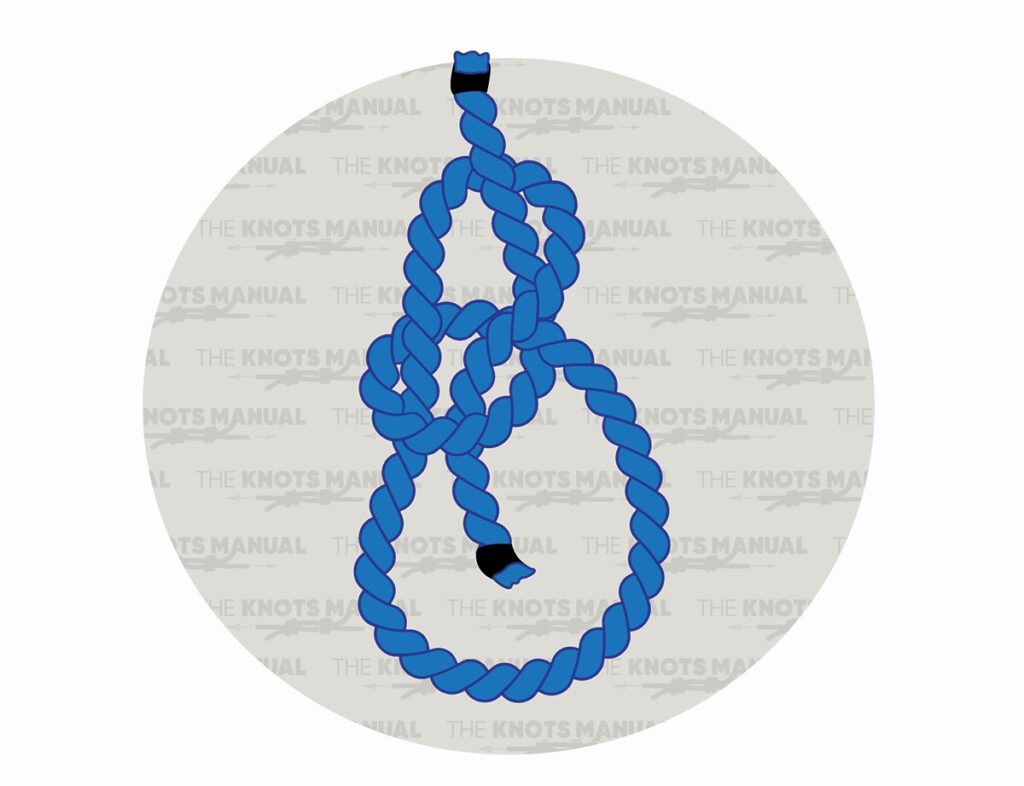
14. Tumble Hitch
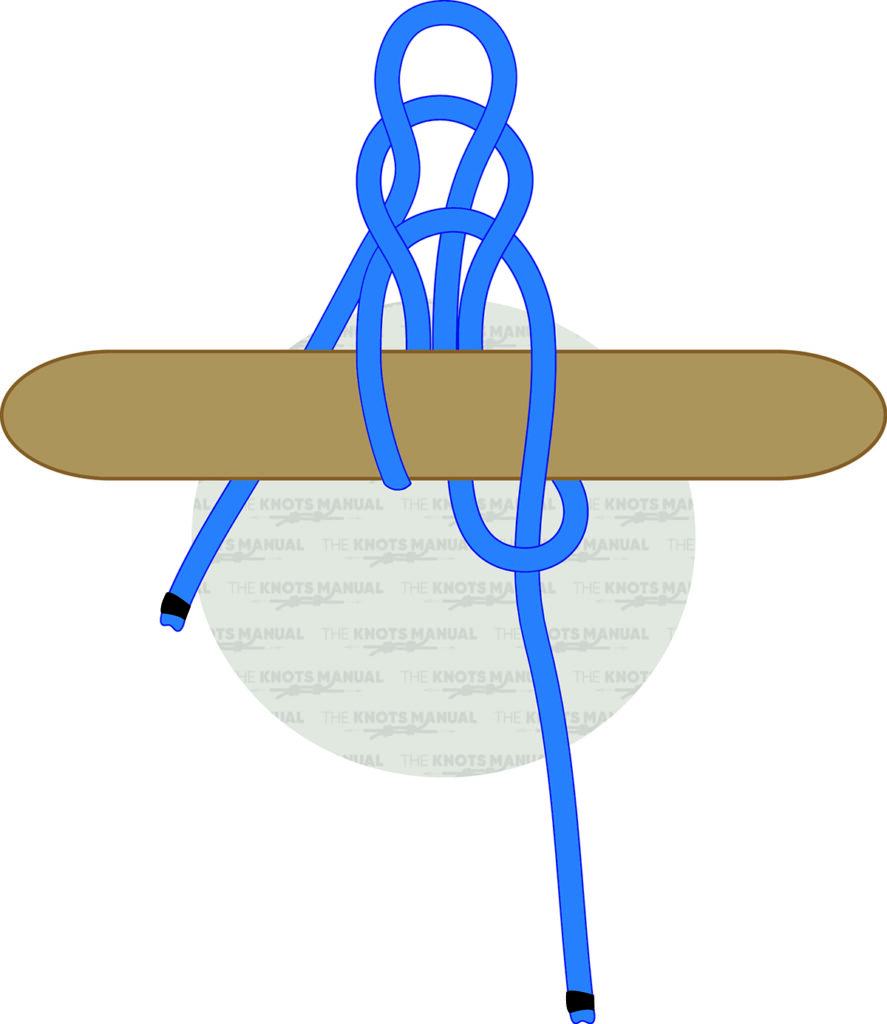
In scouting, the Tumble Hitch is a quick-release knot used for when a secure but temporary hold is needed, such as fastening loads that may need to be quickly released. With its easy untying, even under tension, this knot is ideal for securing equipment in a way that ensures fast deployment when needed and increases the efficiency in setting up and breaking down camp.
When tying a Tumble Hitch knot, begin by making a bight in the rope and placing it against a pole. Next, make another bight on the working end of the rope and wrap it around the backside of the pole and up through the first bight created. Then pass the working end behind and over the standing end. Create another bight with the working end and pass it through the second loop. Pull the standing end while holding the final bight to tighten. To quickly untie the knot, pull the working end.
15. Cleat Hitch
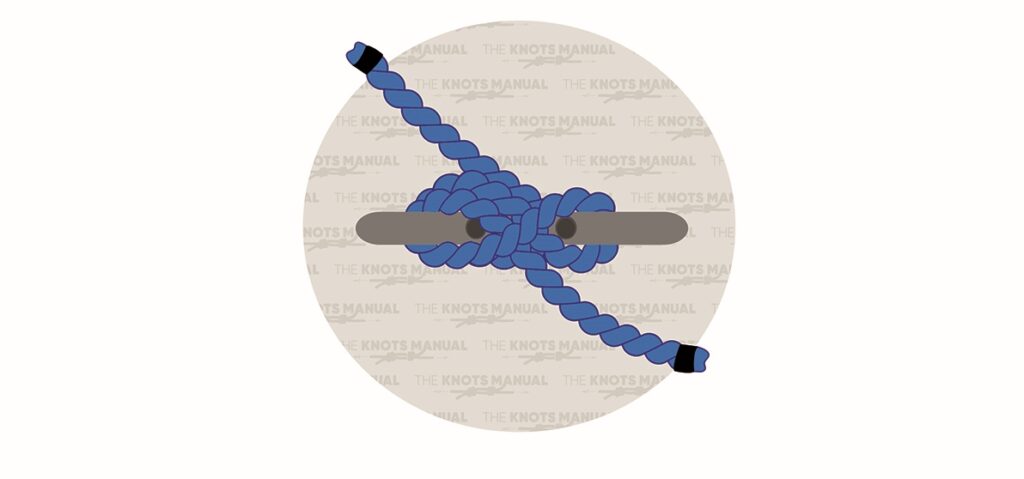
Scouts often use the Cleat Hitch when working with boating activities or securing tarps and shelters in windy conditions. Its a simple yet effective knot used to secure a rope to a cleat, often found on boats and docks, providing a secure hold while allowing for quick adjustments when necessary.
When tying a Cleat Hitch knot, wrap a rope around the boat’s far horn. Next, wrap the rope’s working end around the near horn and pass it around the back and then around the front of the horn. Create a loop in the working end of the rope, and slide the loop over the near horn. Tighten the knot by pulling on the working end.