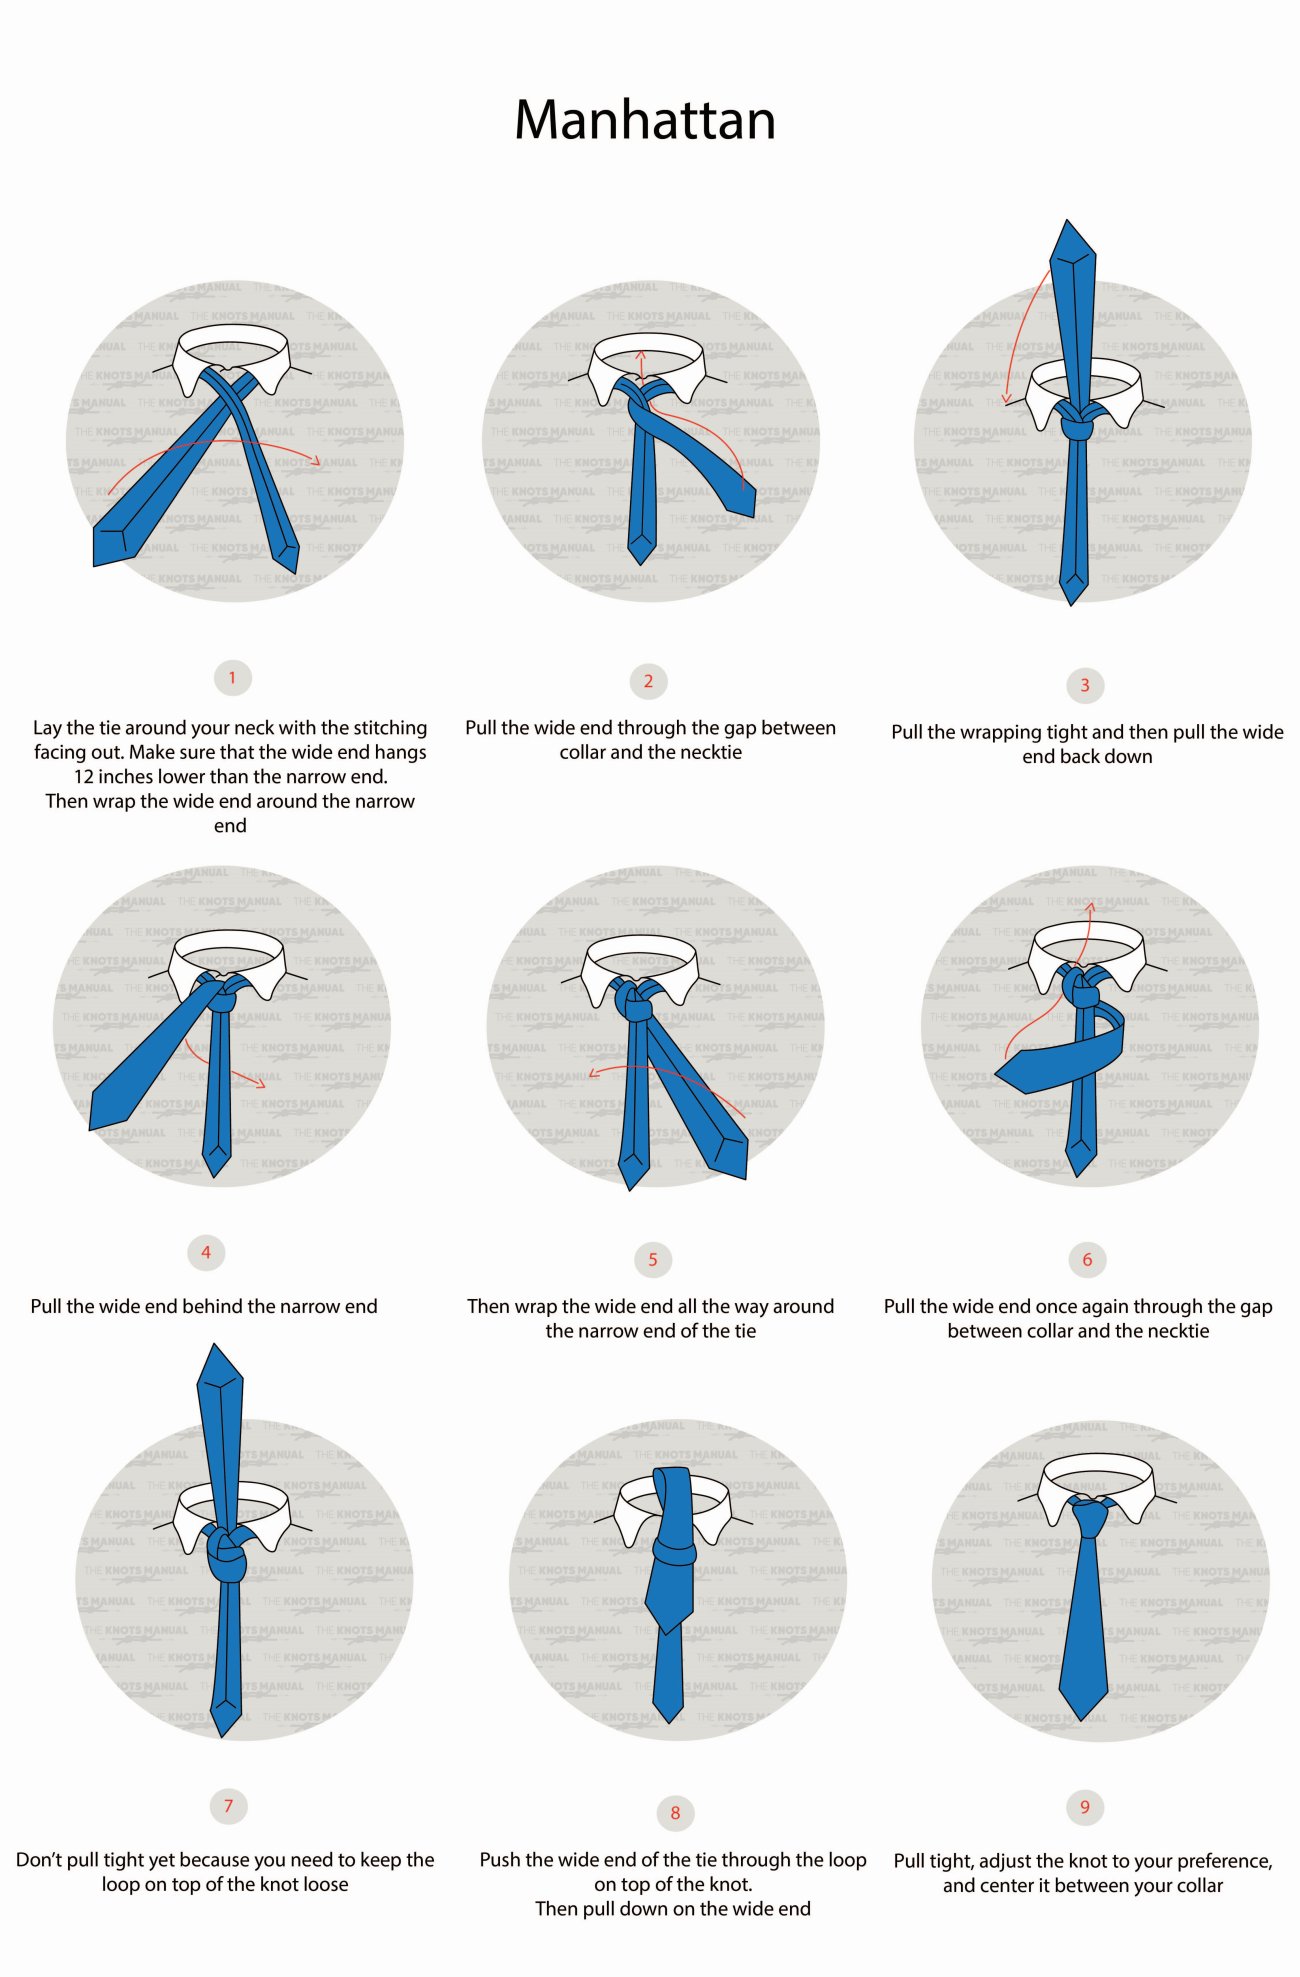
The Manhattan Tie Knot creates a long and narrow tie knot with a classic appearance. It works very well with wide ties and for people with a round chin.
Quick Guide: Tying the Manhattan Tie Knot
To tie the Manhattan Tie Knot, lay the tie around your neck with the stitch side visible. The wide end should be 12 inches (30 cm) below the narrow end because you’ll be tying it only with the wide end. Pass the wide end underneath the narrow end to reach the starting position.
Pass the wide end over the narrow end and underneath the top of the knot (steps 1-2). Now pass it down over on the left side (step 3), around the narrow end one full turn (steps 4-5), and back up underneath the top of the knot on the left side (step 6). Finally, tuck it underneath the horizontal loop in front of the knot (steps 7-9).
Tip: Tighten the knot as you go until you reach step 5. Keep the rest of the turns loose until you reach the final step.
About the Manhattan Tie Knot
The origins of the Manhattan Tie Knot are unclear. Today, it’s a moderately-popular tie knot that’s easy to tie and creates a classic look.
It creates a triangular and symmetrical knot. It’s unique because it’s longer and narrower than on other tie knots. It also creates a dimple in the tie just underneath the knot.
The Manhattan Tie Knot is tied with the stitch-side up, and it also doesn’t untie by itself when you pull out the narrow end.
When and How to Wear the Manhattan Tie Knot
The Manhattan Tie Knot has a classic and elegant appearance. Wear it whenever you need to go to formal events, job interviews, and business meetings.
Because of its narrow profile, it’s best worn with narrow-collar shirts. You can wear it with any kind of tie, even wide and thick ones because it will hold a compact profile even then.
It works best for people with rounded faces because of its narrow profile.
Knots Like the Manhattan Tie Knot
Prince Albert Tie Knot: A medium-sized tie knot with a square-like appearance. It’s slightly easier to tie than the Manhattan Tie Knot. It also looks good for people with rounded chins.
Pratt-Shelby Tie Knot: This tie knot has a medium-sized, triangular, and symmetrical appearance. It’s also very easy to tie.
Kelvin Tie Knot: An easy-to-tie knot with a medium-sized, square-like appearance. It can also be worn with narrow-collar shirts.
Half Windsor Tie Knot: One of the most popular tie knots. It creates a medium-sized, triangular, and symmetrical tie knot. Compared to the Manhattan Tie Knot, it’s wider in shape and similarly easy to tie.
Full Windsor Tie Knot: A very large and bulky tie knot. It creates a wide and triangular knot that looks good with wide-collar shirts. It’s much harder to tie than the Manhattan Tie Knot.
Step-By-Step Guide: How to Tie the Manhattan Tie Knot
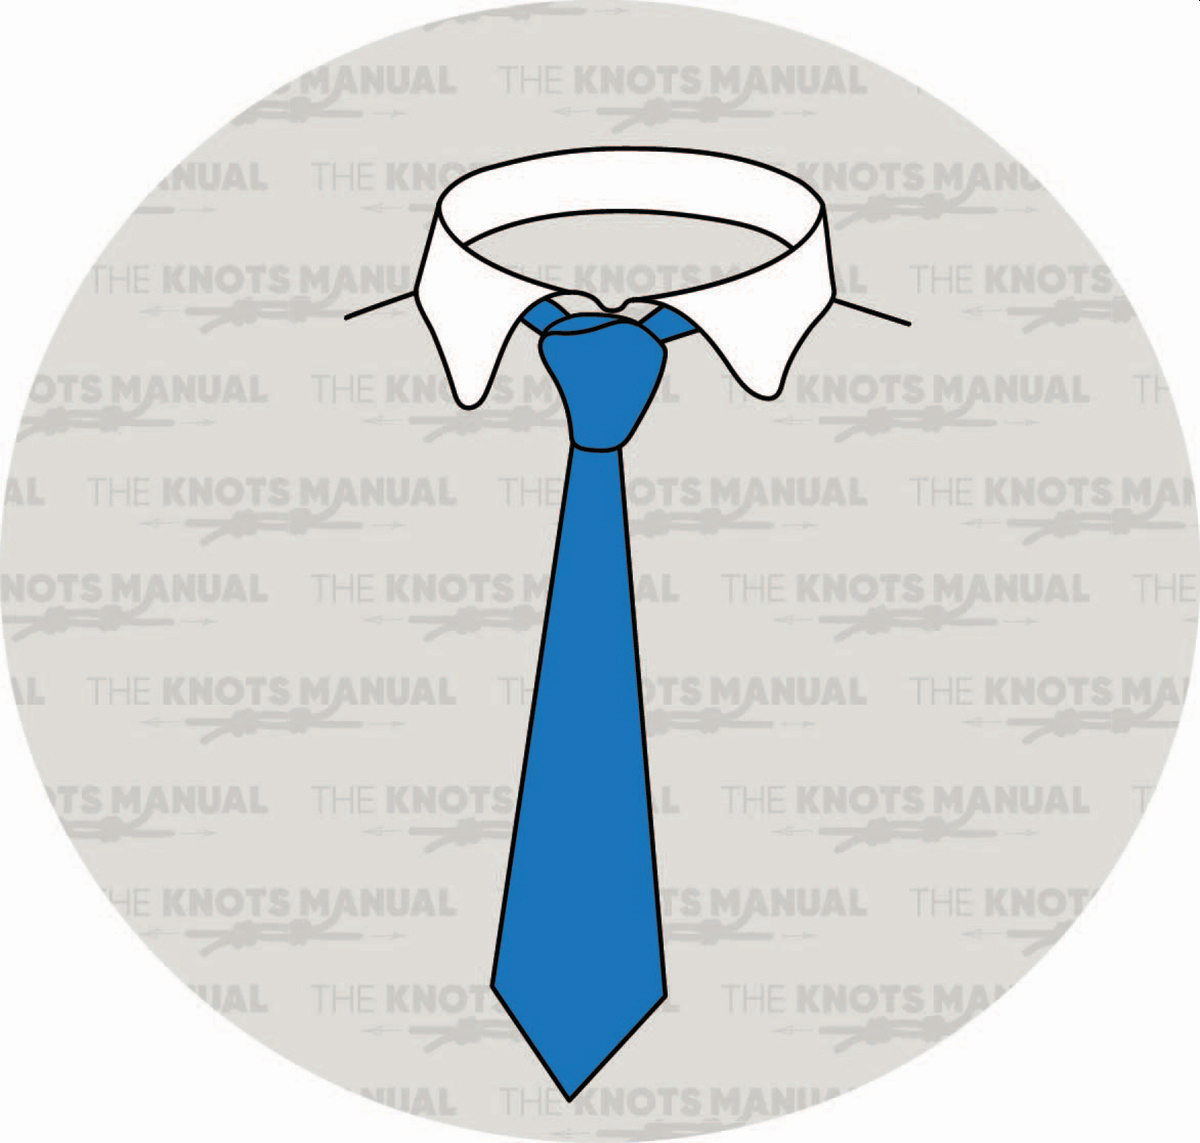
A step-by-step guide on how to tie the Manhattan Tie Knot.
Step 1:
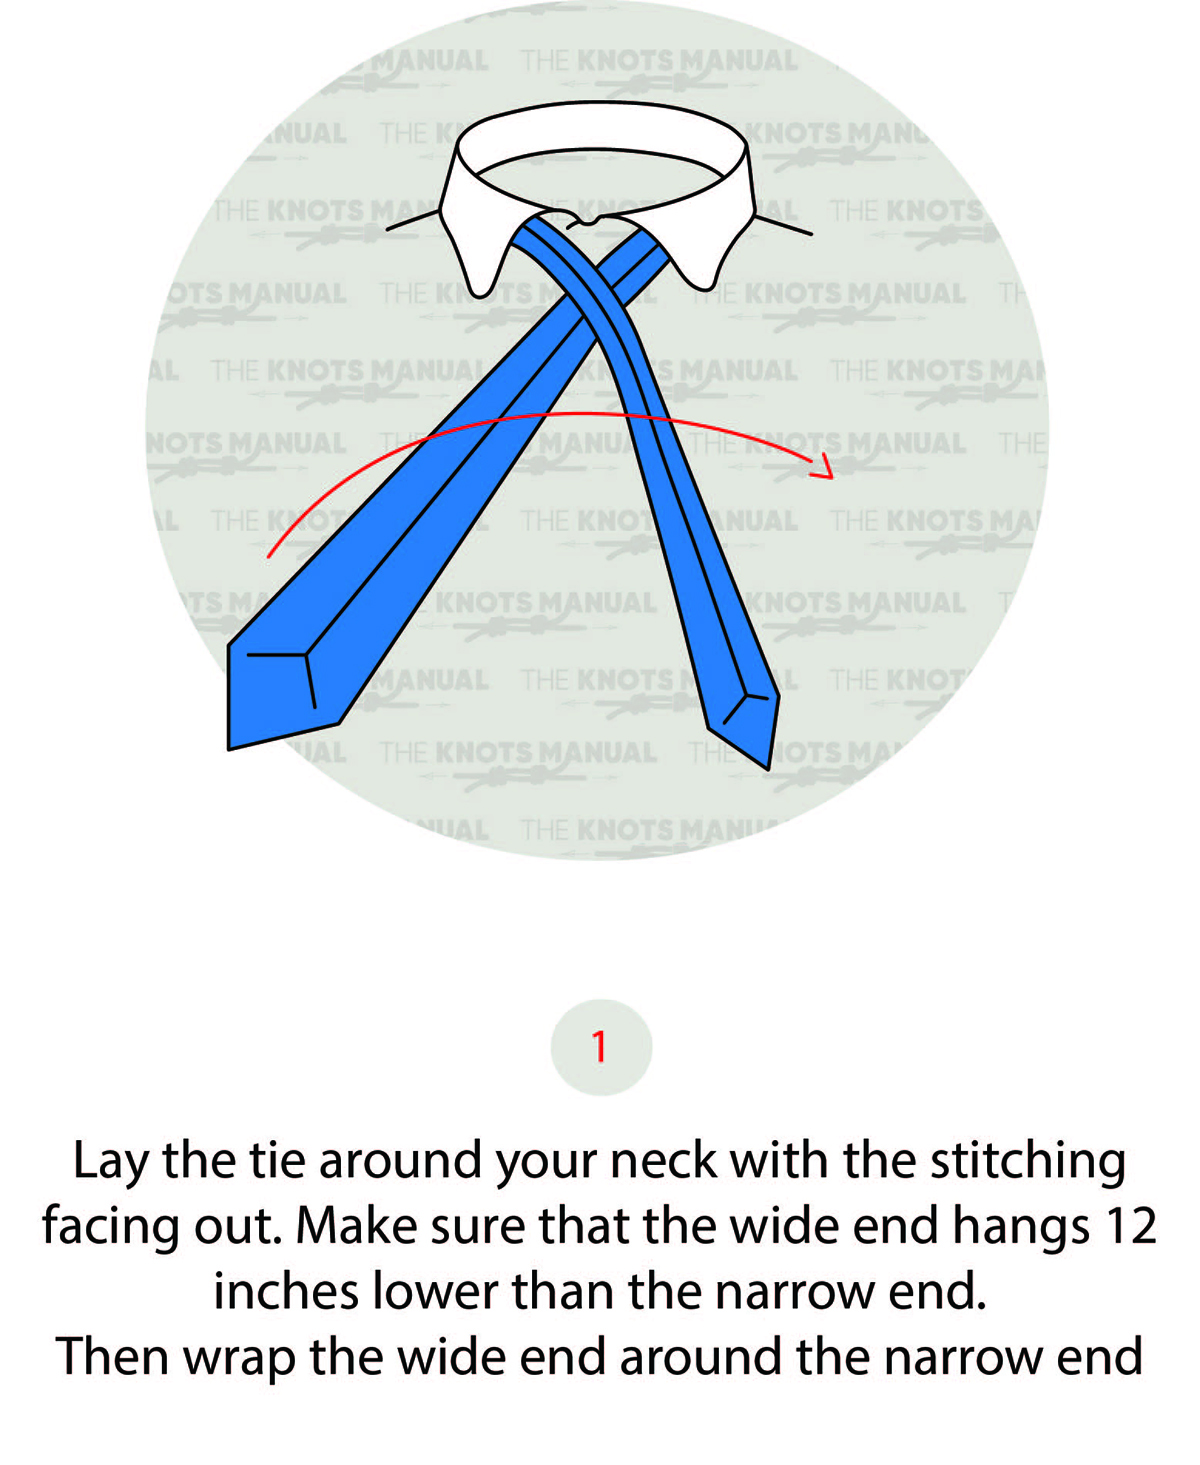
To tie the Manhattan Tie Knot, you’ll need to work with the wide end of the tie, and the narrow end should remain static. Lay the tie around your neck with the stitch side visible. Now adjust the wide end 12 inches (30 cm) lower than the narrow end and put it underneath the narrow end, as illustrated above.
Step 2:
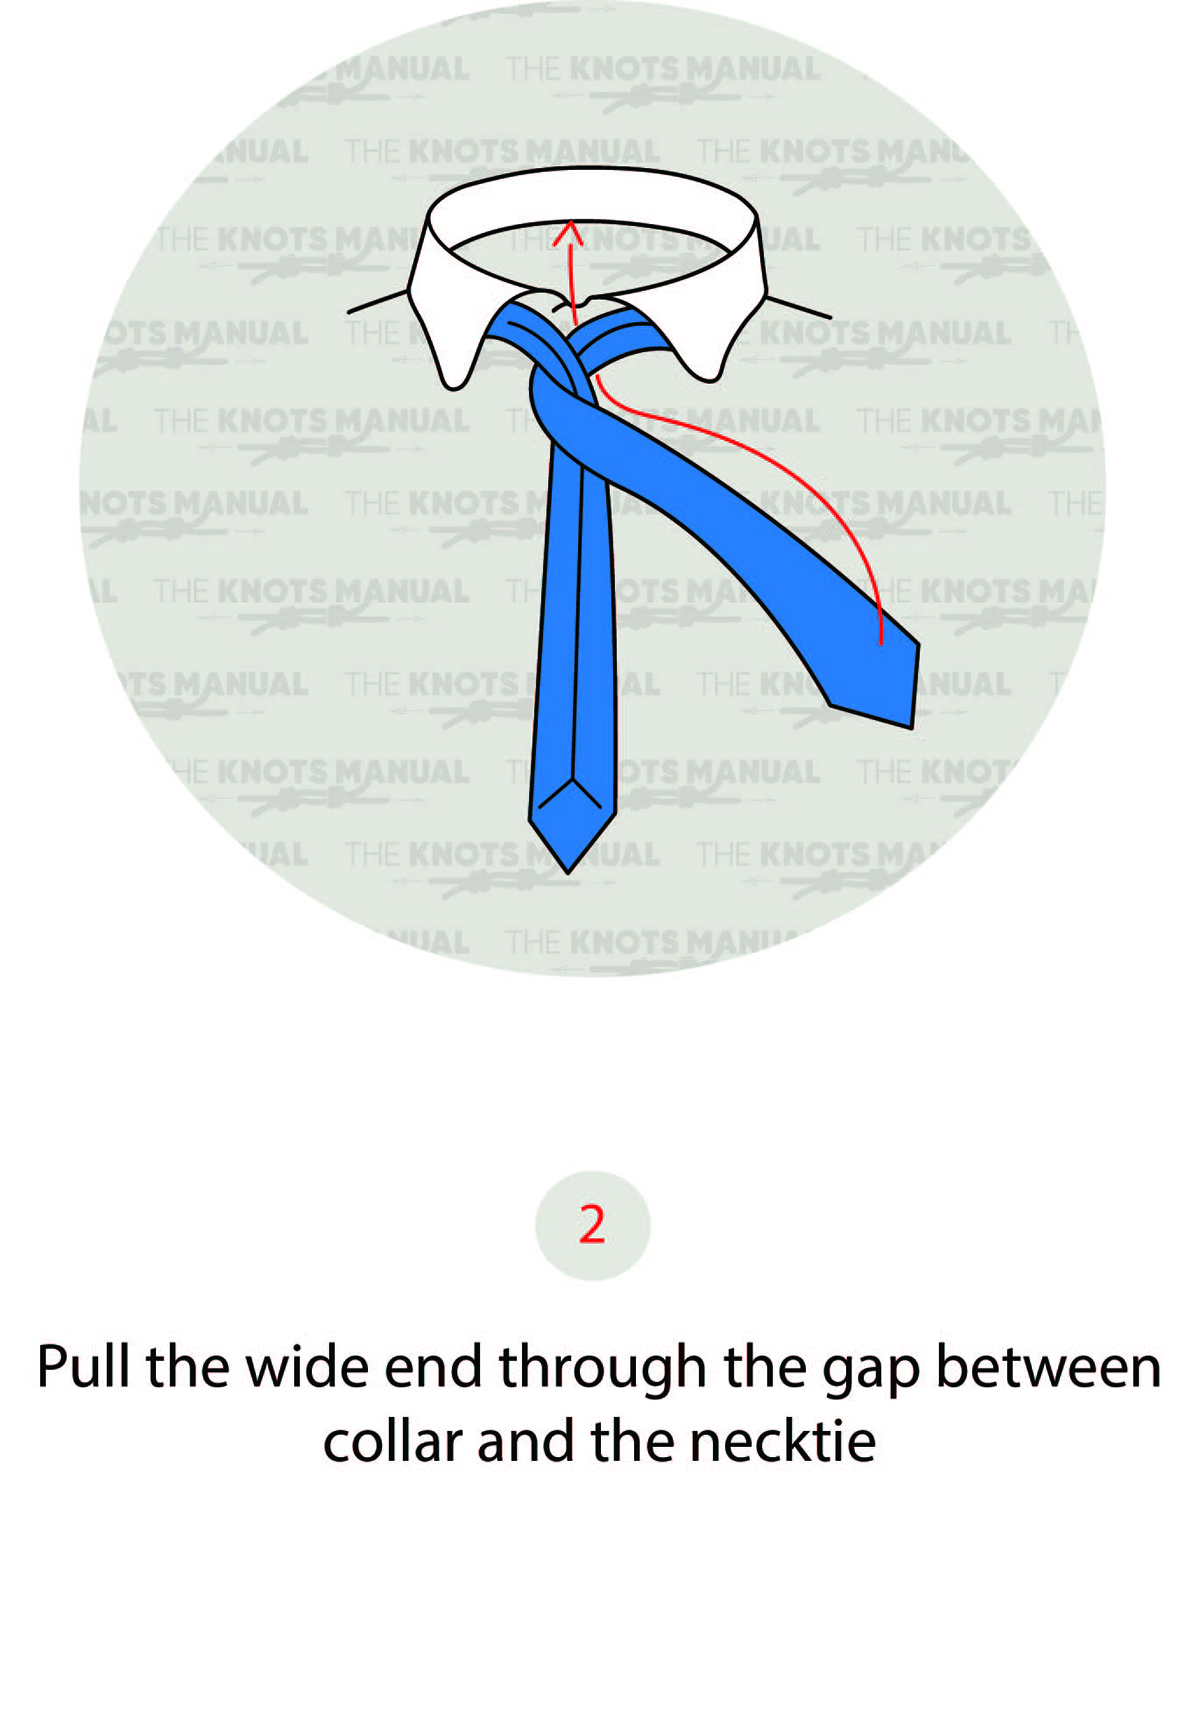
Pass the wide end over to the right side and underneath the top of the knot.
Step 3:
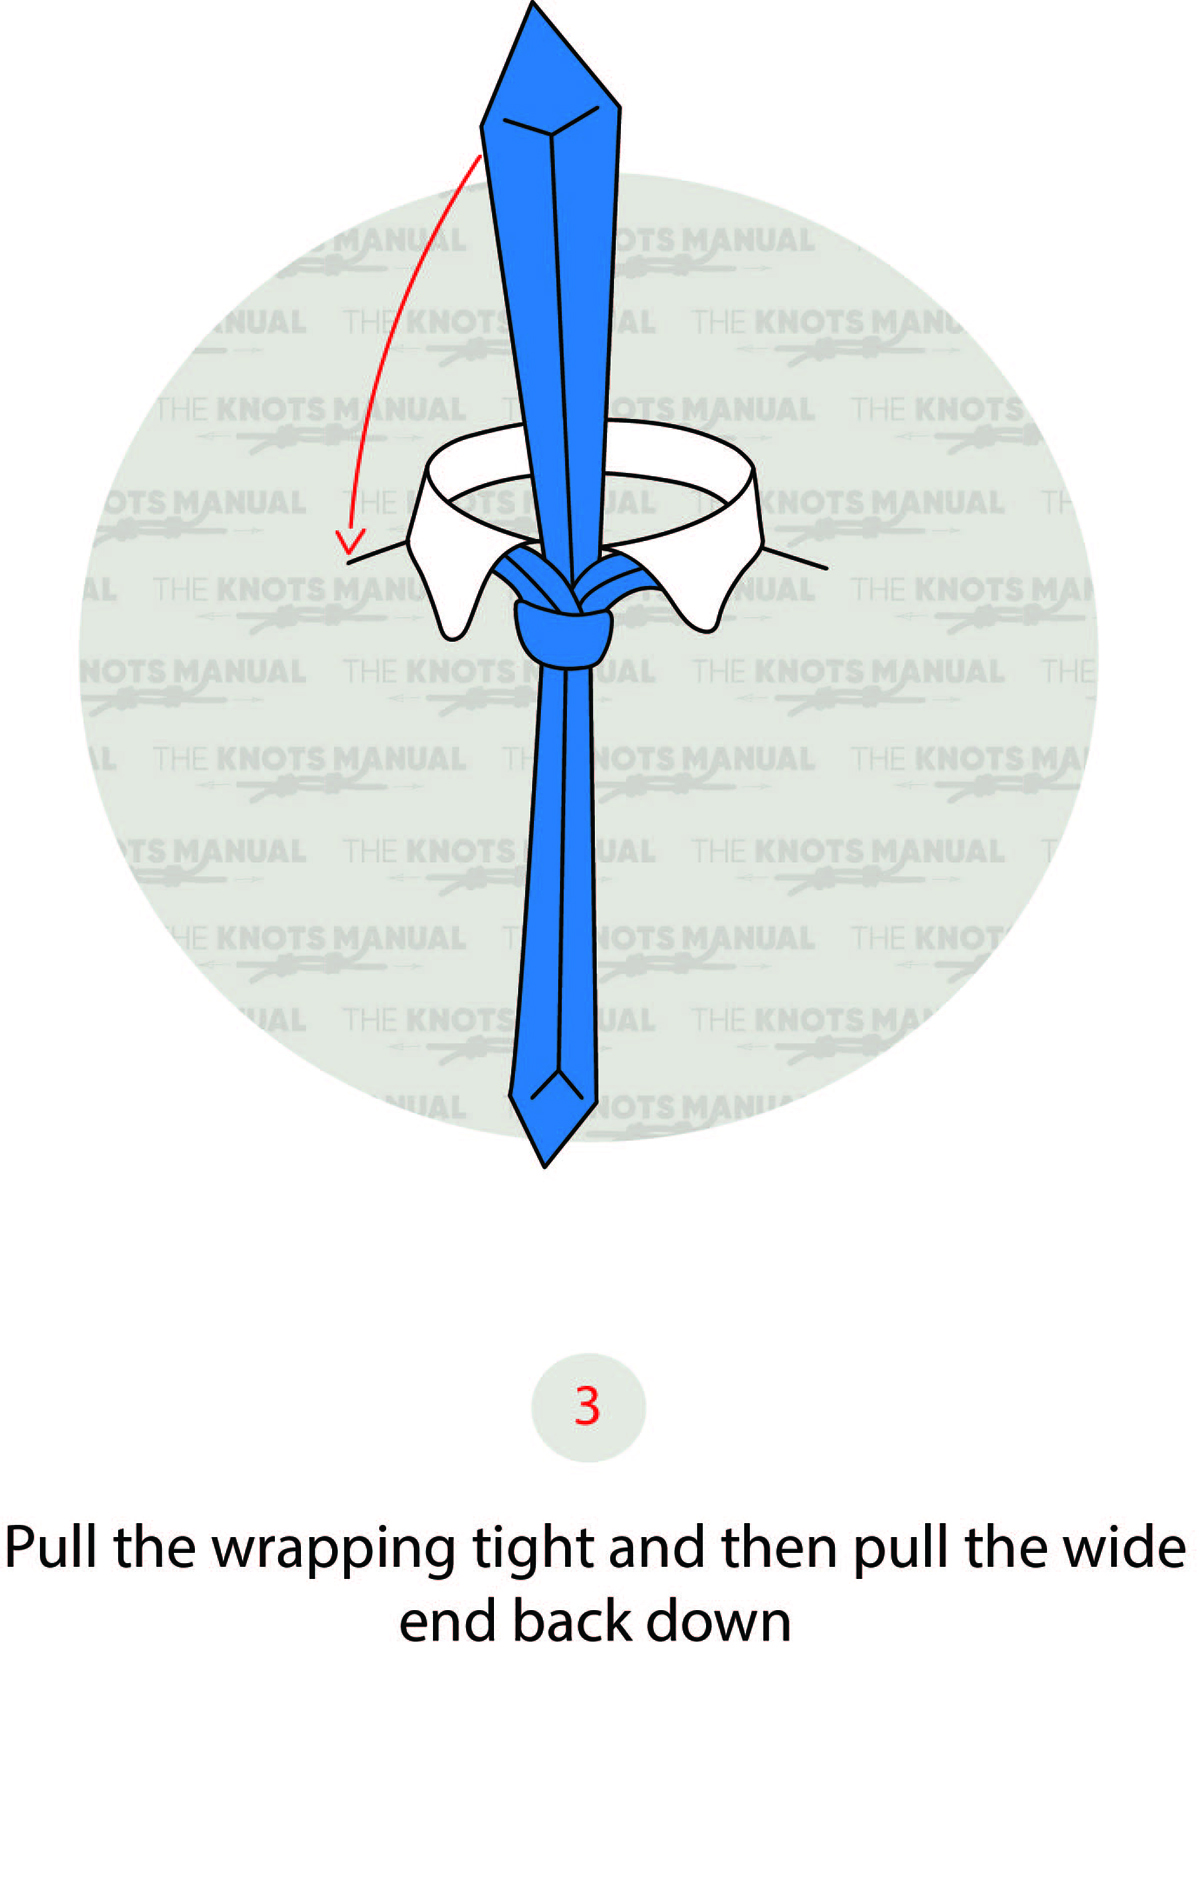
Tighten the knot and pass the wide end downwards, over to the left side.
Step 4:
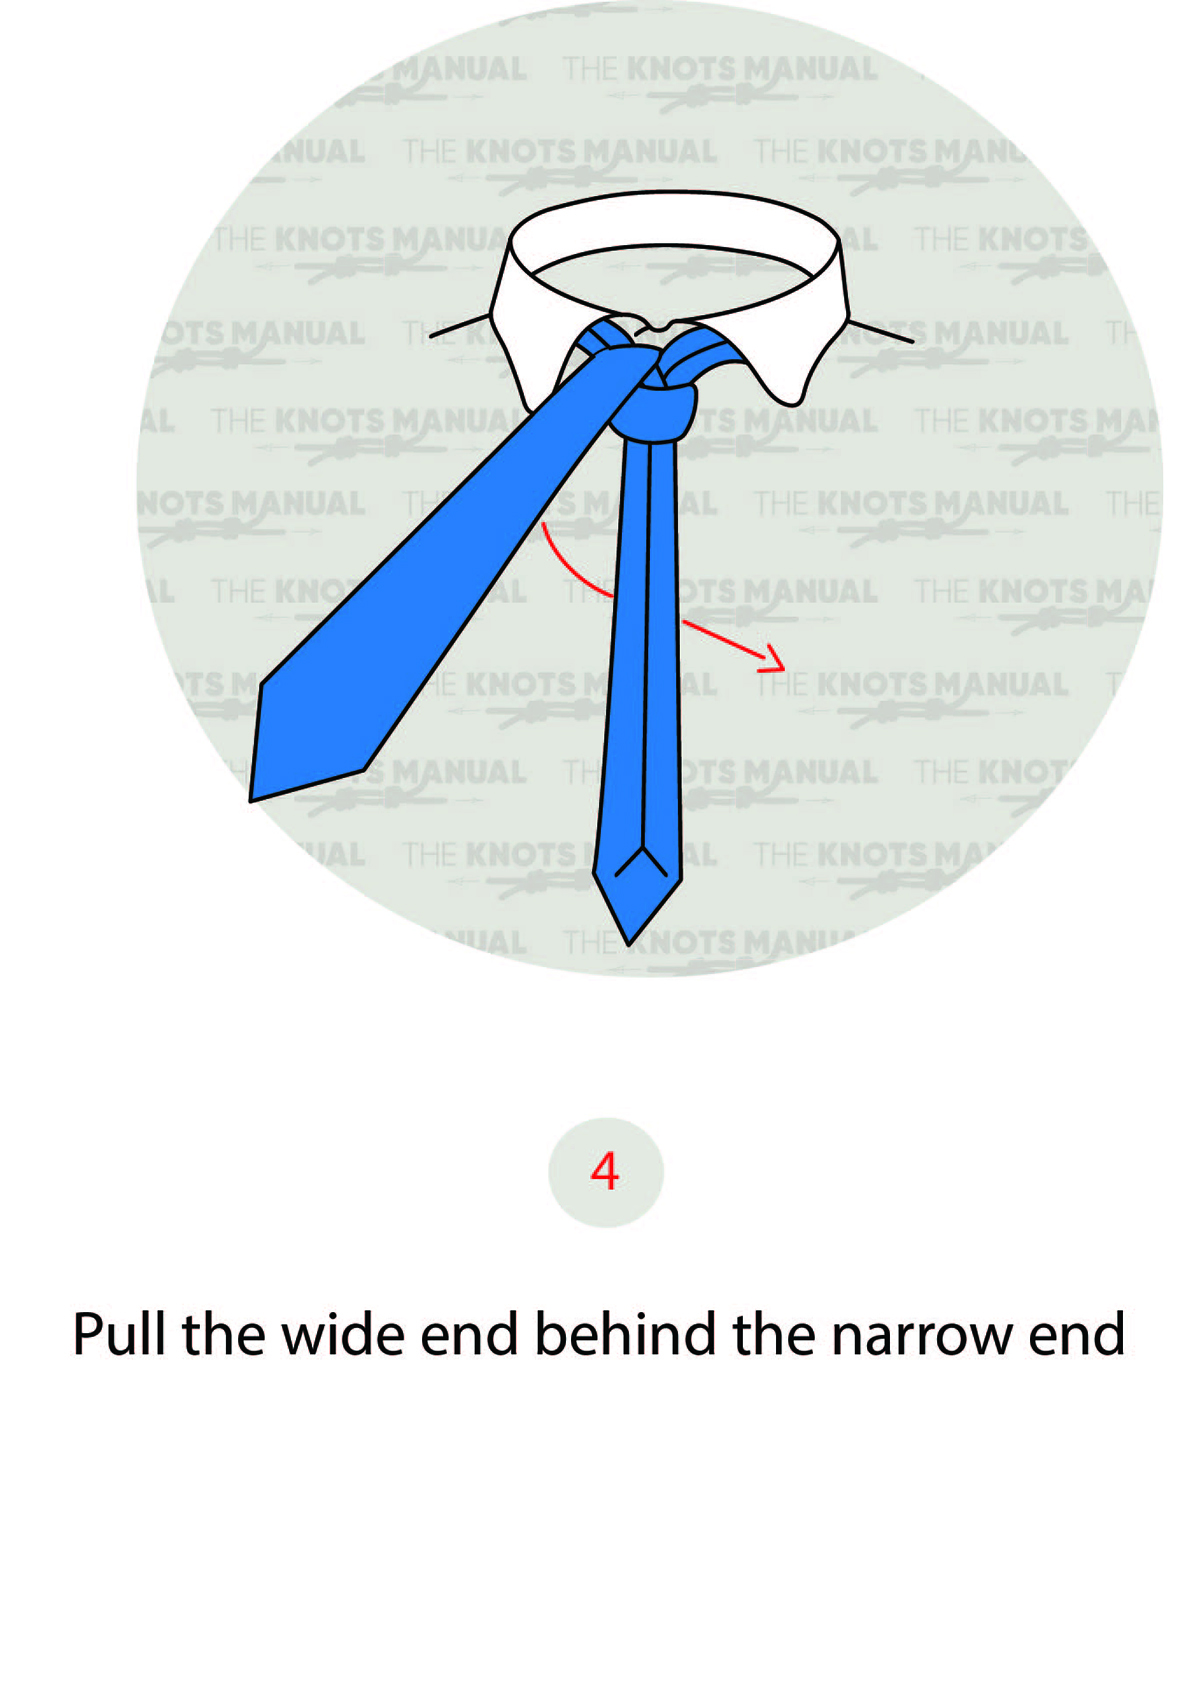
Pass the wide end behind the narrow end over to the right side.
Step 5:
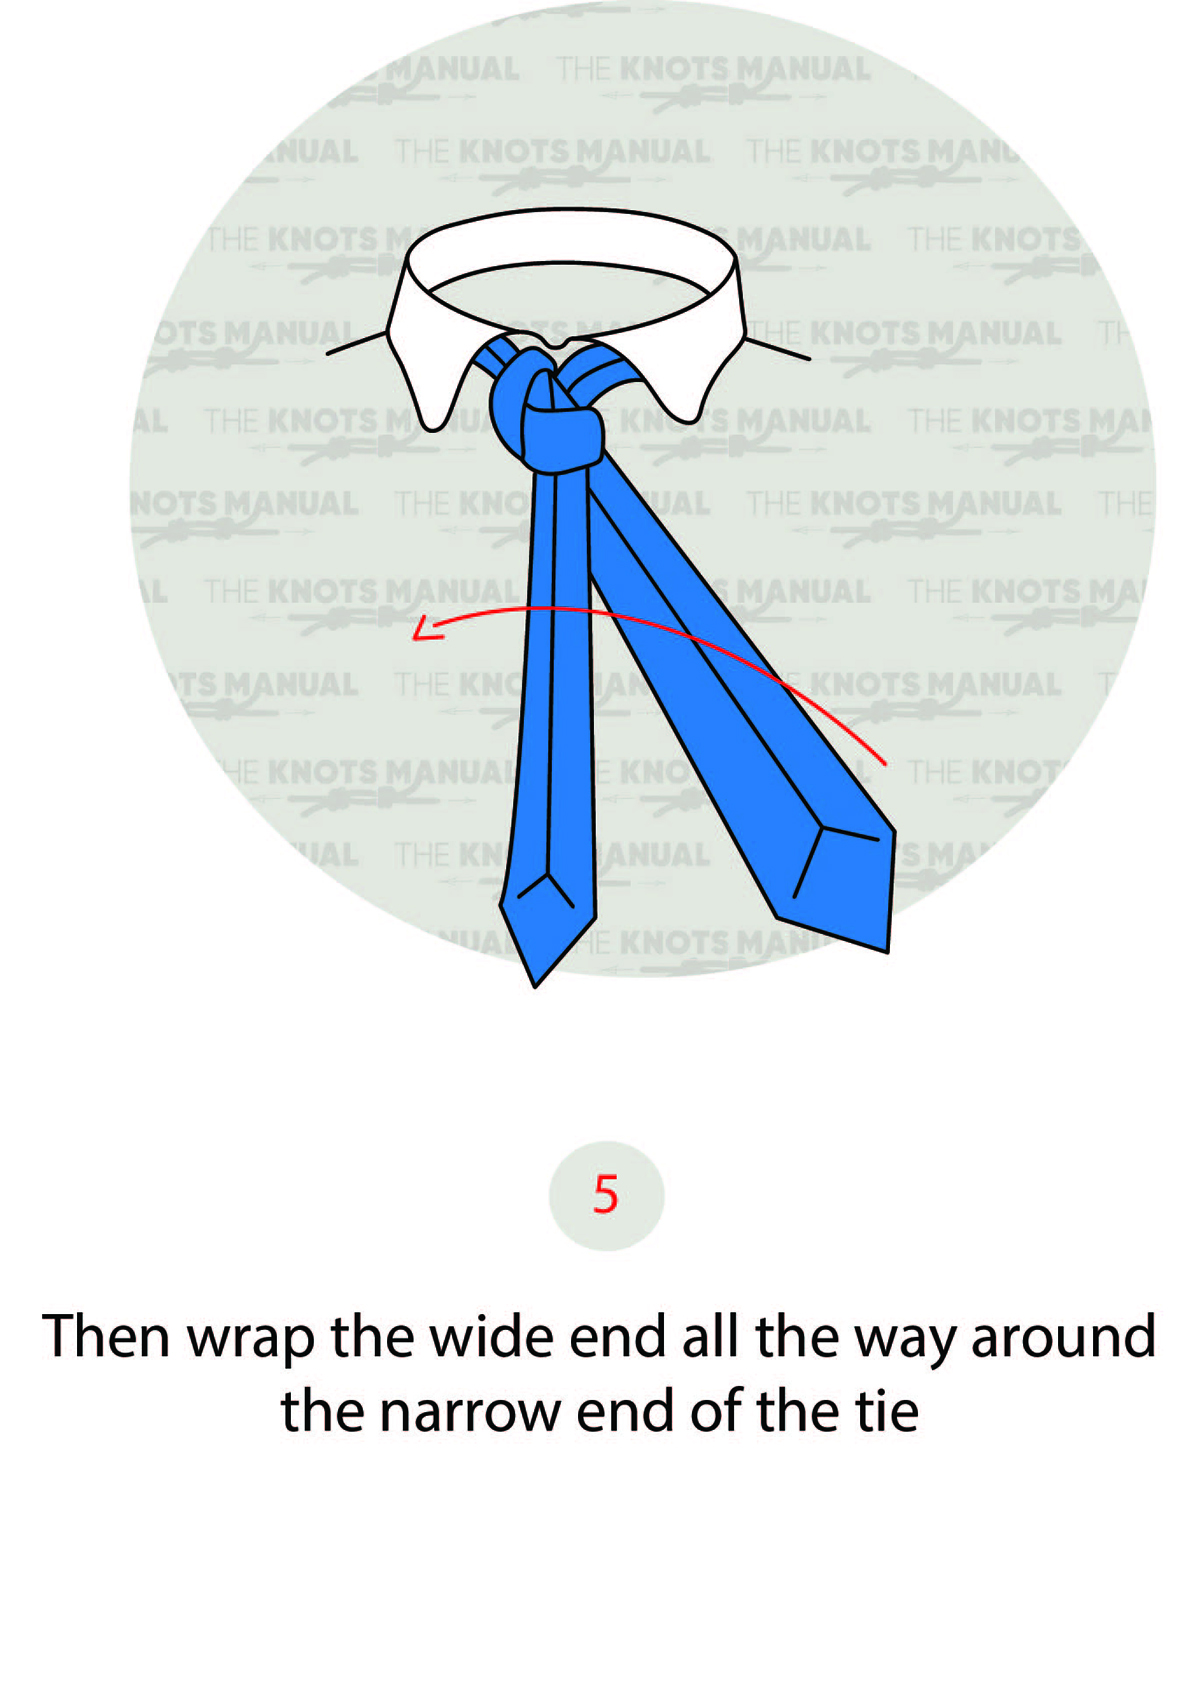
Now pass the wide end in front of the narrow end over to the left side.
Step 6:
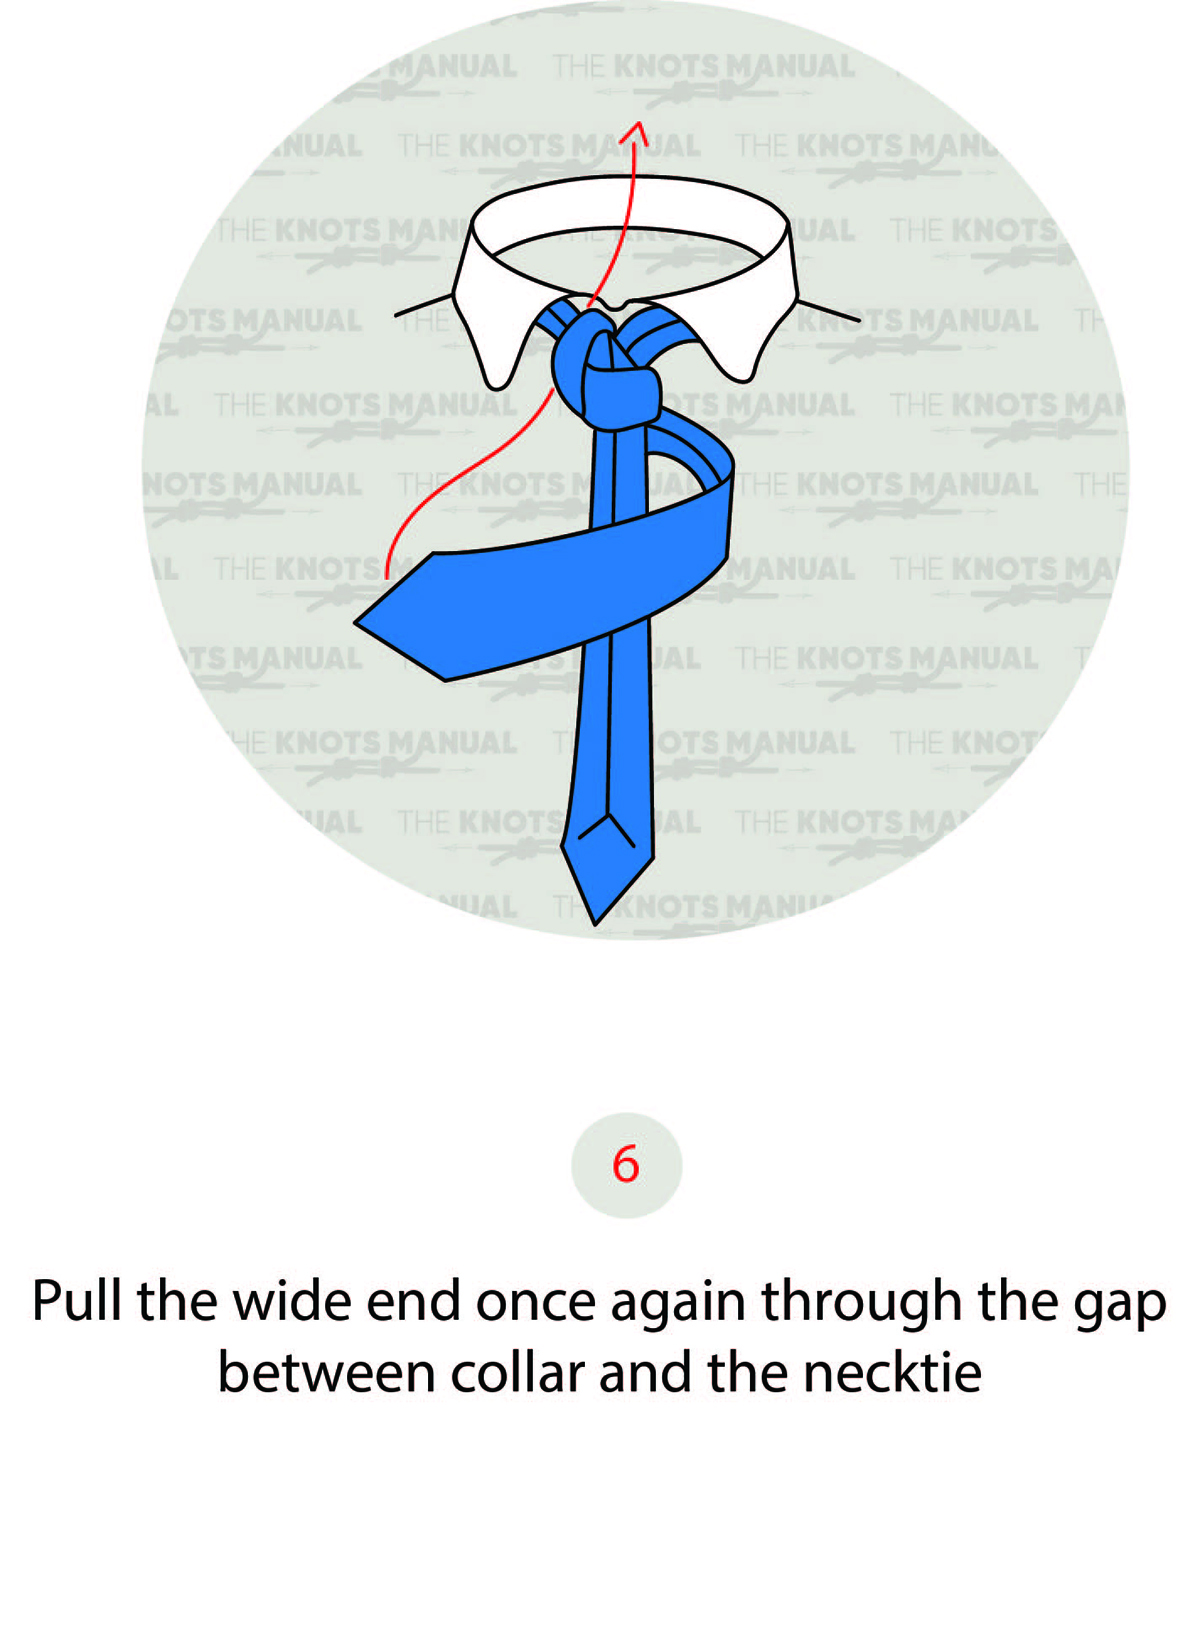
Pass it underneath the top of the knot over on the left side.
Step 7:
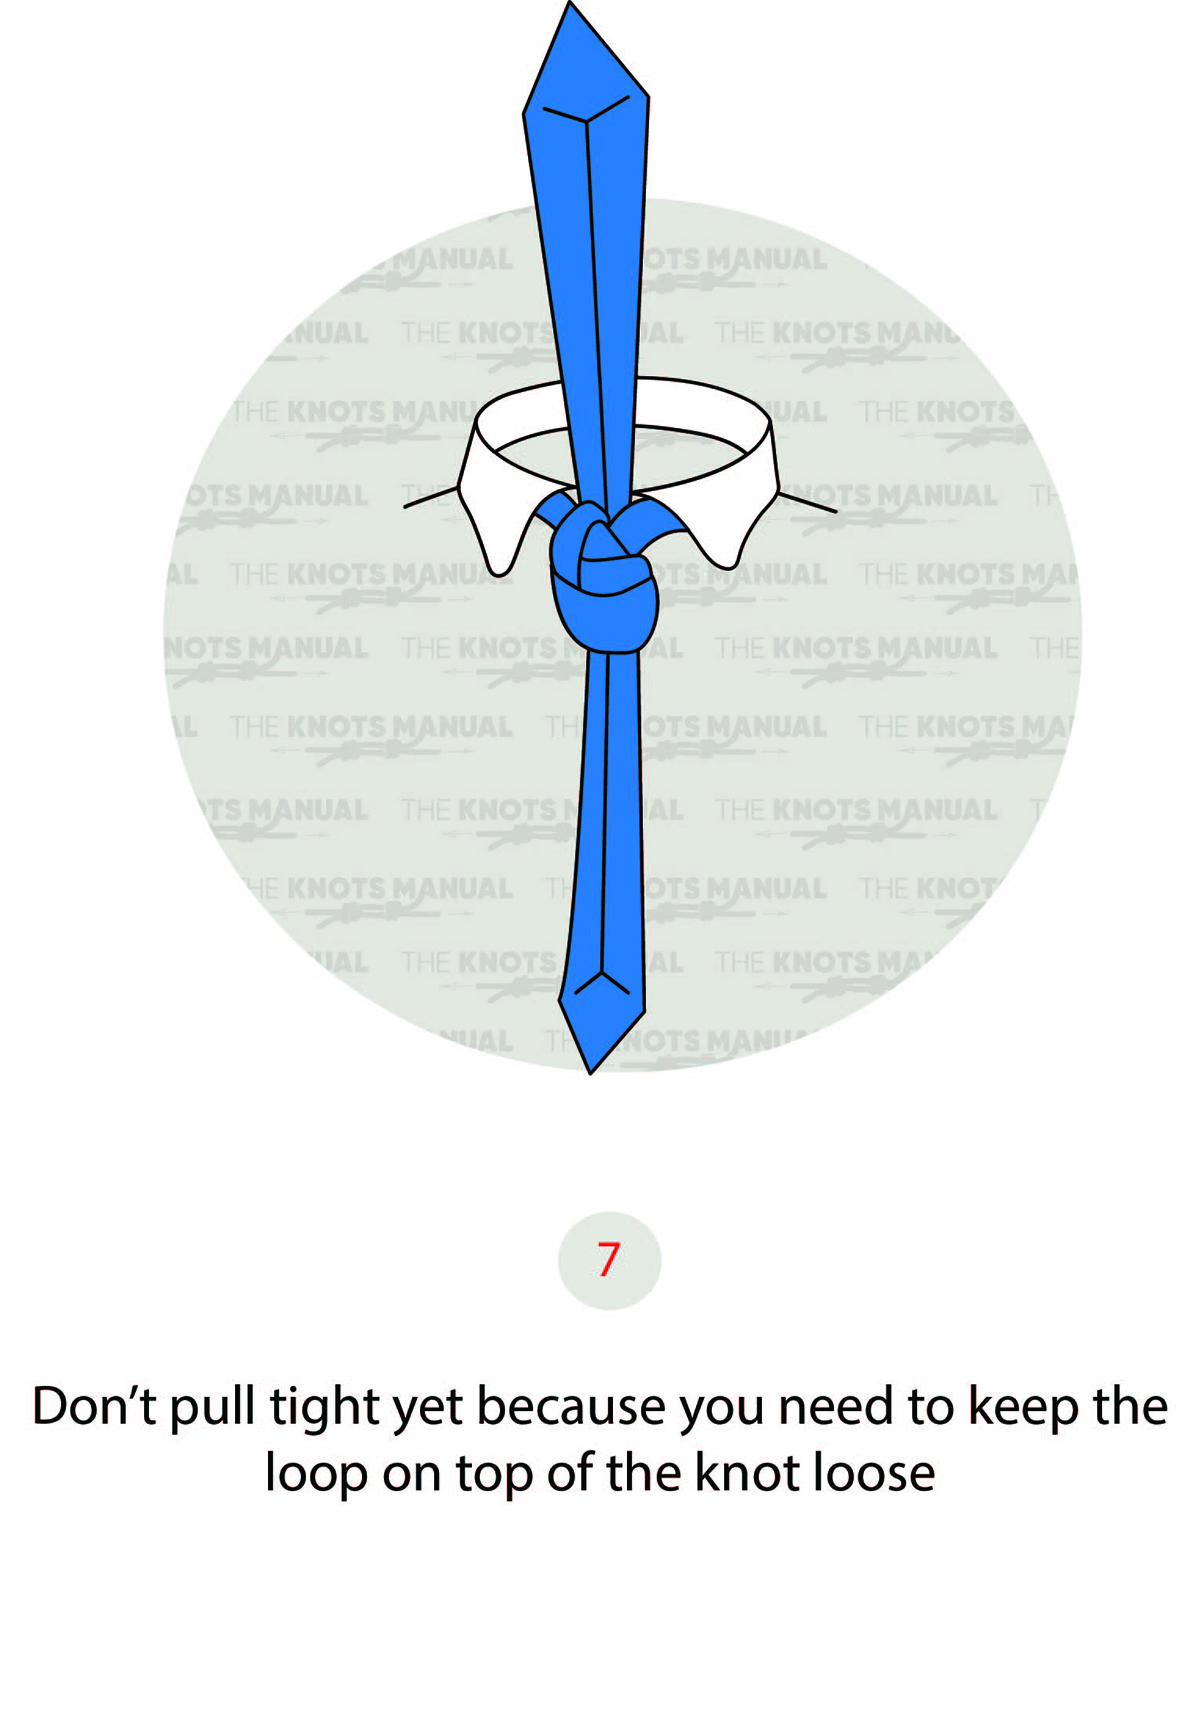
Loosen the horizontal loop in front of the knot.
Step 8:
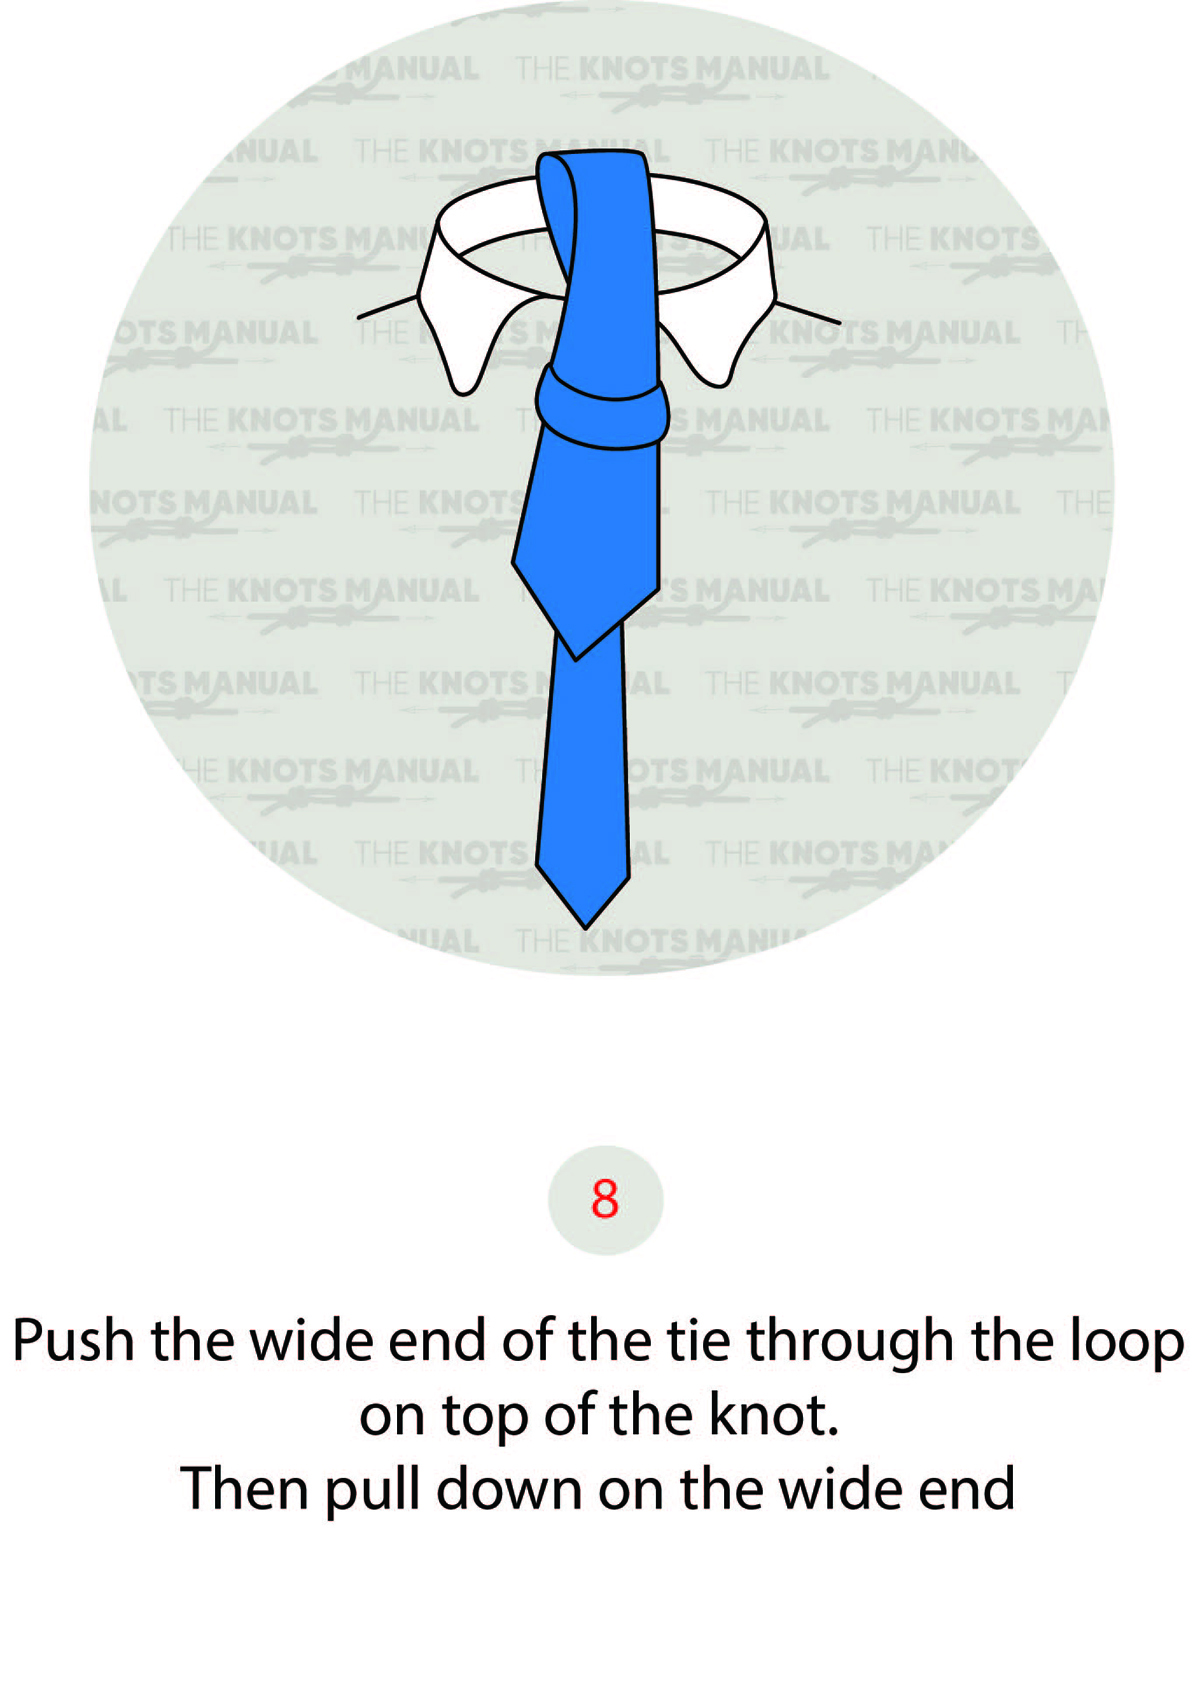
Pass the wide end underneath this loop.
Step 9:
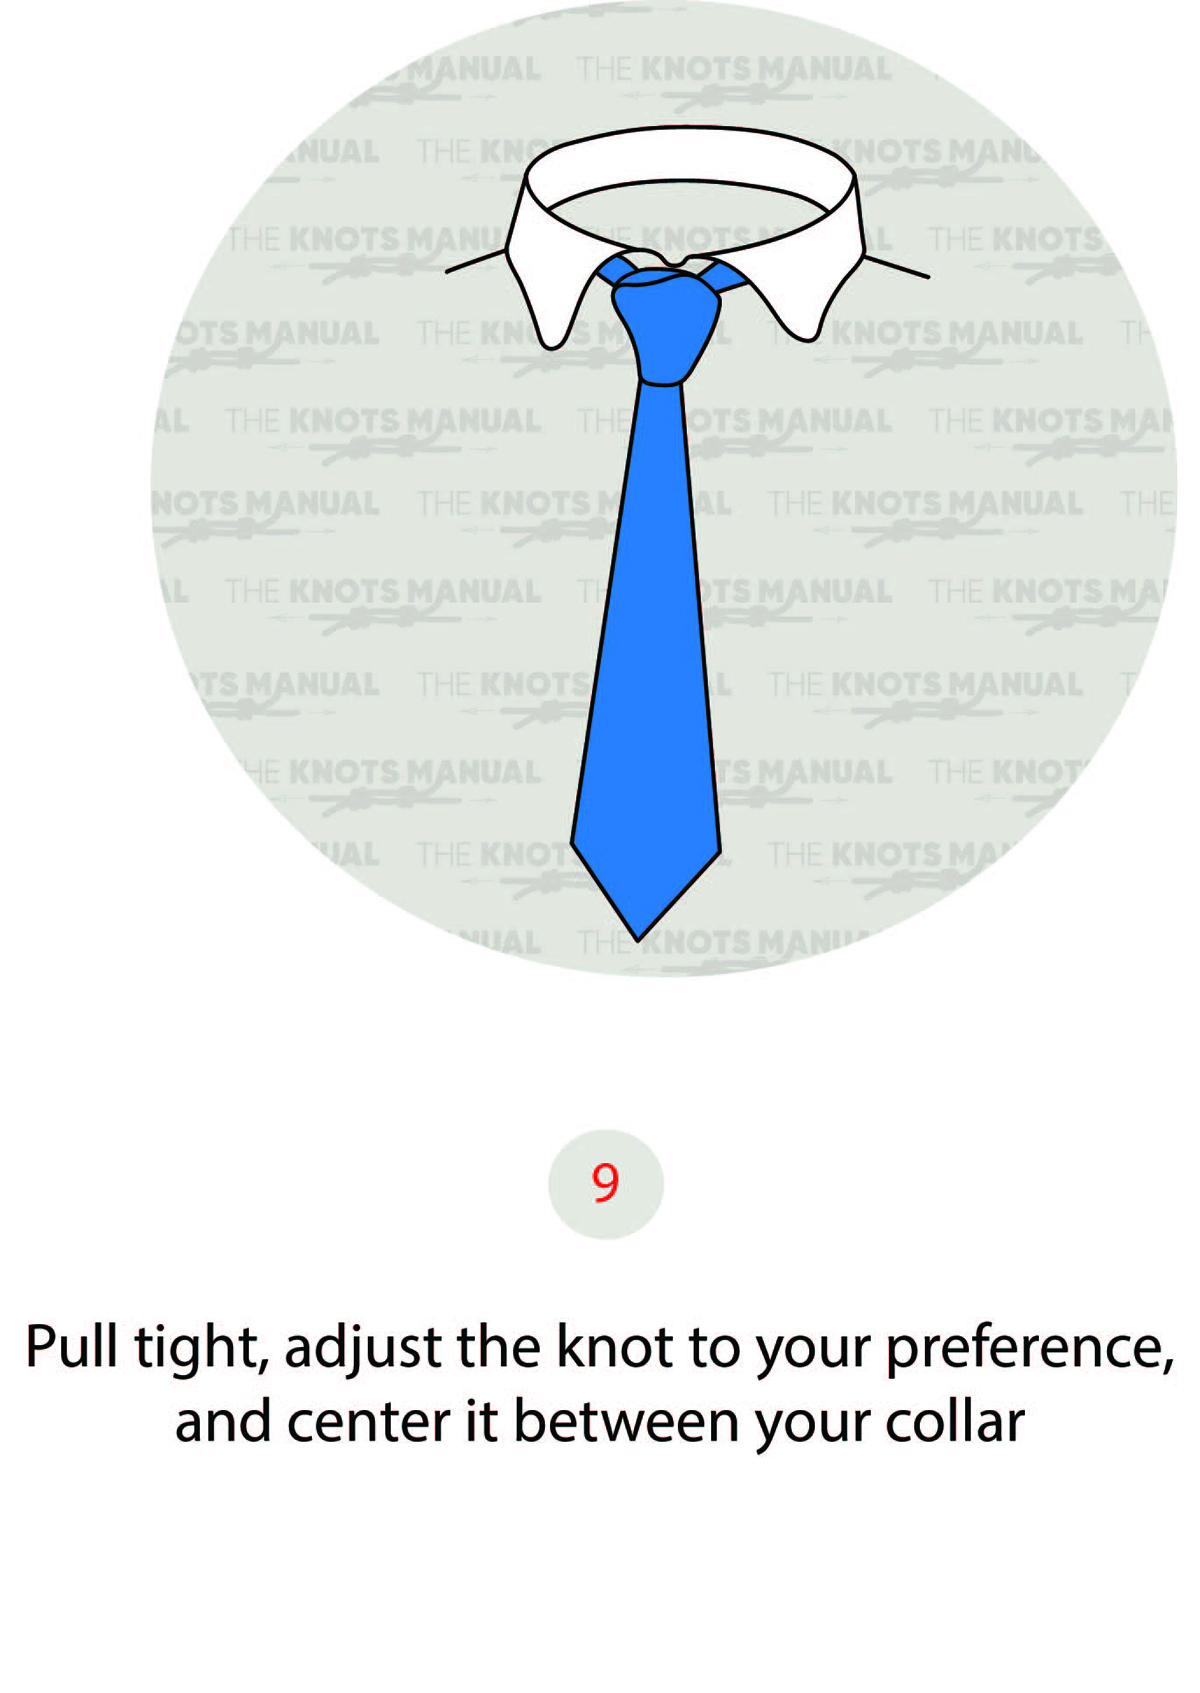
Adjust and tighten to finish the Manhattan Tie Knot.


