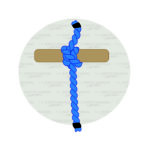
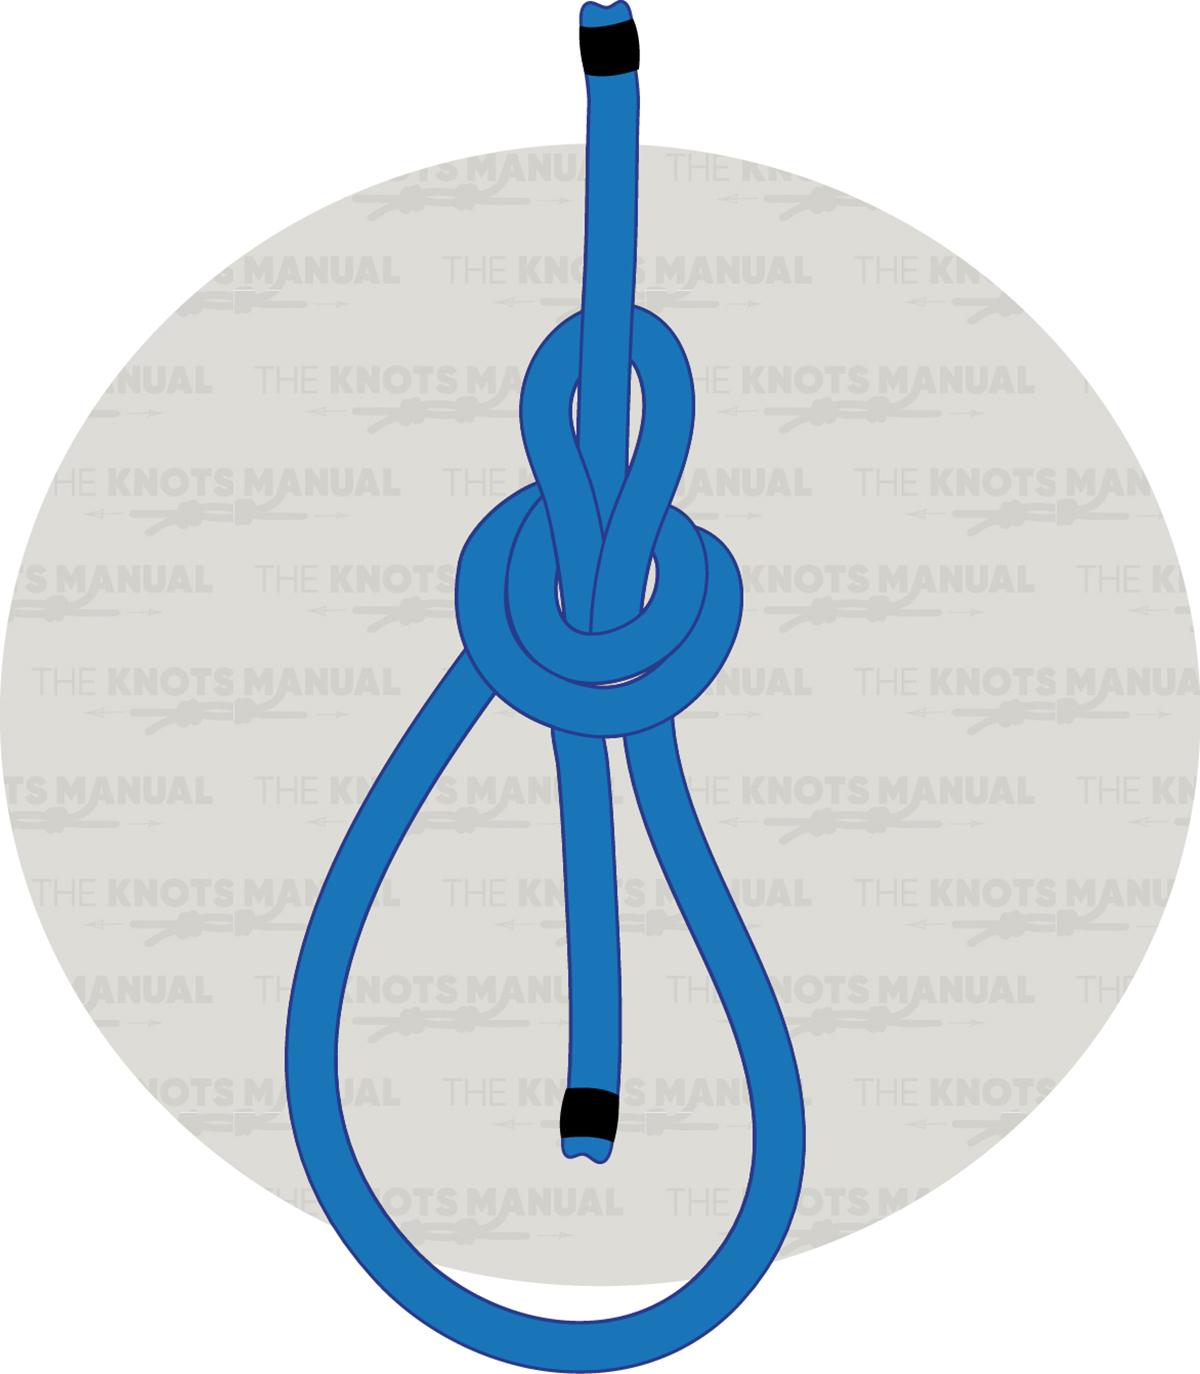
The Water Bowline Knot is a variation of the classic bowline knot, designed specifically for use in wet or slippery conditions. It is widely used in sailing, fishing, and other maritime activities where reliability and security are essential.
Water Bowline Knot: Quick Tying Guide
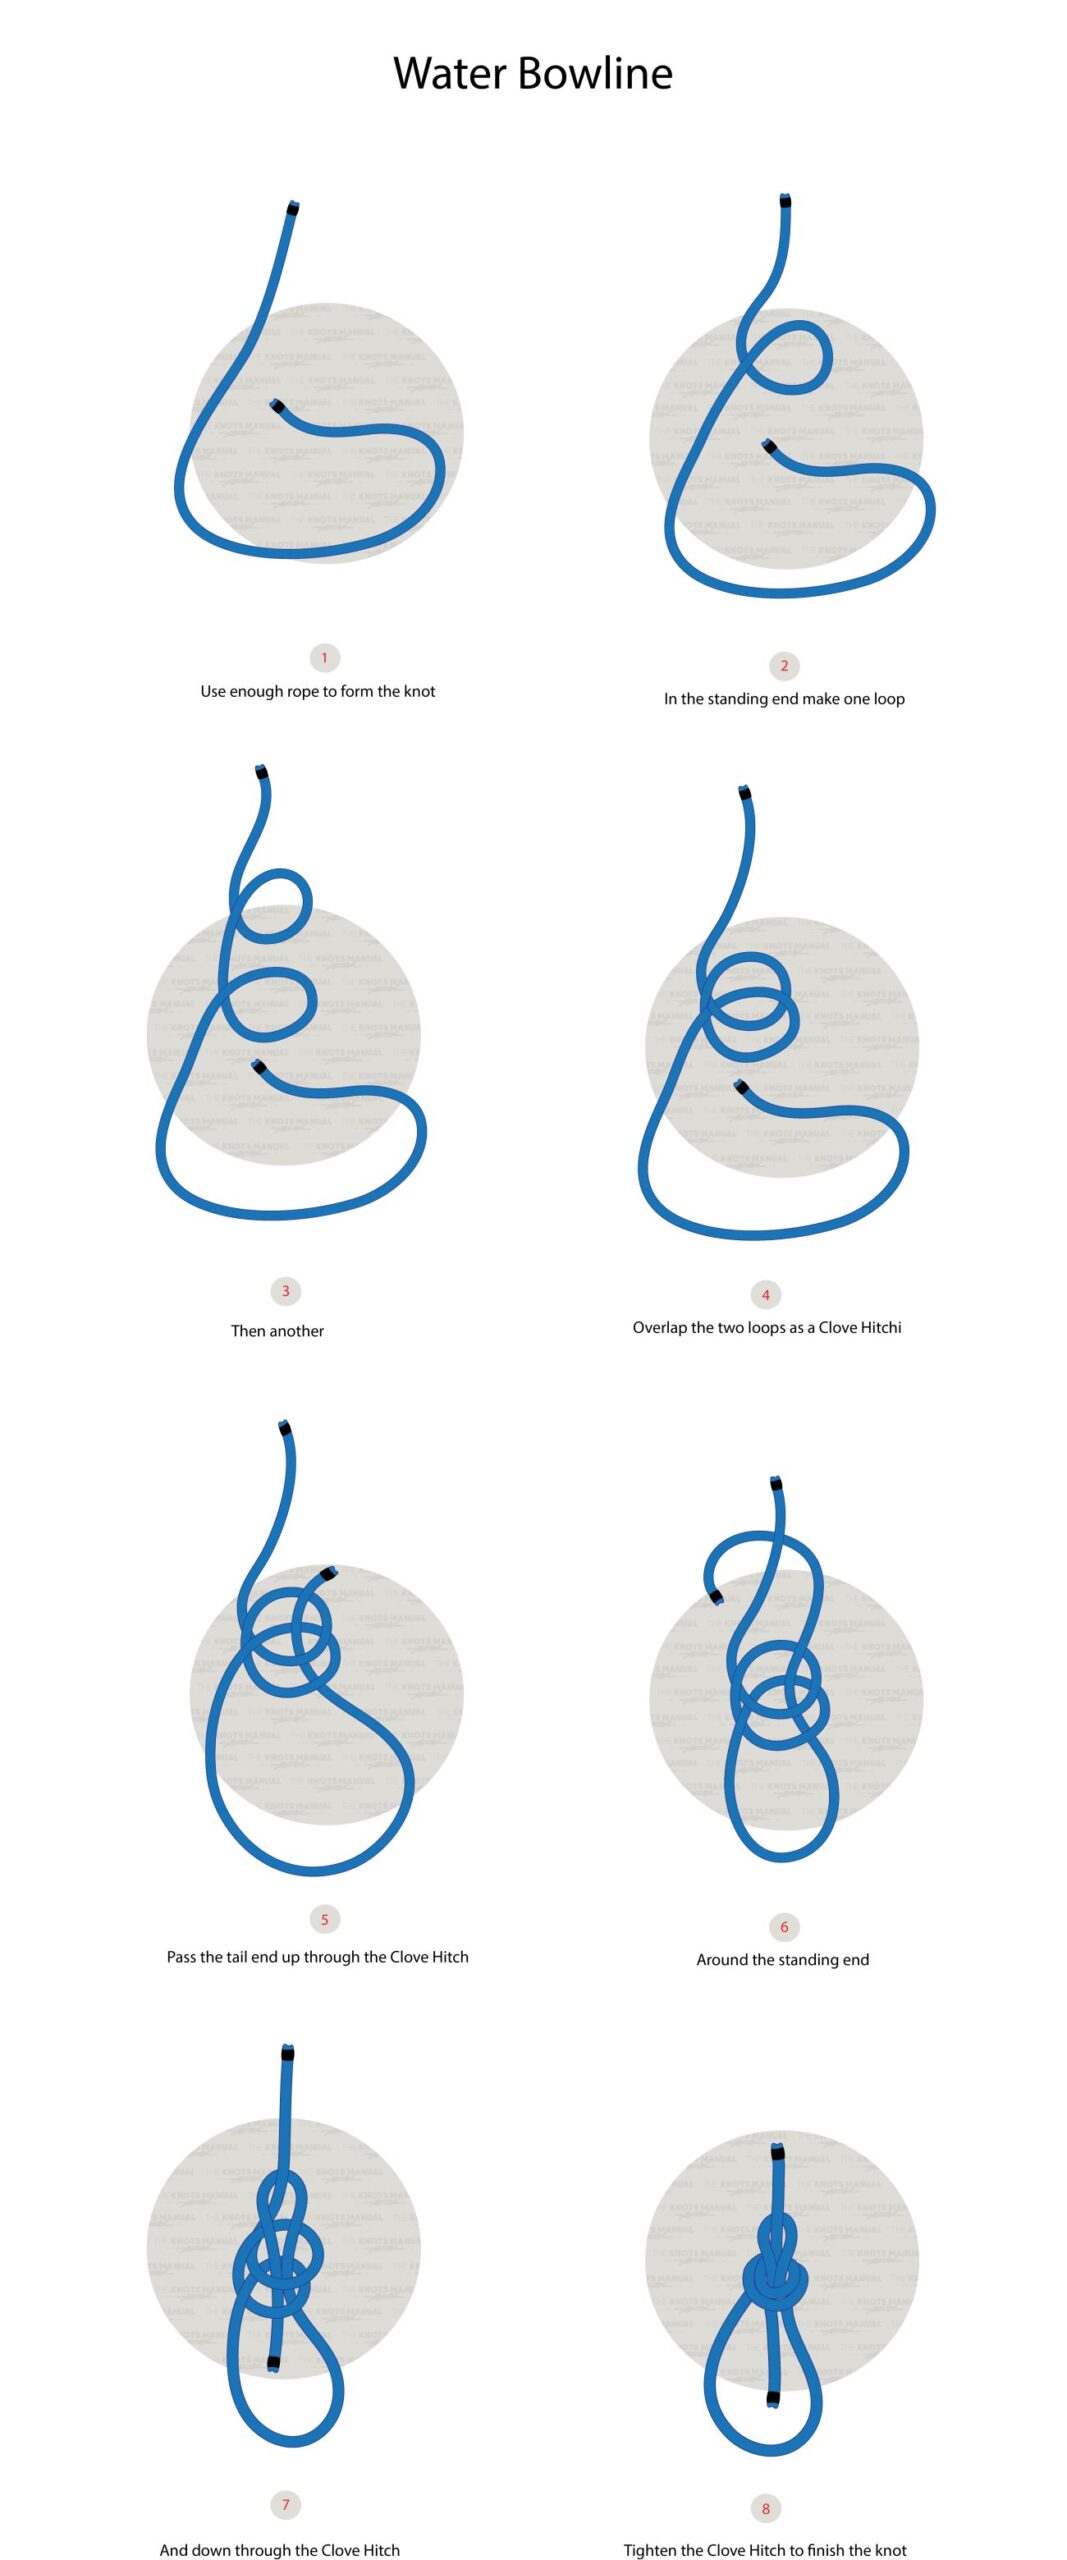
To tie a Water Bowline Knot, start by making sure there is enough rope to form the knot. Make a loop in the standing end of the rope. Then make another loop. Next, overlap the two loops as a Clove Hitch and pass the tail end through the Clove Hitch and around the standing end of the rope. Then bring the tail end back down through the Clove Hitch. Pull the ends to tighten and secure the knot.
Why Use a Water Bowline Knot?
The Water Bowline Knot stands out for its reliability in wet environments. It is stronger and more secure than the traditional bowline, especially when subjected to dynamic or jerking loads. Sailors and anglers prefer it for tying lines to rings, loops, or posts in conditions where other knots might slip. While highly effective, it requires a bit more practice to master compared to simpler knots.
Knots Similar to the Water Bowline Knot
Bowline Knot: A versatile knot used to form a secure loop at the end of a rope.
Sheet Bend: Ideal for joining two ropes of different diameters.
Double Fisherman’s Knot: Used for securely joining two ropes or creating a loop.
Figure Eight Loop Knot: A simple and strong knot for creating a fixed loop in a rope.
Step 1:
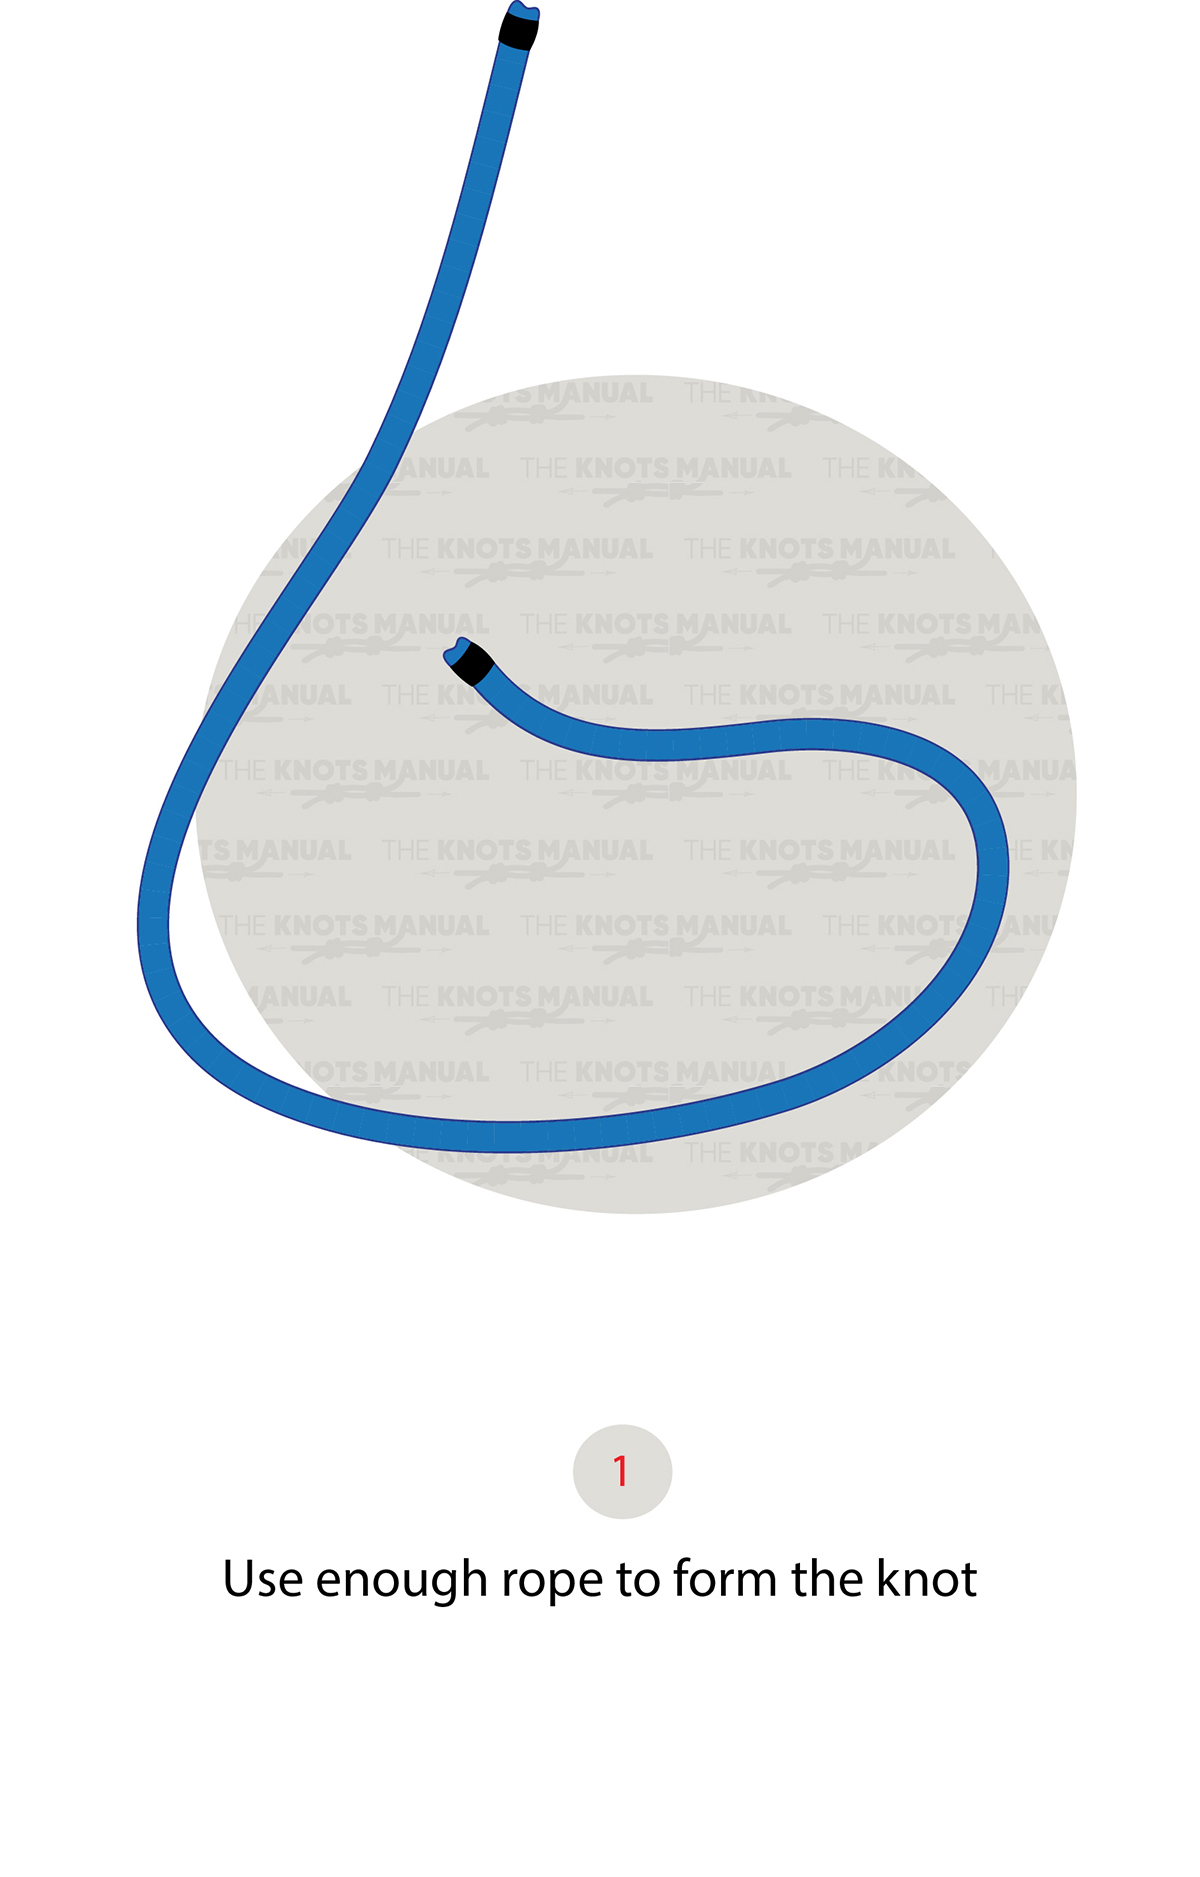
Ensure there is enough rope to form the knot.
Step 2:
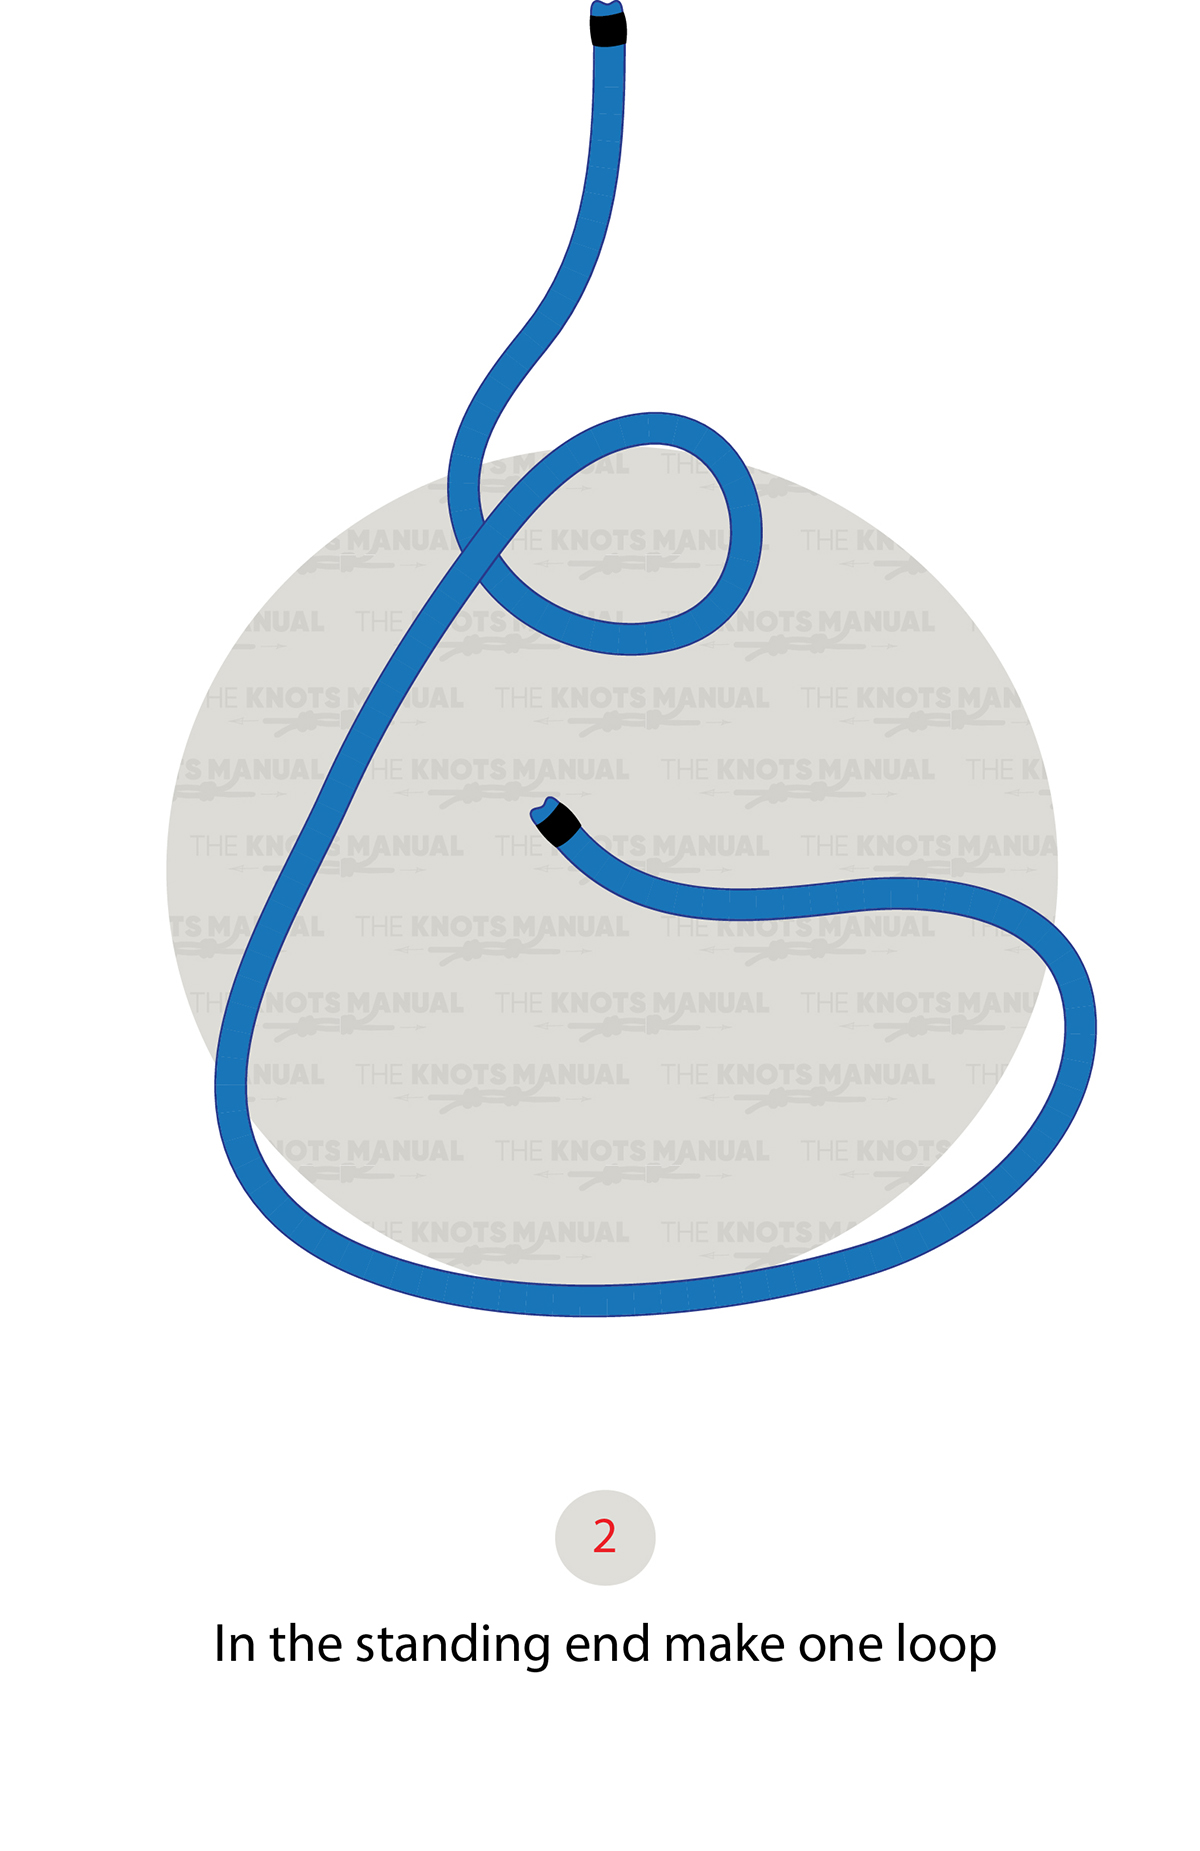
Create a loop at the standing end of the rope.
Step 3:
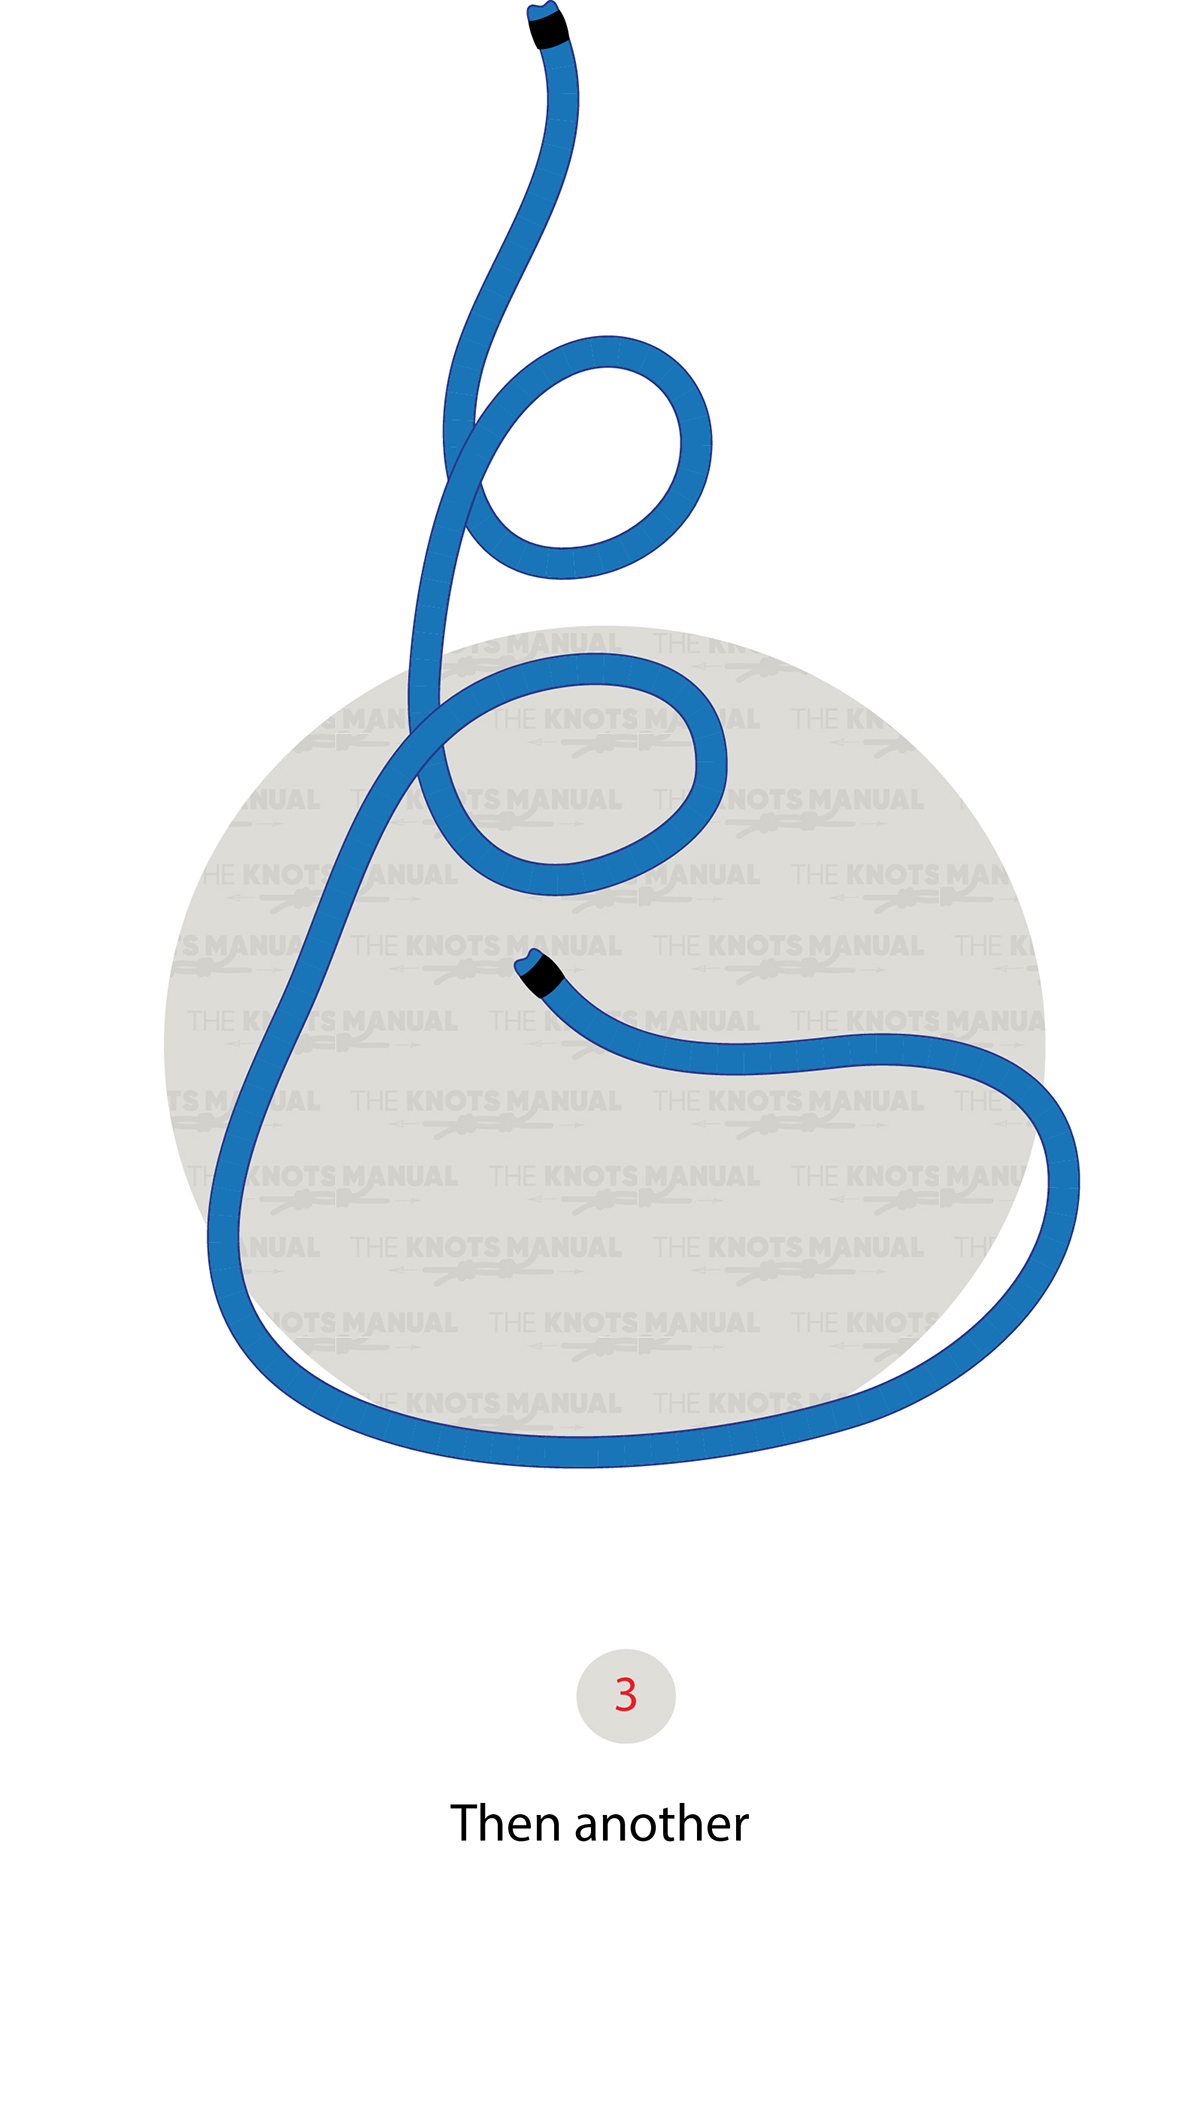
Make another loop.
Step 4:
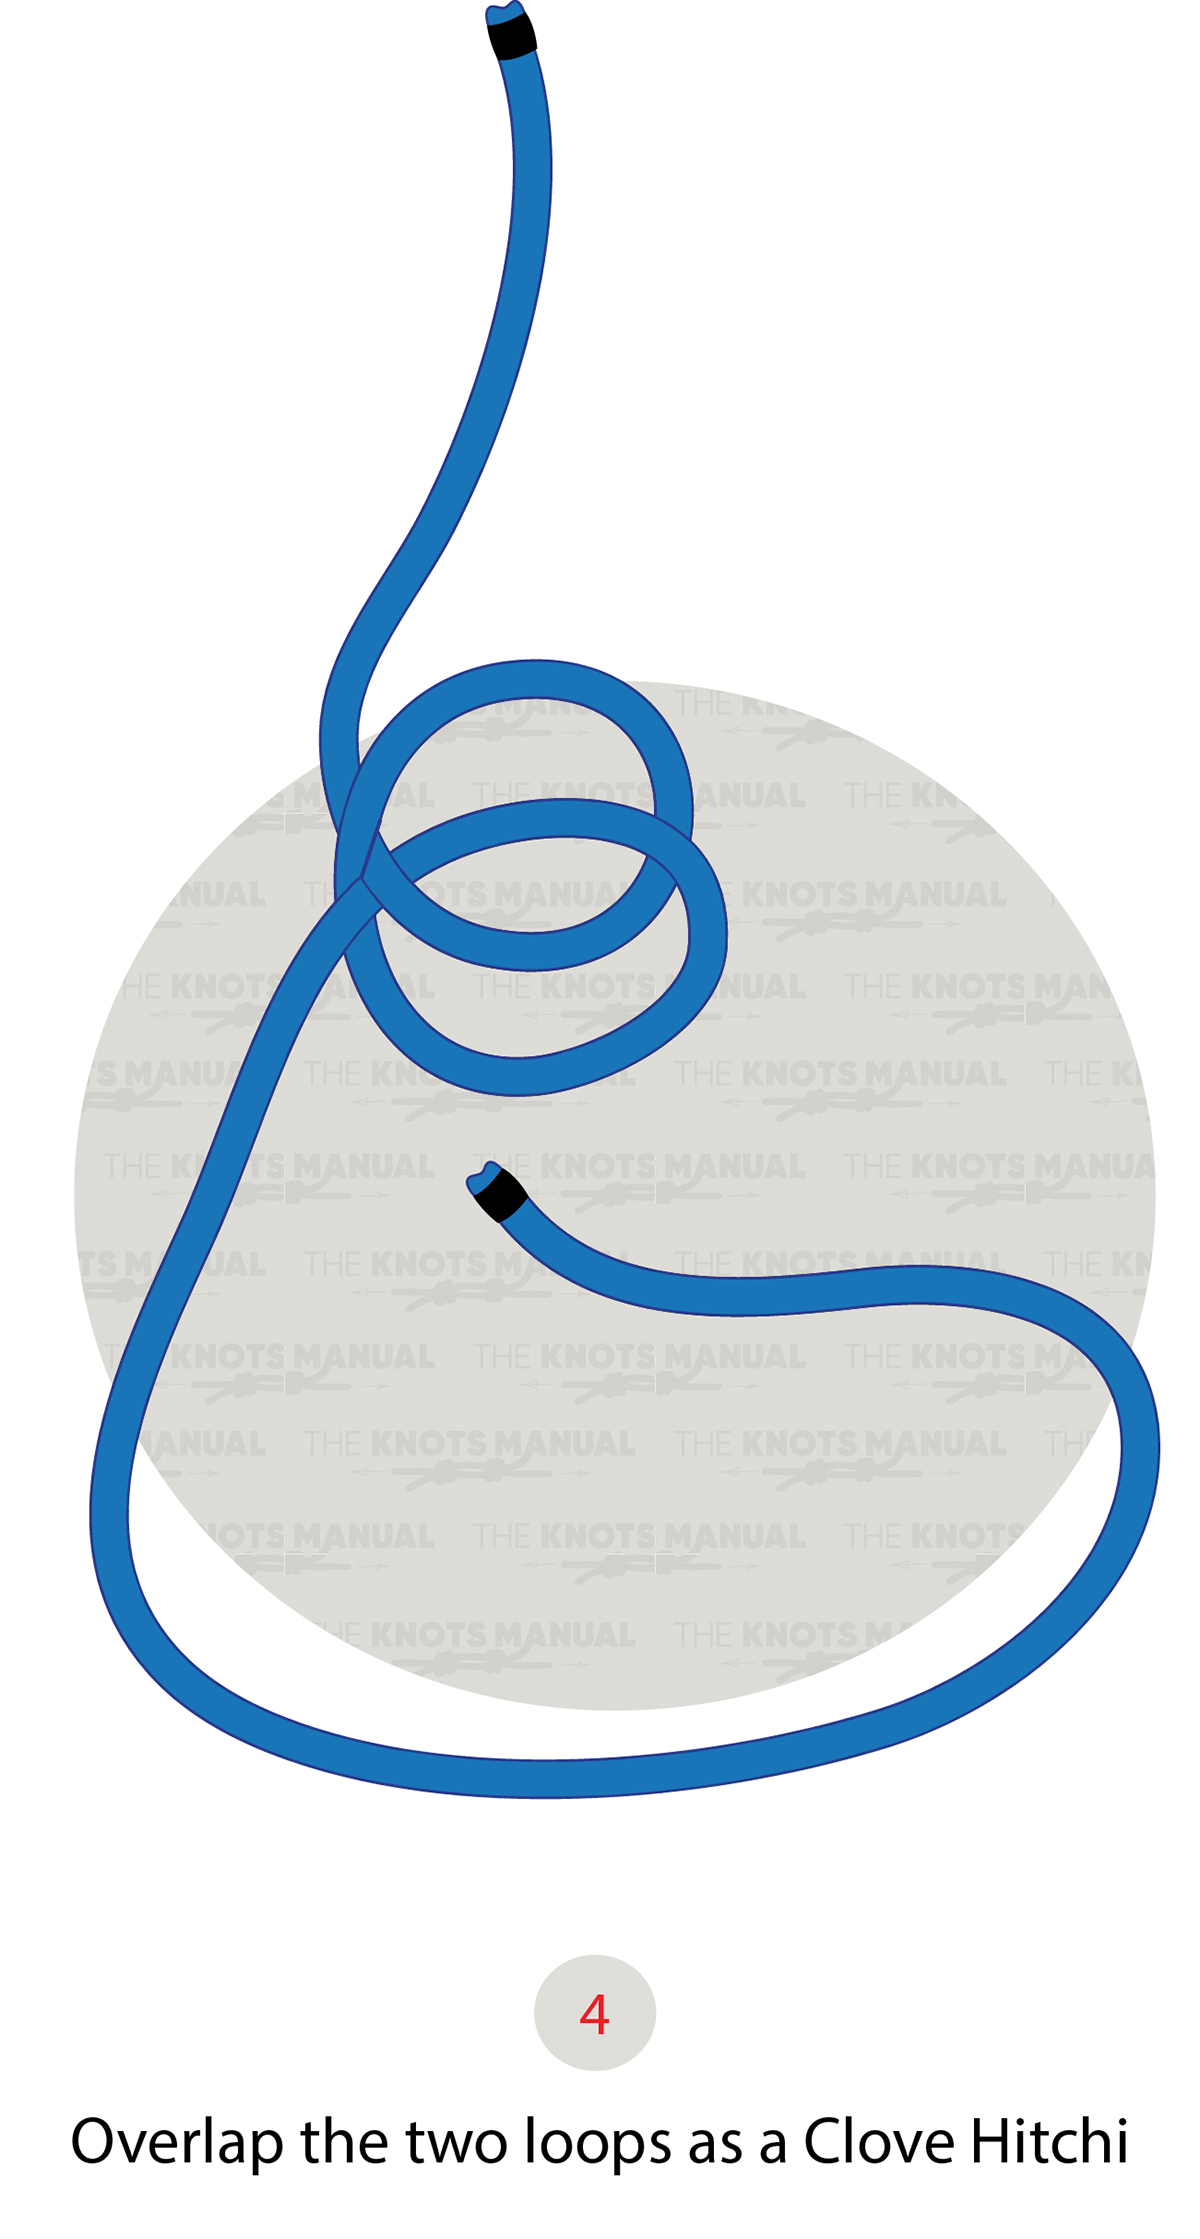
Overlap the two loops as a Clove Hitch.
Step 5:
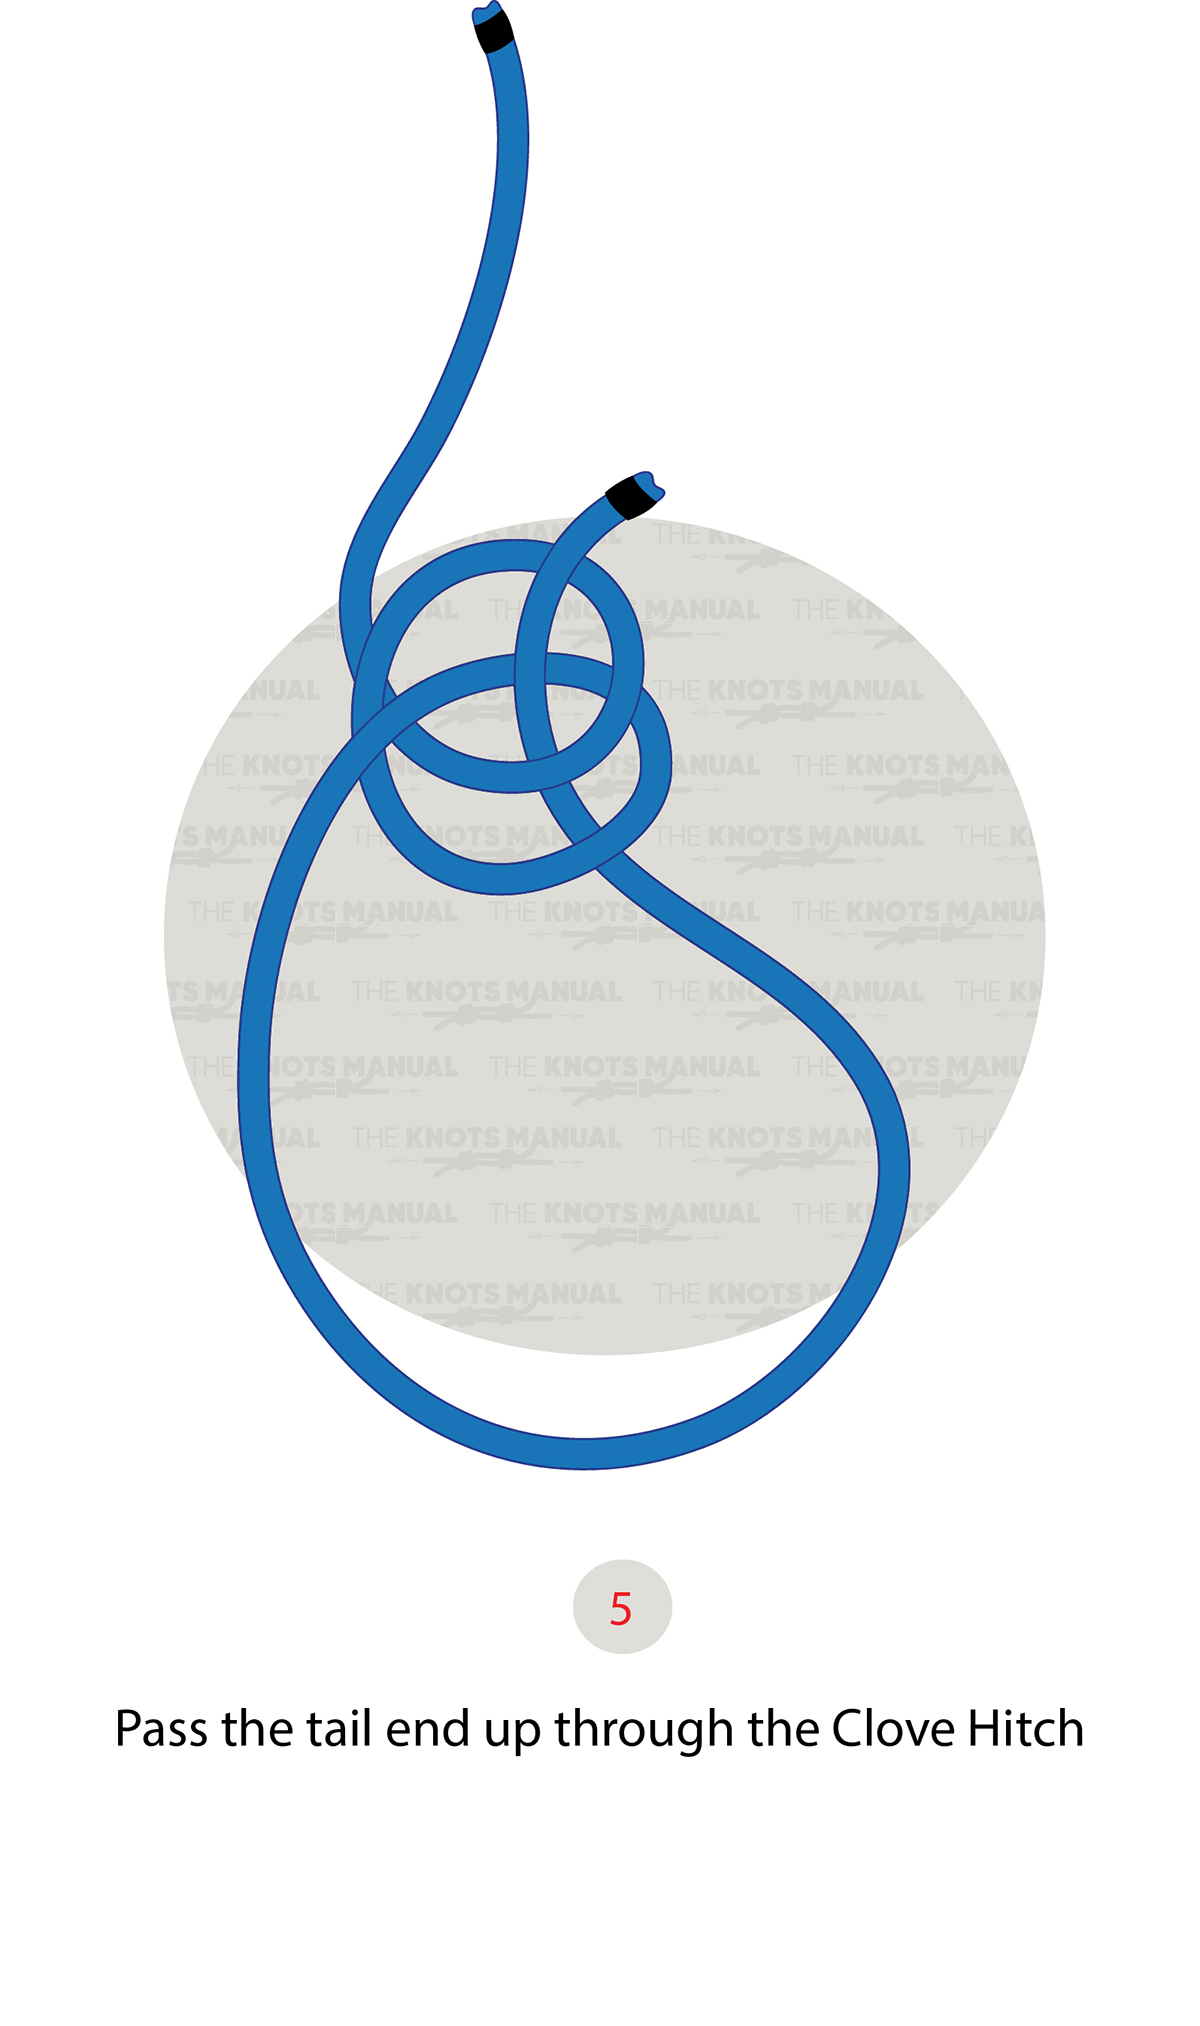
Pass the tail end up through the Clove Hitch.
Step 6:
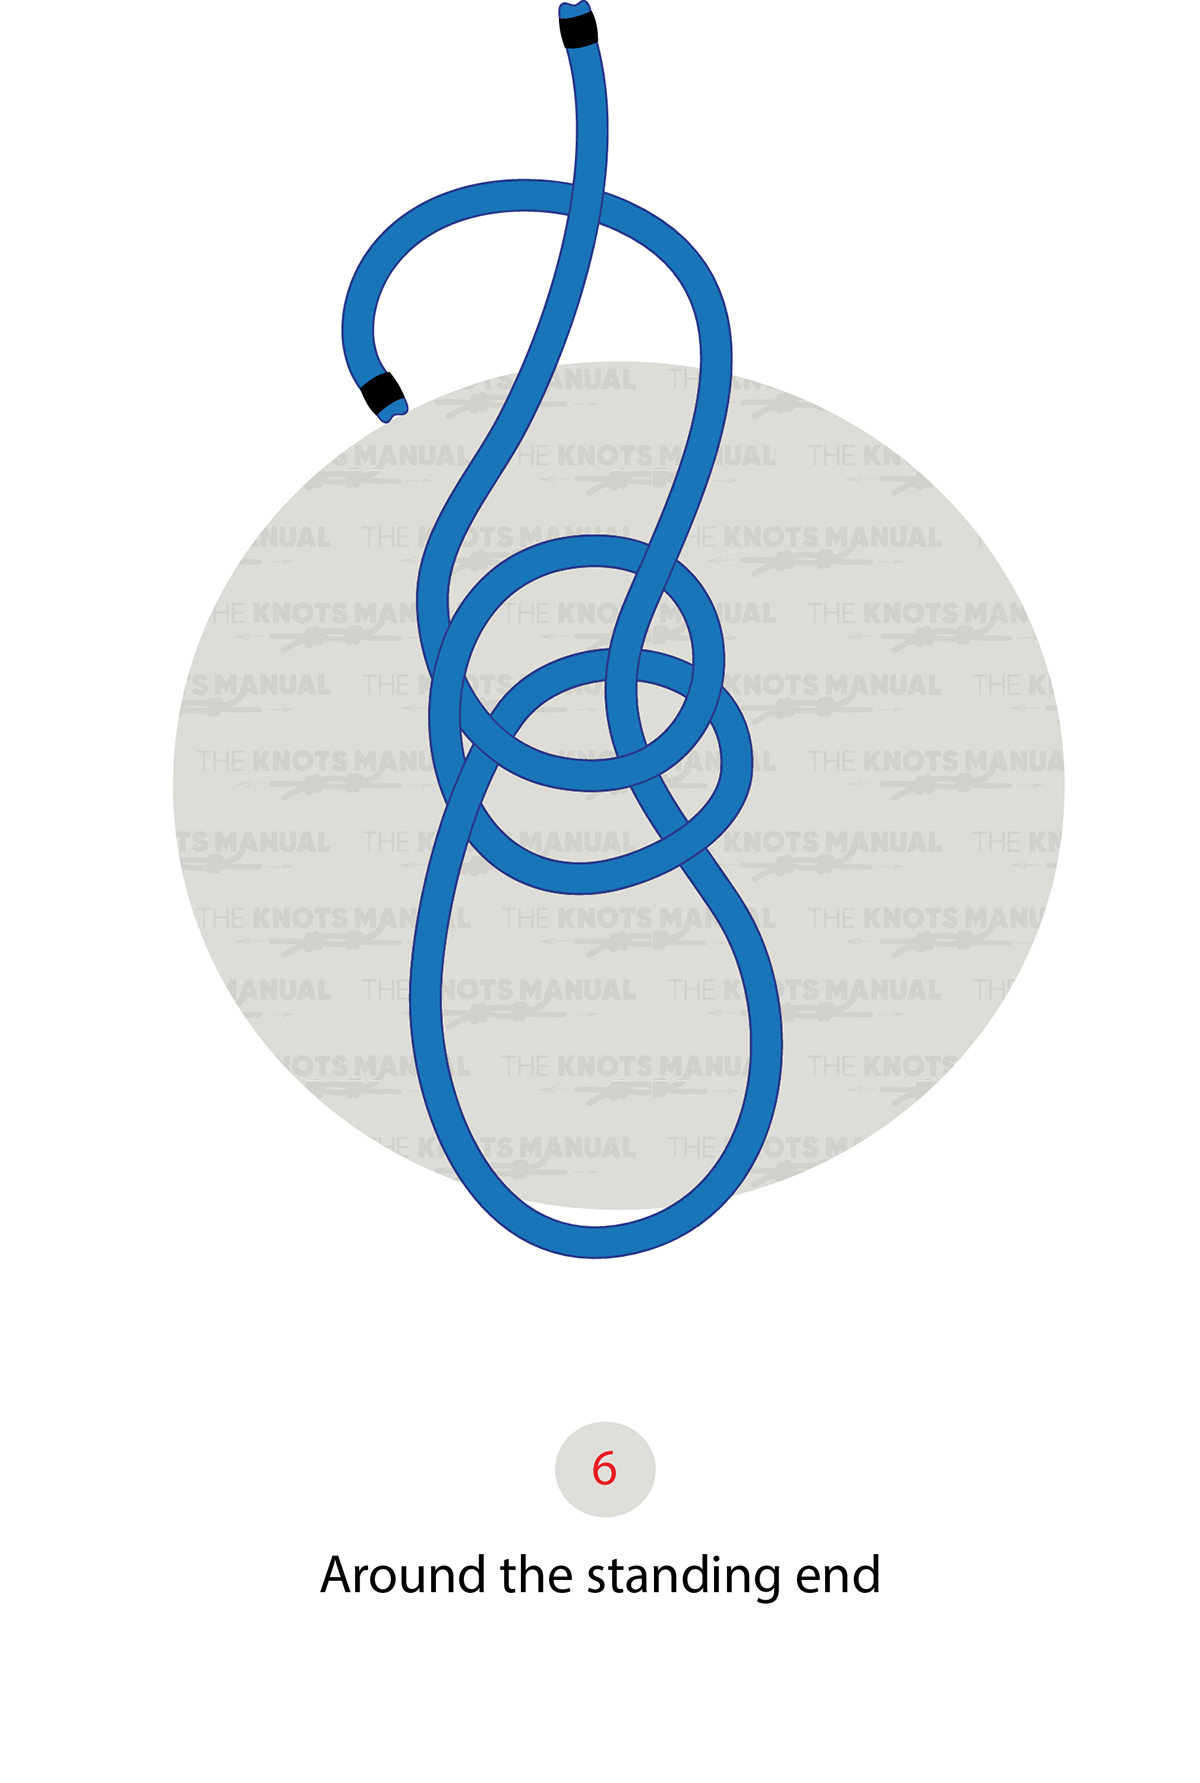
Bring the tail end around the standing end.
Step 7:
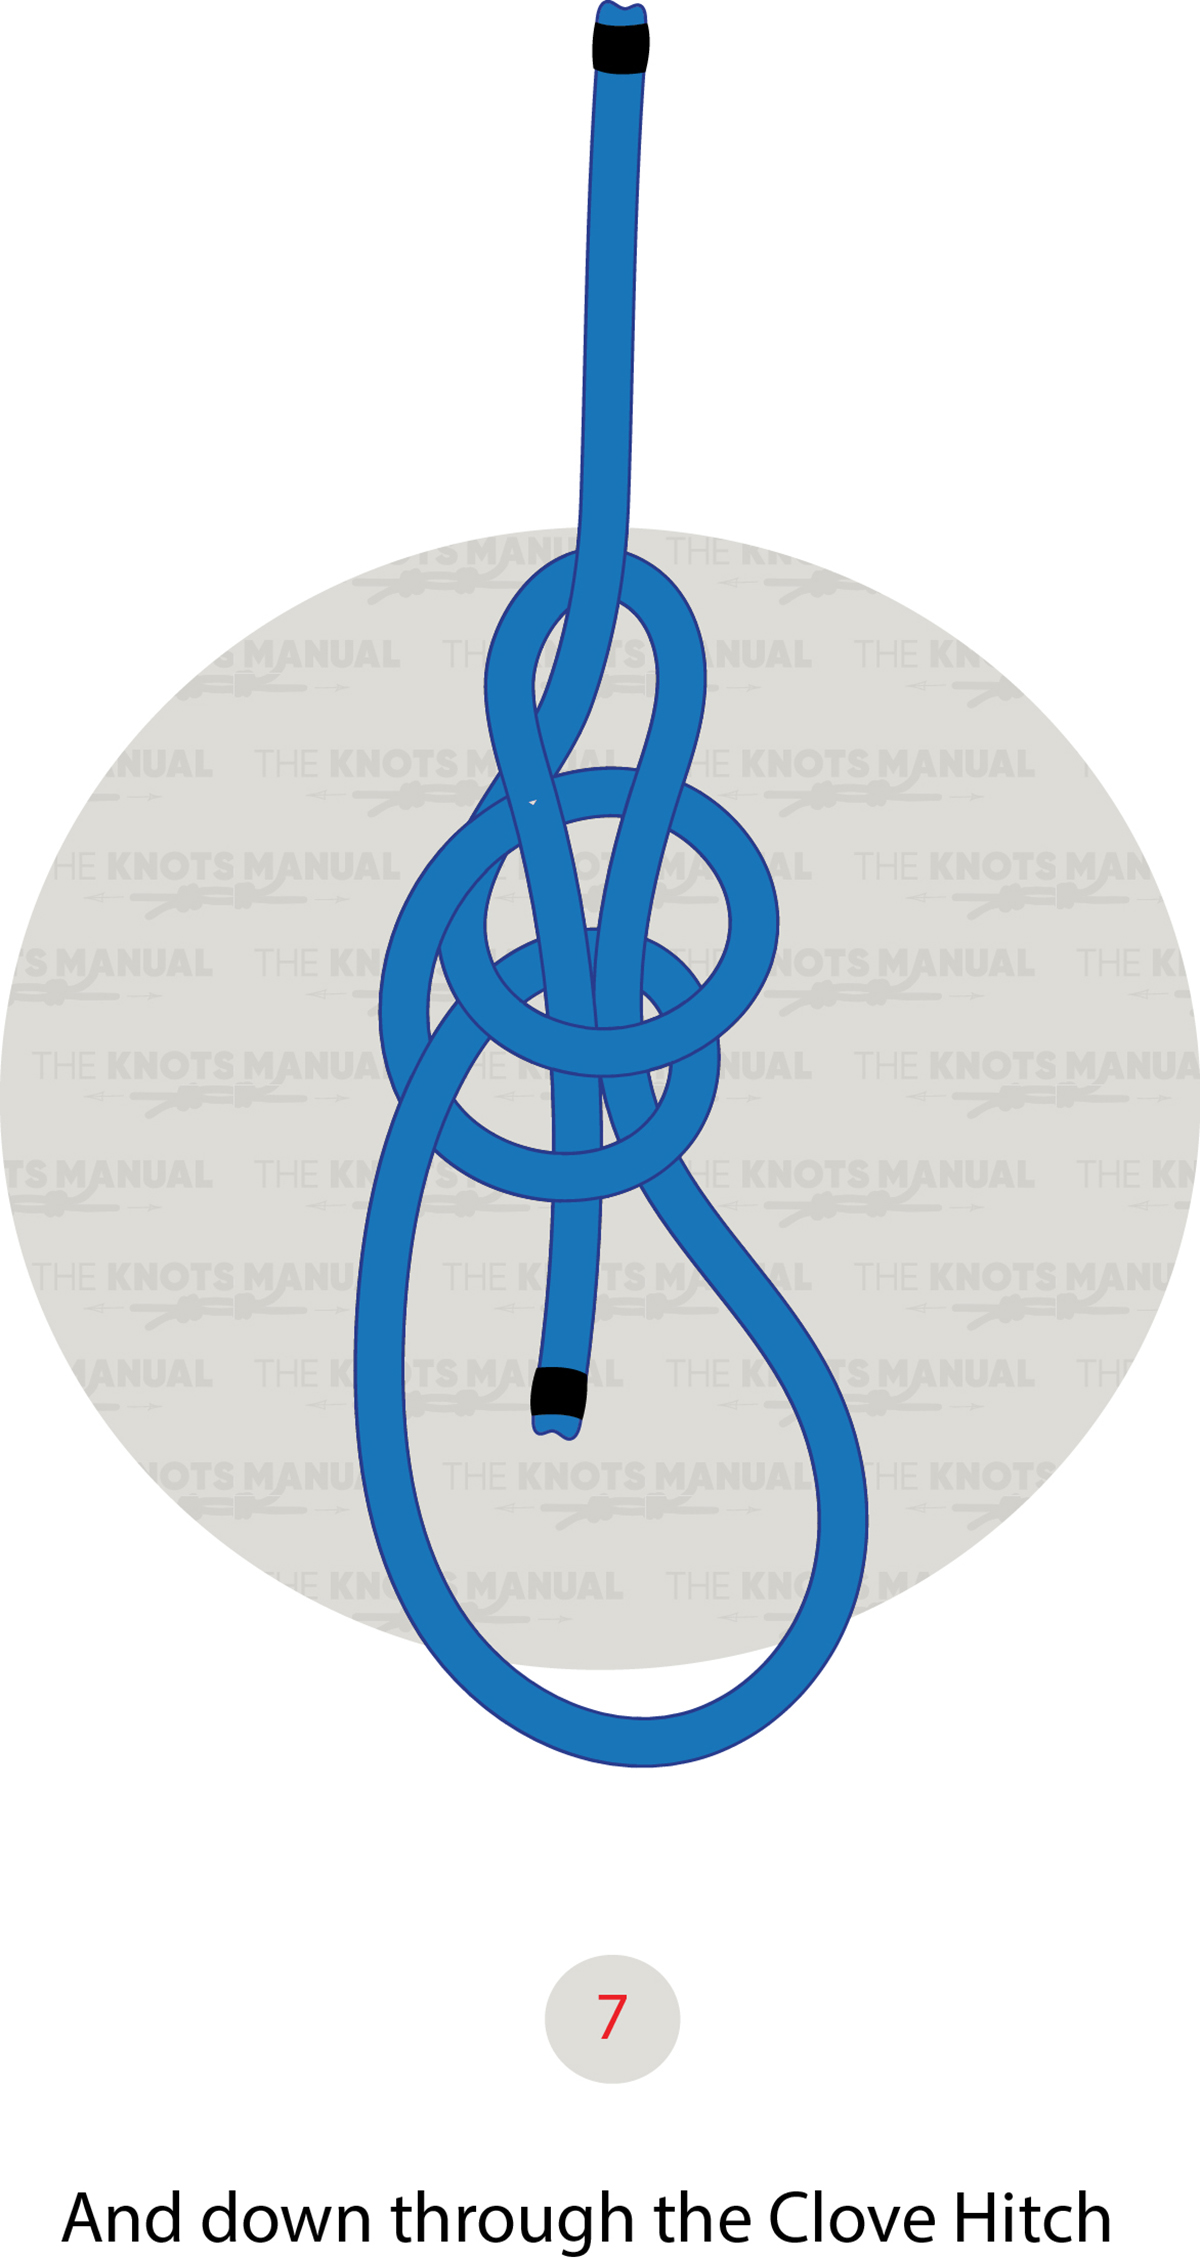
Push the tail end back down through the Clove Hitch.
Step 8:
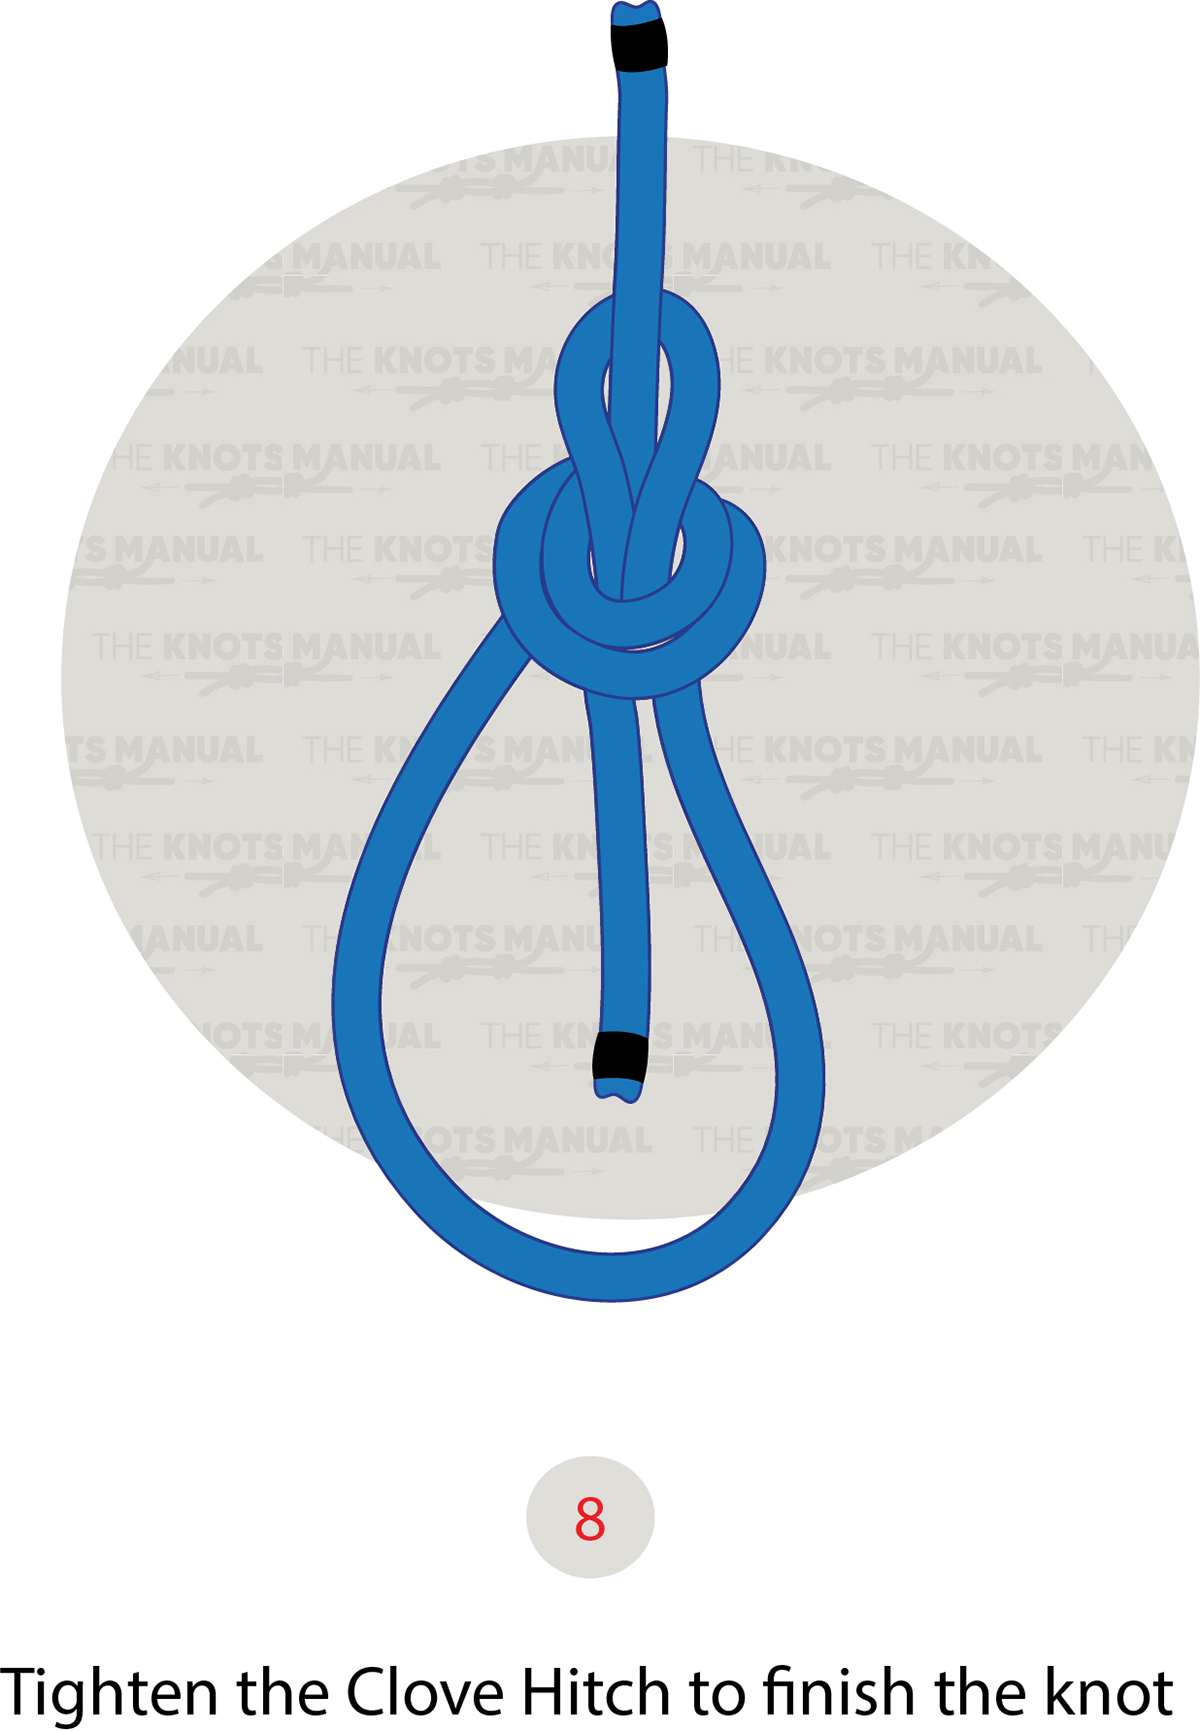
Pull to tighten the Clove Hitch and complete the knot.
