The Transom Knot is a secure lashing knot that ties together two poles at a 90-degree angle. It has various outdoor uses because it offers a very simple way of tieing two branches perpendicularly.
Quick Guide: How to Tie a Transom Knot
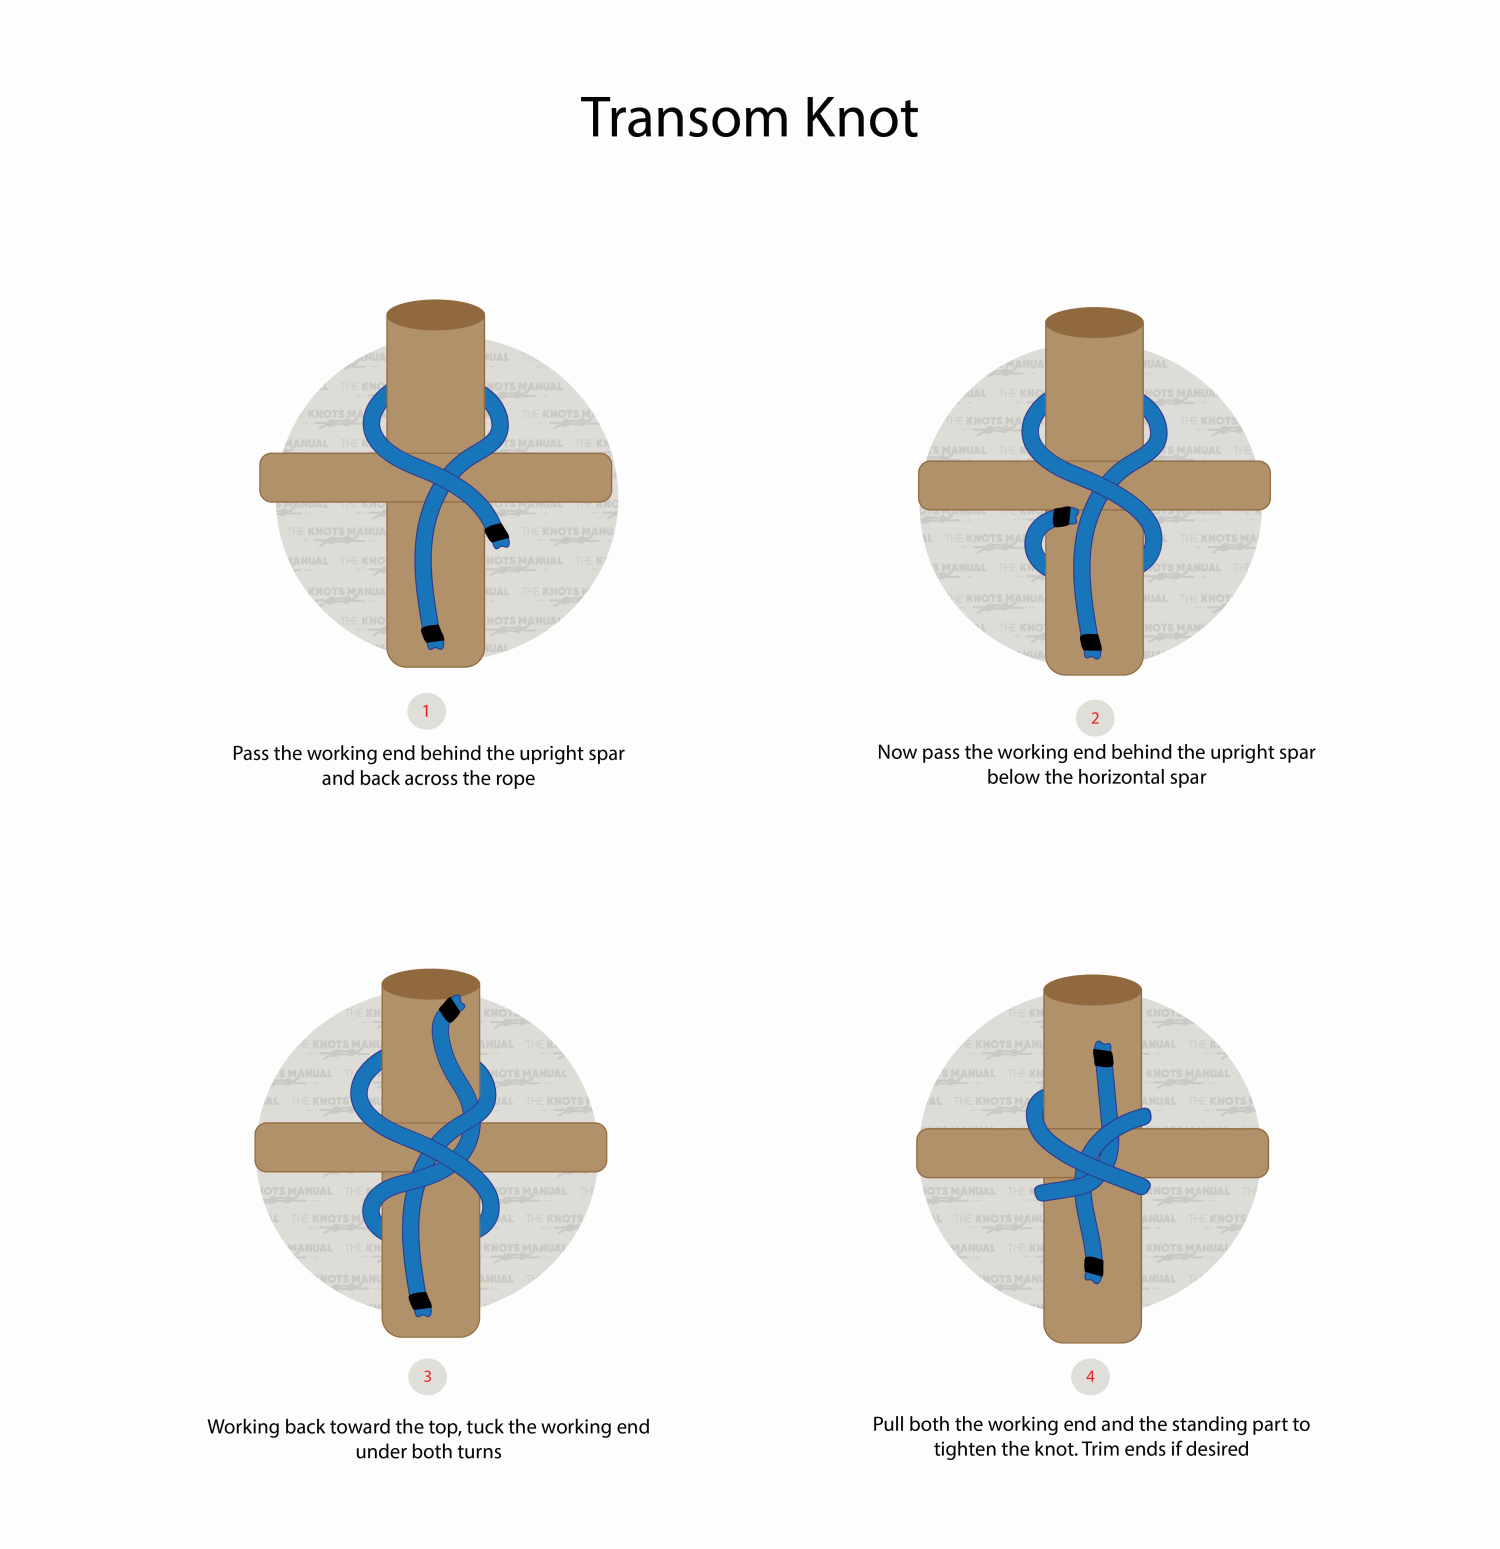
To tie a Transom knot, wrap the working end of the rope around the top vertical pole from the backside. After that, go over the standing end and then around the bottom of the vertical pole. Finally, go over the standing end and then under both remaining strands. Tighten by pulling both ends of the rope in opposite directions.
The ends of the Transom Knot can be trimmed off to make it look cleaner.
To check that it’s tied correctly, inspect the knot from the front side. It should form a simple diagonal Overhand Knot that’s crossed with another strand.
To make the connection more secure, you can tie another Transom Knot on the other side of the two poles, only rotated by 90 degrees. This will make it much more reliable and less likely to come loose.
You can also reinforce the knot by tieing stopper knots on each end of the rope. A simple Overhand Knot or a Double Overhand Knot is perfect for this purpose.
Pros and Cons of the Transom Knot
The Transom Knot is very easy to tie, making it ideal to teach to beginners and scouts.
Due to the structure of the knot, it also holds both poles at a 90-degree angle. If you tie another Transom Knot on the opposite side, rotated by 90 degrees, the effect will be even better.
The Transom Knot is also a somewhat secure lashing knot. If you tighten it securely, it will hold both poles in place with ease.
The only downside to the Transom Knot is that it shouldn’t be used for extended periods. Under cyclical loads (for example, from moving the poles), it will start to untie eventually. That’s why is usually used only for temporary connections. The only way to fix this is to tie stopper knots on both ends of the rope.
Common Uses for the Transom Knot
The Transom Knot has many survival and outdoor uses. You can use it to tie two tent poles together, create a fence from branches, create a DIY crucifix, or create makeshift shelters. You can use it anytime you need to connect two poles at a perpendicular angle.
A lot of gardeners are also familiar with the Transom Knot. It’s ideal for making temporary wooden structures for growing tomatoes and cucumbers.
Knots Like the Transom Knot
Constrictor Knot: A very secure hitch knot that can be tied around one or many objects. It’s tied in a very similar manner to the Transom Knot.
Strangle Knot: This is a simple hitch knot that’s tied identically to the Transom Knot. You can tie it in the same way if you imagine that there is no vertical pole in our illustrations. It’s a very widely used survival knot with many outdoor uses.
Square Lashing Knot: This is a complicated lashing knot for connecting two poles together at a 90-degree angle. It consists of a Clove Hitch, Two Half-Hitches, and many wraps around both poles. It’s much more secure compared to the Transom Knot. It’s usually used for more permanent and load-bearing connections. For example, when making scaffolding.
Diagonal Lashing Knot: This is another lashing knot used to connect two poles at a 90-degree angle. It consists of a Timber Hitch, Clove Hitch, and many wraps around the poles diagonally. It’s much more complicated than a Transom Knot, but also more secure. Like the Square Lashing Knot, it’s also used for permanent solutions.
Step-By-Step Guide: How to Tie a Transom Knot
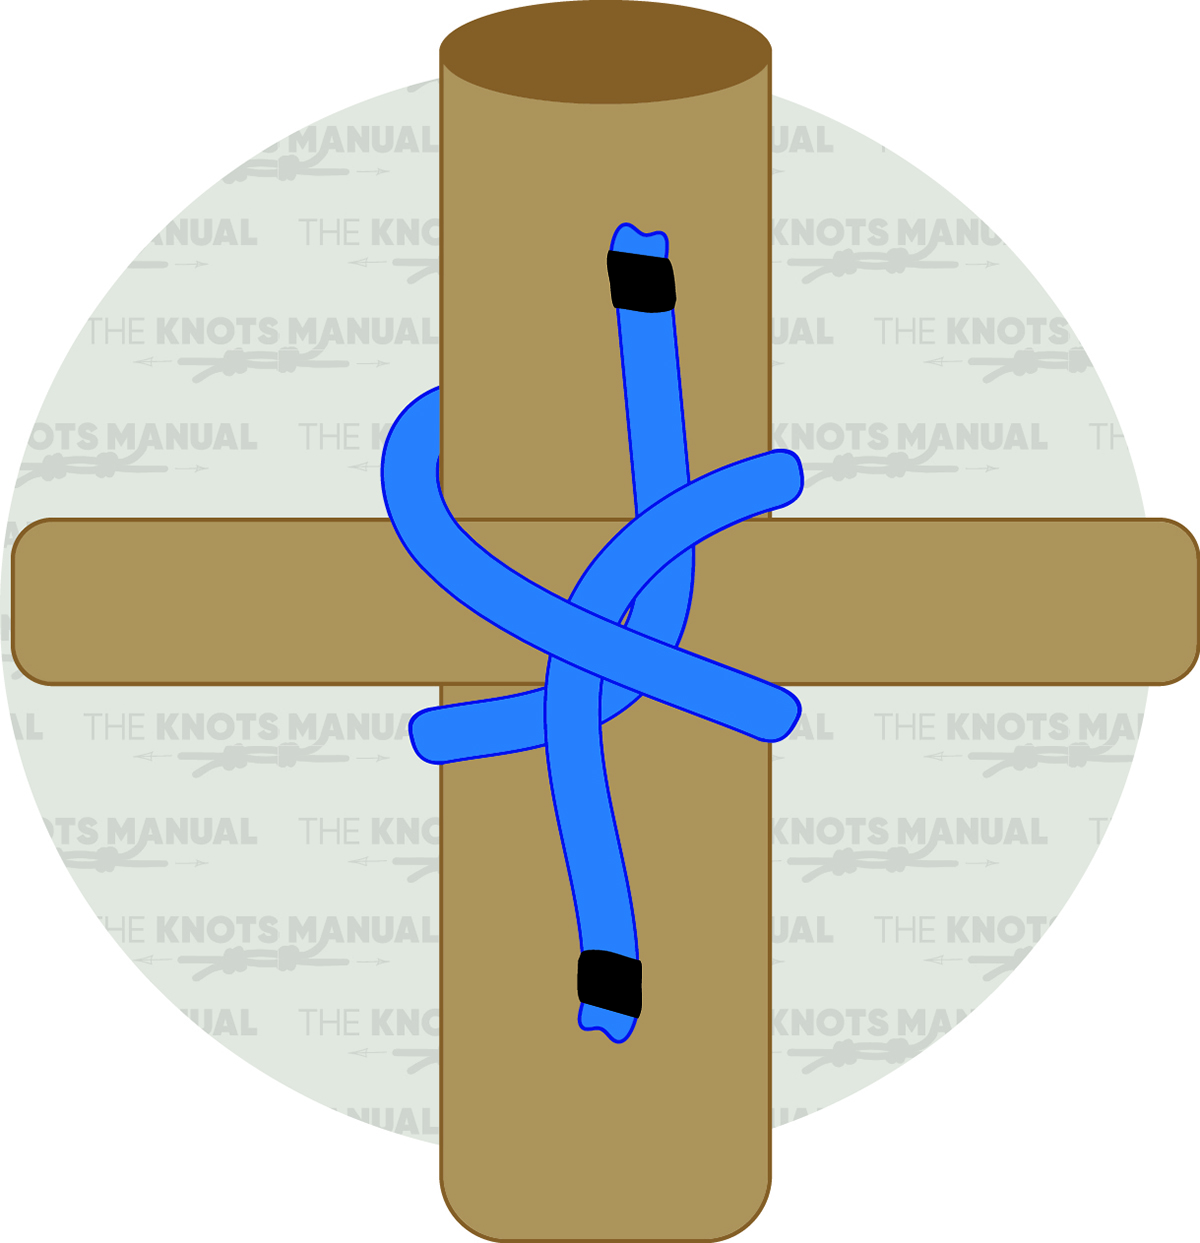
A step-by-step guide on how to tie a Transom Knot.
Step 1:
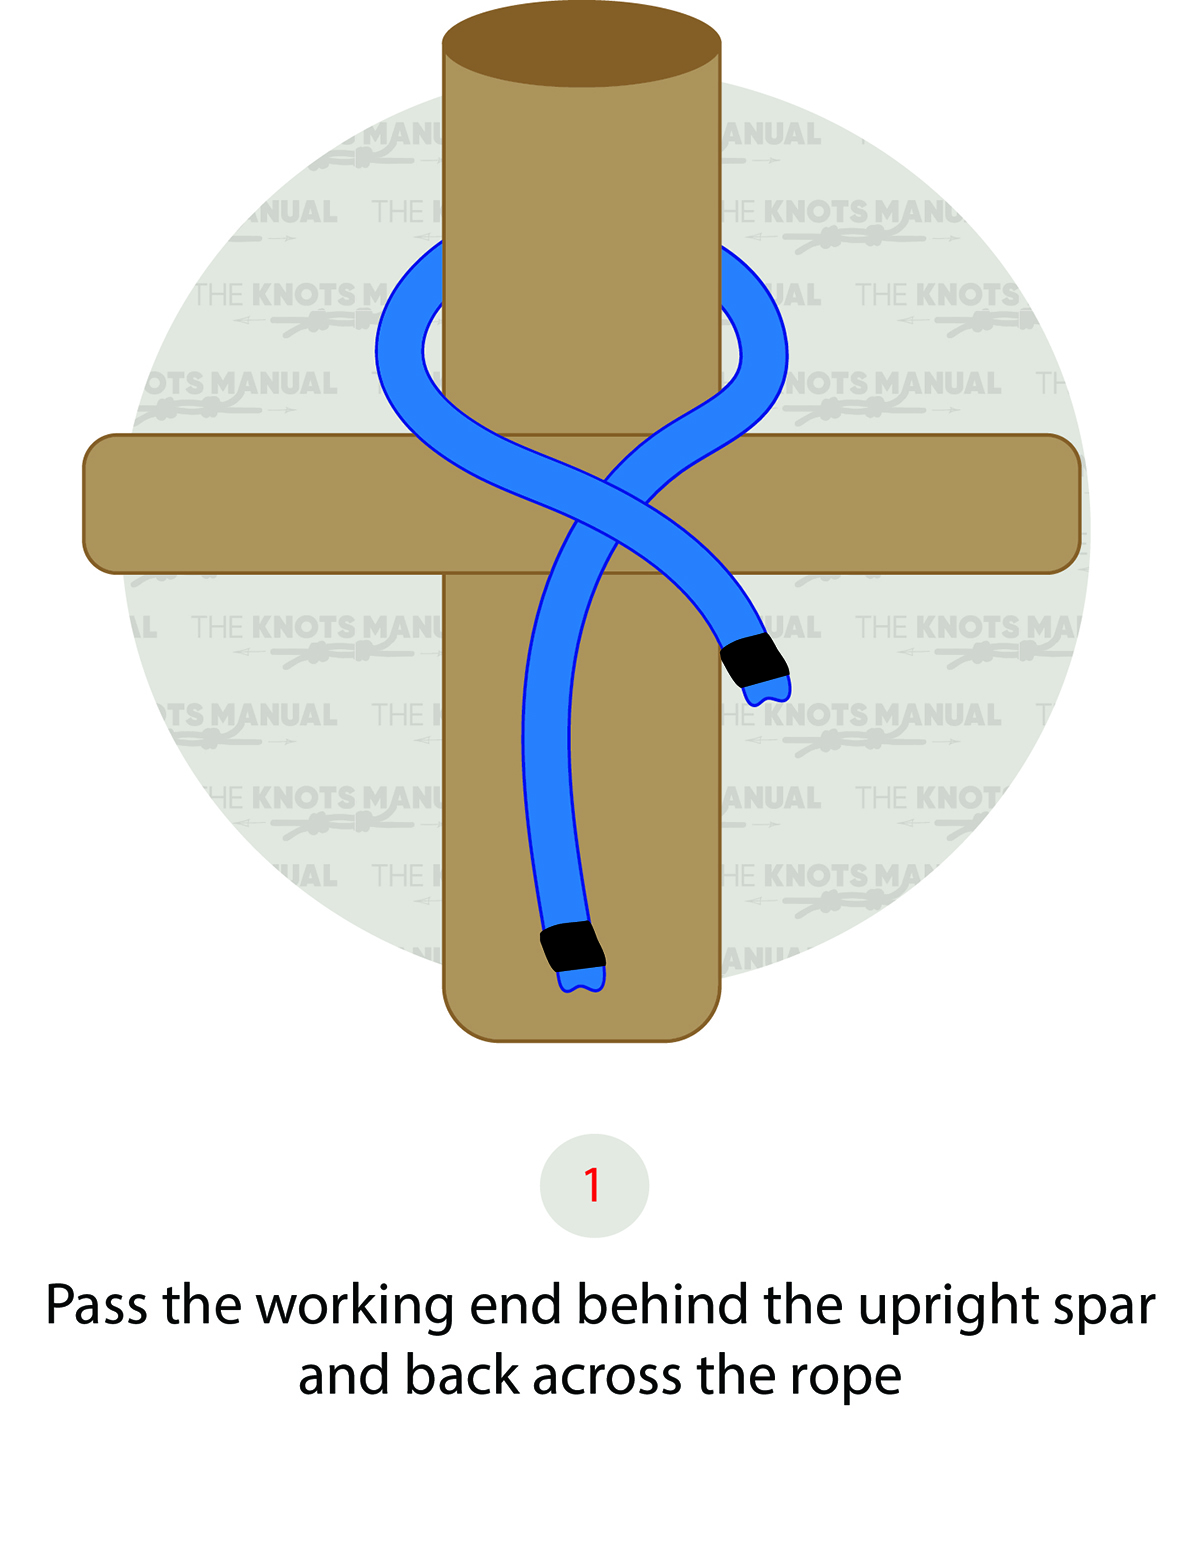
Wrap the working end around the vertical pole from the backside, and cross the standing end.
Step 2:
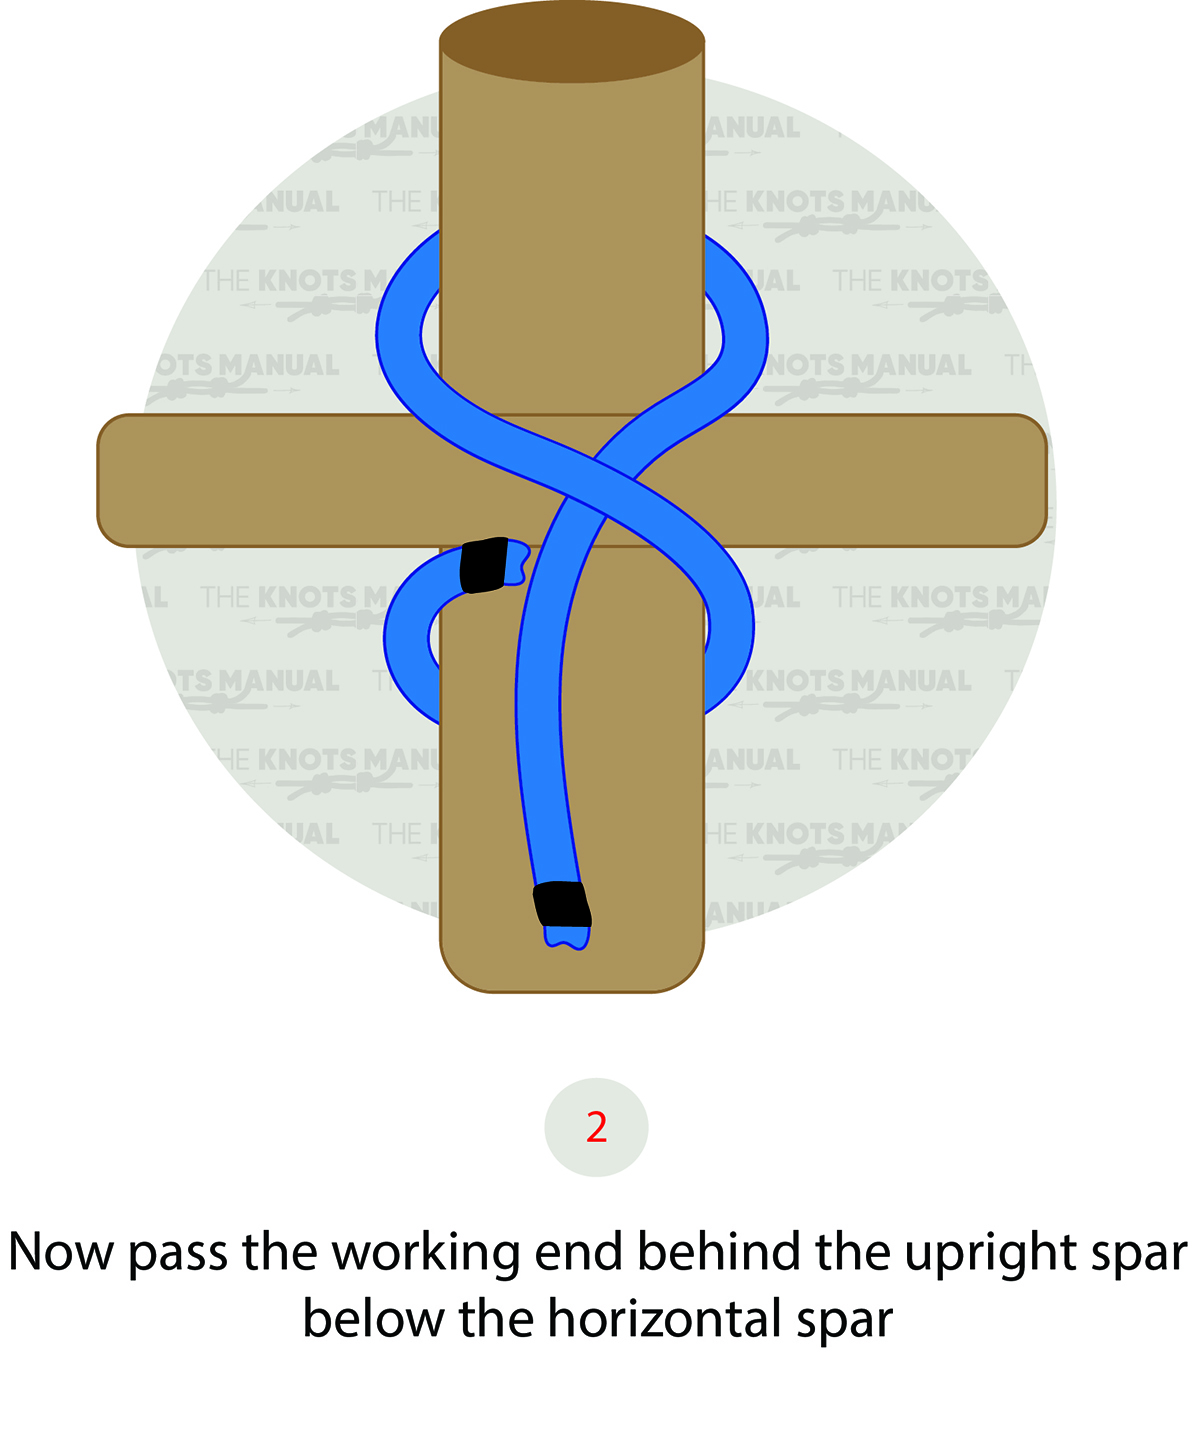
Wrap the working end around the vertical pole from the bottom.
Step 3:
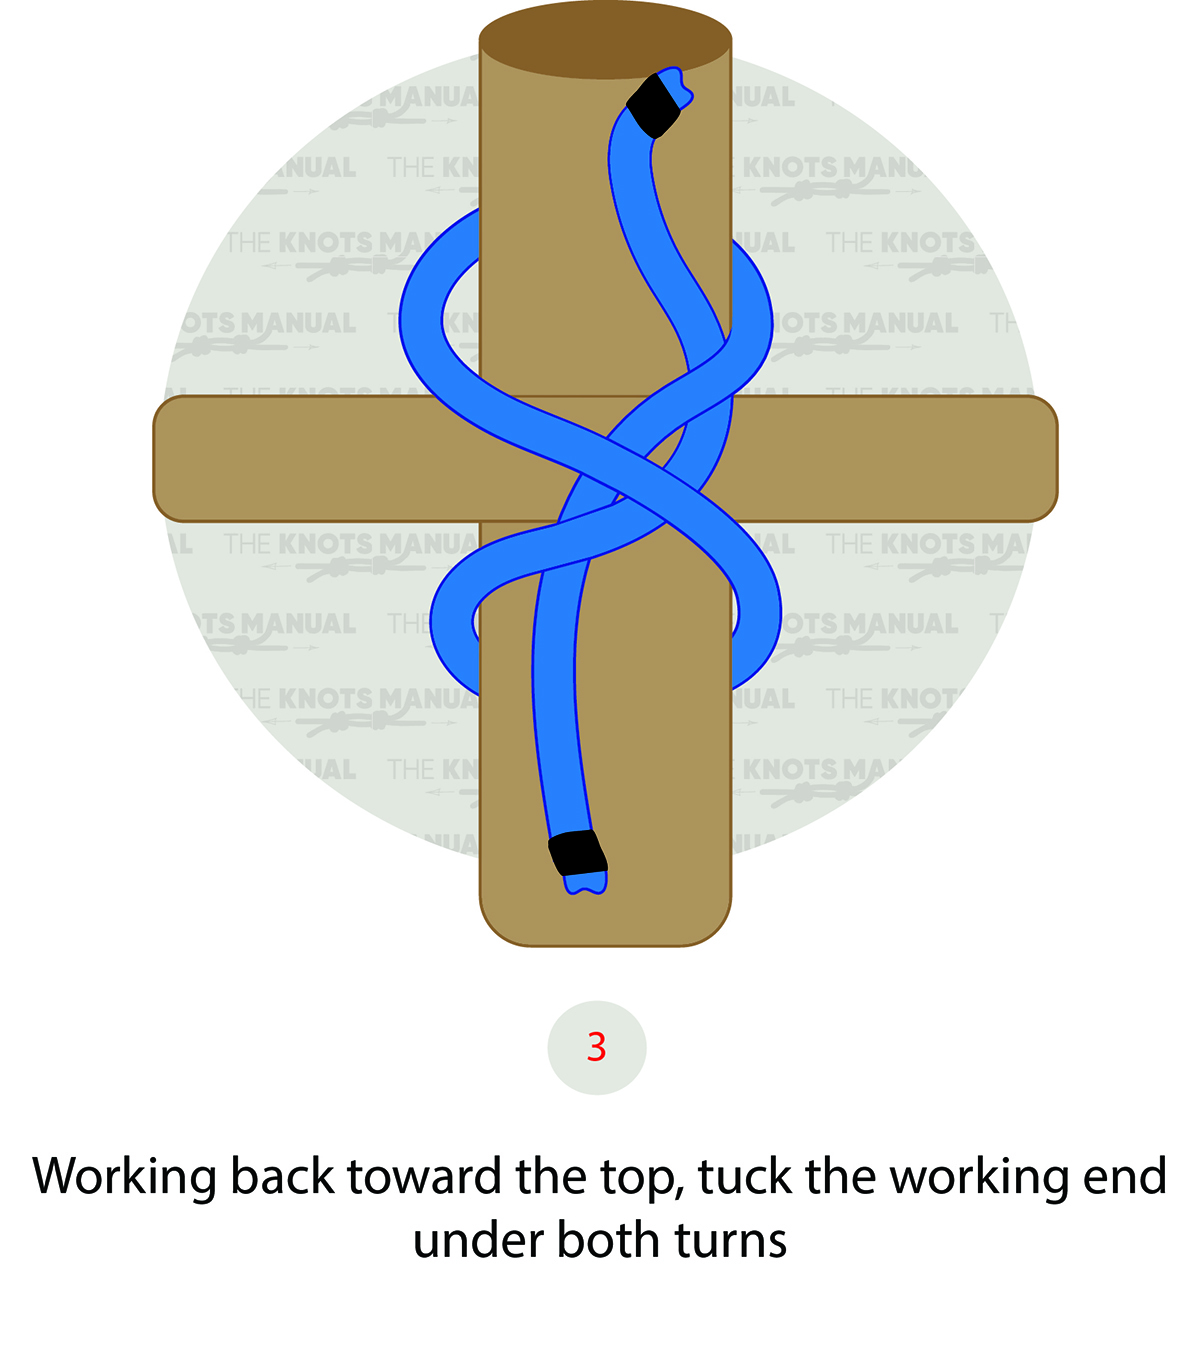
With the working end, go over the standing end and then under both next strands.
Step 4:
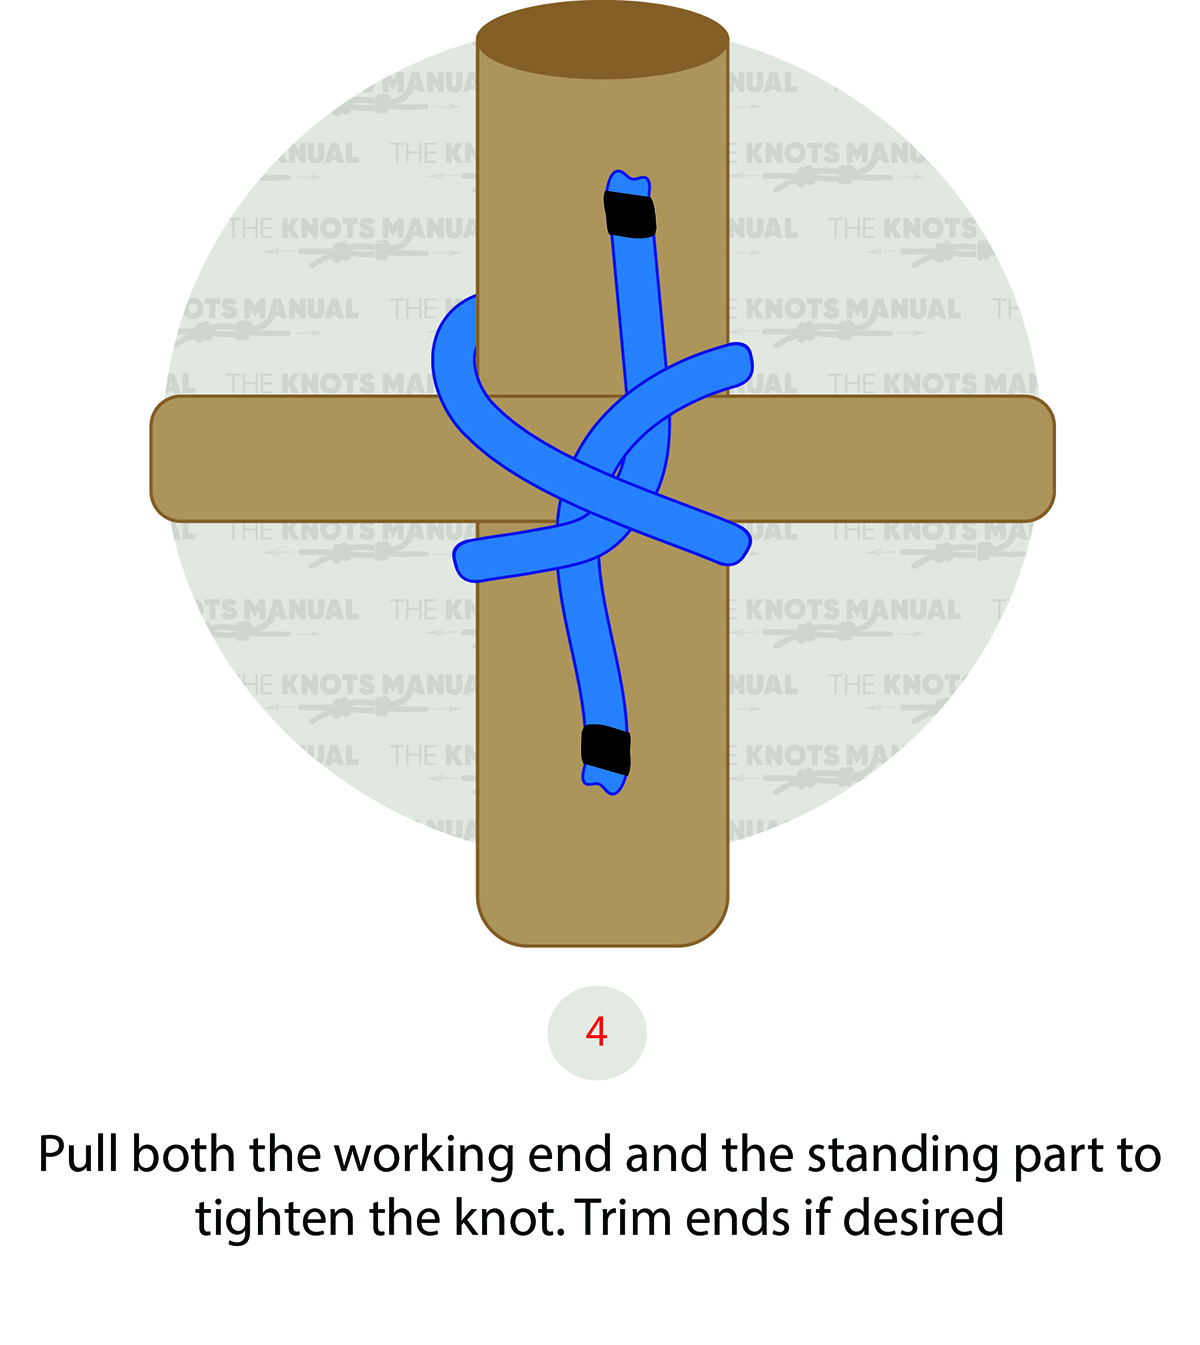
Tighten the knot by pulling both ends of the rope.


