A strangle knot is a binding knot with many purposes. Its uses include tightening a bag or the end of a frayed rope, temporary whipping, securing a roll, making a tourniquet for a broken limb, tying a fender line, storing hanks of a rope, and lastly, securing chords onto an object for a paracord graft.
A strangle knot is also the same as a double-hand knot.
Quick Tying Guide: Strangle Knot
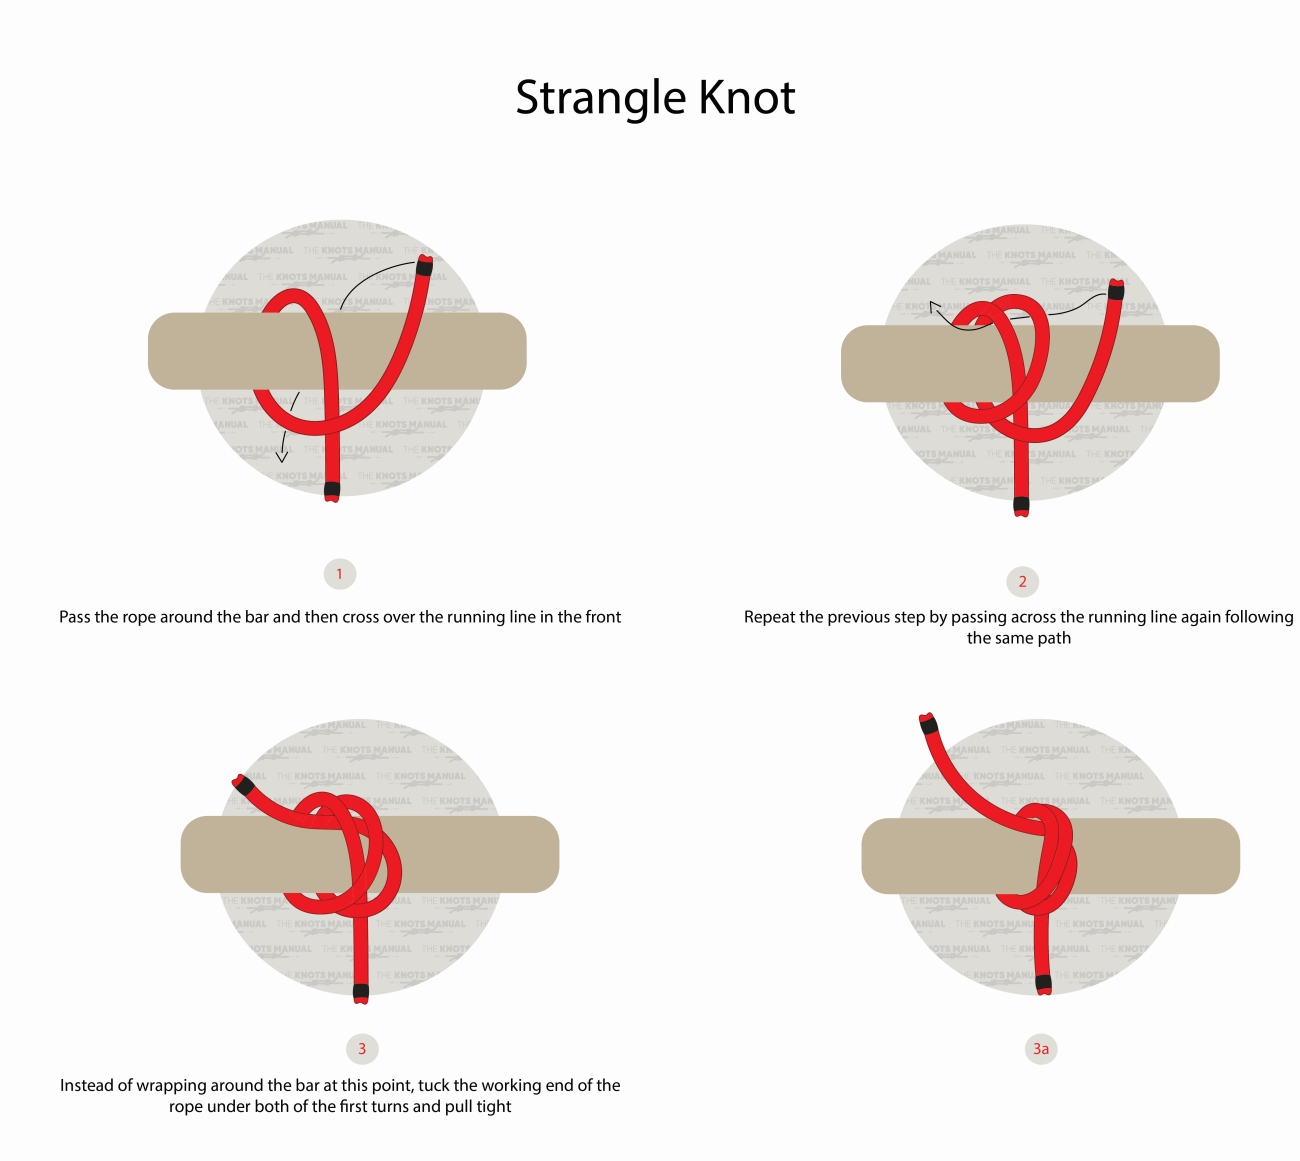
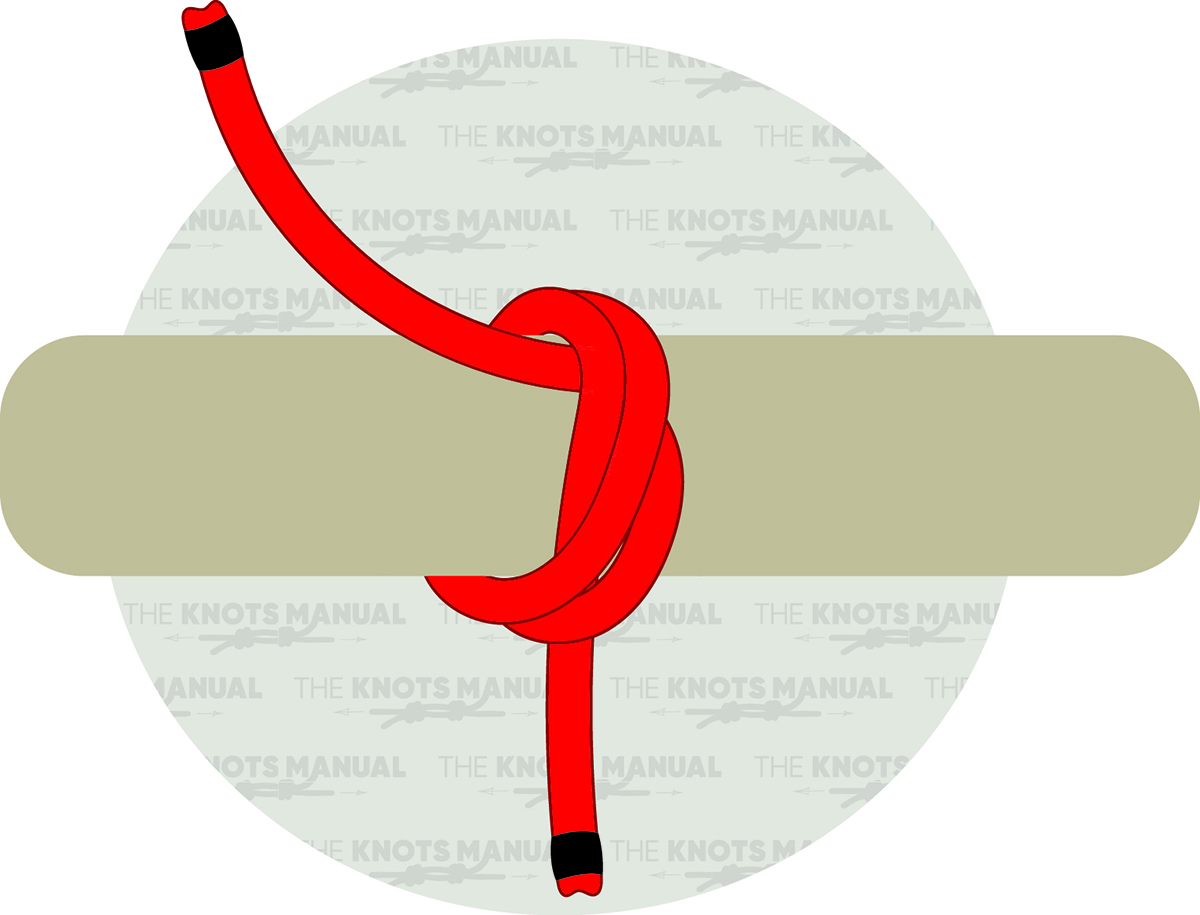
To tie a strangle knot, wrap the rope around an object crossing over the running line in the front. Then, repeat this step, following the same pass. Lastly, tuck the working end of the rope under the turns and pull tight.
The Pros and Cons of a Strangle Knot
The strangle knot can secure many items, such as sacks, broken limbs, and whipping. A strangle knot is also commonly used for storage to tie up hanks of rope.
As versatile as it is, the strangle knot has a couple of drawbacks. First, it only works when tying a knot around a cylindrical object. Second, it isn’t as secure as the constrictor knot.
Knots similar to a Strangle Knot
Miller knot—A Miller knot binds the opening of a bag, sack, bundle, or roll. It does not bind prematurely, which provides more of a guarantee that the knot has been tightened enough.
Clove hitch knot—The clove hitch is a binding knot used for camping, rock climbing, and theater.
Dutchman knot—The Dutchman knot is excellent for securing loads on the roof of a car or truck bed. It provides a firm hold.
Constrictor knot—A constrictor knot is a popular binding knot that is simple and effective for securing a semi-permanent binding. Once it has been tightened, it is almost impossible to untie.
Step 1:
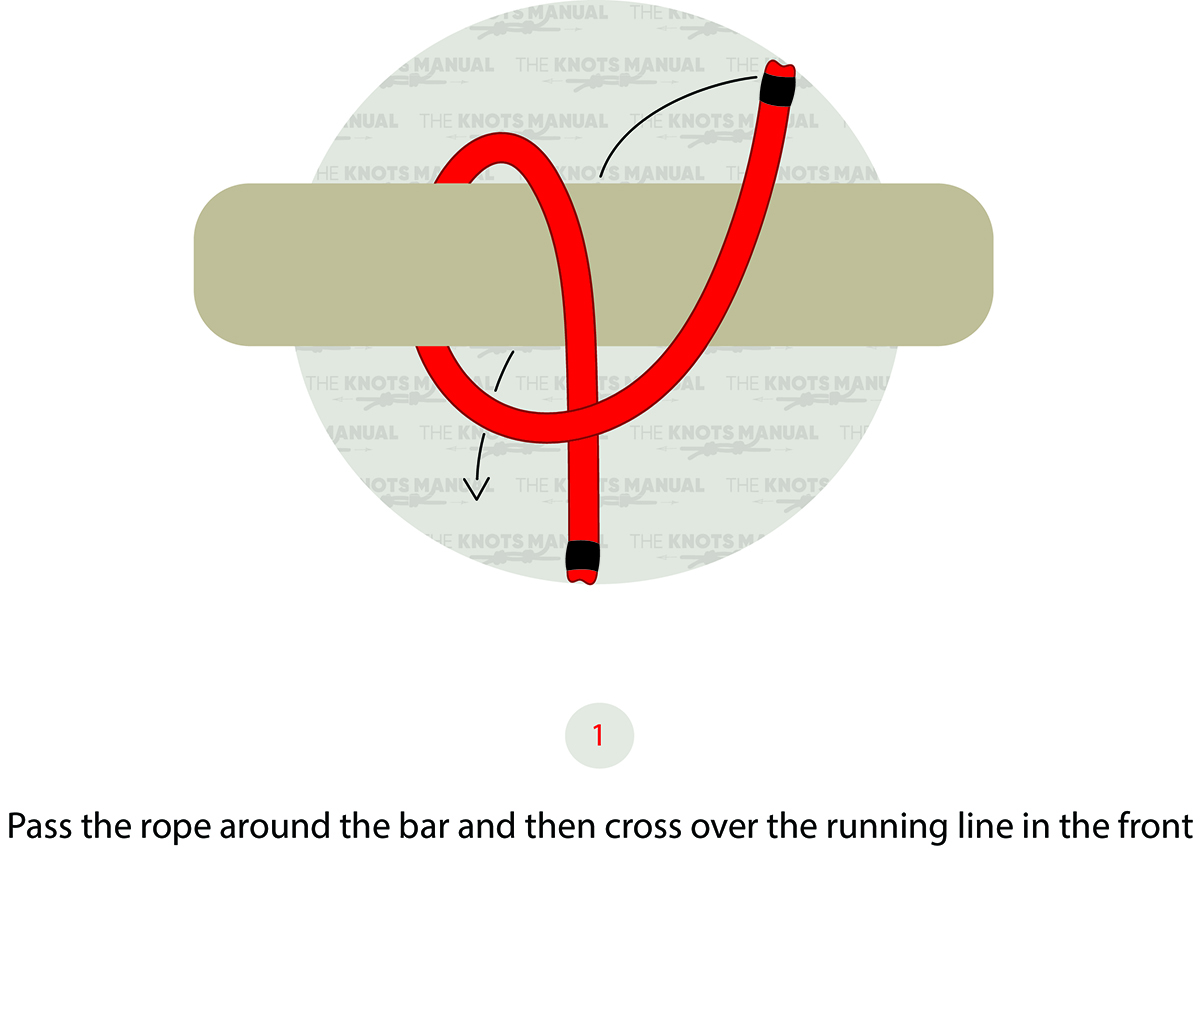
Start by passing the rope around an object like a bar. Cross over the running line in the front.
Step 2:
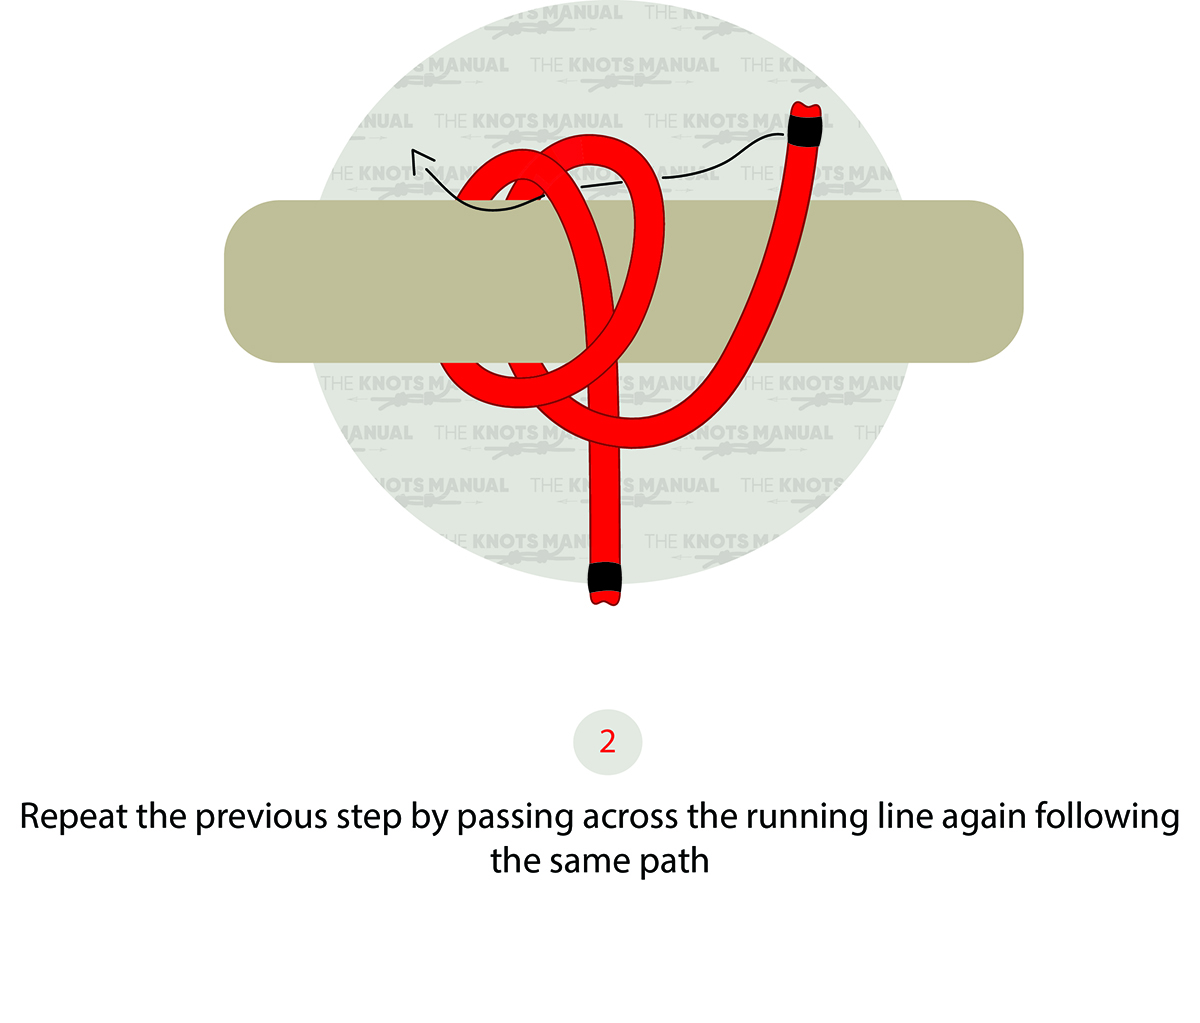
Repeat the first step by passing across the running line, following the same path.
Step 3:
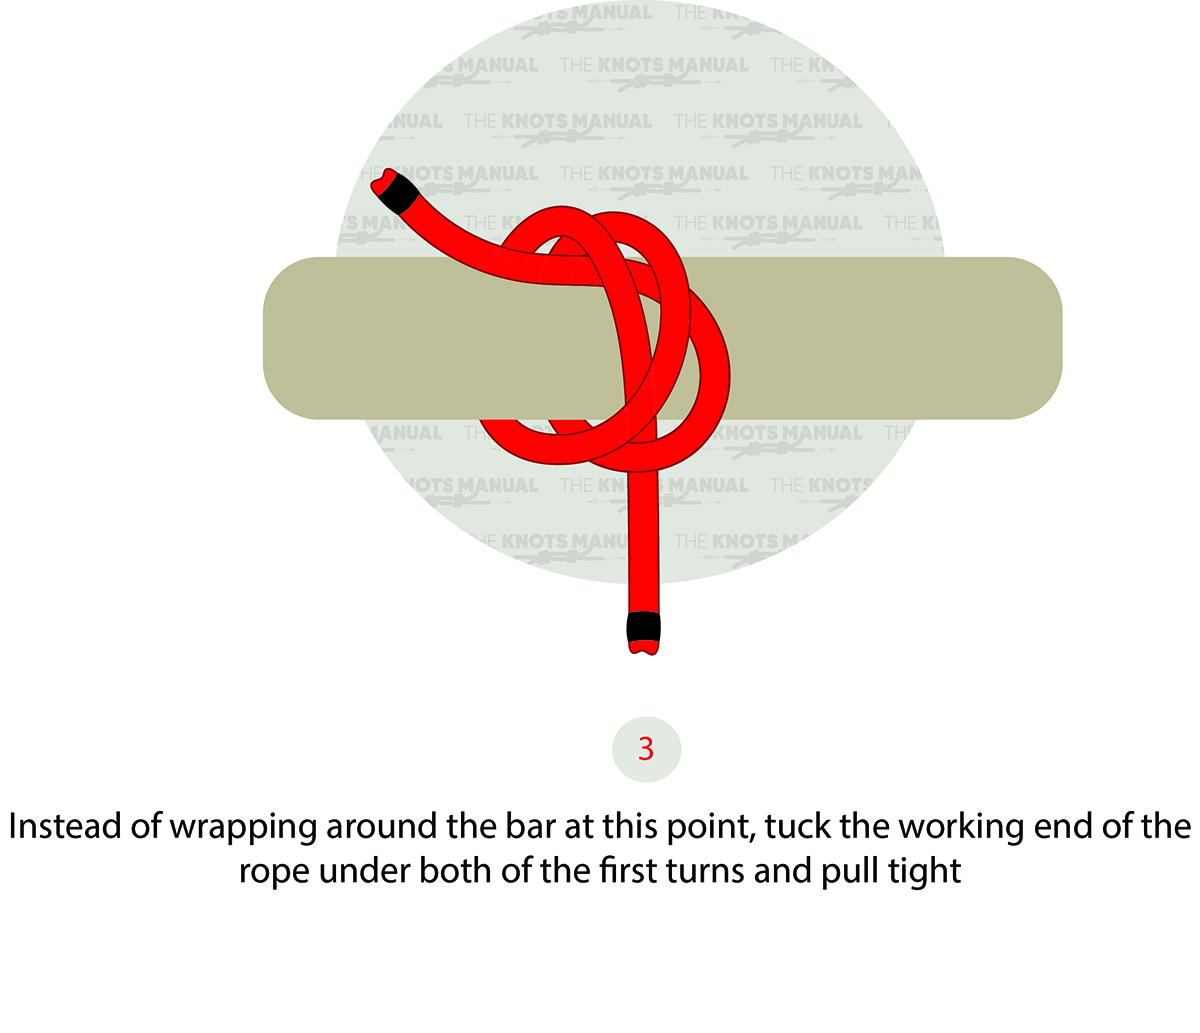
Step 3a:
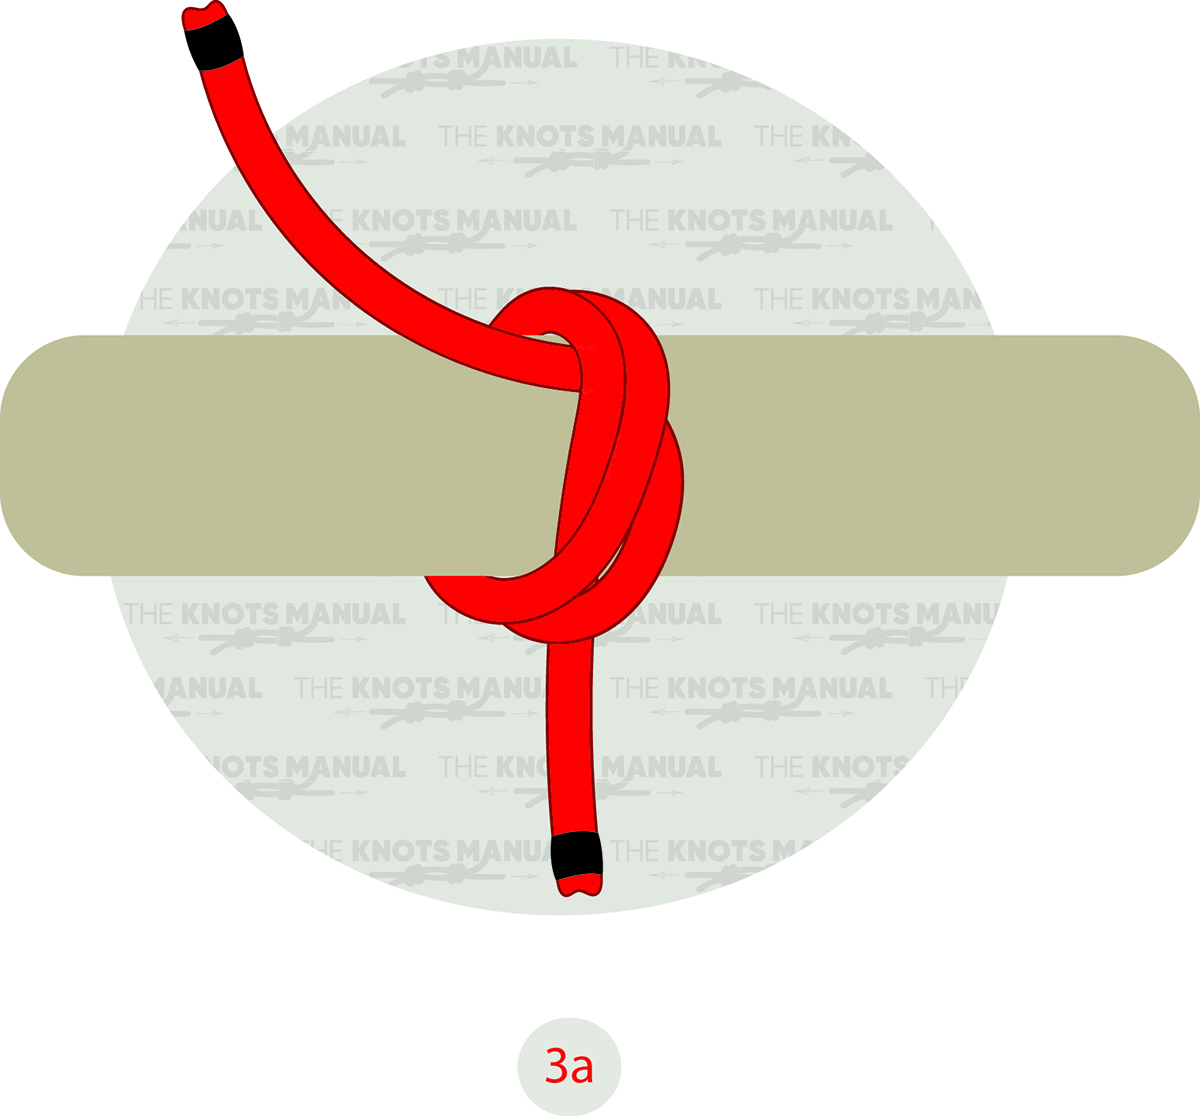
Do not wrap around the bar; instead, tuck the working end of the rope under the first turns and pull to tighten.


The diagrams under “constrictor hitch” actually show a strangle hitch instead.
A “constrictor hitch” has a totally different look, much more symmetrical, with a big “X” in the middle. It involves wrapping the end around the object first under the standing part, then over, then helix it once around the standing part, then tightening.
Whereas your “constrictor hitch” diagrams actually show a “strangle hitch” being tied: wrap end around object under standing part, then again UNDER standing part, then helix it once under both loops.