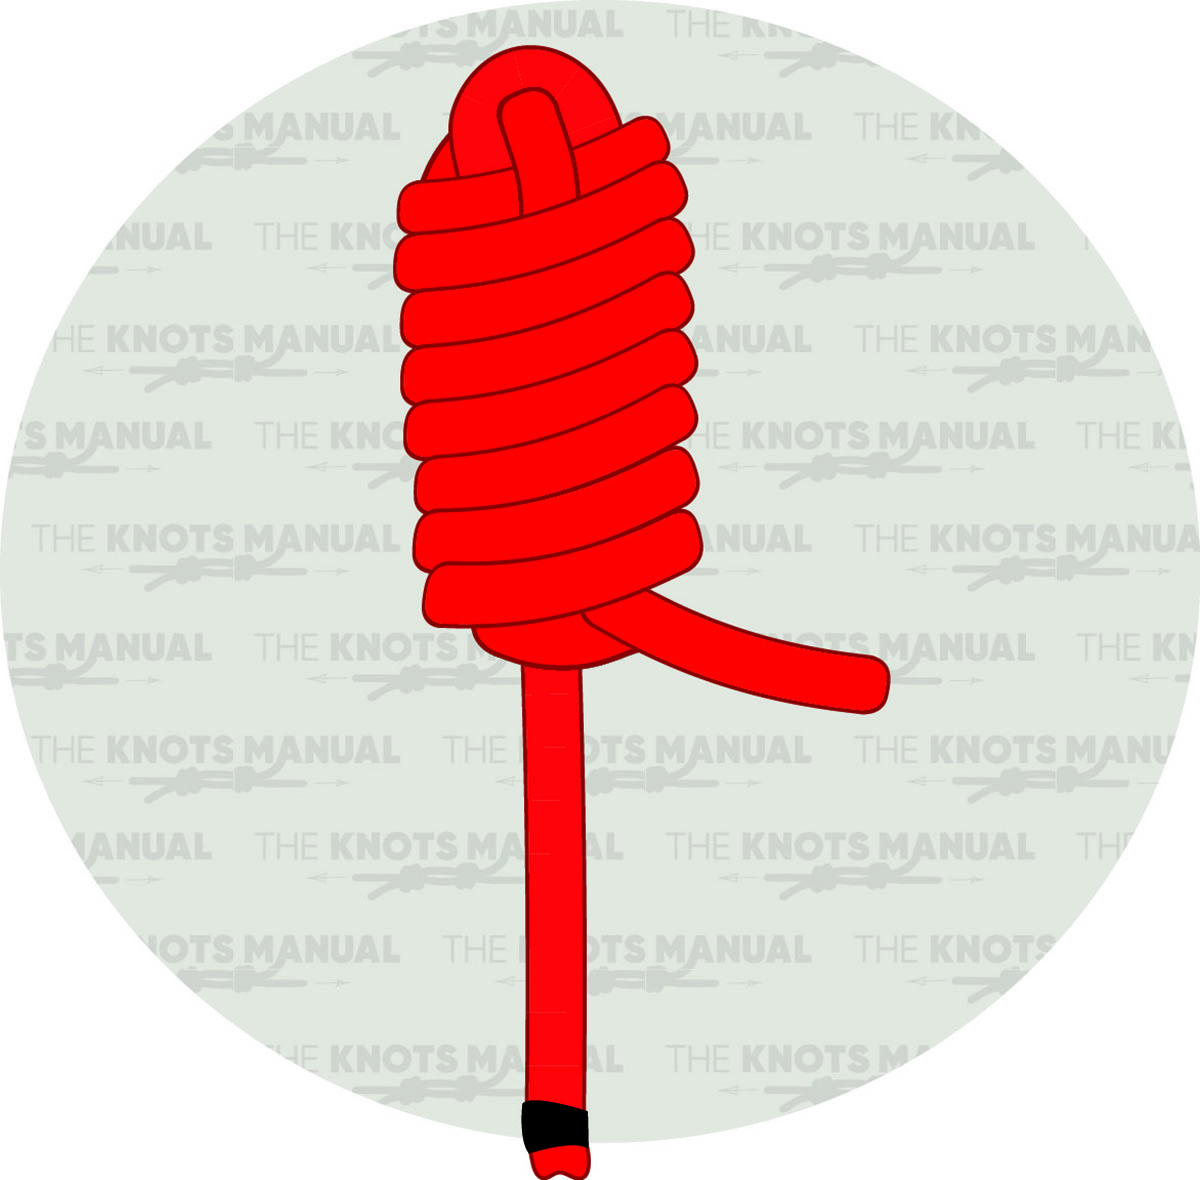
Rigging knots are essential for securing, lifting, and adjusting loads across various industries. From construction to maritime work, these knots provide strength and adaptability in demanding conditions. Each rigging knot has its own unique benefits, whether for quick adjustments, load-bearing security, or ease of untying. Mastering these knots ensures safer and more efficient operations in any rigging task.
1. Bowline Knot
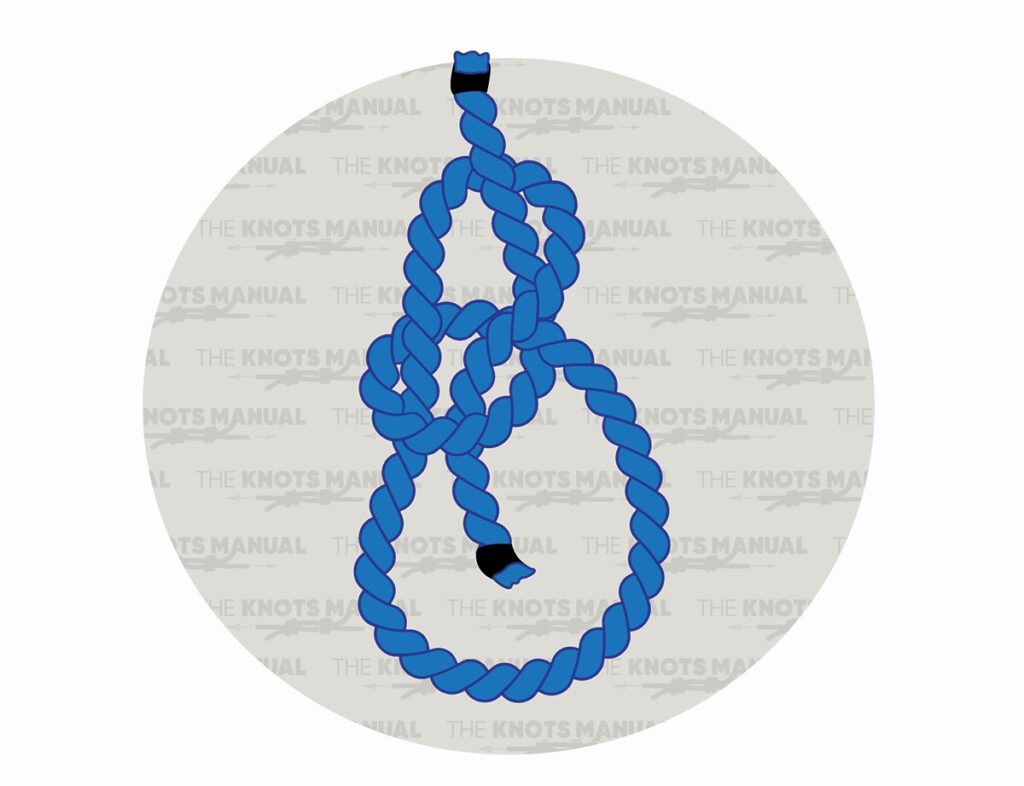
The Bowline Knot creates a secure, non-slip loop at the end of a rope, making it invaluable for lifting and securing loads. It’s reliable under tension and ensures the knot won’t slip or bind, even under heavy strain. This knot is widely used in sailing, rescue operations, and various rigging scenarios where a fixed loop is necessary.
To tie the Bowline Knot, form a small loop near the end of the rope. Pass the working end through this loop, then go around the standing end, and finally back through the loop, only the other way. Tighten the knot by pulling the working end opposite to the fixed loop.
2. Clove Hitch
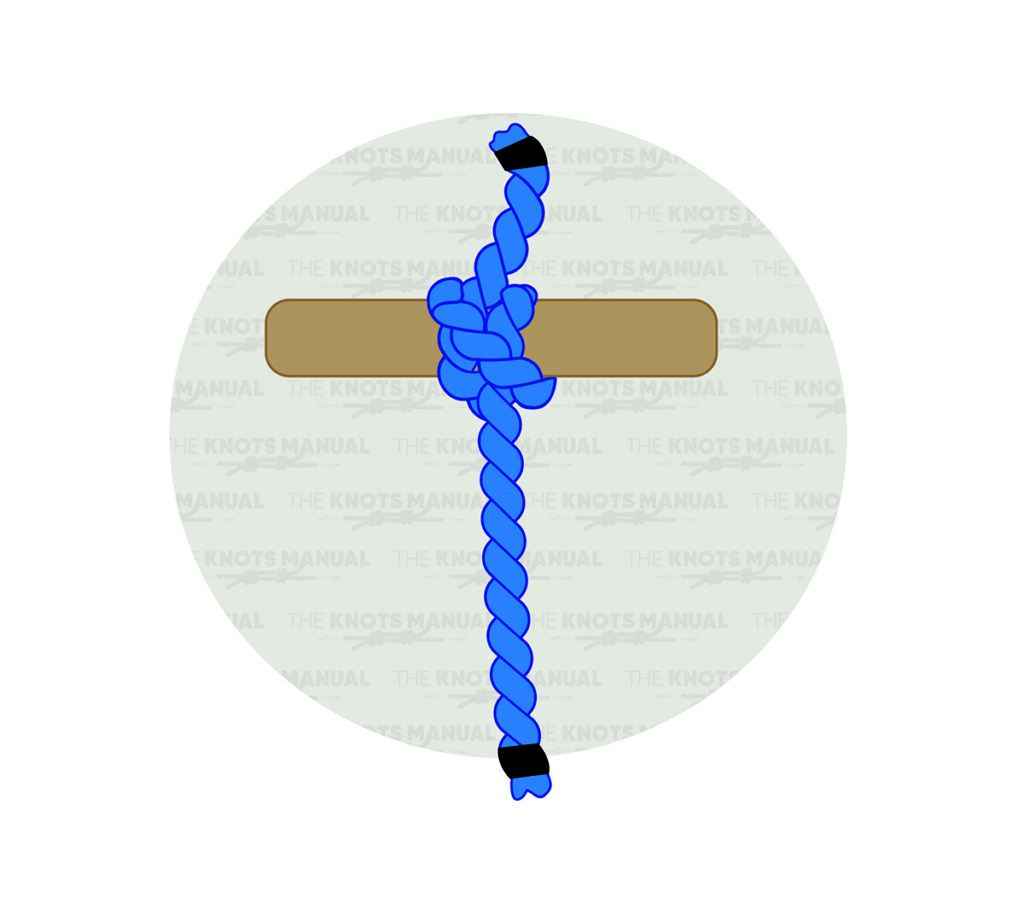
A Clove Hitch offers a quick and easy method for temporarily securing a rope to a post or rail. This knot is particularly useful when the length or tension of the rope may need adjustment. Since the knot can slip under heavy or variable loads, it’s best used in conjunction with other knots or for lighter tasks. Its simplicity allows for quick deployment in various rigging applications.
Tying a Clove Hitch Knot begins by wrapping a rope around a pole or tree. Cross the rope over itself, and then wrap it around again. Tuck the end under the second loop before pulling tight to secure it.
3. Figure Eight Follow-Through Knot
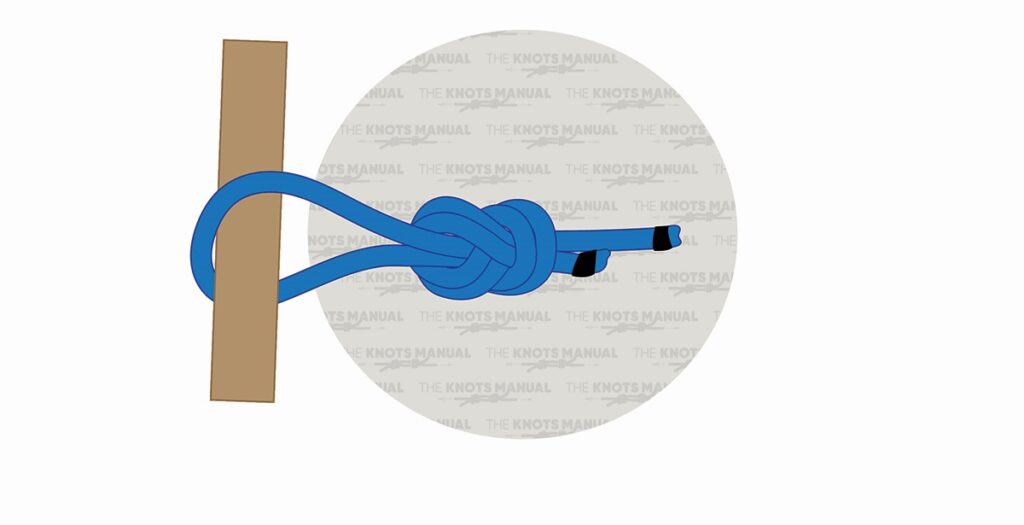
The Figure Eight Follow-Through Knot is one of the strongest and most reliable knots that can support very heavy loads. It serves as a stopper, preventing a rope from slipping and is fundamental in activities requiring safety and reliability. Commonly used in climbing and rigging, this knot is easy to inspect and unlikely to come undone unintentionally. Because of its symmetrical shape, this knot distributes stress evenly, preserving the rope’s strength under load.
When tying a Figure-Eight Follow Through Knot, start by loosely forming a regular Figure-Eight Knot near the rope’s end. Then wrap the working end around the object and pass it through the loops of the figure eight. Next, bring the working end behind the big loop and pass it next to the upper line. Take it out parallel to the standing part and pull the ends to tighten.
4. Trucker’s Hitch
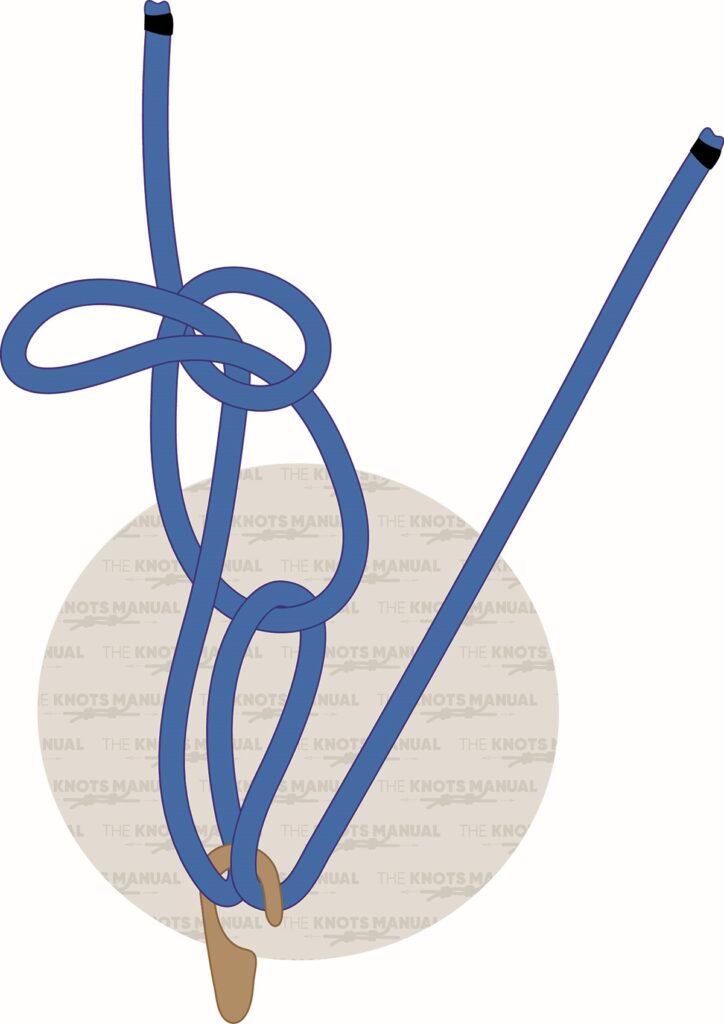
Providing an advantage for tightening and securing loads, the Trucker’s Hitch is invaluable in situations where high tension is required. This knot creates a pulley effect, enabling the user to cinch down loads tightly and even secure heavy or awkwardly shaped loads effectively. It’s commonly used in securing cargo, setting up tents, and other applications where adjustable tension is needed.
In order to tie a Trucker’s Hitch knot, form a bight in the standing end of the rope. Pass the bight behind the standing end and cross the working end over the bottom loop.
Next, bring the bight in front of the standing end and do another half-turn with the bight, and then pass it through the bottom loop, from the back side. Thread the working end through the hook or carabiner and bring it back through the bottom loop.
Tighten the newly-formed loop slightly, and pass the working end behind the bottom loop, completing the two half hitches below the loop.
After one turn, pass the working end under itself, forming a half hitch in the process, and then go behind the bottom loop once again to create a second half hitch and complete the knot.
5. Rolling Hitch
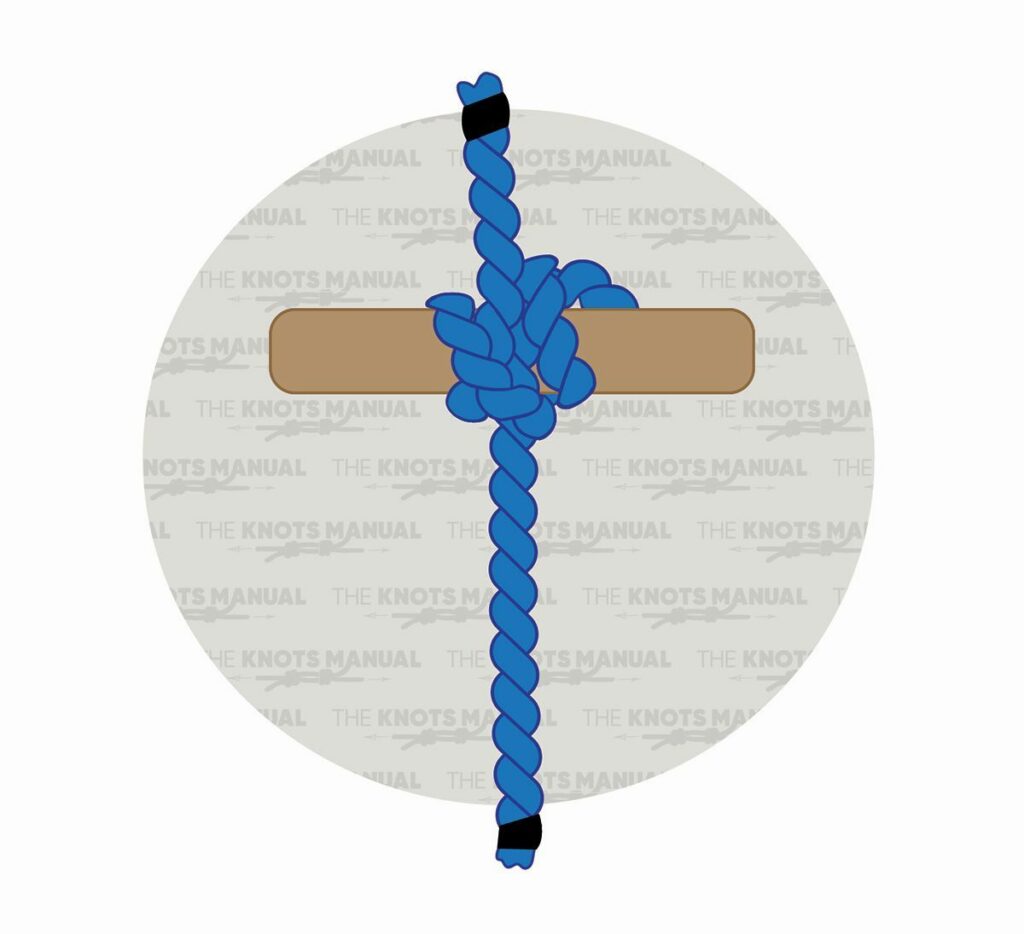
The Rolling Hitch is designed to attach a rope to another rope or pole under tension, allowing for controlled adjustments. This knot grips the object securely in one direction while permitting movement in the other. It’s ideal for tensioning lines or relieving strain on a primary rope and is particularly useful in sailing and climbing scenarios where load distribution is critical.
To tie a Rolling Hitch knot, loop the working end of the rope around a post, bringing it down from behind the post. Bring the working end back up and wrap it around the post. Then, pass the working end under the post and underneath the first wrap, pulling it upwards from between the two wraps. To tighten and secure the knot, pull the working end and standing end simultaneously.
6. Round Turn and Two Half Hitches
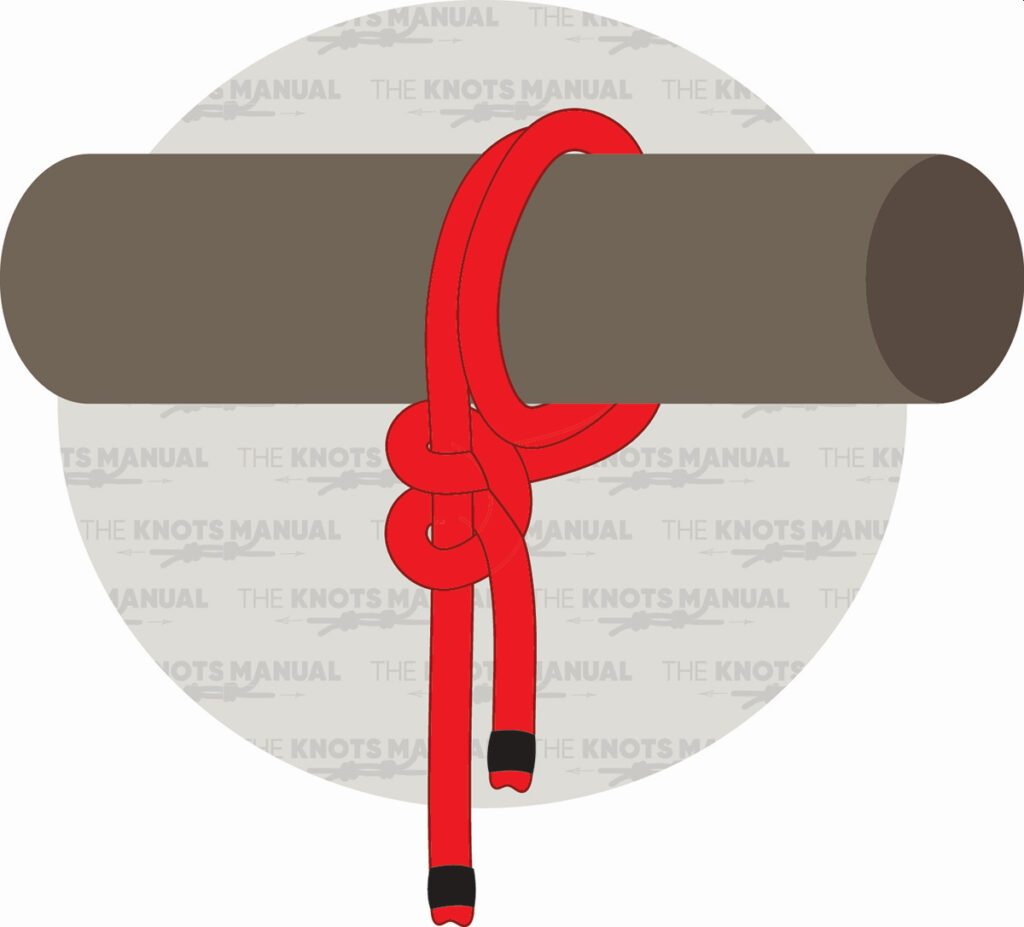
A Round Turn and Two Half Hitches provides a secure attachment to a fixed object while holding a load. The first round turn around the object takes the strain and creates friction, helping to prevent the knot from slipping, and the half hitches lock the rope in place.
This knot is commonly used in boating and general rigging due to its simplicity and effectiveness. Its ability to secure a rope firmly while being easy to tie and untie makes it a favorite among professionals.
Tying a Round Turn and Two Half Hitches knot starts by placing a rope over the support and feeding it around. Bring the rope around the support again to complete the loop.
Then, wrap the end of the rope around the main rope. Form the first half hitch by tucking the end of the rope through, and then wrap the end of the rope around the main rope again in the same direction. Tuck the end of the rope through to create the second half hitch, and pull the main end of the rope to tighten the knot.
7. Taut-Line Hitch
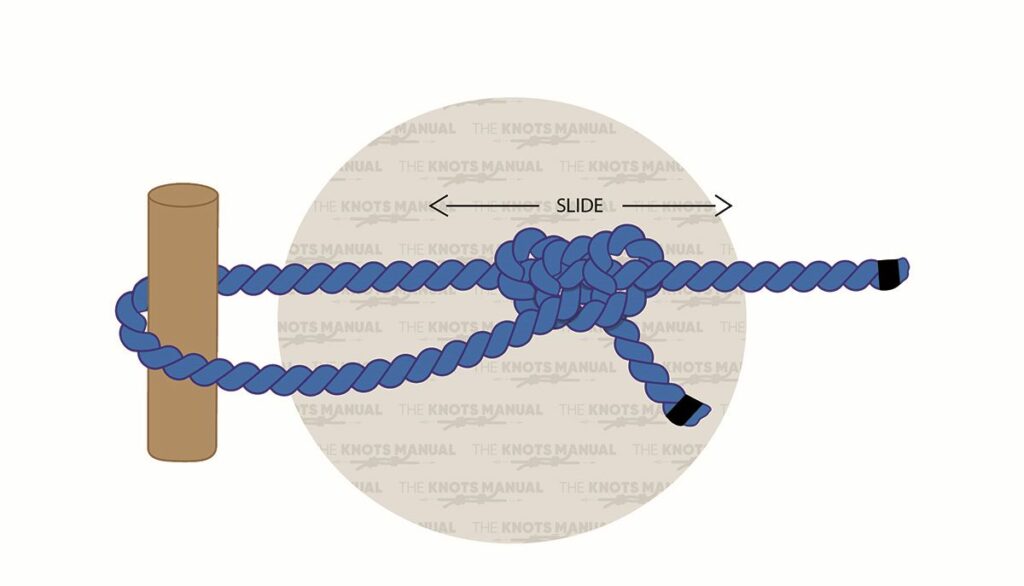
The Taut-Line Hitch is an adjustable knot that maintains tension on a rope, making it ideal for applications like tent or tarp rigging. This knot slides easily when not under load but holds firm under tension, allowing for easy adjustments to line length or tension. It’s particularly useful in situations where the load can shift, and retensioning is necessary.
When tying a Taut-Line Hitch knot, wrap the working end around the support and then around the rope’s standing part. Next, take the working end and wrap it around the standing end again, starting inside the loop.
Then, pull the end of the rope upwards so that it’s outside the loop. Wrap the working end around the standing end again, outside the original loop.
Tighten and complete the knot by holding the standing part on either side of the support with one hand and pulling both ends of the rope with the other hand. Slide the knot across the rope to adjust the tension.
8. Anchor Hitch (Fisherman’s Bend)
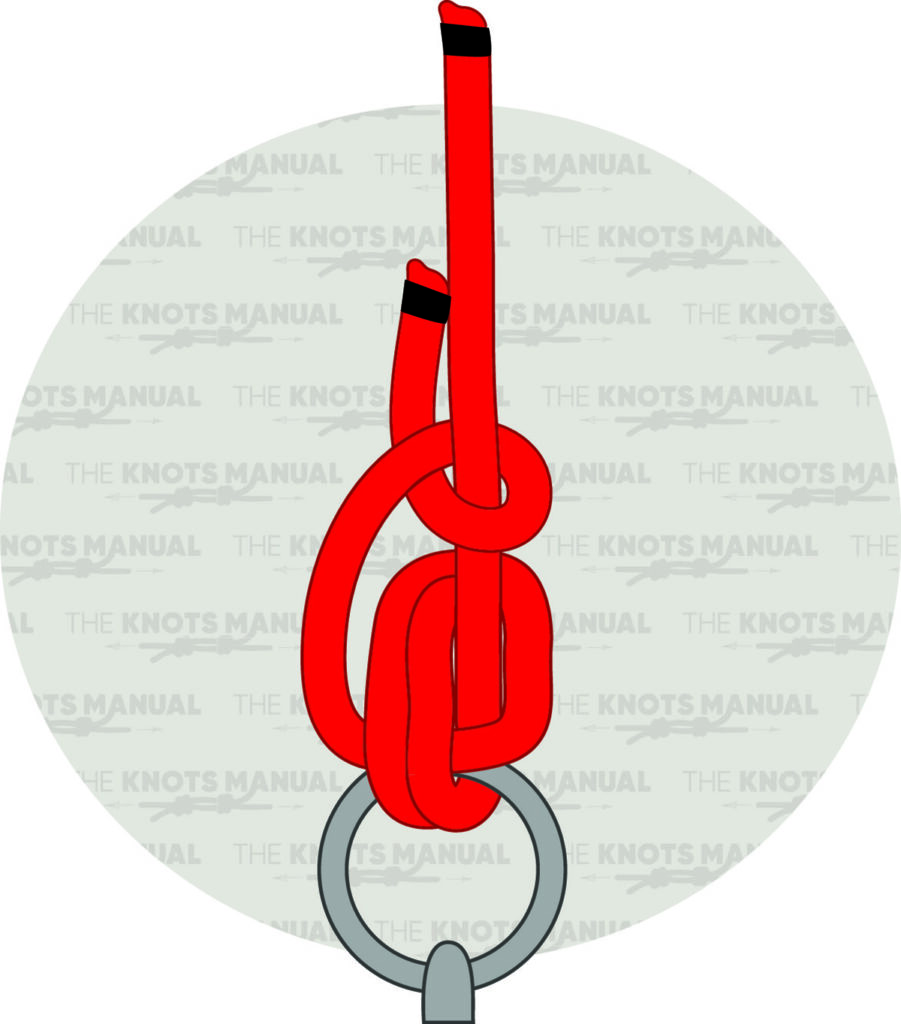
The Anchor Hitch, also known as the Fisherman’s Bend, securely attaches a rope to an anchor, ring, or fixed point. Designed to withstand heavy loads and resist slipping, this knot works well even in wet conditions. It’s commonly used in marine settings for securing anchors and in industrial rigging where a dependable attachment point is crucial.
In order to tie an Anchor Hitch knot, begin by wrapping the working end of a rope around the shackle or swivel two times. Next, pass the working end through the loops created and pull to tighten. Then, wrap the working end around the rope’s standing part. Holding the shackle with one hand and pulling up on the working end with the other will complete the knot.
9. Zeppelin Bend
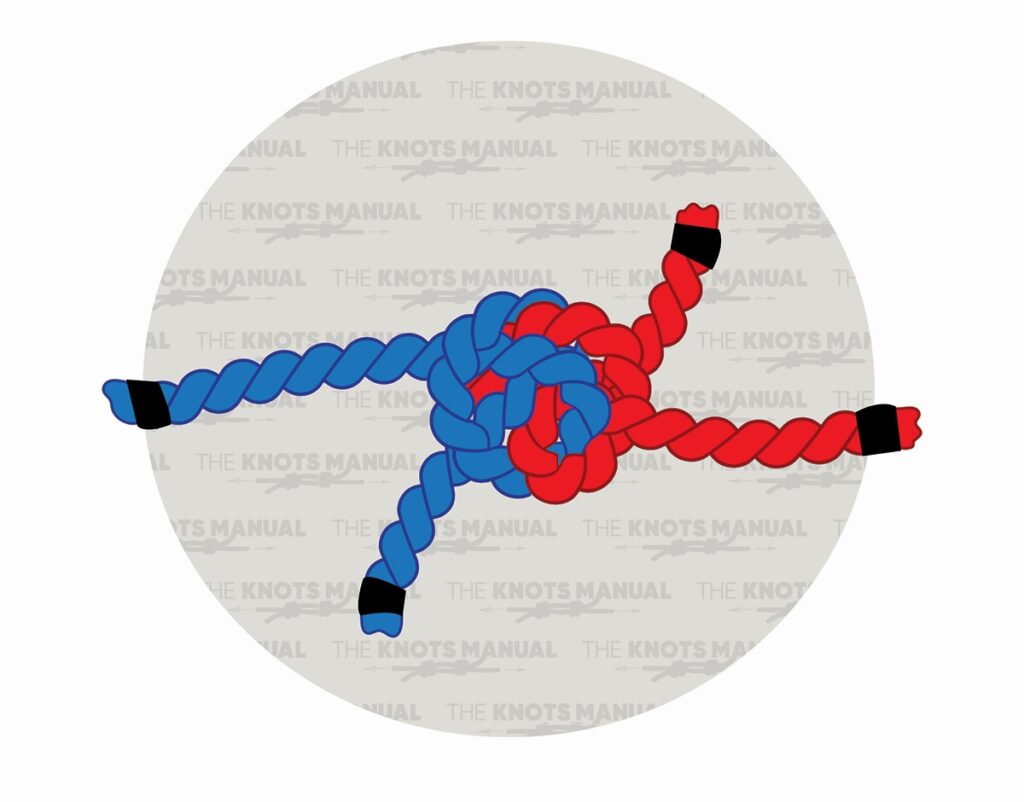
Renowned for its strength and reliability, the Zeppelin Bend is one of the most secure knots for joining two ropes together. This knot is easy to tie and untie, even after being subjected to significant tension. It’s less prone to jamming compared to other bends and is suitable for load-bearing, making it a preferred choice in critical applications where rope failure is not an option.
A Zeppelin Bend is created by interlinking two symmetric Overhand knots. Start by placing one loop over another loop and pass one of the ends through the loops. Then pass the end of the other rope through the loops. Simultaneously pull on the working ends and two standing ends to tighten the knot.
10. Double Fisherman’s Knot
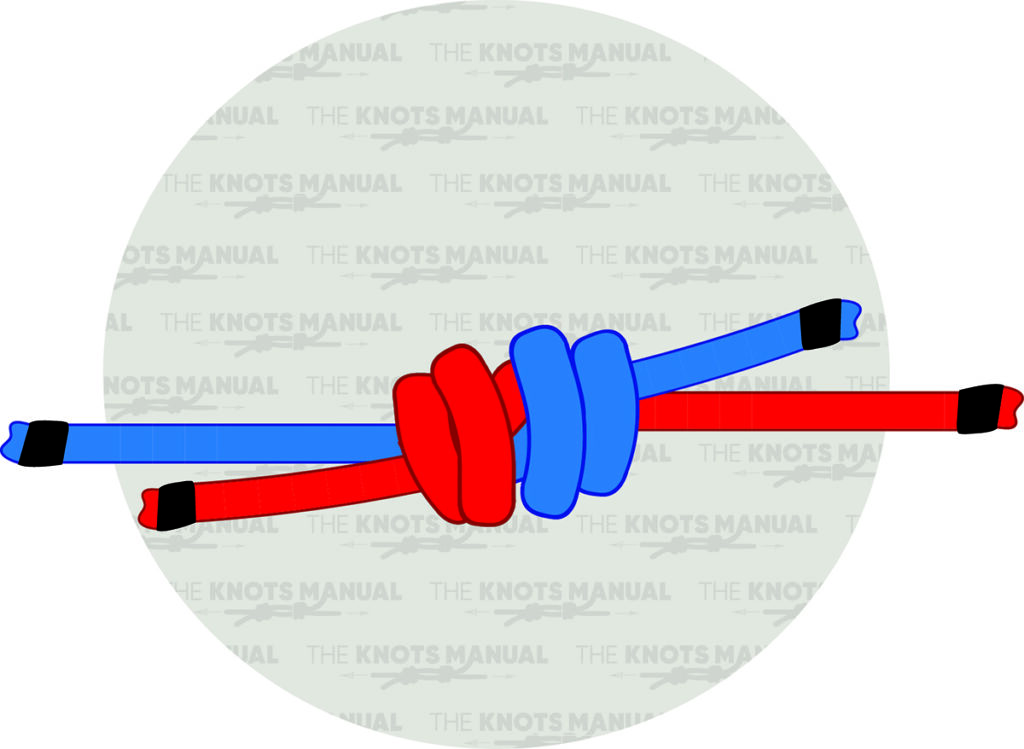
Commonly used for securely connecting two ropes, especially in climbing and load-bearing applications, the Double Fisherman’s Knot is both compact and reliable. This knot is most effective with ropes of similar diameter and is known for its ability to withstand heavy loads without slipping. However, it can be challenging to untie after being loaded, so it’s best used in semi-permanent situations.
To tie a Double Fisherman’s Knot, place two rope ends parallel. Next, wrap one end around the other rope twice. Then tuck the end through the loops. Repeat with the other rope end in the opposite direction. Pull both standing ends to tighten the knots against each other.
11. Cleat Hitch
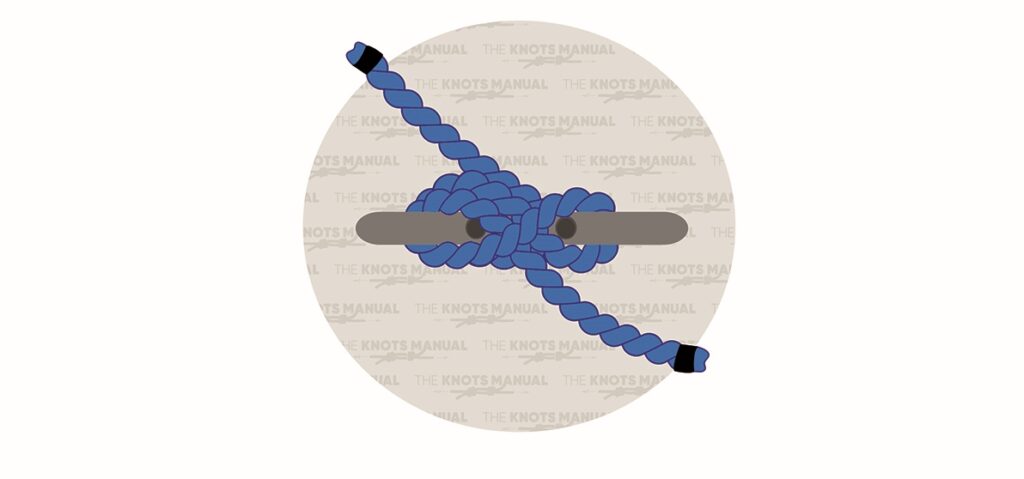
The Cleat Hitch is used to fasten a rope to a cleat, a common fixture on docks and boats. This knot allows for quick securing and releasing of lines, making it ideal for docking procedures and securing vessels. When tied correctly, the Cleat Hitch prevents slipping and ensures that the rope remains in place under various conditions. Its straightforward technique and reliability make it a fundamental knot in maritime activities.
When tying a Cleat Hitch knot, wrap a rope around the boat’s far horn. Next, wrap the rope’s working end around the near horn and pass it around the back and then around the front of the horn. Create a loop in the working end of the rope, and slide the loop over the near horn. Tighten the knot by pulling on the working end.
12. Midshipman’s Hitch
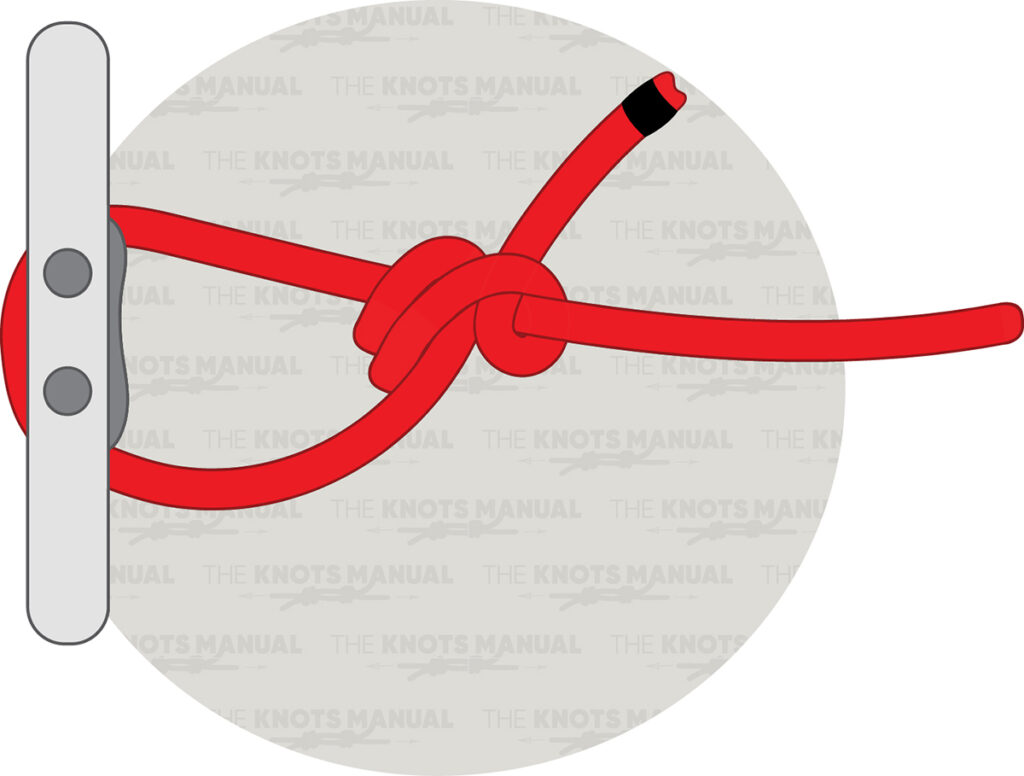
Providing excellent grip while allowing for smooth tension adjustments, the Midshipman’s Hitch is valuable in situations where line length or tension needs frequent modification. This knot is similar to the Taut-Line Hitch but offers greater security under load. It’s commonly used in sailing and camping to adjust guy lines and other tensioned ropes. The Midshipman’s Hitch’s adaptability makes it a reliable choice for various rigging applications.
Tying a Midshipman’s Hitch knot starts by wrapping the working end of a rope around the object. Pass it through the loop and around the standing line, forming the first half hitch.
Next, bring the working end around again, working back away from the object and toward the standing line. Then pull tight to form an Awning Hitch that can take the load while the next step is tied.
Make a half hitch in the same direction and outside of the loop around the standing line, and pull both ends to tighten the knot so that it can slide on the standing line and hold tight when holding a load.
13. Heaving Line Knot
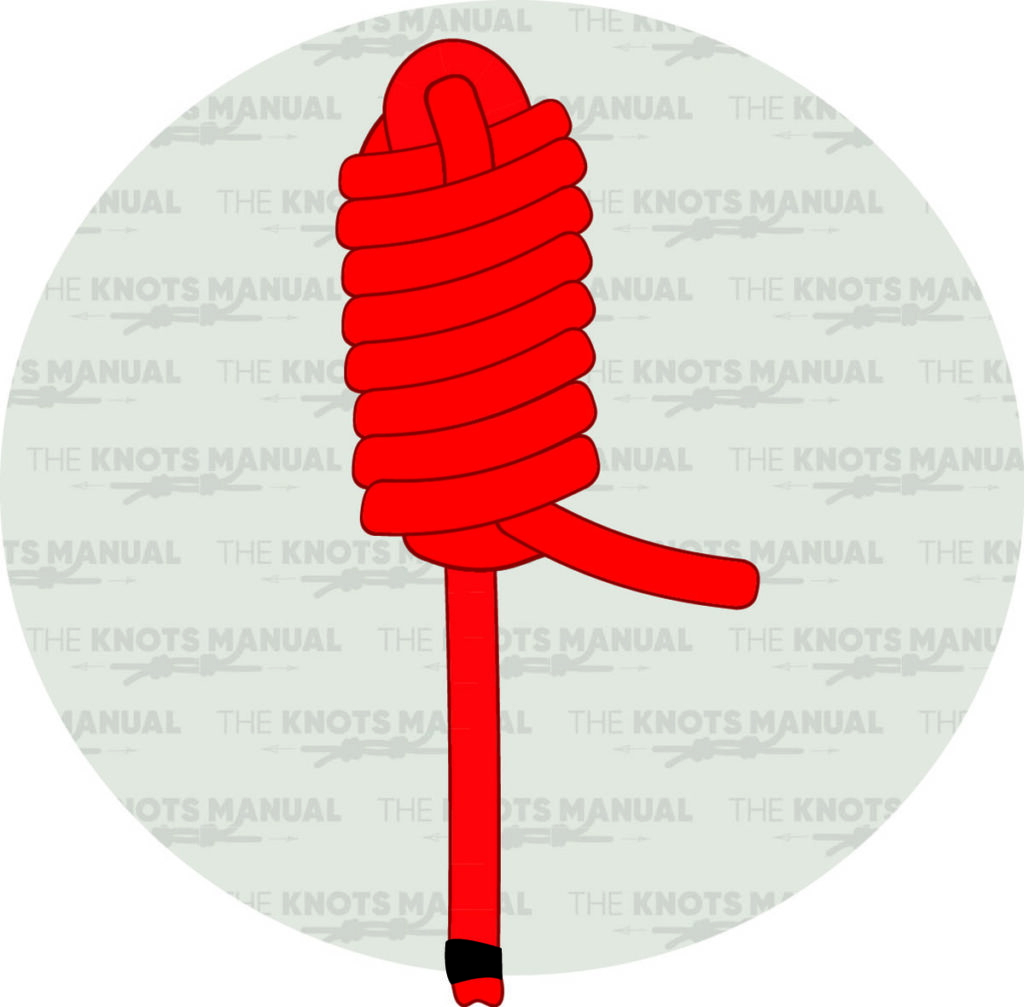
The Heaving Line Knot adds weight to the end of a rope, making it easier to throw or pass to another person. It is especially useful in marine and rescue applications where a rope must be thrown across a distance because the added weight ensures better accuracy and distance when passing a line.
A Heaving Line knot is tied by making two bights next to each other in an S-shape near the end of a rope, at the desired knot size of the finished knot, being sure to leave plenty of rope in the working end to make the wraps needed. Next, pass the working end through the loop of the top bight and wrap it around both strands of that bight only. Continue making wraps, but now encircling all three strands, working down the rope until you reach the end. Finally, pass the working end through the bottom loop. Pull the top loop until it secures the working end, and then pull the standing end to tighten the knot completely.
14. Buntline Hitch
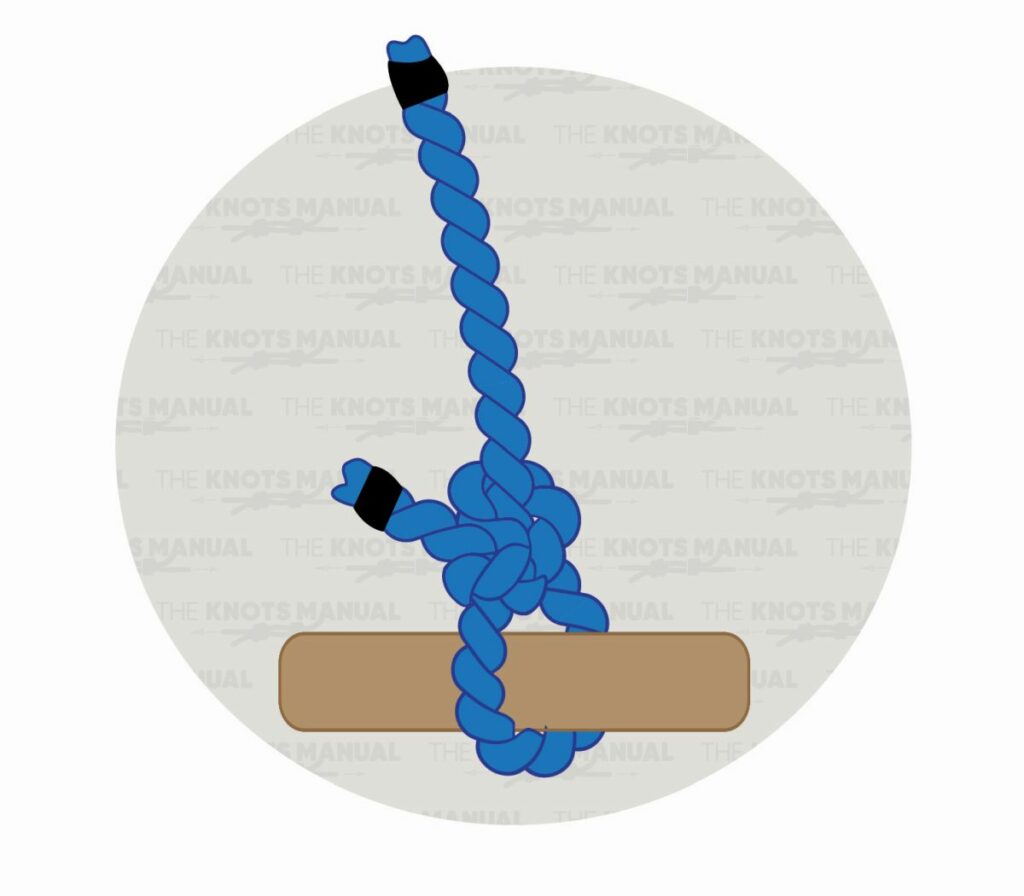
A compact and secure knot, the Buntline Hitch is commonly used to attach a rope to a fixed object. This knot is known for its strength and resistance to slipping, even under heavy strain. A valuable knot for fastening loads securely, it is frequently used in maritime and rigging applications where a secure and compact connection is needed.
Tying a Buntline Hitch begins by passing the working end of a rope under the support and bringing it around and over the standing end to create a figure eight. Then take the working end and push it through the loop formed. Pull the standing end to tighten and complete the knot.
15. Marlinspike Hitch
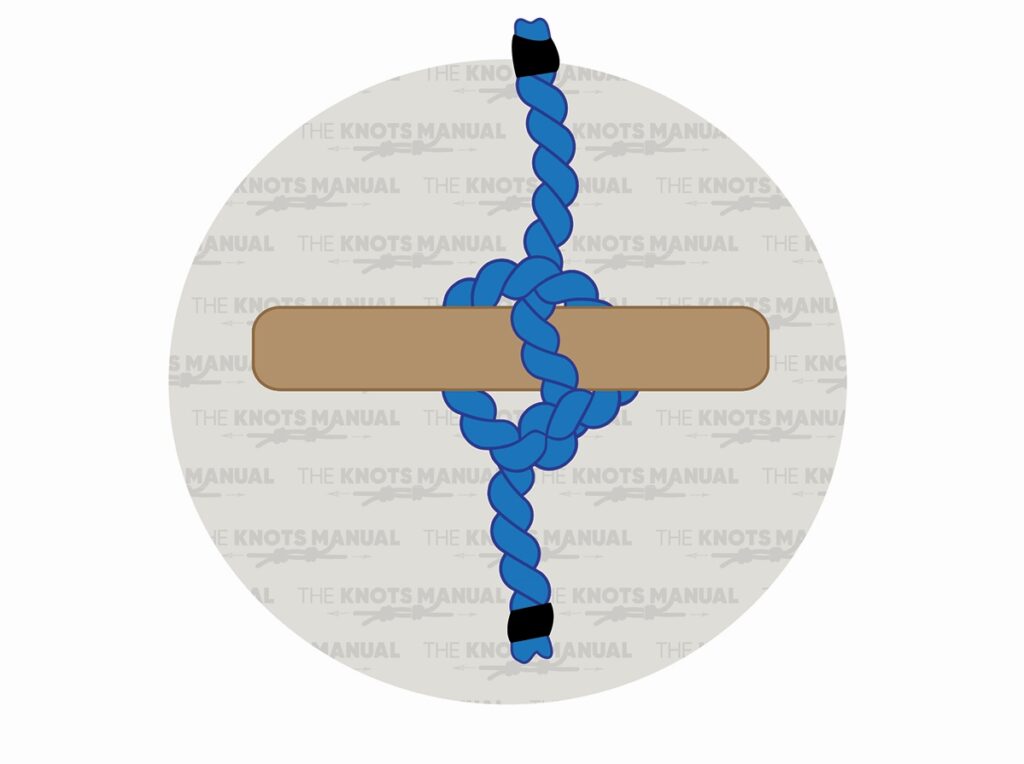
The Marlinspike Hitch is used in conjunction with a marlinspike to assist in tightening and manipulating heavy ropes. This knot creates a temporary loop that provides extra leverage when working with thick or stiff lines. A favorite among riggers and sailors, it is able to aid in rope handling and provide additional force when required to secure or adjust heavy-duty rigging lines.
To tie a Marlinspike Hitch, create a loop with the working end displaced to the right. Pull the loop to the right across the vertical line created by the rope. Bring the middle line to the left and over the loop. Pass a cylindrical support through the loop formed and pull on the working and standing ends of the rope to tighten the knot.
