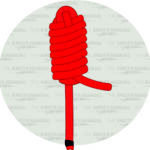
Quick-release knots are essential for anyone who needs a secure hold that can be undone in an instant. Whether you’re setting up camp, securing gear, or handling emergency situations, these knots offer the perfect balance of strength and convenience. Some are designed for high tension, while others provide stability with a simple tug to undo.
Table of Contents
1. Highwayman’s Hitch
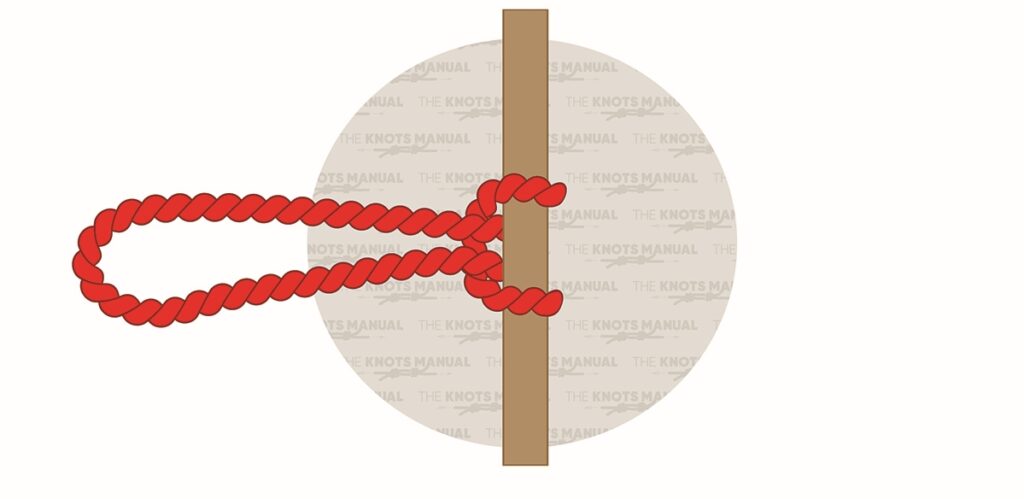
The Highwayman’s Hitch is a fast-tying, easily releasable knot often used to secure boats, horses, or gear. By creating a series of loops, it holds tightly under tension but pulls free with a simple tug. Its versatility makes it a favorite for temporary security. For quick docking or tying down loads, this knot is an excellent choice.
To tie a Highwayman’s Hitch knot, start by forming a bight near the end of the rope and place it behind the support. Create another bight on the standing end in front of the support, and then pass the newly-formed bight through the first one. Make another bight in front of the support with the working end. Pass it through the last bight created and tighten. Release the knot by pulling on the working end of the rope. This will instantly loosen the knot and allow it to come undone, even when under tension
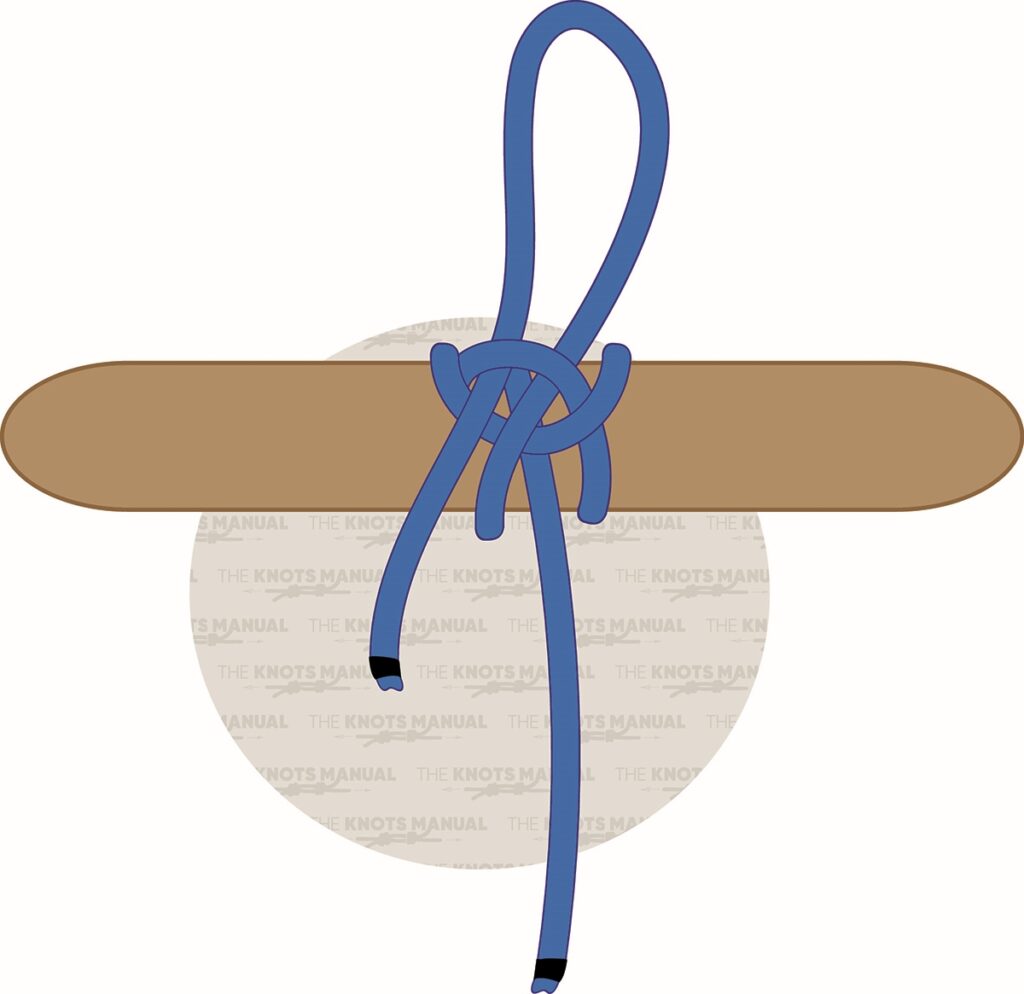
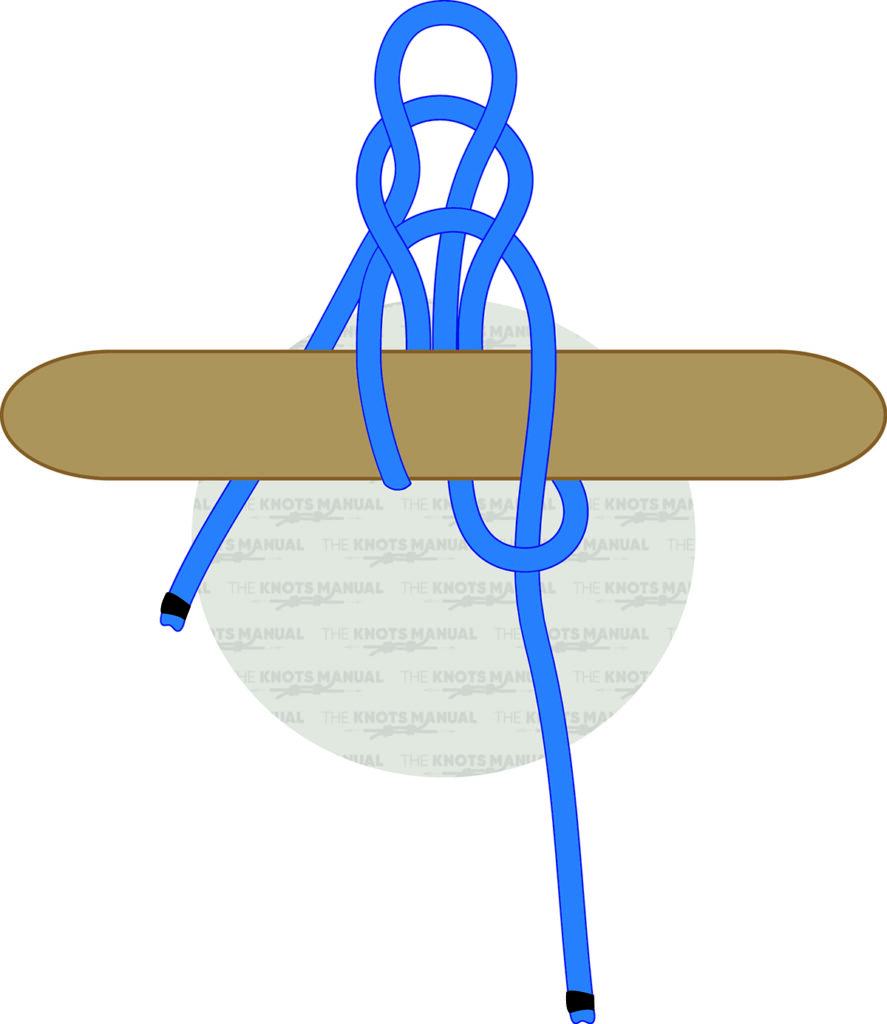
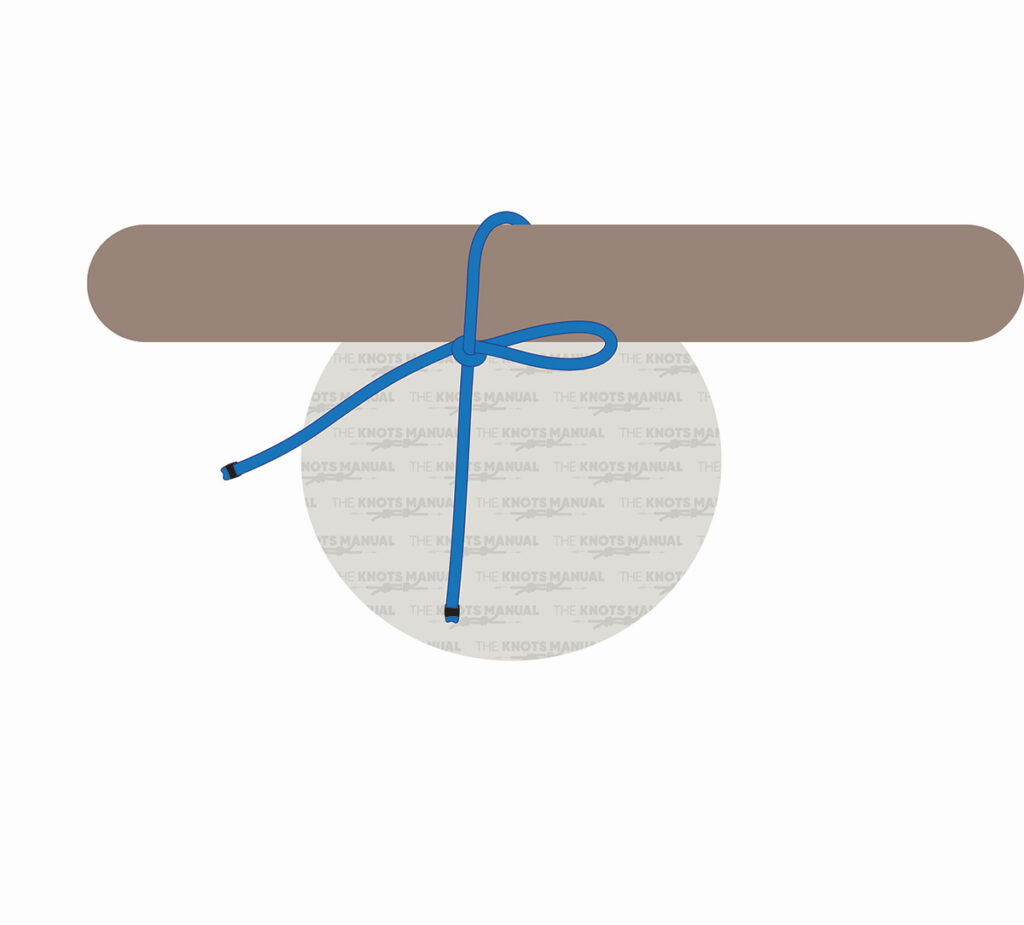
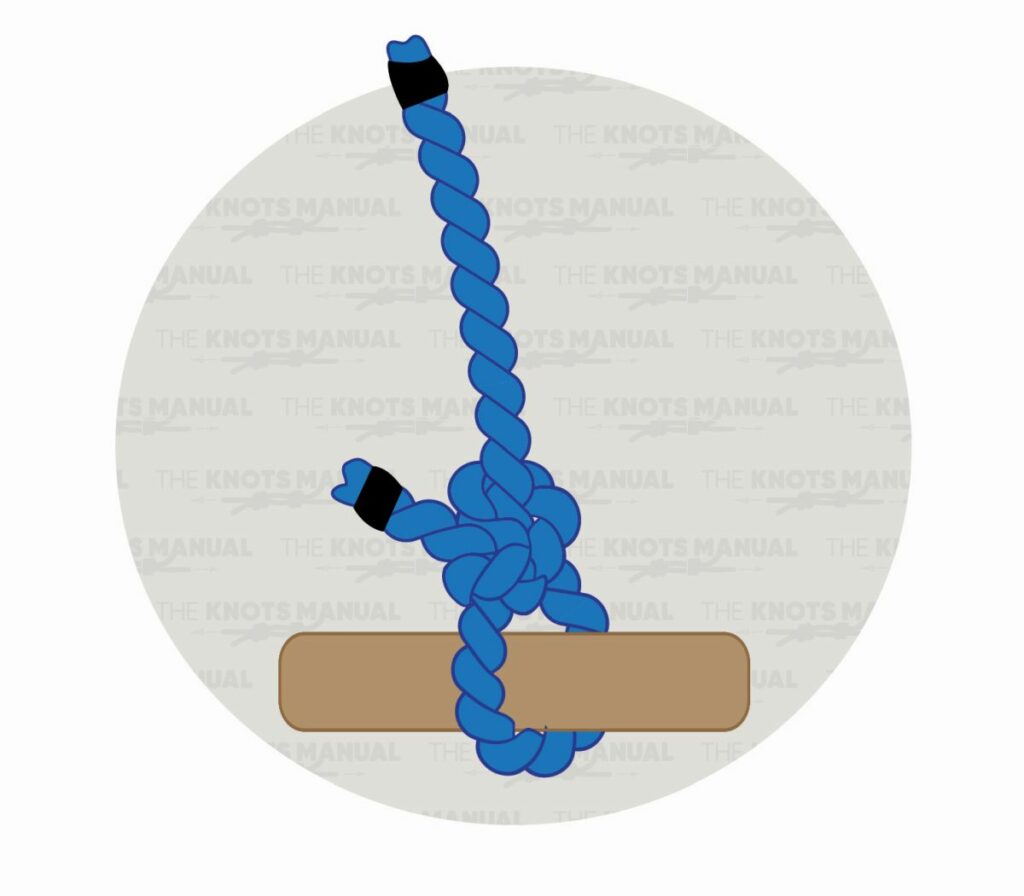
2. Tumble Hitch
The Tumble Hitch provides a strong yet easily releasable hold, making it perfect for suspending loads. This knot stays firm under tension, yet a single pull releases it immediately. It’s frequently used in camping, sailing, and rescue work. The ability to release even under weight sets this hitch apart from others.
When tying a Tumble Hitch knot, begin by making a bight in the rope and placing it against a pole. Next, make another bight on the working end of the rope and wrap it around the backside of the pole and up through the first bight created. Then pass the working end behind and over the standing end. Create another bight with the working end and pass it through the second loop. Pull the standing end while holding the final bight to tighten. To quickly untie the knot, pull the working end.
3. Slippery Half Hitch
A simple and effective knot, the Slippery Half Hitch is useful for temporarily securing loads. Formed by making a loop and passing the working end through, it tightens under tension. However, a quick tug on the free end causes it to unravel effortlessly. Its ease of use makes it popular in both survival and everyday applications.
To tie a Slippery Half Hitch knot, wrap the rope or line around the anchor point, leaving a short tail end. Form a loop with the tail end by crossing the lines. Then, pass a bight through the loop created, and tighten the knot by pulling the standing end of the line. Pull on the tail end to quickly release.
4. Adjustable Grip Hitch
The Adjustable Grip Hitch is a practical knot that provides a secure hold while allowing for easy adjustment. Used commonly for setting up tarps or adjusting lines, it slides along the rope when needed. Once under tension, it grips firmly and won’t slip. With a simple pull, it can be undone in seconds.
To tie an Adjustable Grip Hitch, pass the working end of the rope around the post or anchor object and place it over the standing end. Wrap it around the standing end twice toward the post, and then wrap it around both sides of the loop and finish by tucking the end under the last wrap. Hold the loop near the post with one hand and pull the working end with your other hand to tighten. The knot can be released by pulling the working end, even under heavy loads.
5. Rolling Hitch
A Rolling Hitch works well when attaching a rope to another under strain. It stays locked when needed but can be repositioned easily when loosened. Quick adjustments and reliable tension-holding make it useful in load-bearing situations. Boaters and climbers often use it to secure lines efficiently.
Tying a Rolling Hitch knot starts by looping the working end of a rope around a post or anchor point. Bring the working end down from behind the post and the back up, wrapping it around the post. Next, pass the working end under the post and then underneath the first wrap, pulling it upward from between the two wraps. Then, at the same time, pull the working end and standing end to tighten the knot. If the hitch is under a lot of load, you may need to slightly loosen the wraps before untying the knot. Gently pull on the standing part of the rope, which is the continuous length that isn’t wrapped around the object, to release.
6. Slip Knot
A Slip Knot is one of the most basic quick-release knots, often used for temporary bindings. The knot is formed by making a simple loop and threading the working end through, allowing it to tighten under tension. A sharp pull on the free end instantly releases it. Its simplicity makes it a go-to for quick and temporary security.
To tie a Slip Knot, begin by creating a bight in the rope. Bring the working end under and around the bight, pulling the rope under and then back over it. Next, wrap the working end around the bight again. Then, with one hand, hold the loop at the end of the bight, and with the other hand, pull the working end of the rope to tighten and finish the knot. Easily untie the slip knot by just pulling the working end.
7. Timber Hitch
Hauling logs or securing loads is where the Timber Hitch excels. The knot tightens around an object as tension is applied, yet releases instantly when the rope is pulled backward. The simplicity of tying and untying makes it a favorite among outdoorsmen. Whether dragging branches or setting up tarps, this hitch is highly reliable.
When tying a Timber Hitch knot, wrap the rope’s working end around the support and then pass the working end around the rope’s standing part. Pull the working end to the left from the formed loop, passing it under the standing part. Pass the working end under the standing part two more times, and then pull both the working end and standing end simultaneously to complete the knot. The knot will come undone instantly by unwinding the running loop from around the rope.
8. Clove Hitch
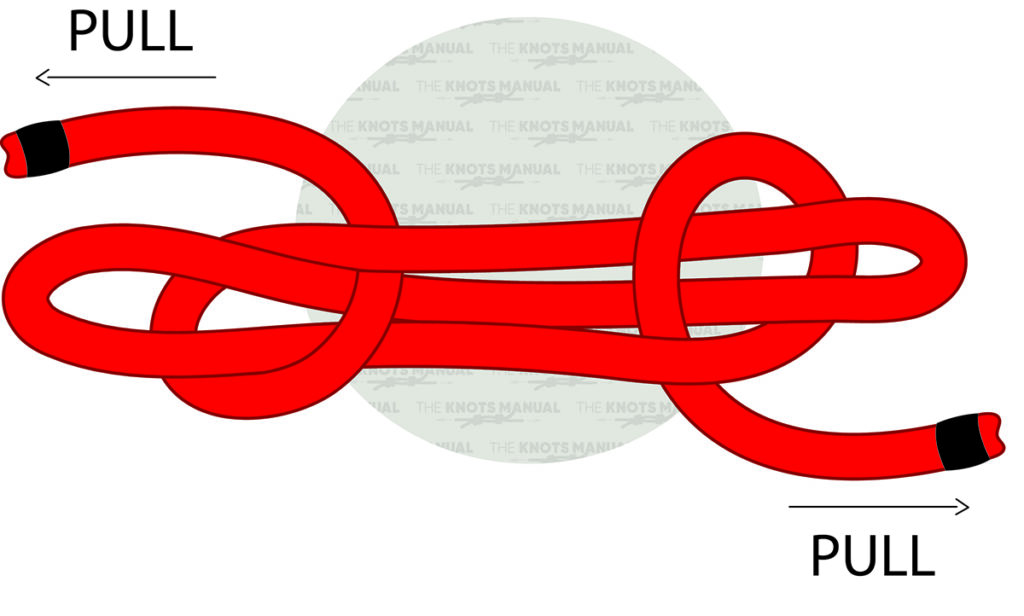
A Clove Hitch is a simple knot that consists of two successive single hitches wrapped around an object. Commonly used to secure a rope to a post, fence, or other object, this knot holds firmly under tension but unravels in seconds when pulled. Often used in climbing, boating, and emergency situations, it is both strong and convenient but can slip under heavy loads, especially on smoother surfaces.
To tie a Clove Hitch, start by hanging the rope from a support object, and then loop the end of the rope around the object, passing the end of the rope from behind the rope. Pull both ends of the rope to tighten the knot. Pushing both ends of the rope together will cause the knot to come apart easily, and simply pulling the standing end and working end of the rope in opposite directions will loosen the knot and allow it to untie.
9. Girth Hitch
Many climbers and riggers rely on the Girth Hitch for attaching ropes to objects efficiently. It holds securely under weight, yet a slight adjustment can loosen it instantly. Used frequently with slings and carabiners, it provides a quick way to secure gear. Its adaptability makes it an essential knot for outdoor enthusiasts.
Tying a Girth Hitch Knot begins by wrapping a pre-tied sling around a support structure. Pass the larger loop through the smaller one, and move the right loop to the left side so that it sits over the smaller loop. Pull on the larger loop to tighten the knot, and pull on the smaller loop to release the knot.
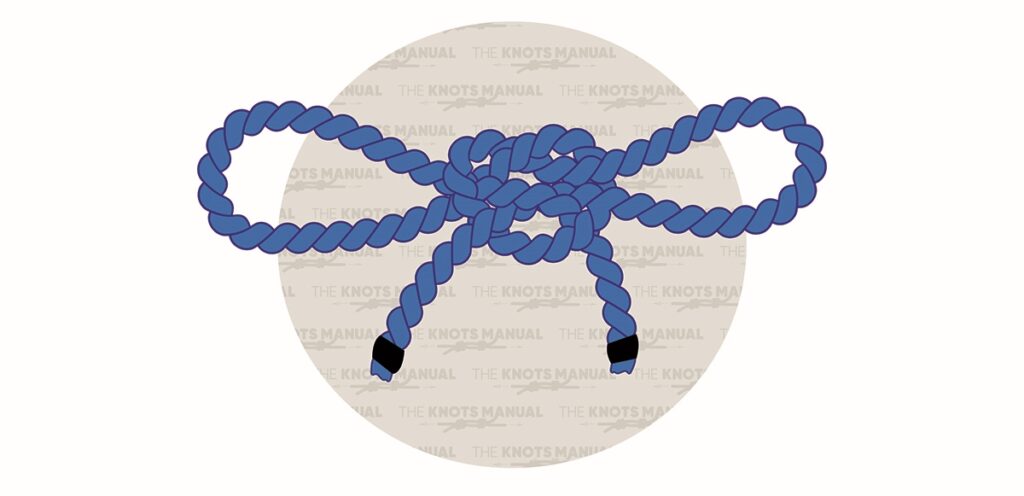
10. Sheepshank with a Slipknot
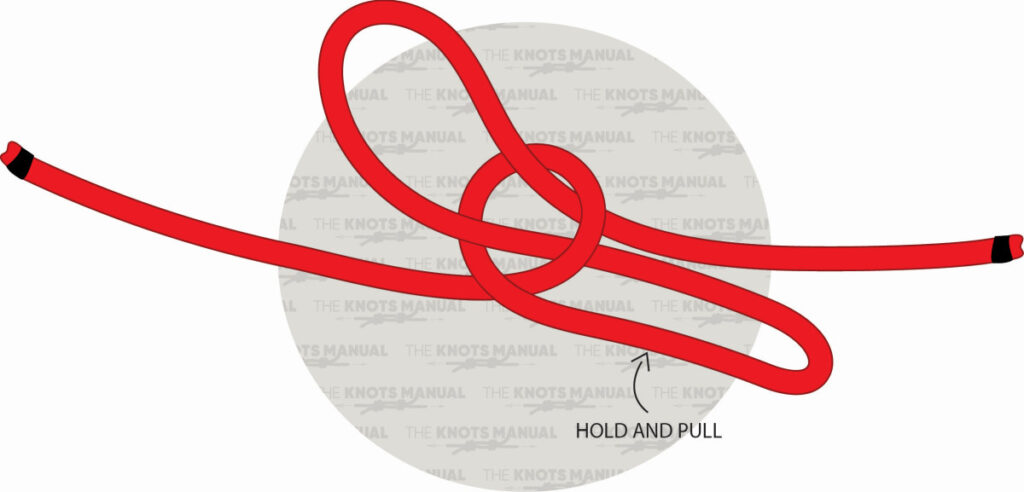
The Sheepshank Knot is designed to shorten a rope while maintaining the option for quick release. It distributes weight evenly while maintaining tension, and a simple pull undoes the knot. This knot’s design benefits emergency situations the most. Those needing adjustable rope length will find this variation highly useful.
In order to tie a Sheepshank knot with a slipknot, create two identical underhanded loops from the slack in the rope, and then pass the bight through the loop on the left and the remaining bight through the loop on the right. To ensure the knot is easily released, instead of pulling the free ends of the rope in opposite directions to complete the Sheepshank knot, insert a slipknot, or a loop of the rope, into each end loop. That way, simply tugging the free ends will instantly collapse the knot.
11. Bell Ringer’s Knot
Also referred to as the Bell Rope Knot, the Bell Ringer’s Knot allows smooth and controlled movement with a temporarily shortened rope. Traditionally, the knot was used to shorten a rope that was used to ring a church bell. The knot would be tied in the rope right after ringing the bell, so that the rope would be shorter and wouldn’t hit the ground. Today, it finds purpose in sailing, rescue work, and any situation requiring instant release. When secured, this knot holds well, even under tension, but a single pull effortlessly collapses the structure.
To tie a Bell Ringer’s Knot, make a loop in a rope, and then form a bight and pass it through the loop from the backside. Next, load the newly created loop with weight and pull opposite to the other end of the rope. Pull on the free ends of the rope to release the knot.
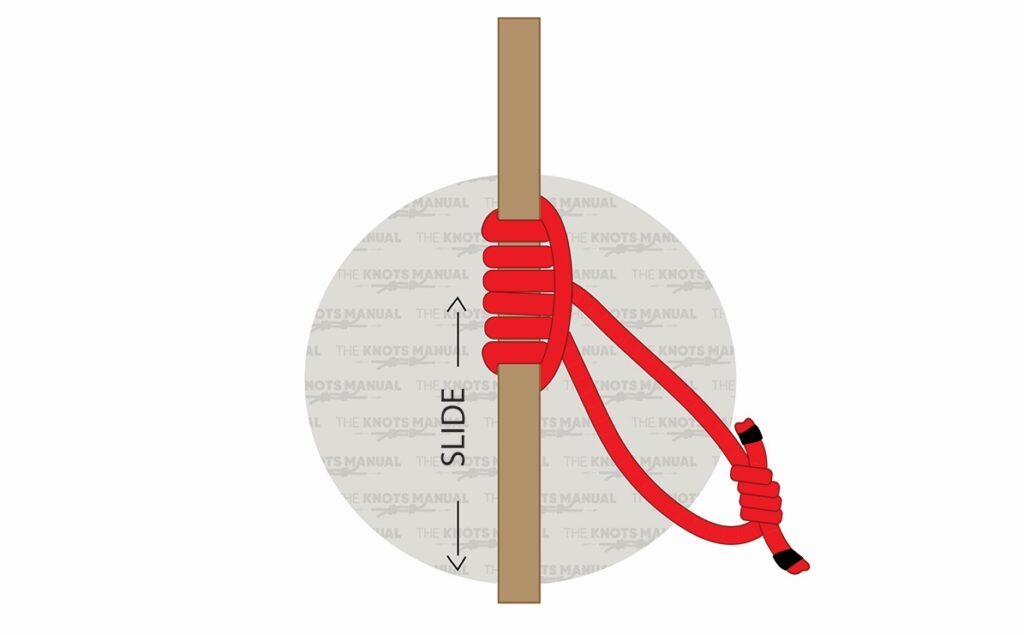
12. Taut-Line Hitch
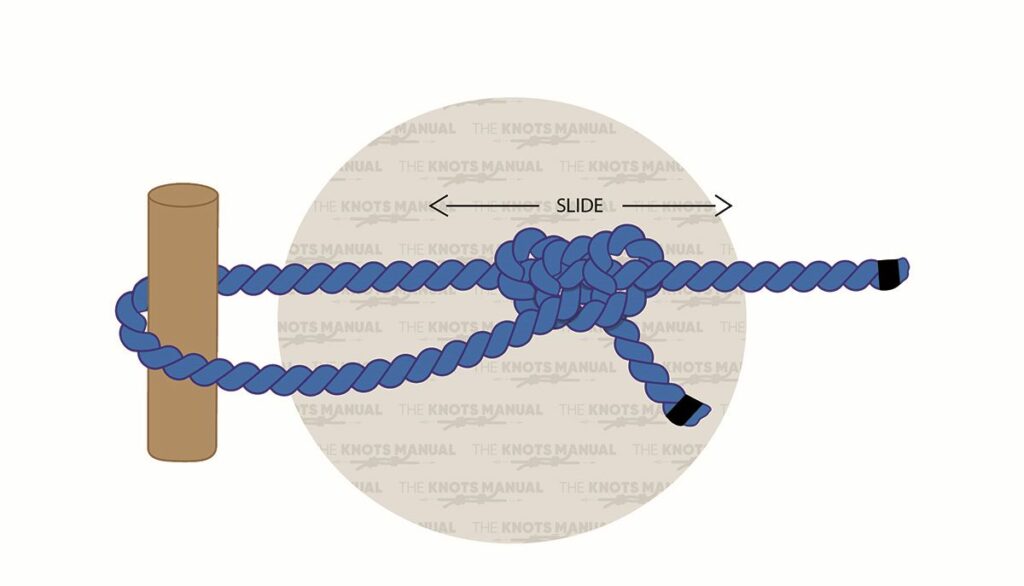
Adjusting tension in ropes is what the Taut-Line Hitch is best at. Commonly seen in camping setups, it tightens and loosens without needing to be untied. Under load, it grips the rope firmly, yet a quick pull releases it. This feature makes it essential for tents and tarps.
When tying a Taut-Line Hitch knot, loop the working end around the support and then around the rope’s standing part. Wrap the working end around the standing end again, starting inside the loop. Next, pull the end of the rope upwards so it’s outside of the loop. Then, wrap the working end around the standing end again, outside the original loop. Hold the standing part on either side of the support with one hand, and with the other hand, pull both ends of the rope to tighten the knot. To adjust the tension, slide the knot across the rope. Gently pull on the standing end while slightly easing the tension on the working end, which will allow the knot to slide along the line and loosen.
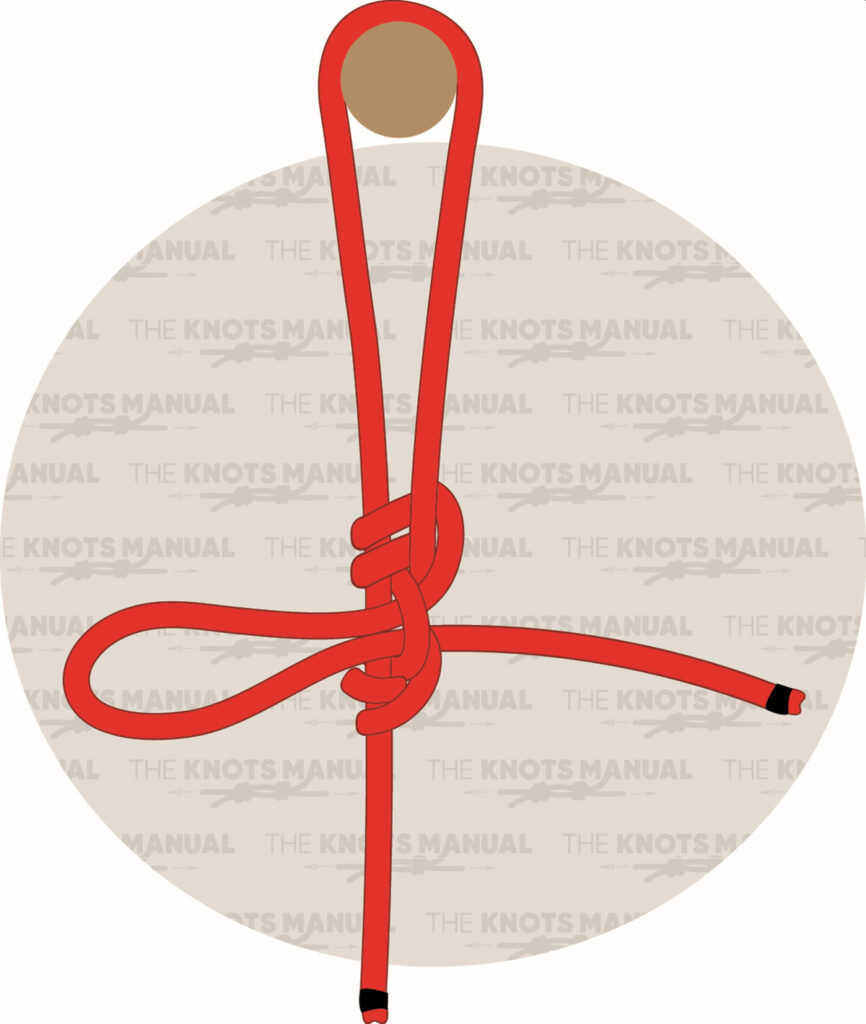
13. Buntline Hitch
Originally used by sailors, the Buntline Hitch creates a strong attachment to rings or posts. It remains firm under strain, but the slipped variation allows for a quick release when necessary. Its compact design minimizes bulk, making it a great option for securing gear. Versatile and easy to untie, this knot is widely used in marine and utility applications.
To tie a Buntline Hitch knot, wrap the working end of a rope around an object and run the end behind the created loop. Form a bight near the working end and then pass it behind the standing end and over the right strand. Tighten the knot by pulling the bight with one hand and the right side of the top loop with the other hand. Release the knot by pulling the working end.
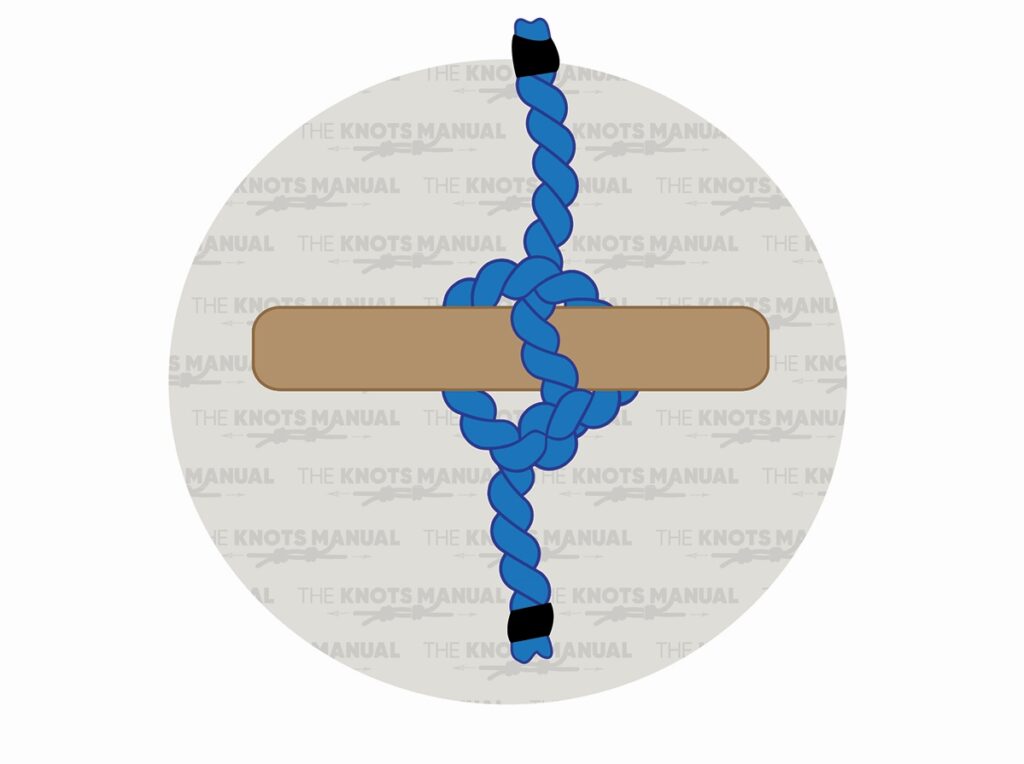
14. Cow Hitch
Slipping a loop into a Cow Hitch turns it into a quick-release knot. This variation allows users to secure objects efficiently while still being able to undo the knot instantly. While not the most reliable hitch when tension isn’t applied evenly, this knot is frequently used in tying animals, securing loads, and fastening gear.
Tying a Cow Hitch knot starts by wrapping the working end around the support and bringing it behind the standing line. Then wrap the end around the support again from the other side, making sure both ends exit parallel to one another. Pull the standing end of the rope while simultaneously pulling the working end in the opposite direction to untie the knot quickly.
15. Square Knot
For bundling or securing objects, the Square Knot provides a dependable yet easily undone hold. A slipped loop within the knot allows for rapid untying, distinguishing it from a standard square knot. This variation is useful in emergency situations where fast access to tied-down items is needed. First responders and survivalists often rely on it.
When tying a Square Knot, cross one rope’s working end over another rope’s working end. Next, pass the working end of the first rope through the loop created by the second rope. Then, pull the working ends and standings ends of both ropes simultaneously to tighten the knot. Untie the knot by pushing the two loops toward each other to release the tension.
16. Figure-Eight Loop
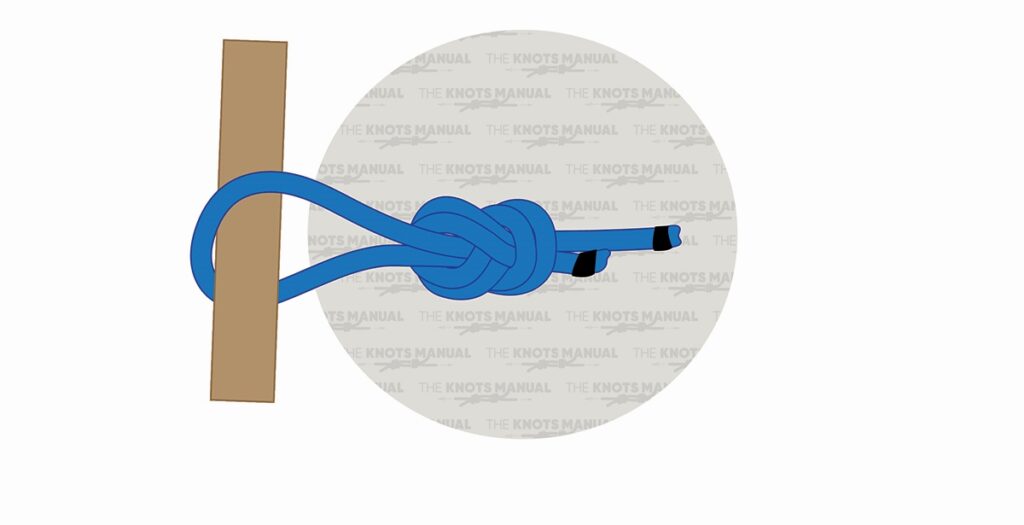
By forming a strong, non-slipping loop, the Figure-Eight Follow Through Loop ensures secure attachments while maintaining quick-release functionality. Climbers, rescue workers, and boaters favor this knot for its dependability. A firm hold under tension doesn’t prevent it from being easily untied when necessary.
To tie a Figure-Eight Follow Through Loop knot, first form a loose “8” with the rope by making a loop and then passing the rope through it from the other side. Wrap the working end around the support and pass it through the loops, following the figure eight pattern and bringing it through the bigger loop. Continue following the rope, wrapping it around the support loop, and going through the bigger loop again. Next, pass it through the smaller loop along the rest of the rope, and pull each rope separately from both ends to tighten the knot. Bend and wiggle the knot from the midpoint and feed the rope into the knot from either end to release.
17. Bowline

Among the most trusted knots, the Bowline forms a stable loop that resists slipping. Despite its strength, it can be quickly undone by pulling the working end. It is frequently used in boating, rescue operations, and climbing. Its versatility and ease of release make it a must-know knot.
When tying a Bowline knot, form a small loop near the end of a rope and pass the working end through the loop. Then, go out of this loop on the left side of the standing end and bring the working end around the standing end. Next, pass the working end through the original loop in the opposite direction. Pull the working end opposite to the fixed loop to tighten. If a slipped Bowline is created by forming a bight, instead of pulling the working end all the way through, the slipknot effect will allow for the instant release. Manually loosen the Bowline by locating where the working end feeds through the main knot, wiggling the knot, and pushing the loops apart. Then pull the working end free to unravel the knot.
18. Handcuff Knot
Creating two adjustable loops, the Handcuff Knot is practical for temporary restraints or rescue operations. These loops can be tightened quickly but are just as easy to release when needed. With a simple pull on the working end, the entire structure collapses. This knot has applications in first aid and survival situations.
Tying a Handcuff Knot starts by creating two loops in the standing part of the rope. Overlap the loops and pass them through each other by their opposite edges. Then, holding the standing ends of the rope, pull the loops outward to the desired size. Pull the standing ends of the rope to tighten the knot, and pushing the loops outward while pulling the center section apart will quickly loosen and undo the knot.
19. Prusik Knot
A friction hitch designed for gripping ropes, the Prusik Knot provides security while still allowing for movement. Climbers and rescue professionals often use it to ascend or descend ropes safely. Once tension is removed, it slides freely, and pulling the working end allows for quick release. Its combination of safety and adaptability makes it essential for vertical movement.
To tie a Prusik Knot, make a Prusik Loop or sling of cordage. Next, form a bight in the loop and tie it around the static rope. Repeat 3-4 more times, making sure the bight stays in the center. Then, apply the load and check that the knot is properly dressed and the ropes aren’t crossing one another. When releasing the knot, ensure there is no weight or load on the knot and gently push the knot up and down along the main rope to loosen it.
20. Farrimond Friction Hitch
Tensioning lines becomes effortless with the Farrimond Friction Hitch. This knot tightens when weighted but releases immediately with a simple pull. Campers and survivalists often use it for securing shelters. The balance between holding power and easy release makes it ideal for temporary rigging.
When tying a Farrimond Friction Hitch, free up a medium-length working end of a rope and pass the end around a tree or branch. Form a loop in front of the standing end and make a bight in the loop. Then wrap the bight around the standing end two times, or three or four times for a more secure knot. Next, make a bight on the working end of the rope and pass it through the previously formed bight. Tighten the knot by pulling on the rope, loop, and bight separately. To release the knot, make sure there is no weight or tension and firmly pull on the loose end of the hitch.
21. Marlinspike Hitch
Creating a temporary handle or grip, the Marlinspike Hitch holds firmly but can be untied in an instant. It is commonly used in marine settings where quick access to rope adjustments is necessary. A sharp pull on the working end releases it effortlessly. Sailors and riggers value this knot for its practicality.
Tying a Marlinspike Hitch knot begins by forming a loop with the working end and displacing it to the right. Pull the loop to the right, across the vertical line created by the rope. Next, bring the middle line to the left, over the loop. Then pass the cylindrical support through the formed loop and pull on the working and standing ends of the rope to tighten the knot. Pull on the standing end of the rope to loosen the loop that holds the knot in place to release.
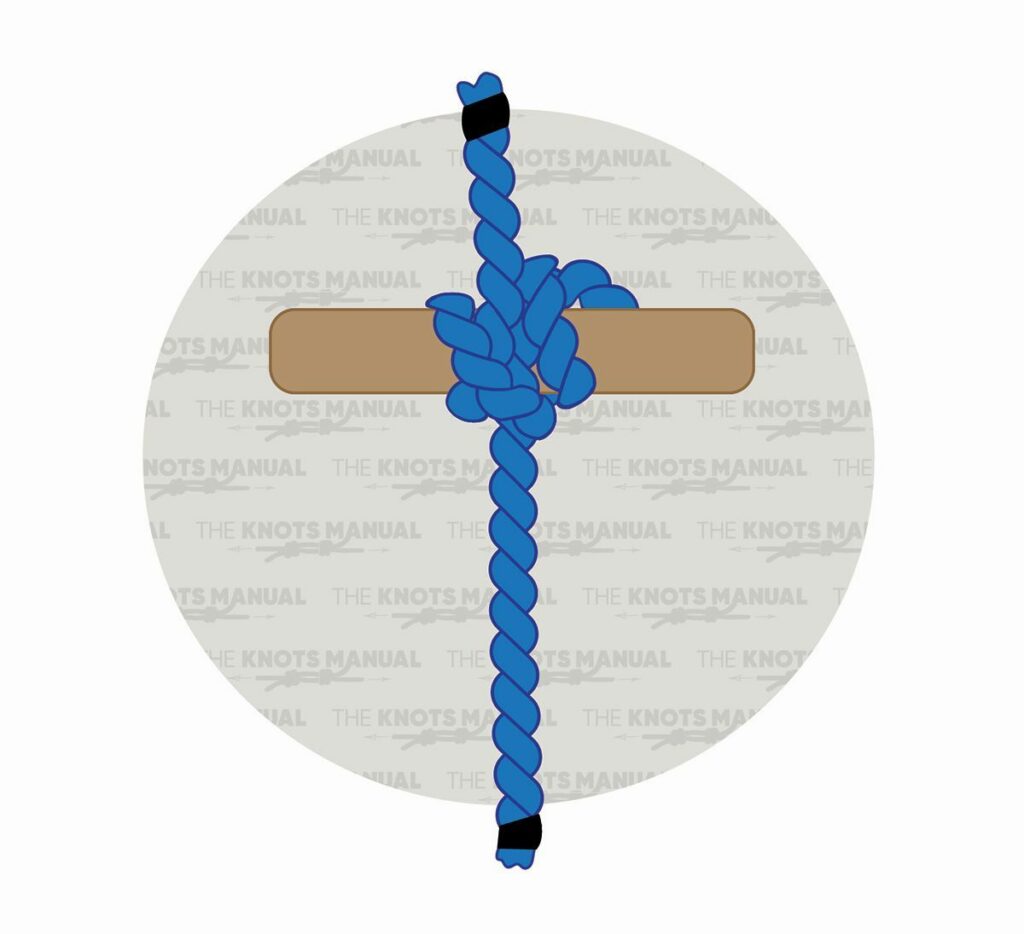
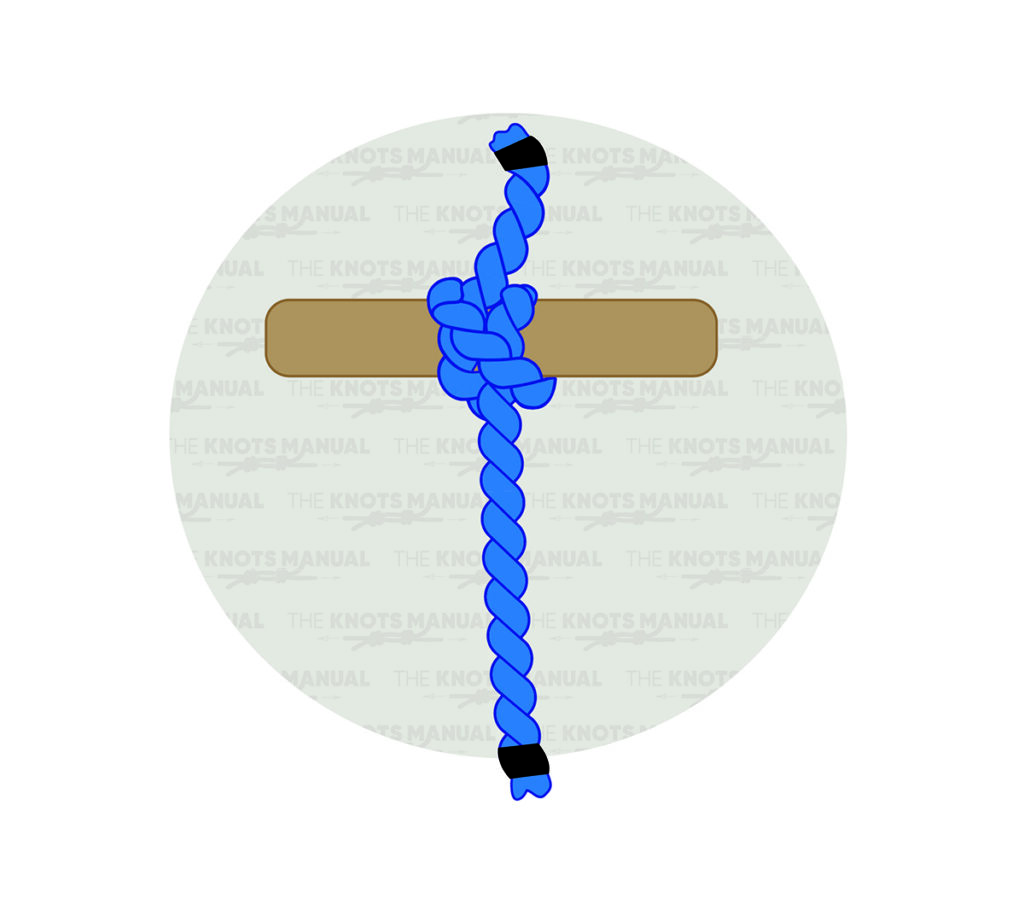
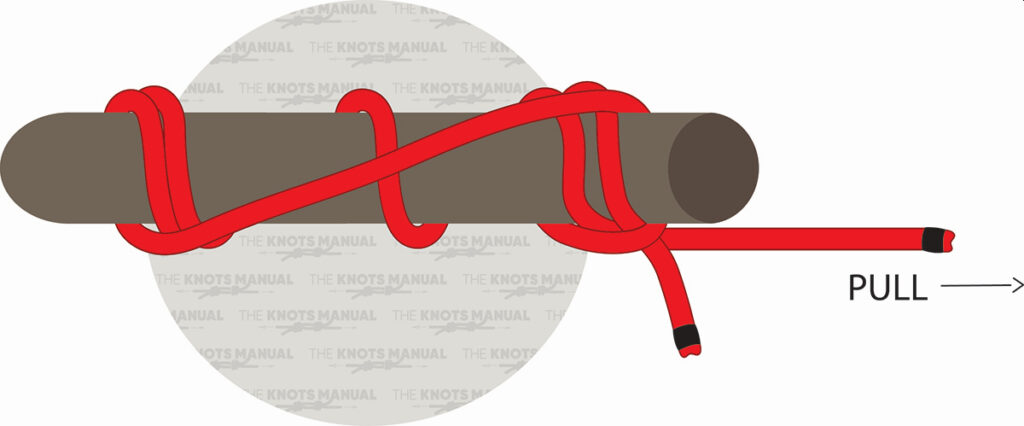
22. Icicle Hitch
The Icicle Hitch is a powerful knot known for gripping smooth surfaces like poles and stakes. Despite its strong hold, it can be quickly released with a controlled tug. Its ability to secure loads without slipping makes it ideal for climbing and rigging. The knot remains effective even under extreme weight.
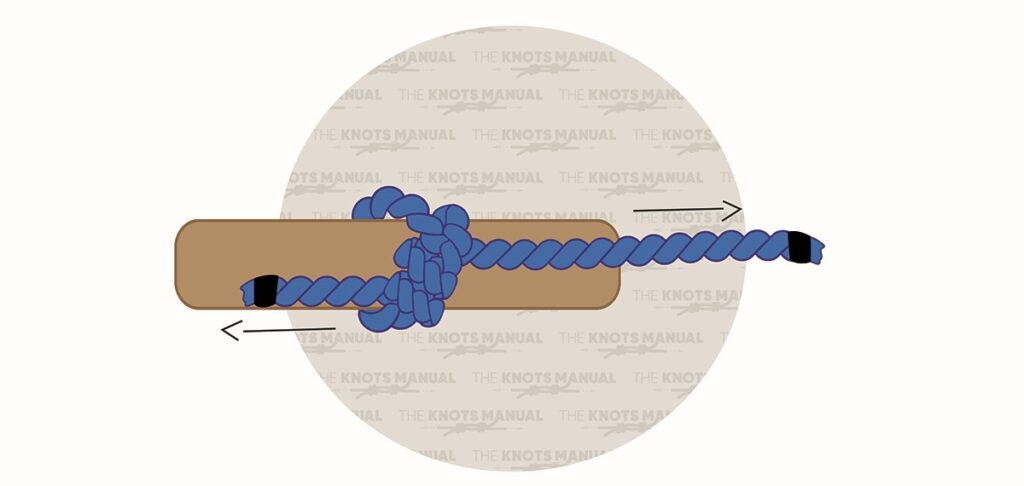
To tie an Icicle Hitch knot, start by wrapping the rope’s working end about a post four times, going away from the end. Pass the working line behind the wraps and standing line and then back over the post to create a hanging loop under the wrapped section. Take the longest part of the loop and pull past the standing line on the front side and over the end of the pole. Then, pull down on both wraps to tighten the knot. Once pressure is applied to a load, the wraps will spread and the knot will tighten further. To release the tension on the wraps and allow the hitch to quickly come undone, pull directly on the standing end of the rope.
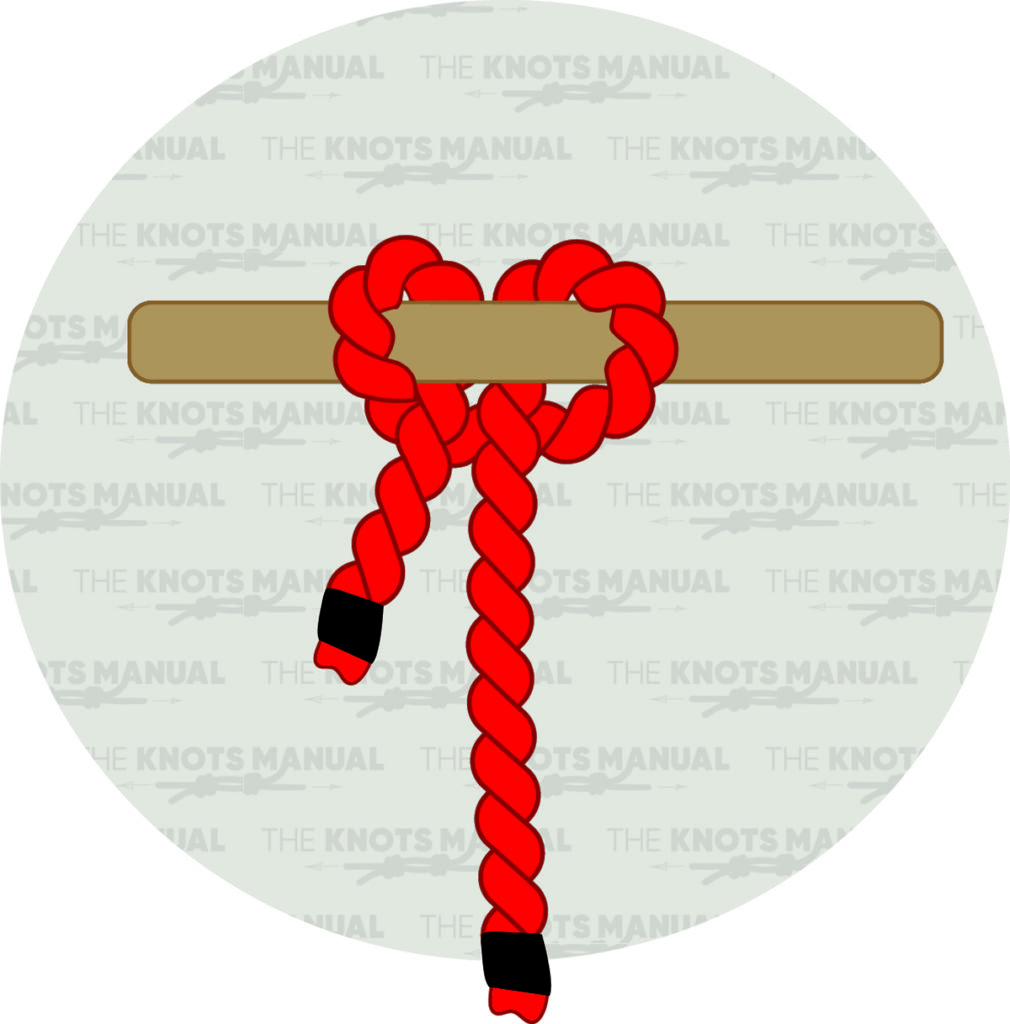
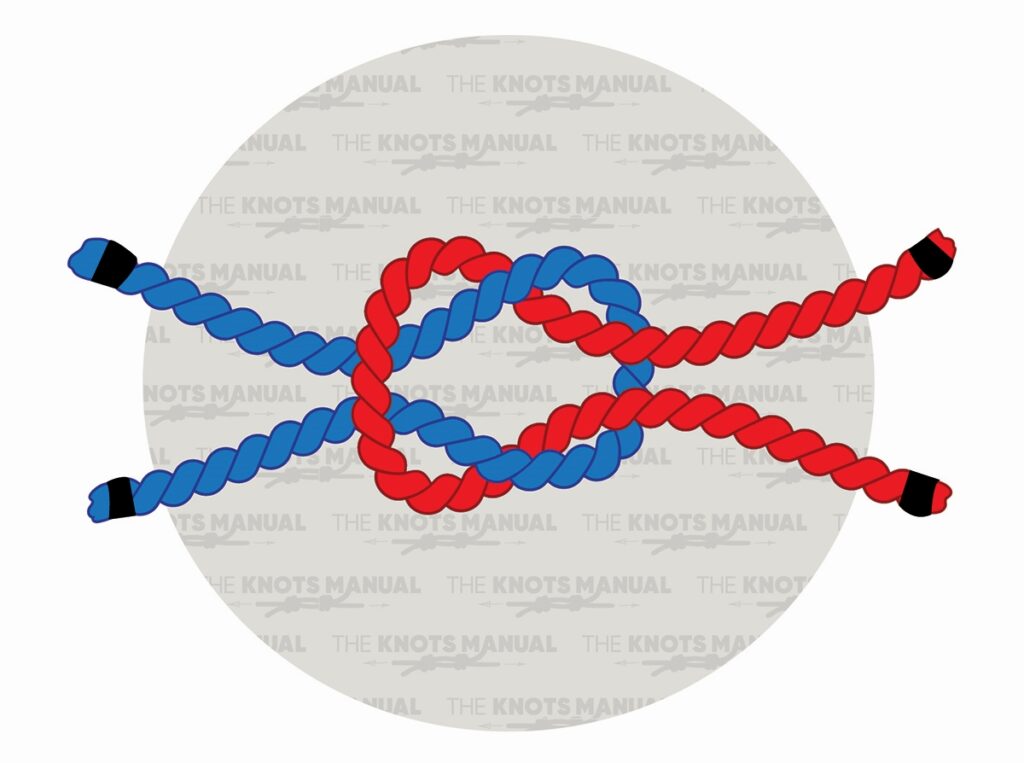
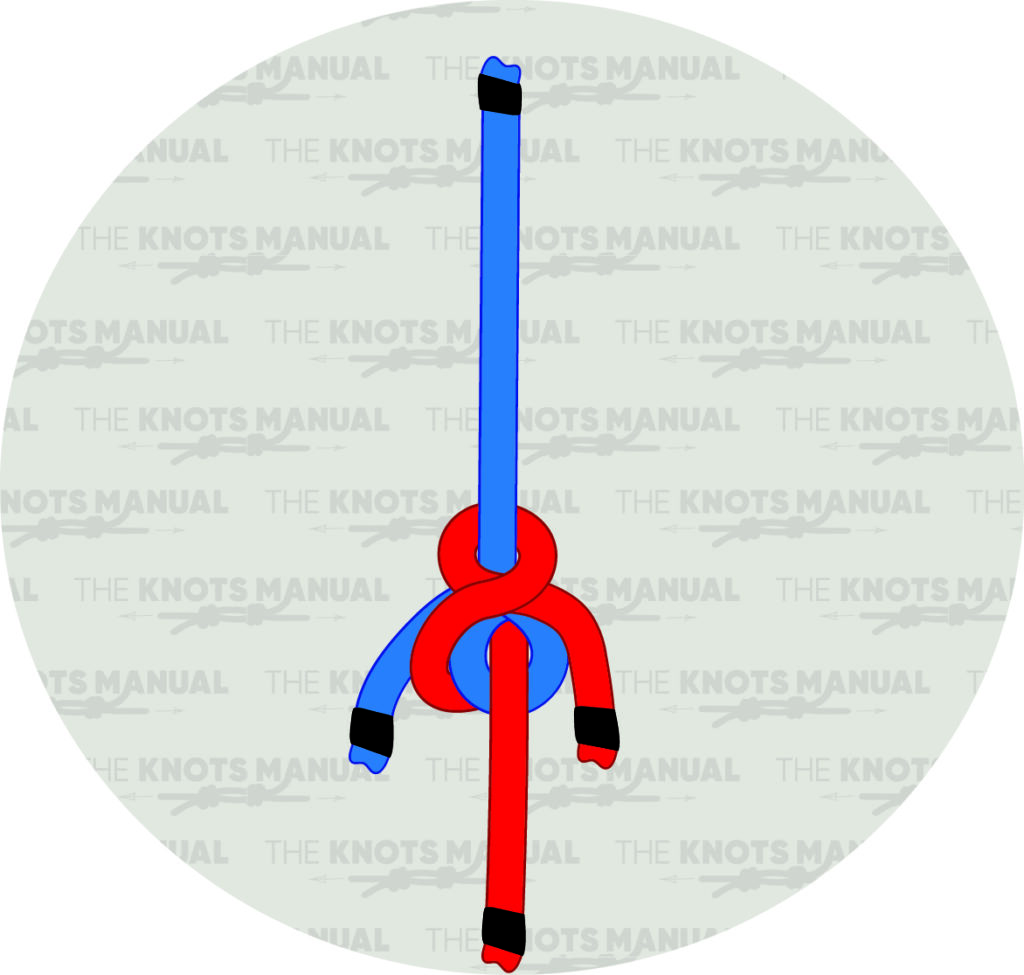
23. Harness Bend
Joining two ropes securely while still allowing for quick release is where the Harness Bend excels. The knot remains tight under pressure but comes undone with a quick tug. It’s frequently used in rescue scenarios and heavy-load applications. Combining strength and convenience, it proves invaluable in critical situations.
In order to tie a Harness Bend knot, create a loop near the end of the first rope, and then pass the working end of the second rope through the loop and over the working end of the first rope. Make another loop around the standing end of the first rope, and tighten the knot by pulling the standing ends in opposite directions. Locate the tail or free end of the rope that was used to tie the knot and pull it directly away from the main line to release the knot.