The Miller’s Knot is a versatile binding knot widely used in applications requiring secure fastening, such as packaging, securing bags, or tying surgical sutures. Its simplicity and effectiveness make it a popular choice for professionals and hobbyists alike.
This knot is particularly valued for its ability to hold tension and remain tight under strain.
Miller’s Knot: Quick Tying Guide
To tie a Miller’s Knot, start by passing a length of cord around the item you want to secure, such as a bundle or a bag and over the first turn. Then tie an Overhand Knot using the doubled line of the loop that was formed. Next, take one end of the cord and loop it around the neck of the sack and over the first turn. Then bring the end around a second time and beside the second turn. Finally, tighten by pulling both ends firmly and tuck the end under the first turn.

Why Use a Miller’s Knot?
The Miller’s Knot is known for its strength and ease of tying, even when working with slippery materials. It’s widely used in fields like veterinary medicine and agriculture, where quick and secure binding is essential. Its straightforward design makes it a reliable option for beginners while still offering the durability needed for demanding tasks.
Knots Similar to the Miller’s Knot
Square Knot – Often used for tying two ends of a rope together, the Square Knot is simple and effective for joining materials of similar thickness.
Clove Hitch – This knot is ideal for temporary fastening, as it’s easy to tie and untie but less secure under heavy strain.
Sheet Bend – Designed for joining ropes of different diameters, the Sheet Bend is versatile and strong, making it useful for various applications.
Surgeon’s Knot – Similar to the Miller’s Knot, this knot adds an extra twist to enhance security, often used in medical or delicate tasks.
Step 1:
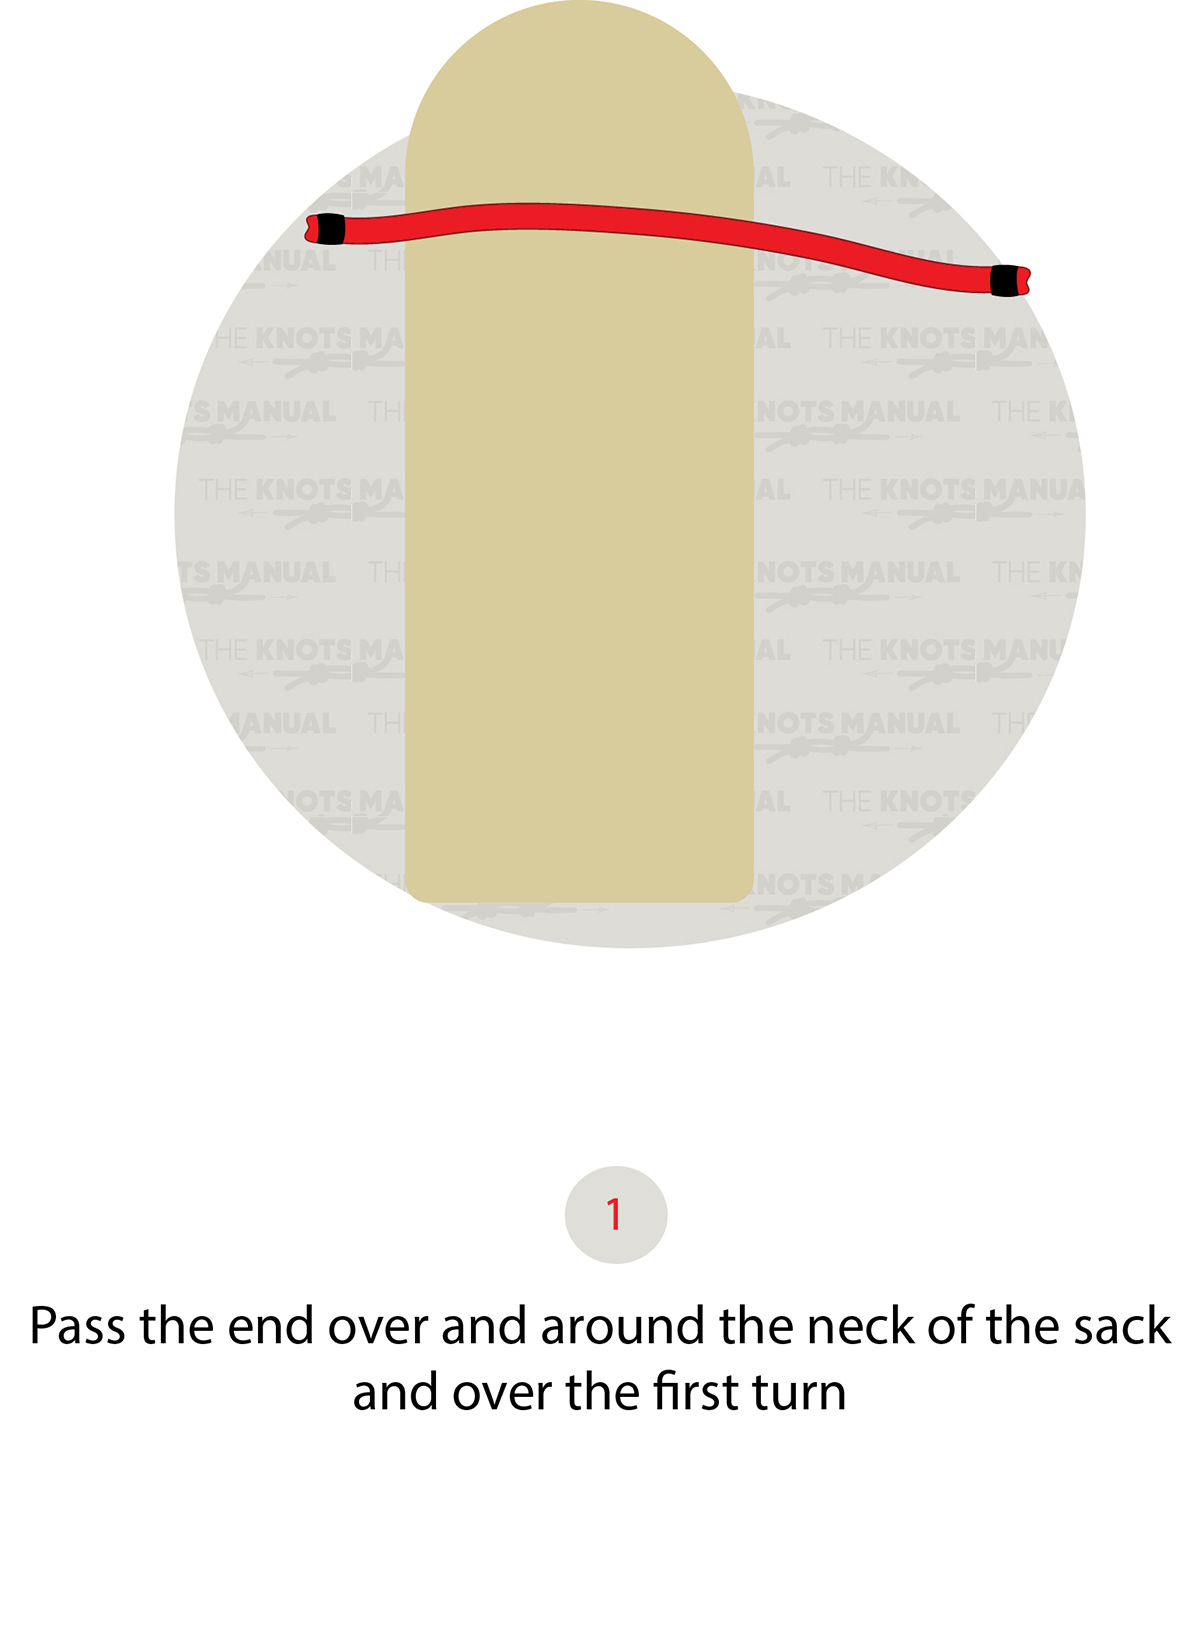
Bring the end of the line over and around the neck of the sack and over the first turn.
Step 1a:
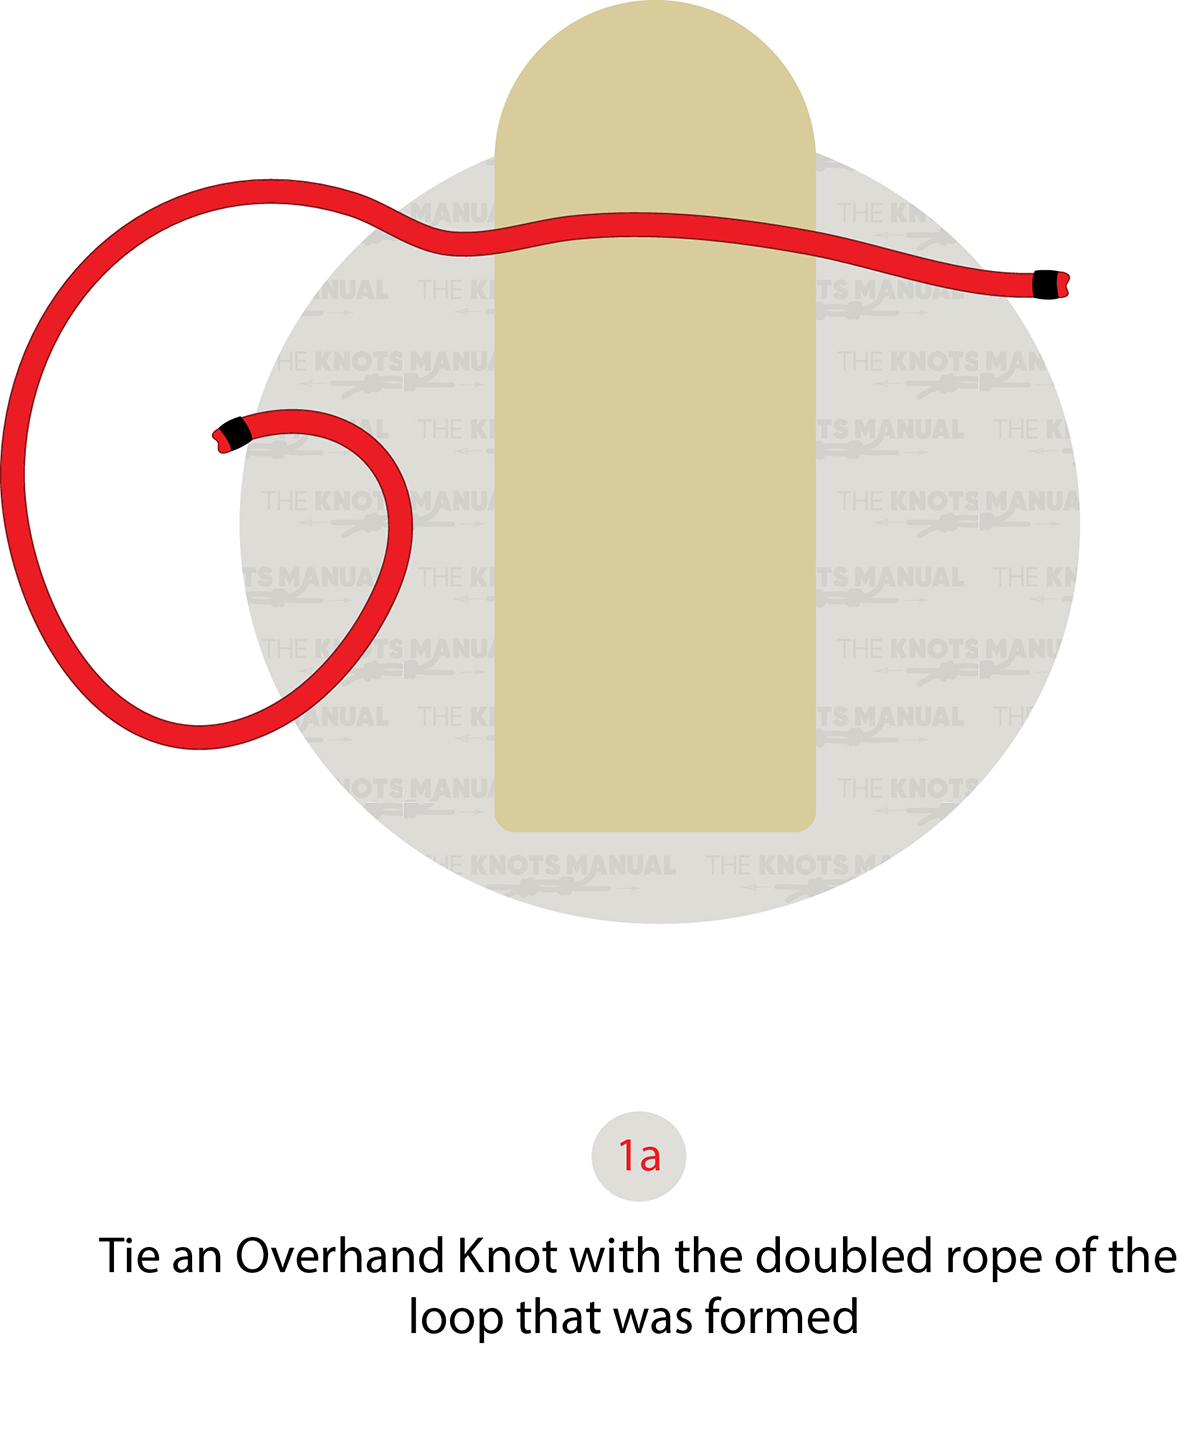
Make an Overhand Knot with the doubled line of the formed loop.
Step 1b:
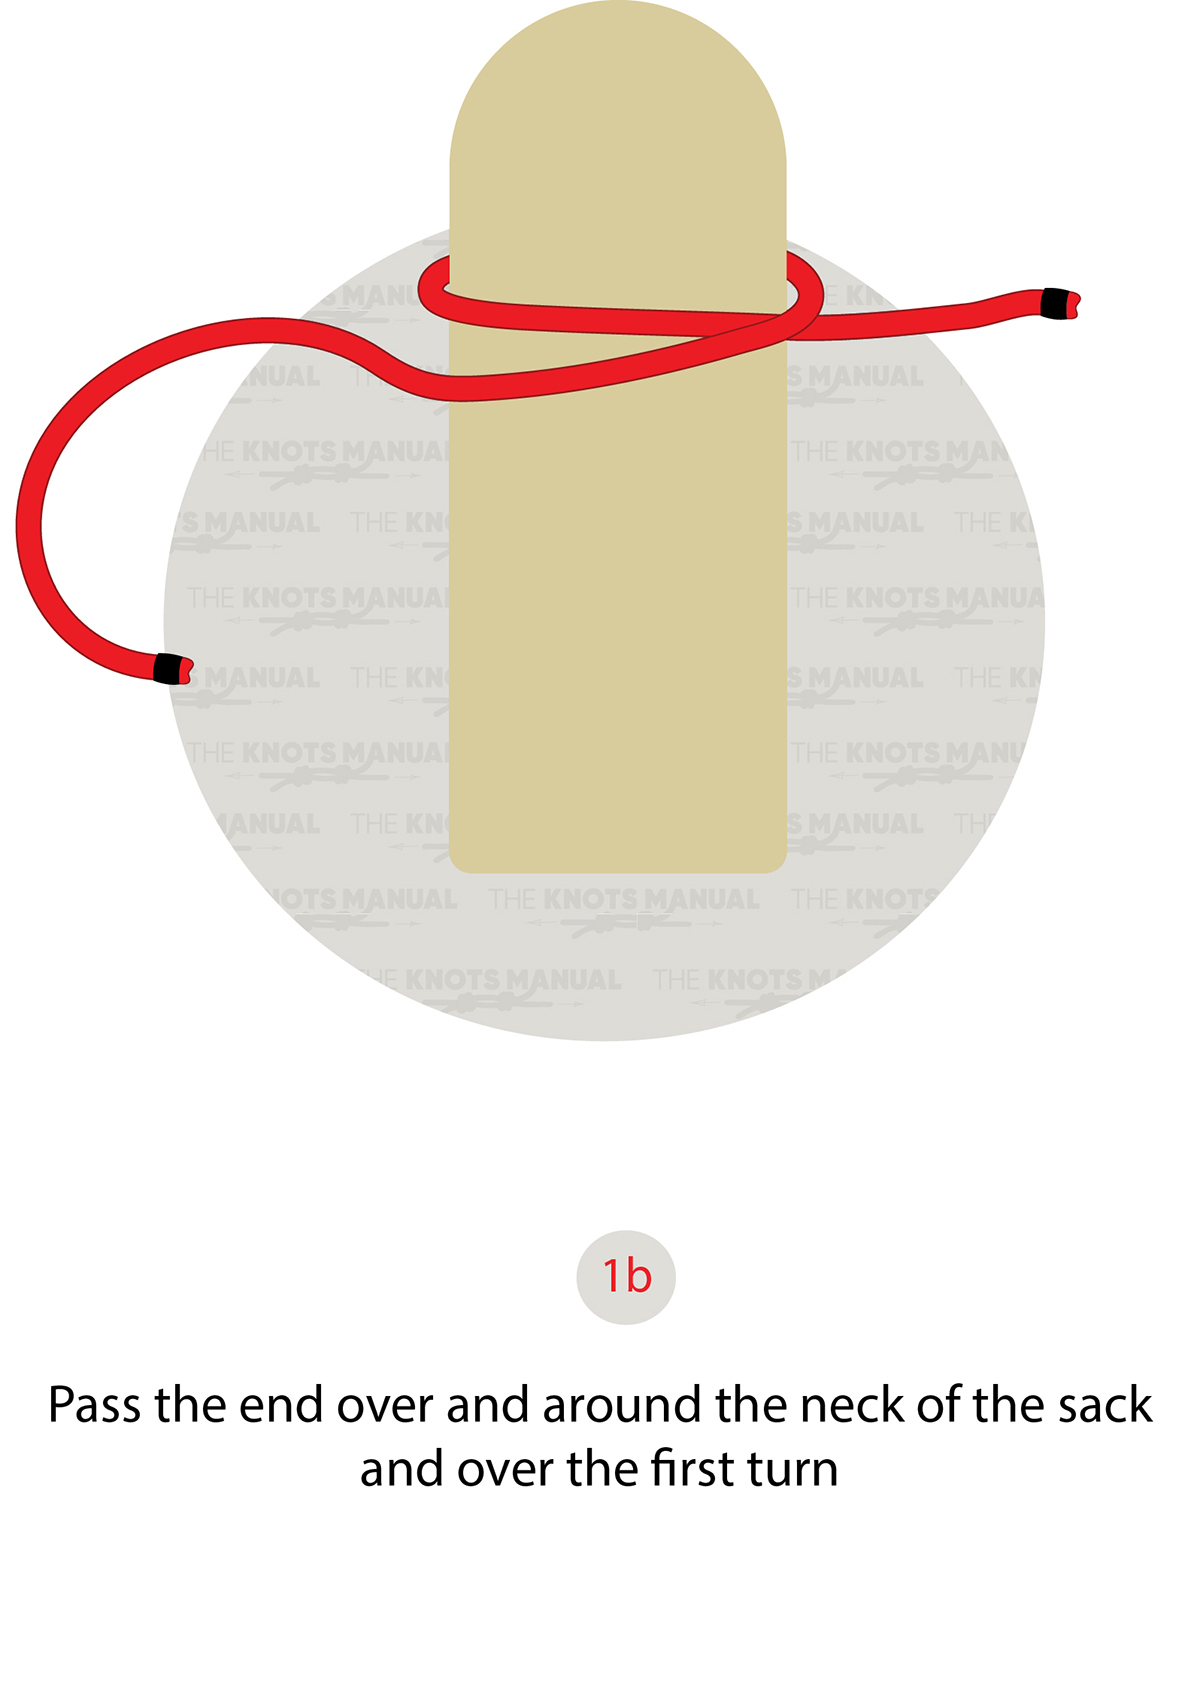
Take the end over and around the neck of the sack and first turn.
Step 2:
Pass the line around a second time and beside the second turn
Step 3:
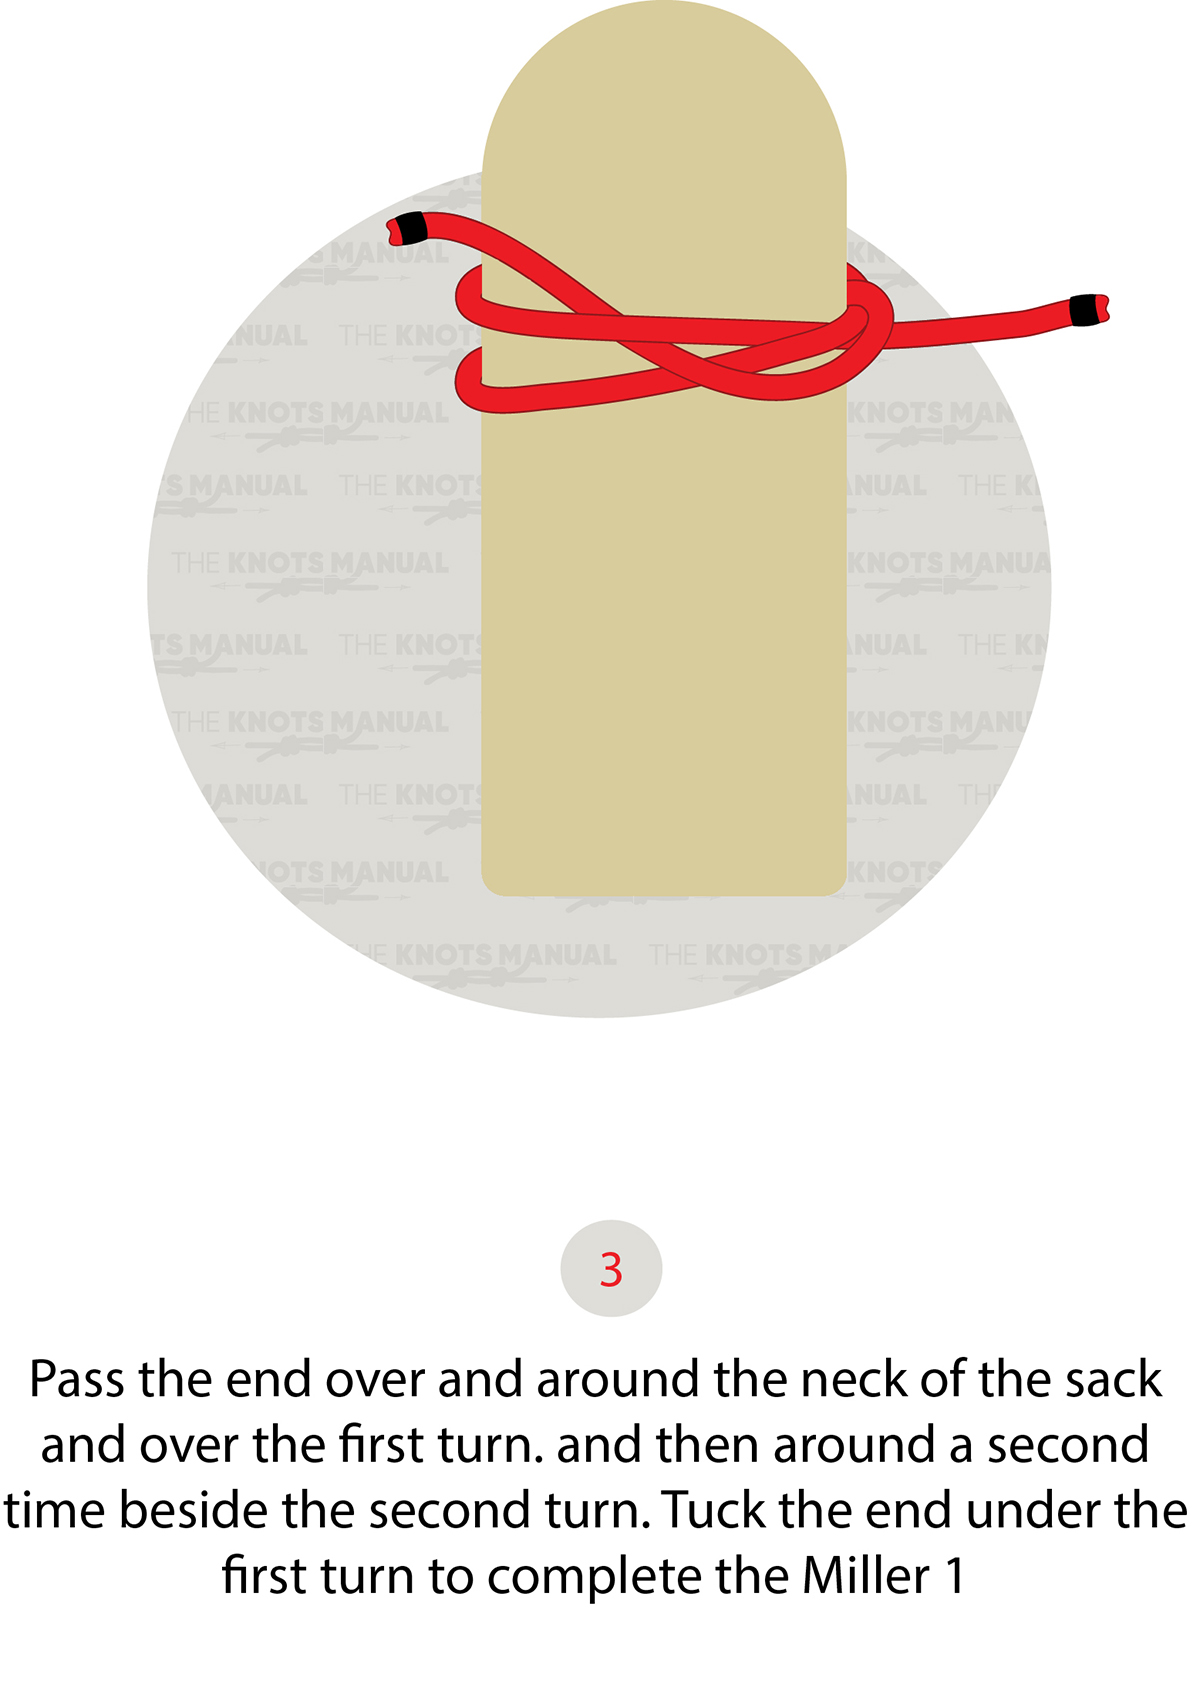
Tuck the end under the first turn.
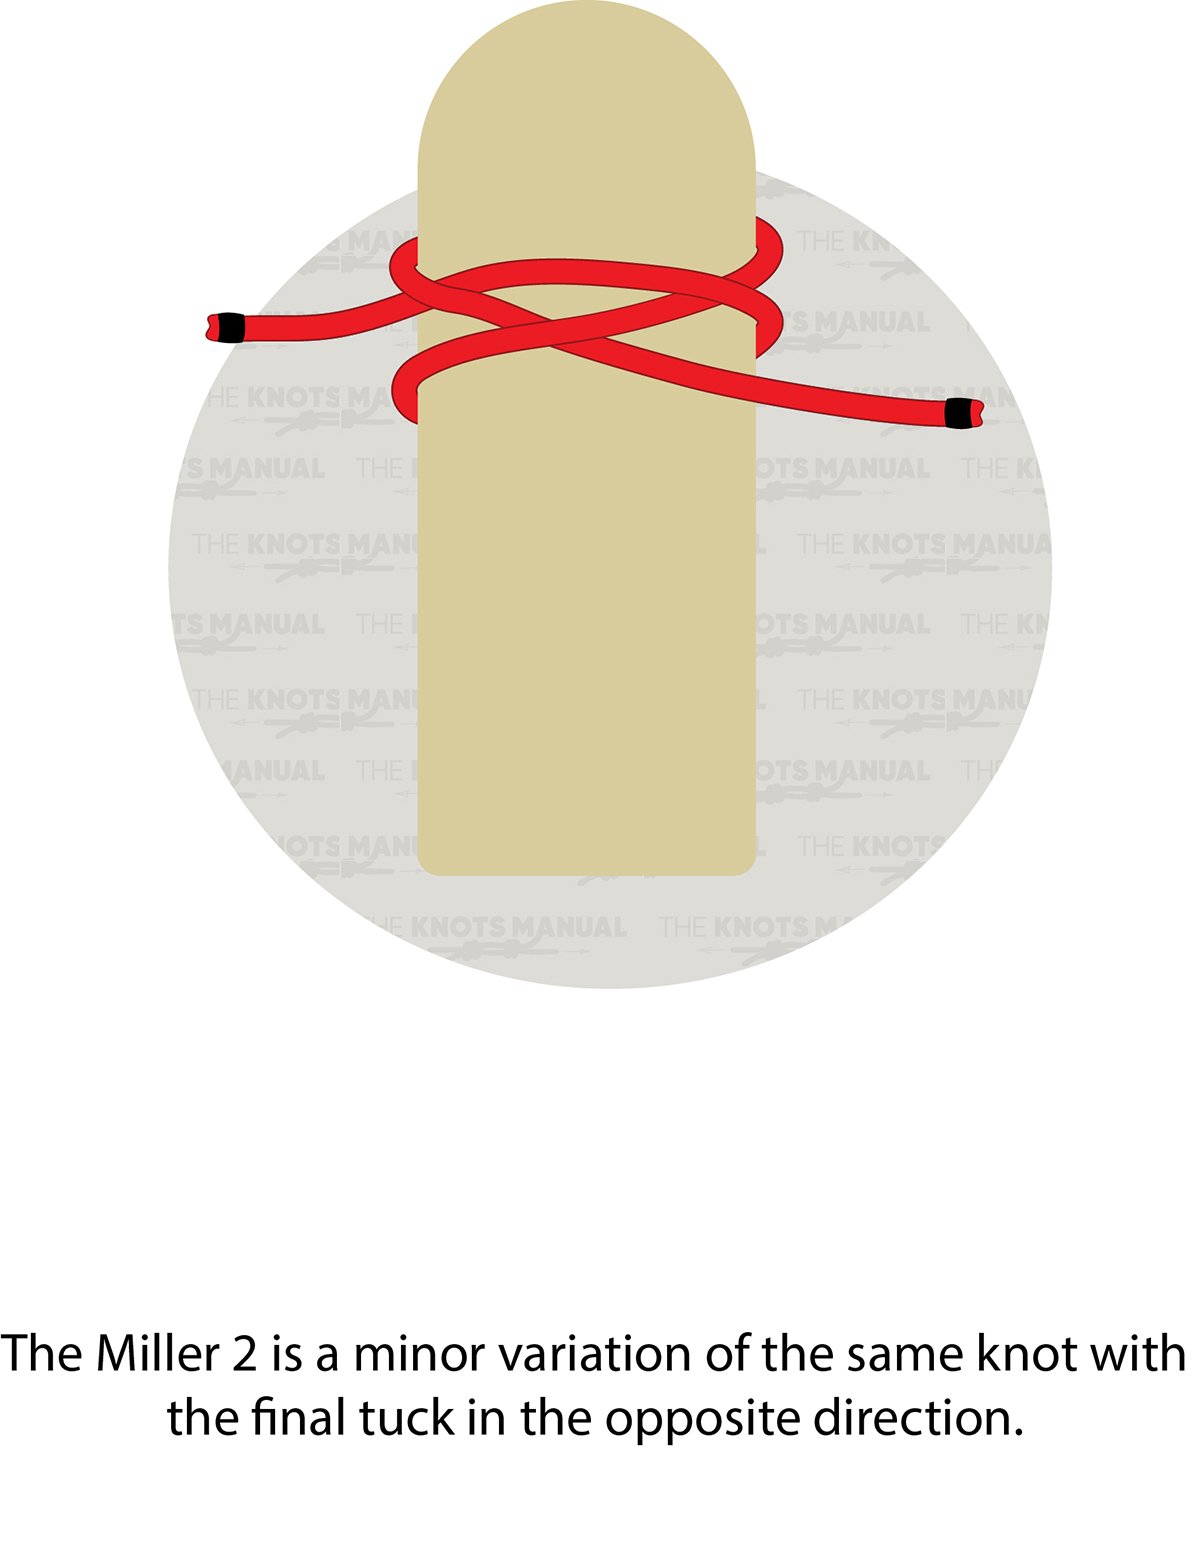
Miller 2: The same steps as the Miller Knot but with the final tuck in the opposite direction.
Sack Knot: Variation of the Miller Knot in which the second turn passes the other side of the standing end before the final tuck.
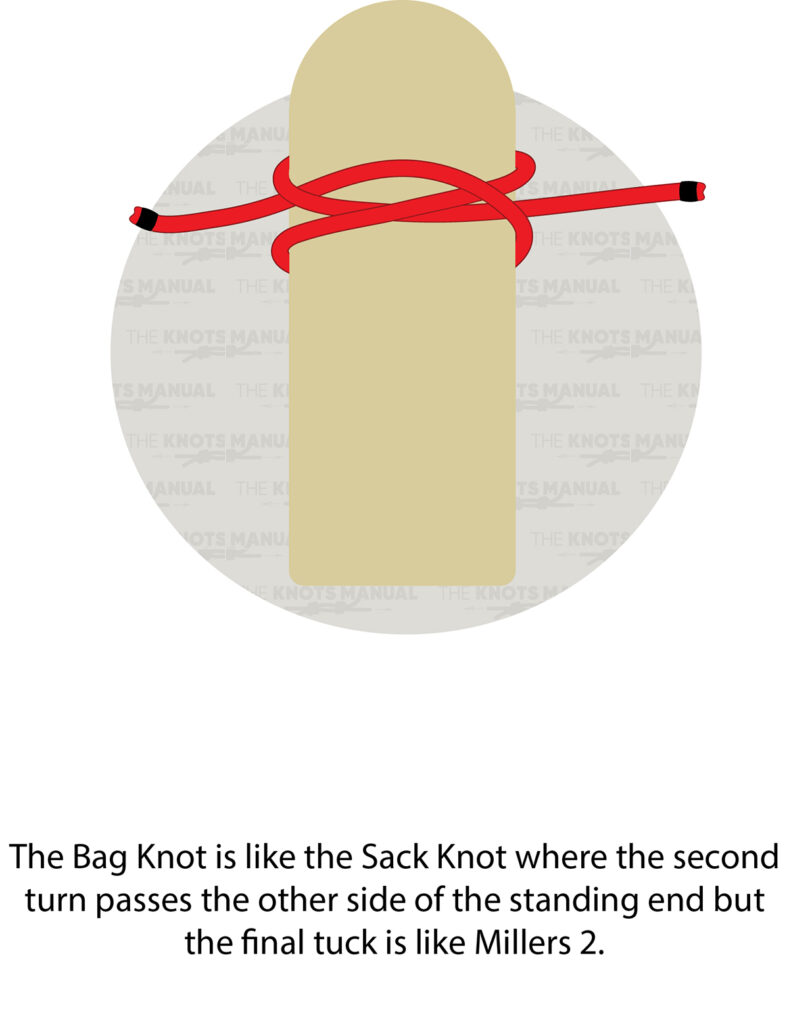
Bag Knot: A combination of the Miller Knot and Sack Knot in which the second turn passes the other side of the standing end but the final tuck is in the opposite direction like the Miller 2.
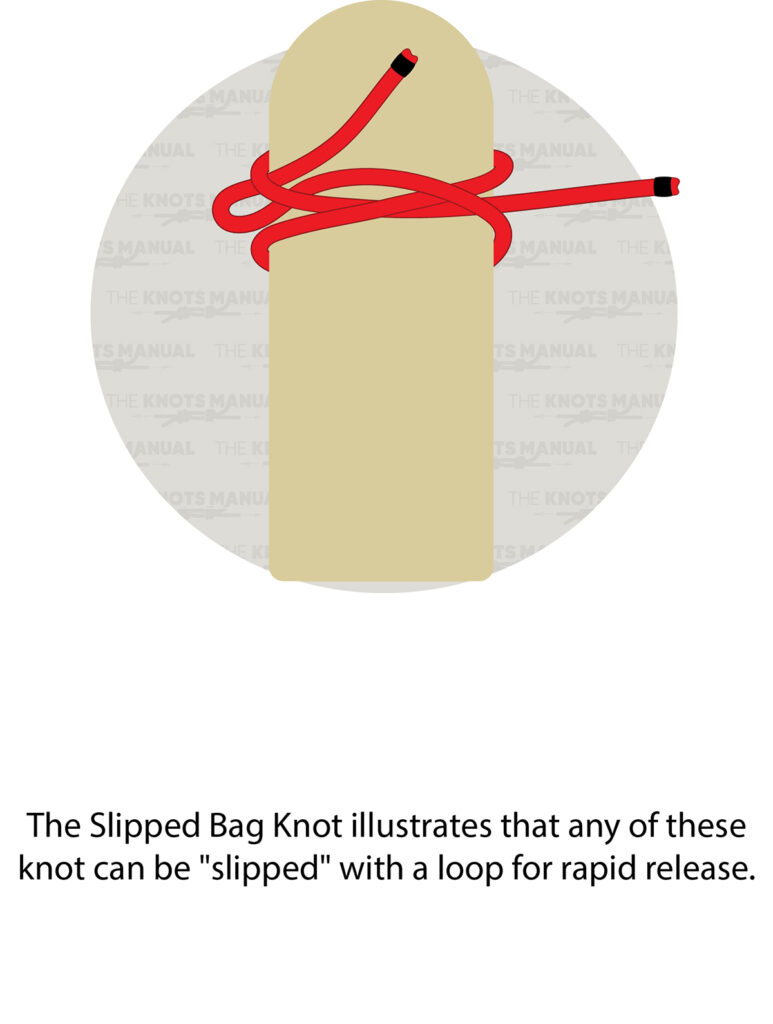
Slipped Bag Knot: This can be applied to any of these knots with a “slipped” loop for quick release.
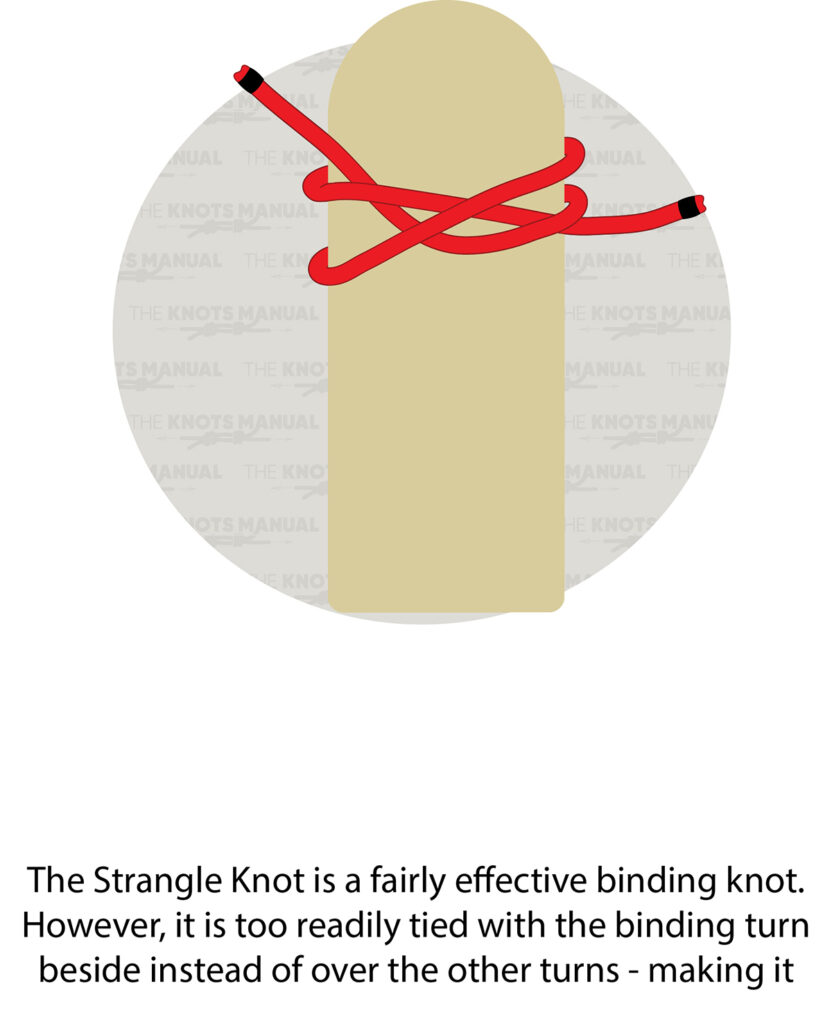
Strangle Knot: An effective binding knot with the binding turn beside instead of over the other turns.
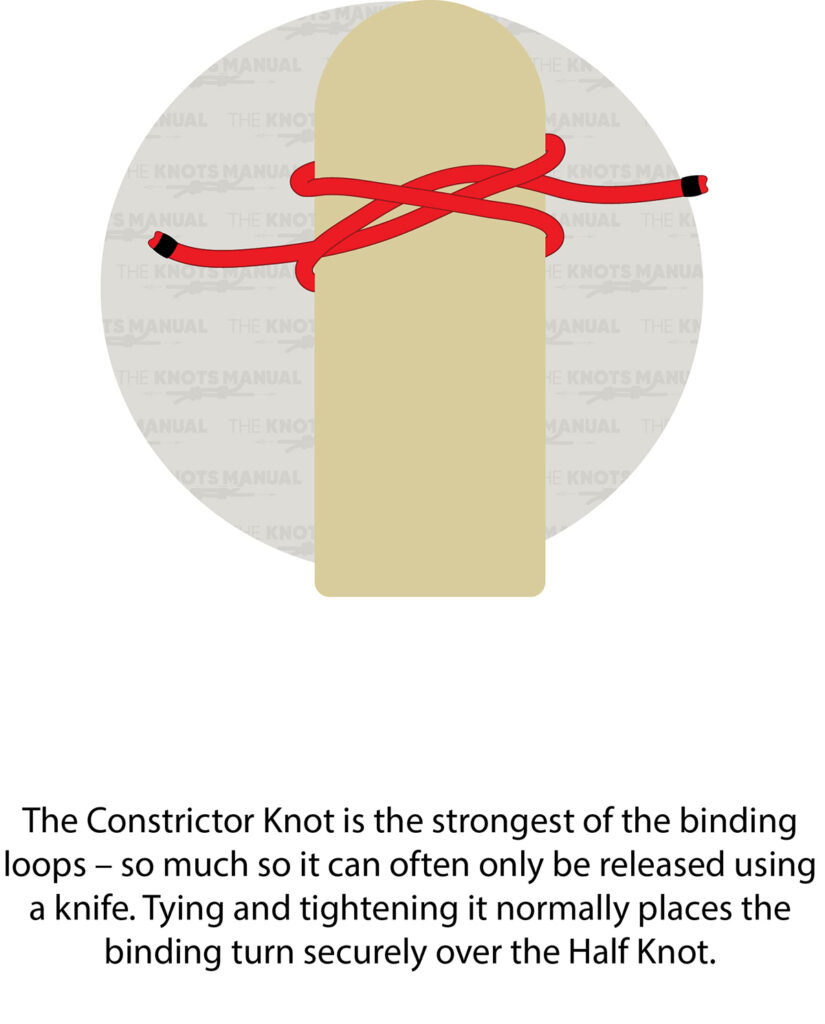
Constructor Knot: The strongest of the binding loops with the binding turn tied securely over the Half Knot.
