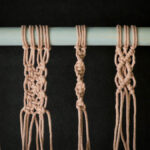
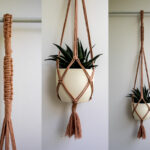
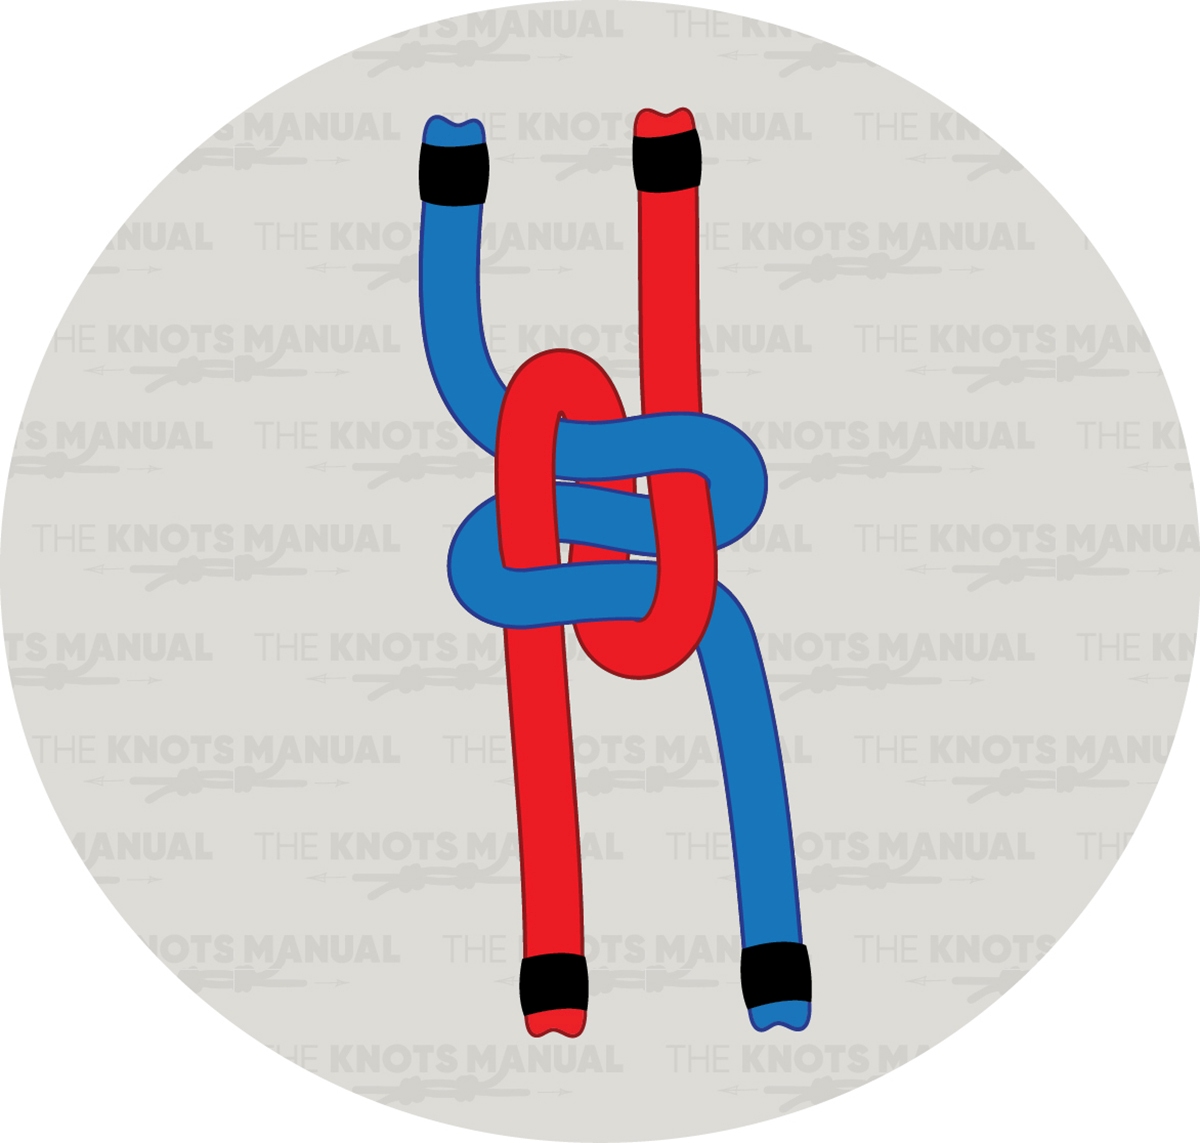
A Japanese Square Knot is a versatile and traditional knot used in crafts, such as macramé and decorative binding. Many artisans use this knot due to its balance and symmetry.
Japanese Square Knot: Quick Tying Guide
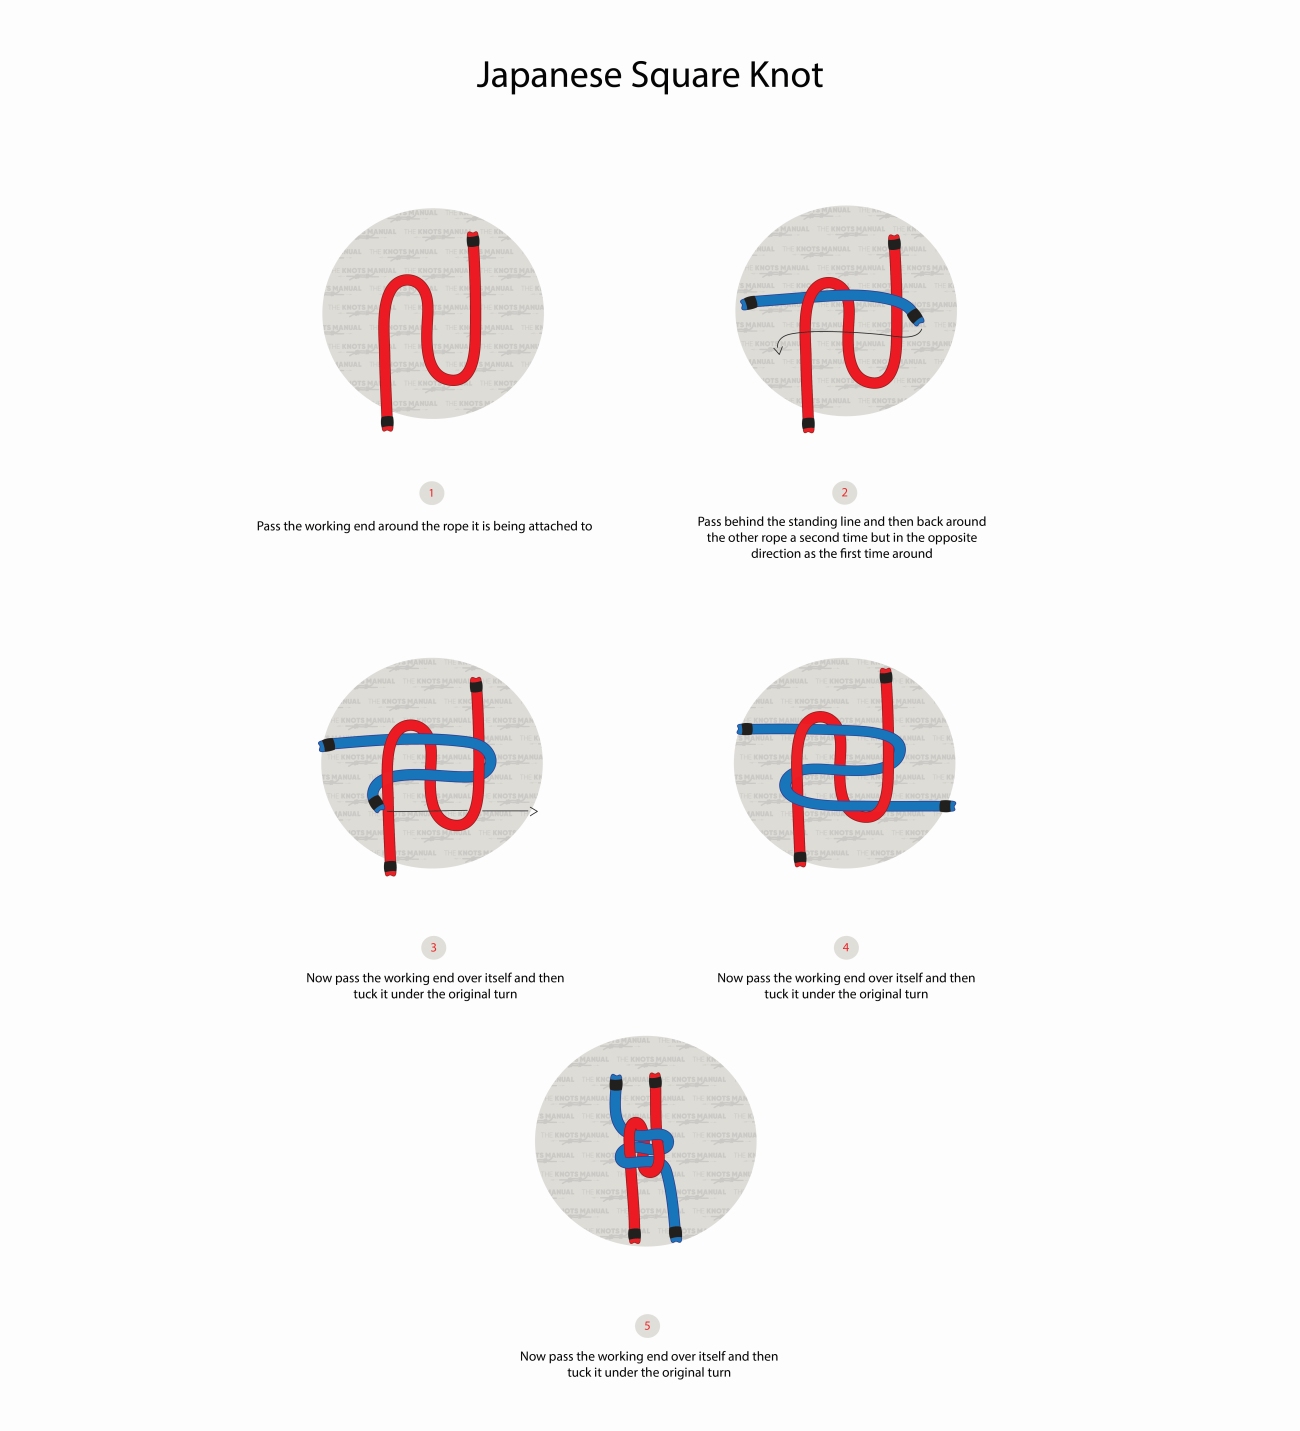
To tie a Japanese Square Knot, start by creating two bights opposite of each other in a rope. Then pass another rope behind the standing line, through the first bite, and then bring it back around the other rope a second time.
Use the working end of the other rope by passing it through the first bight, then cross it over the tops of the other bight in the opposite direction as the first time around.
Next, bring the working end up through the second bight and then down through the first bight. Then wrap over the top of the first bight and bring into the second bight. Finally, pull both ends, a little at a time on each of the four ends to tighten down the knot evenly.
Why Use a Japanese Square Knot?
The Japanese Square Knot is simple, elegant, and secure. It’s popular among crafters because of its aesthetic appeal and ease of use. The knot lays flat, making it ideal for jewelry making, decorative packaging, and other artistic projects. However, it’s not suitable for heavy-duty applications, as it can slip under excessive strain.
Knots Similar to the Japanese Square Knot
Reef Knot – Similar in structure, the Reef Knot joins two cords and is widely used in sailing and camping.
Lark’s Head Knot – A quick-release knot often used in macramé to attach cords to a base.
Overhand Knot – A basic and versatile knot, often used as a stopper knot in various applications.
Double Fisherman’s Knot – A secure knot used to join two ropes, often for climbing or outdoor activities.
Step 1:
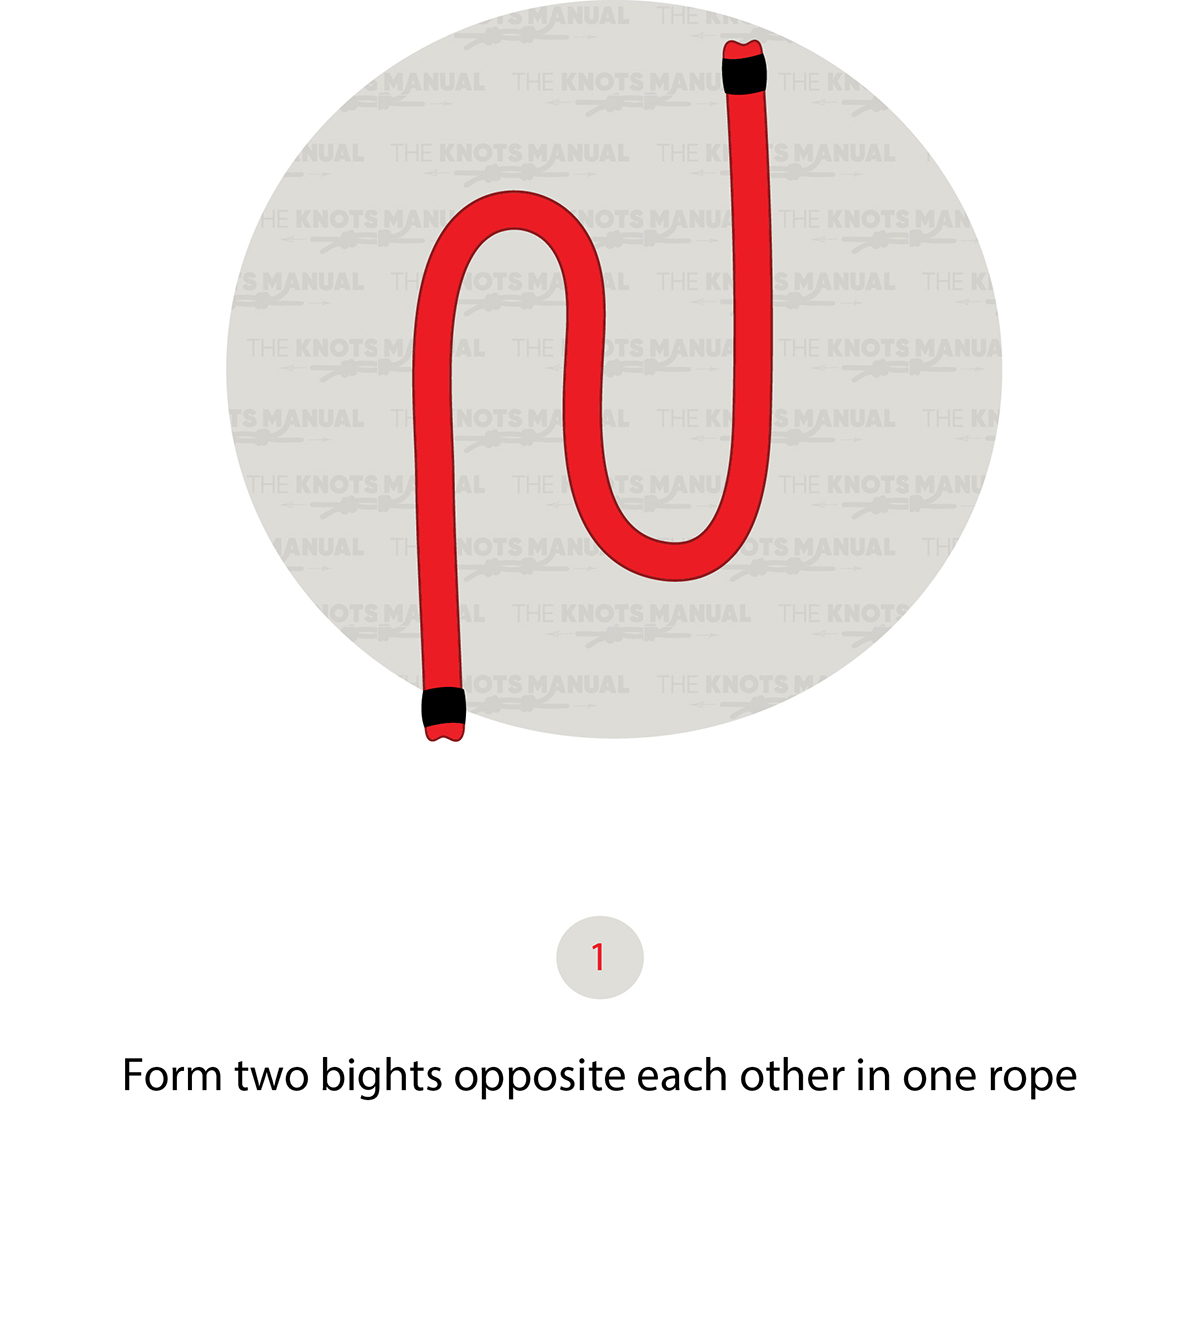
Create two bights opposite of each other in a rope.
Step 2:
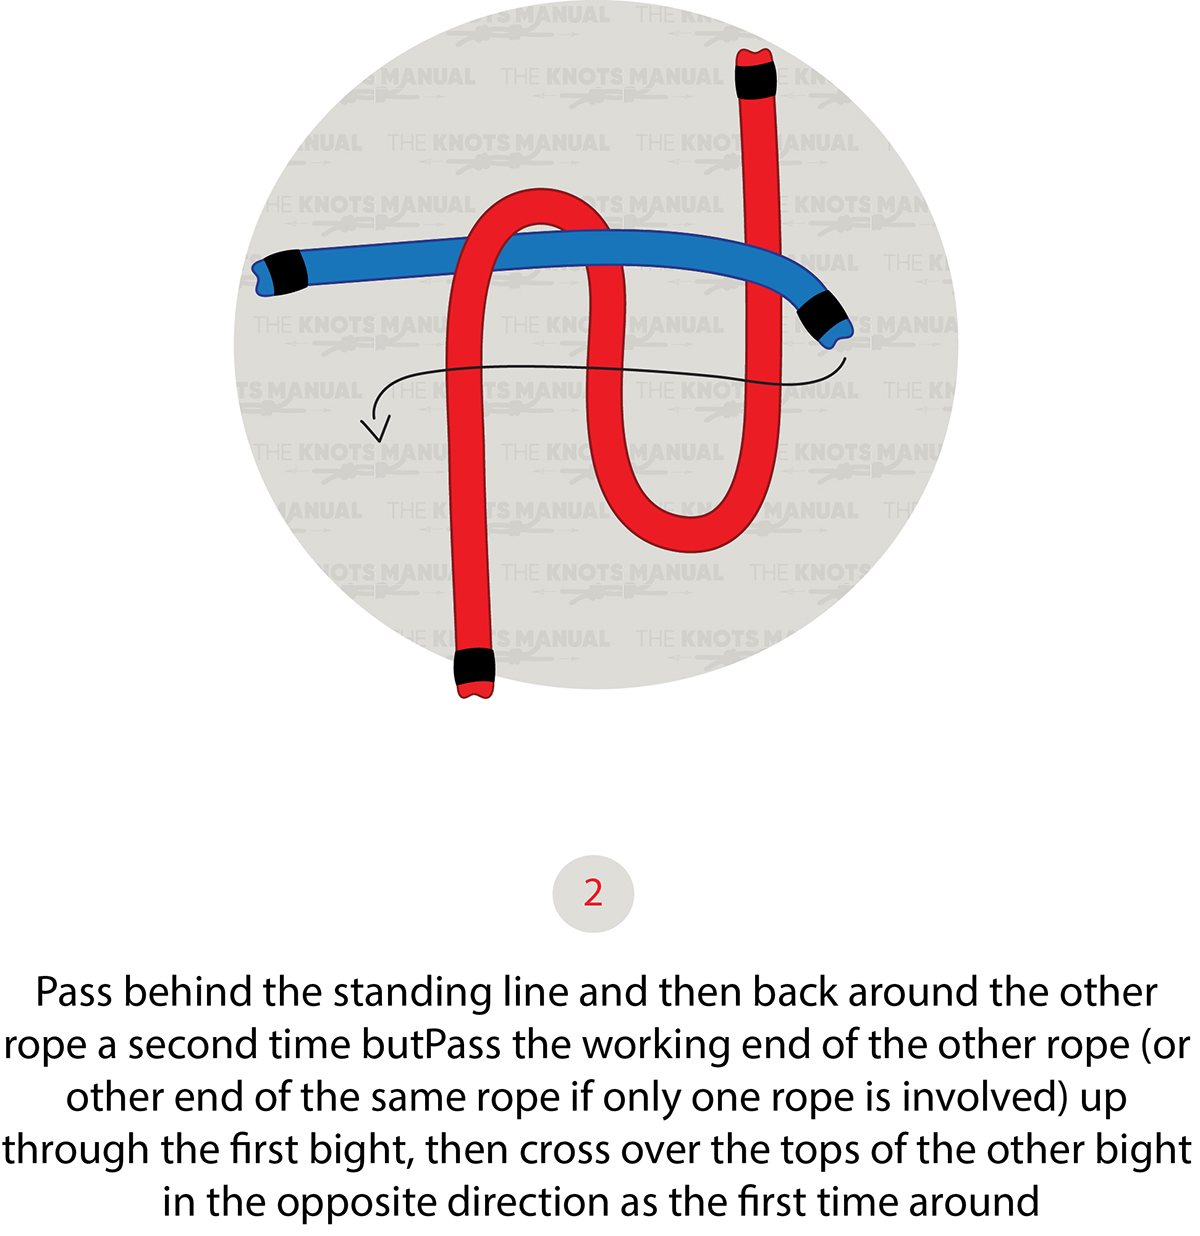
Bring another rope behind the standing line and through the first bite, and then bring it back around the other rope a second time. Use the working end of the other rope by passing it
Step 3:
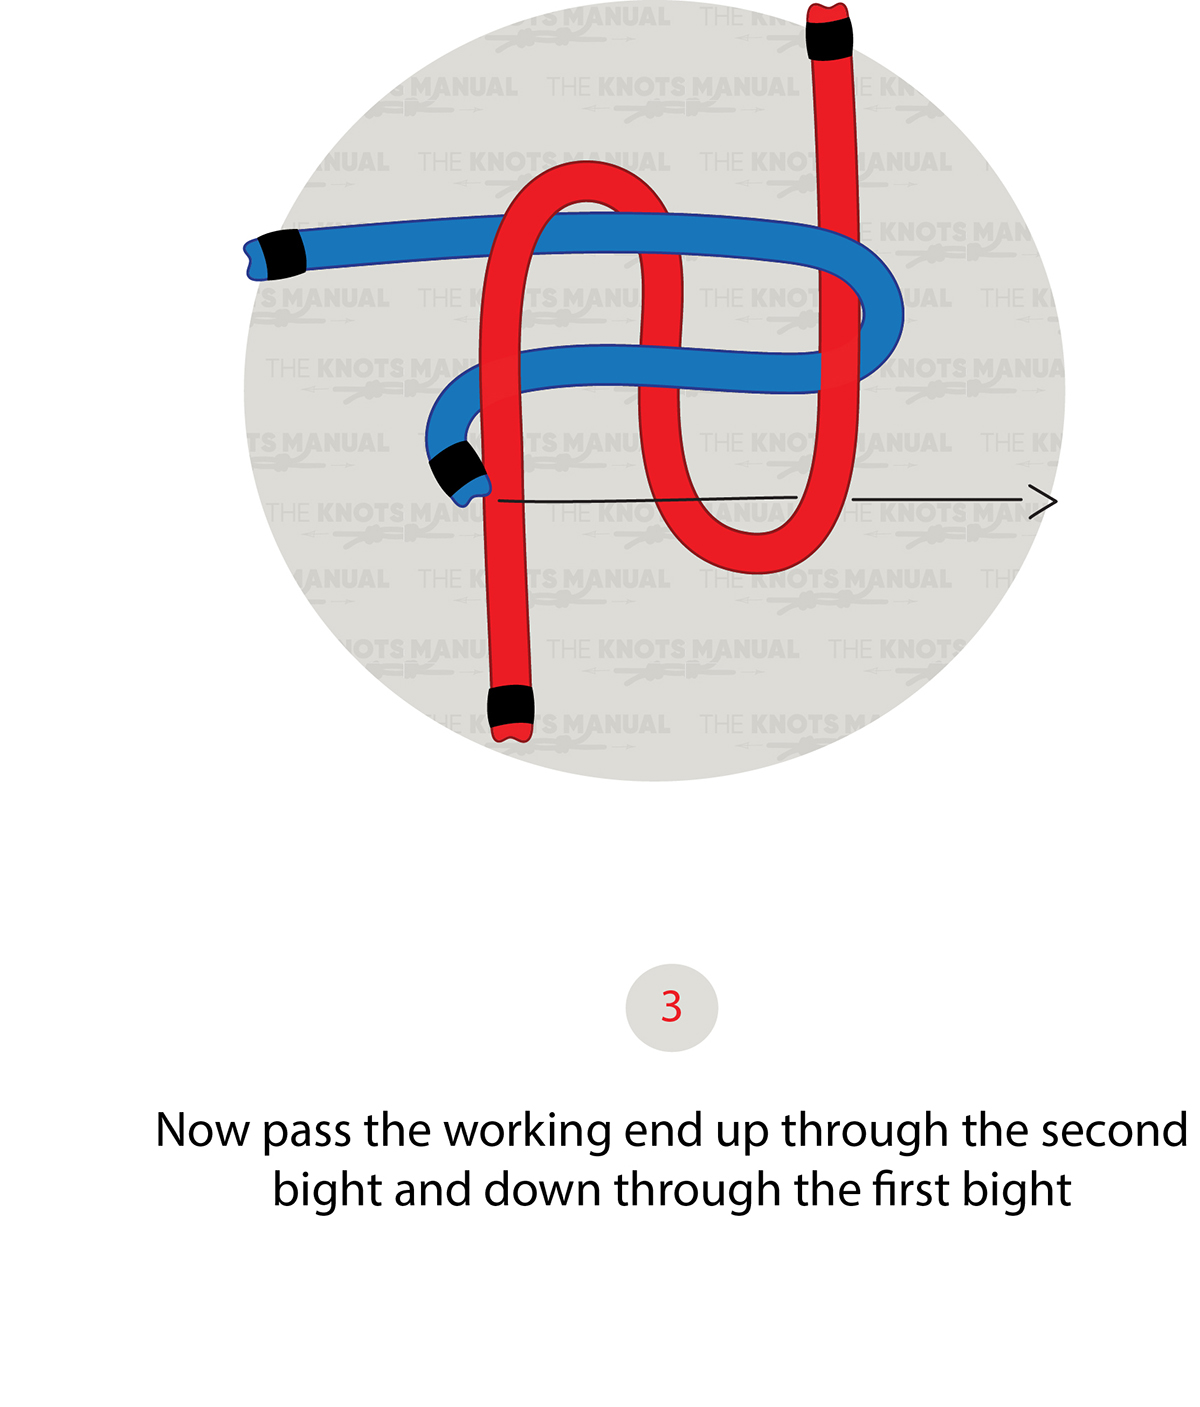
Pass the working end up through the second bight and then down through the first bight.
Step 4:
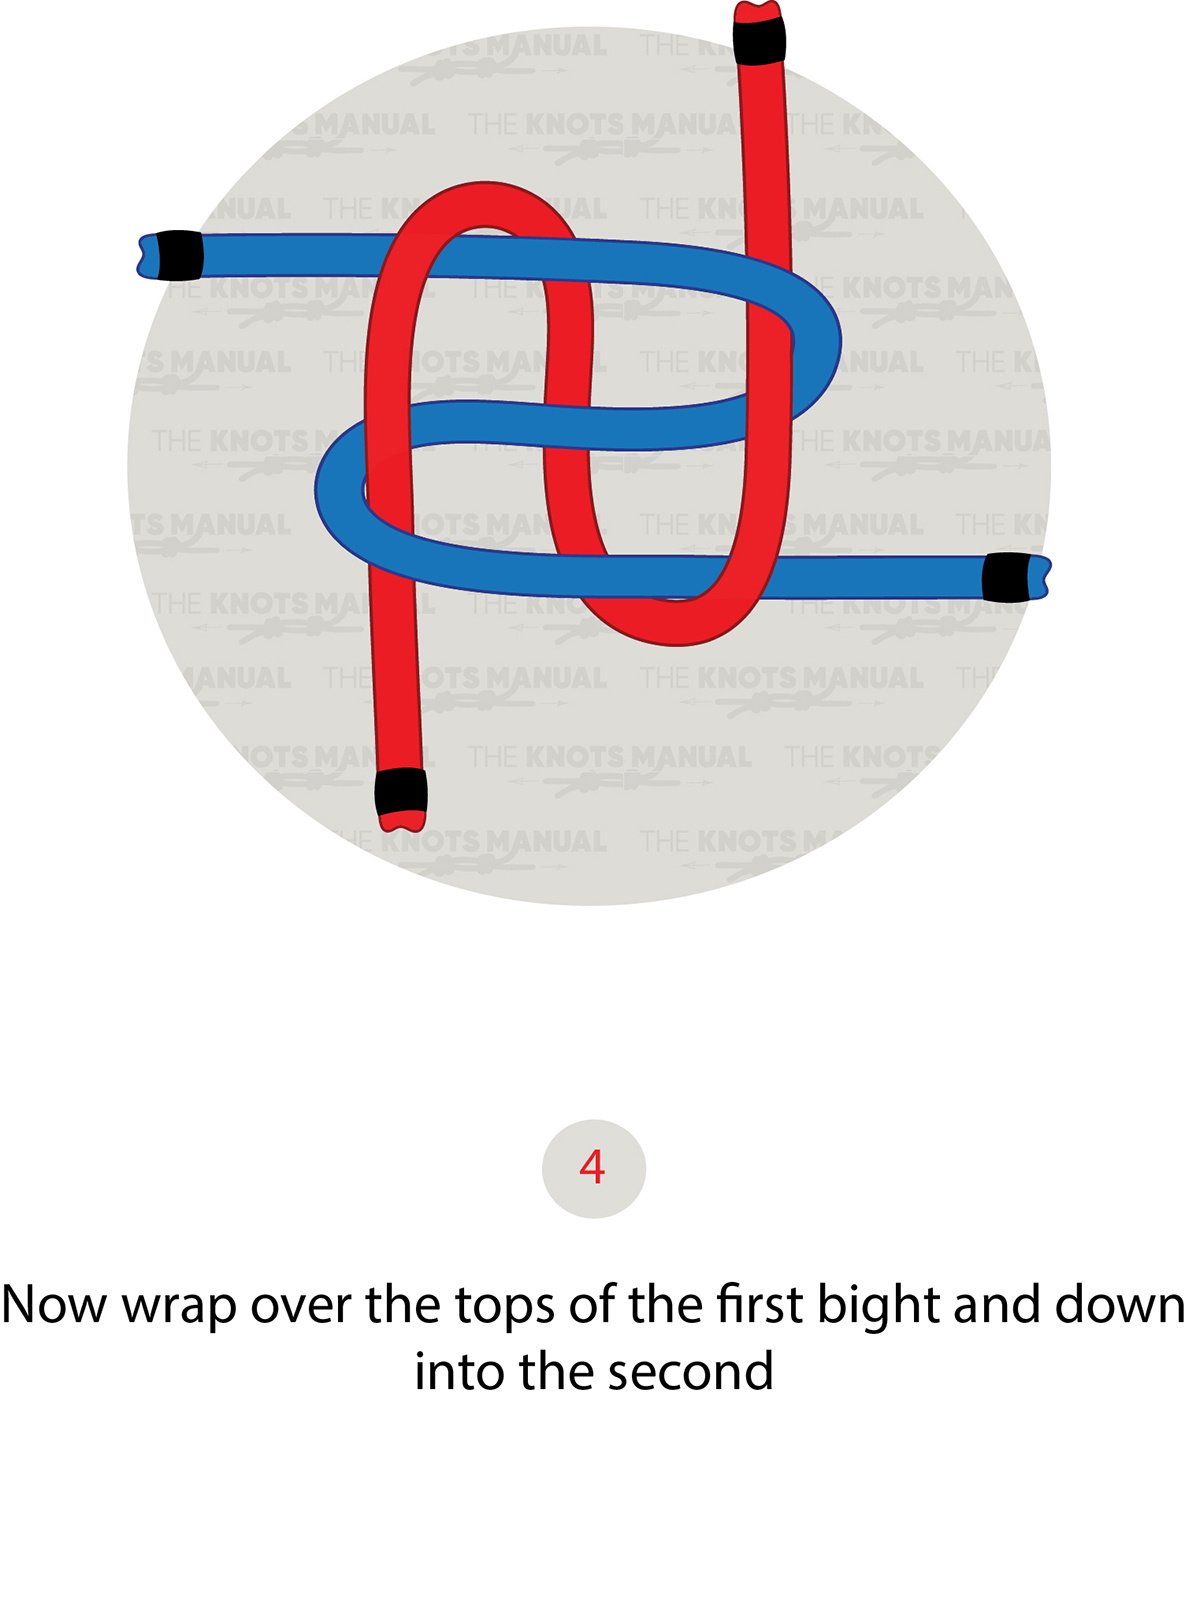
Wrap back around the top of the first bight and pass down through the second bight.
Step 5:
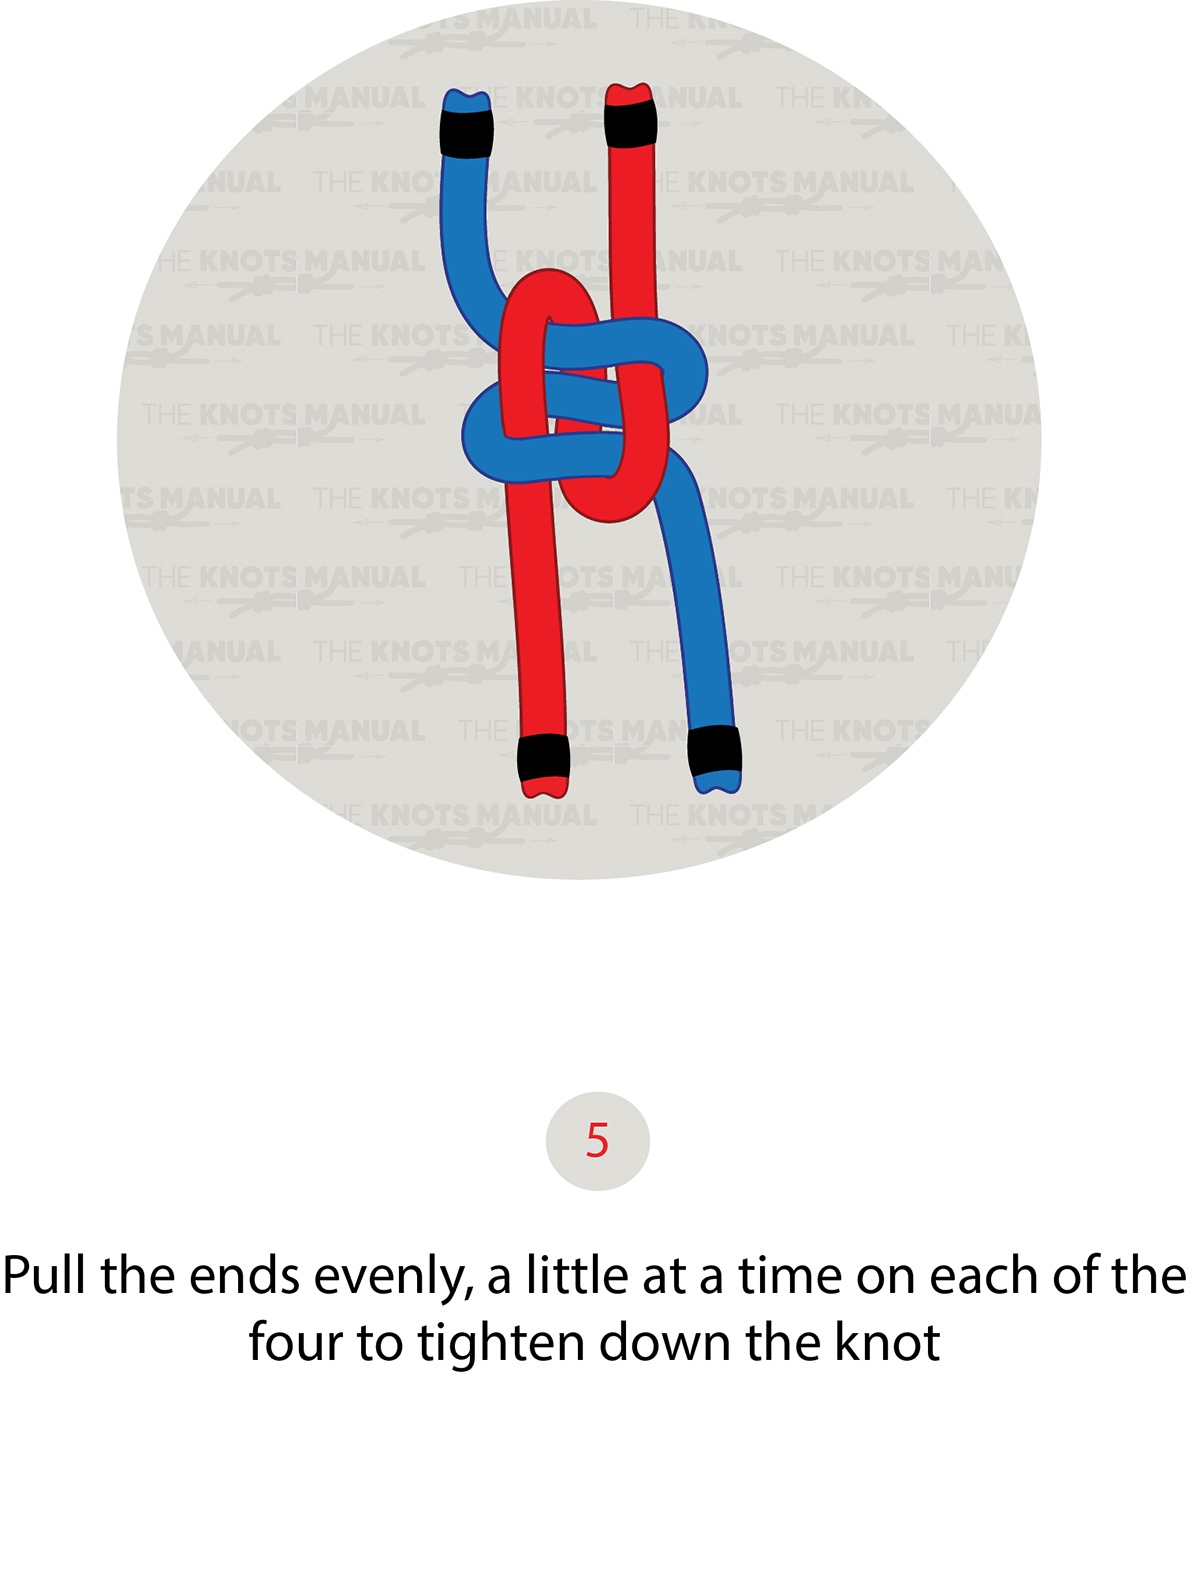
Pull both ends, a little at a time on each of the four ends to tighten down the knot evenly and securely.
