The Super Munter Hitch is a belaying knot that’s useful for lowering heavy loads.
It also has other common names, like the Monster Munter Hitch, Double Munter Hitch, Super Italian Hitch, and Super Crossing Hitch.
Quick Guide: Tying the Super Munter Hitch
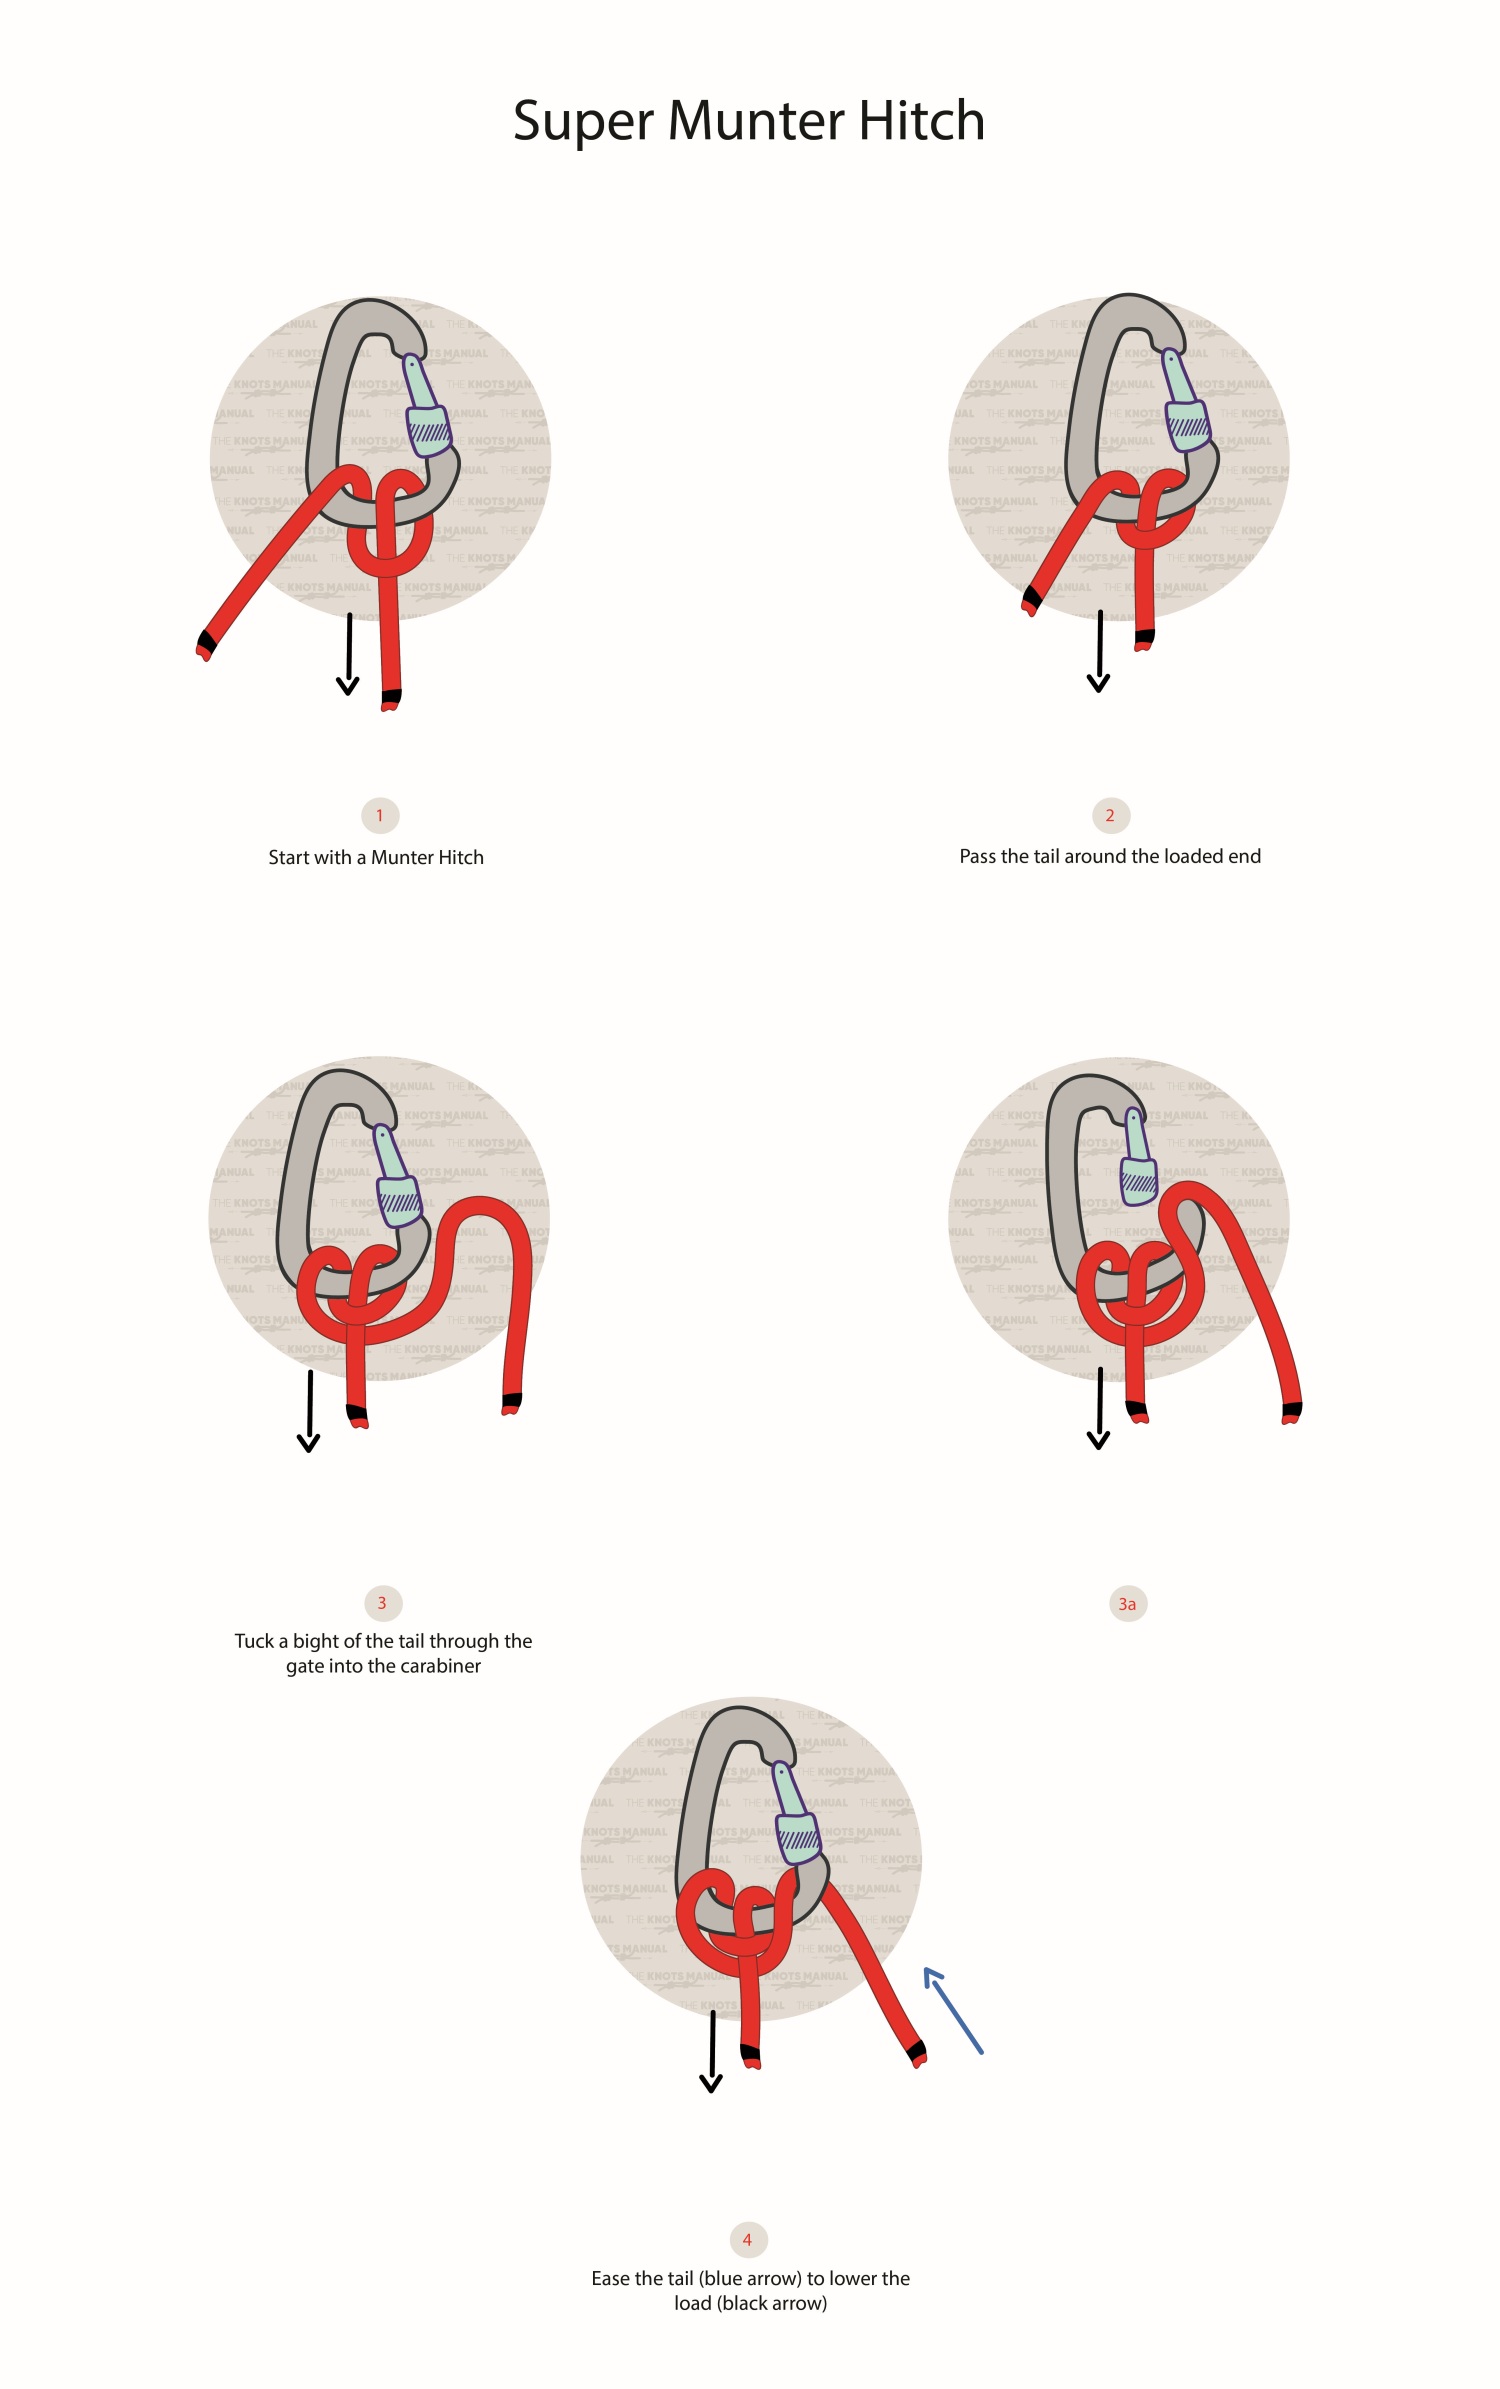
To tie the Super Munter Hitch, first tie a regular Munter Hitch (step 1). Then take the unloaded end, go around the loaded end (steps 2-3), and pass it through the carabiner once again (step 3a). Make sure that it exits on the opposite side of the carabiner.
In our illustration, the black arrow is the loaded end (it should be attached to your harness). The other end of the rope should be used for lowering (blue arrow).
Pros and Cons of the Super Munter Hitch
The most important advantage of the Super Munter Hitch is that it adds improved friction. This allows for a more controlled lowering and is especially useful for heavier loads.
Another benefit is that this variation almost completely reduces the issues that regular Munter has with rope twisting. The extra turn makes the rope correct itself.
The main downside to the Super Munter Hitch is that it only works with heavy loads. With normal loads, like rappelling in climbing, there’s too much friction for it to be used effectively. In this case, a regular munter with a Prusik hitch tied around the loaded end works better.
Regular Munter Hitch can be used in the other direction as well if needed because it capsizes and corrects itself. The Super Munter also does this, but the knot does a full rotation, and it requires more friction, so changing the direction is much more difficult.
Using a modern belay device is preferred over using the Super Munter. That’s because it’s safer and doesn’t damage the rope over time from friction.
Common Uses for the Super Munter Hitch
The Super Munter Hitch is usually only used for lowering very heavy loads. For example, when you need to lower two people at the same time or heavy gear bags. For a single person, it adds too much friction and makes it too hard to use.
Although it’s mostly used in search and rescue, it’s also sometimes used by climbers, arborists, cave and canyon explorers, and military personnel.
There are some situations in climbing where the Super Munter Hitch might be useful. For example, when using a smaller-diameter rope made from strong, modern materials. Or when rappelling with a thicker rope, but with a single-rope setup. You may also want to use it on canyoneering trips with short descents to keep your pack weight low. It’s also good to know if you lose, forget, or damage your belaying and locking devices, or if the rope is too frozen to feed into them.
Knots Like the Super Munter Hitch
Standard Munter Hitch: A simpler variation of the Super Munter Hitch with much less friction. It’s often used in climbing and search and rescue to do solo rappelling or when lowering another person.
Super Munter Tieoff: This knot allows you to tie off the Super Munter Hitch to lock it in place. To tie it, feed a long bight backward from the unloaded end. Then wrap it around the loaded and unloaded ends and tie two Half-Hitches around them.
Zooper Munter: In this variation, an additional carabiner is clipped in next to the original one, to the same anchor point. After tying a regular Munter on the first one, the unloaded end is then fed around the loaded end and through the second carabiner. This works almost identically to the Munter Hitch, except allows you to set it up after already starting the lowering. For example, if you notice that the load is too heavy to be lowered with a regular Munter.
Prusik Knot: A friction knot that’s often used in combination with the Super Munter Hitch. With it, a shorter cord is tied between the harness of the belayer and the lowering end. This allows for a more controlled lower and acts as a safety backup.
Step-By-Step Guide: How to Tie the Super Munter Hitch Knot
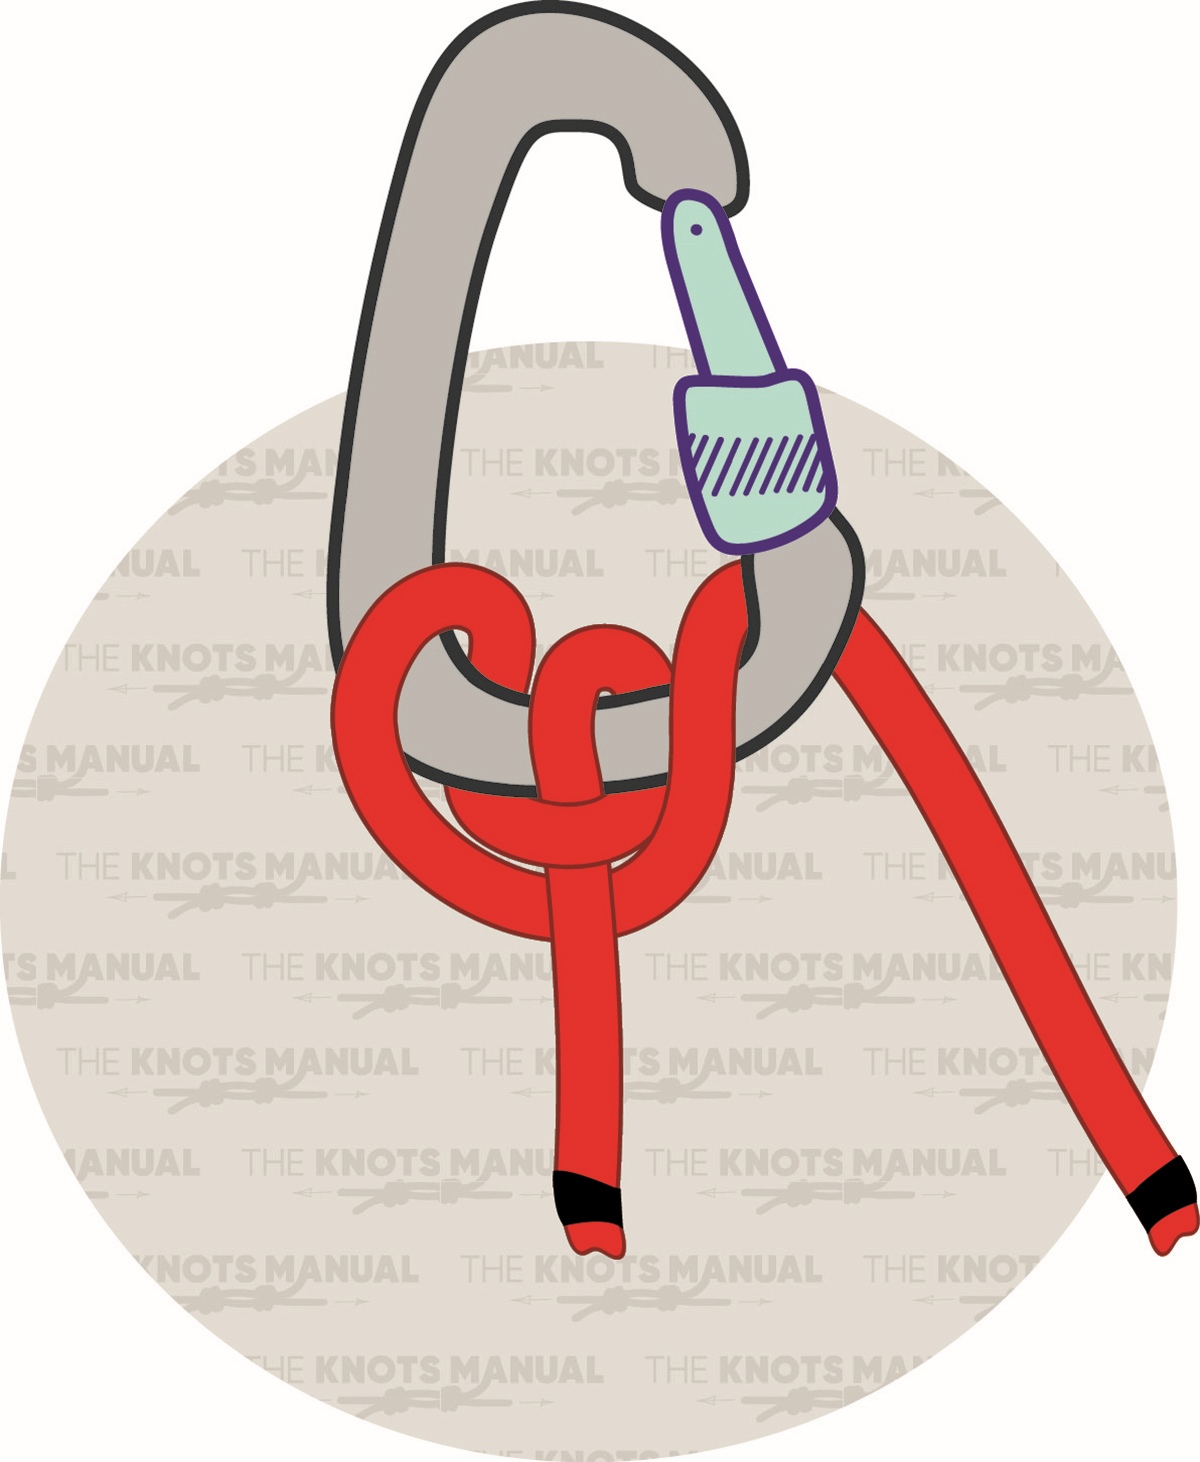
A step-by-step guide on tying a Super Munter Hitch
Step 1:
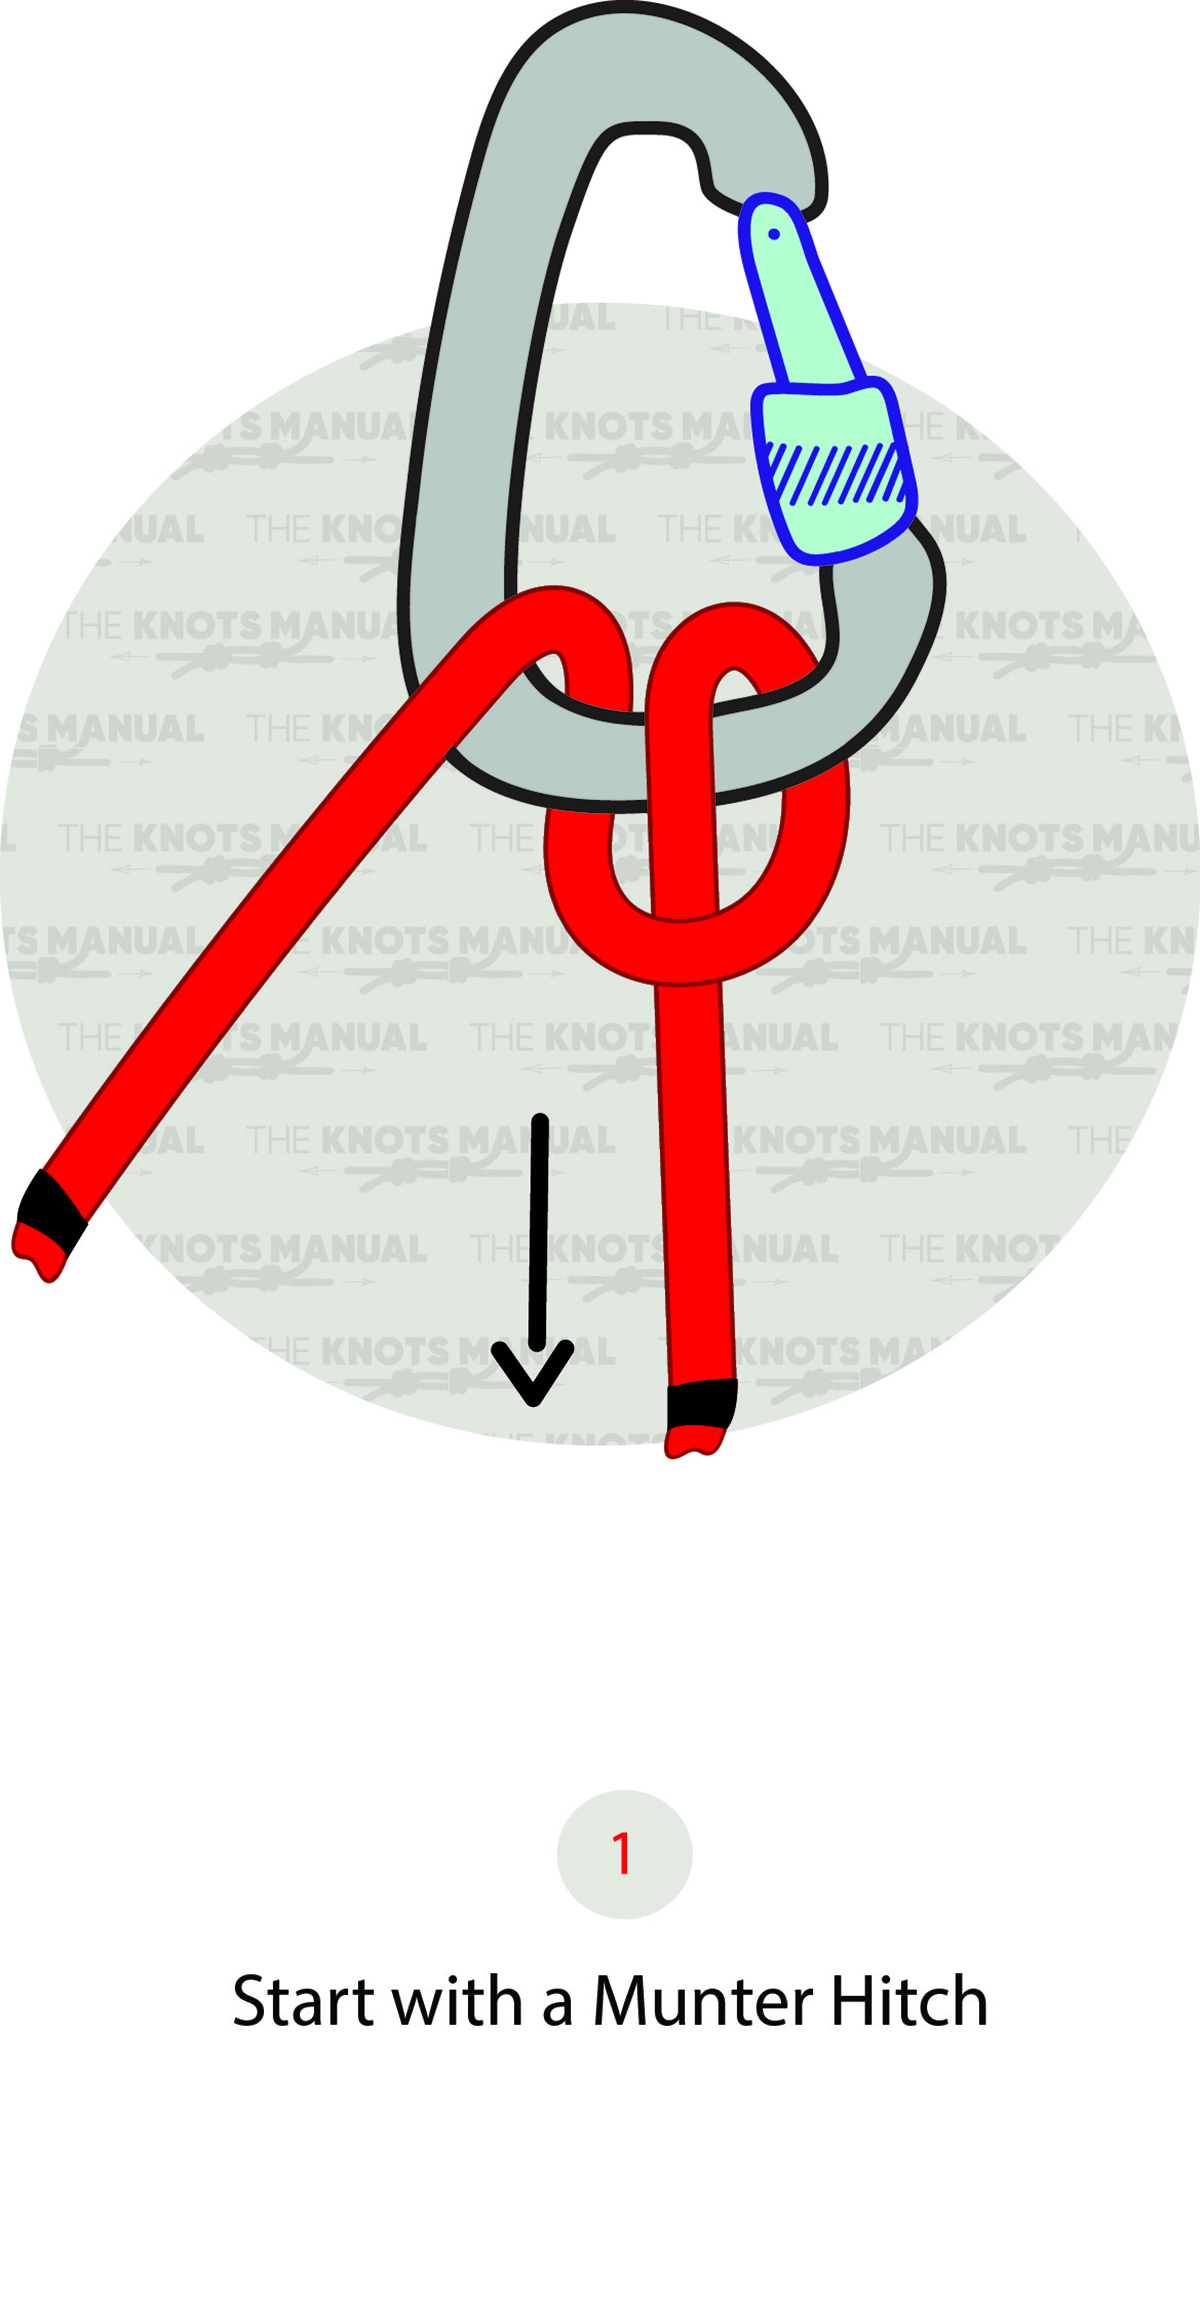
Make a regular Munter Hitch, as illustrated above.
Step 2:
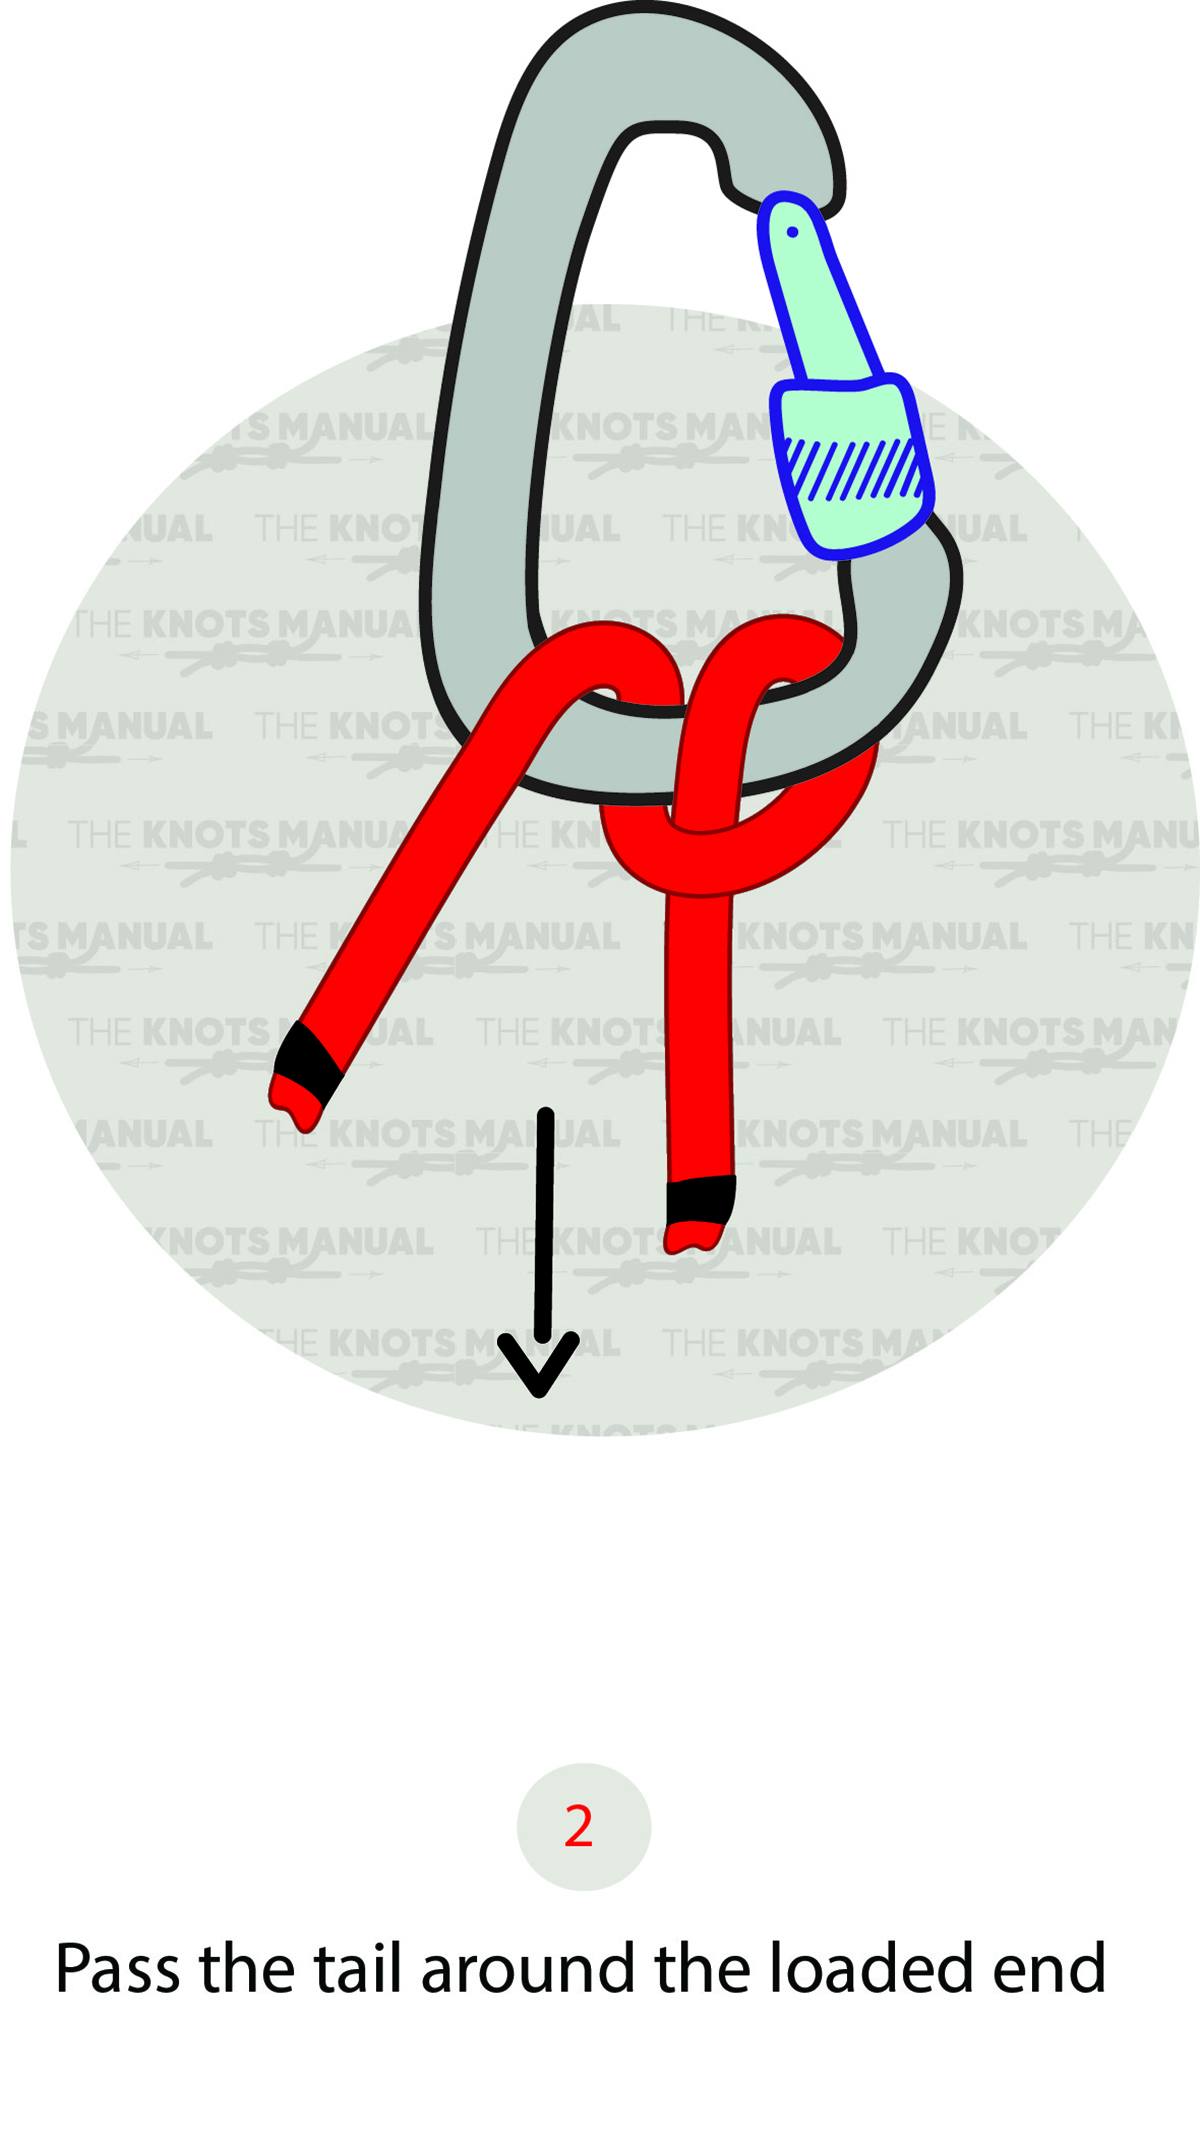
Take the standing (unloaded) end and pass it behind and around the working (loaded) end.
Step 3:
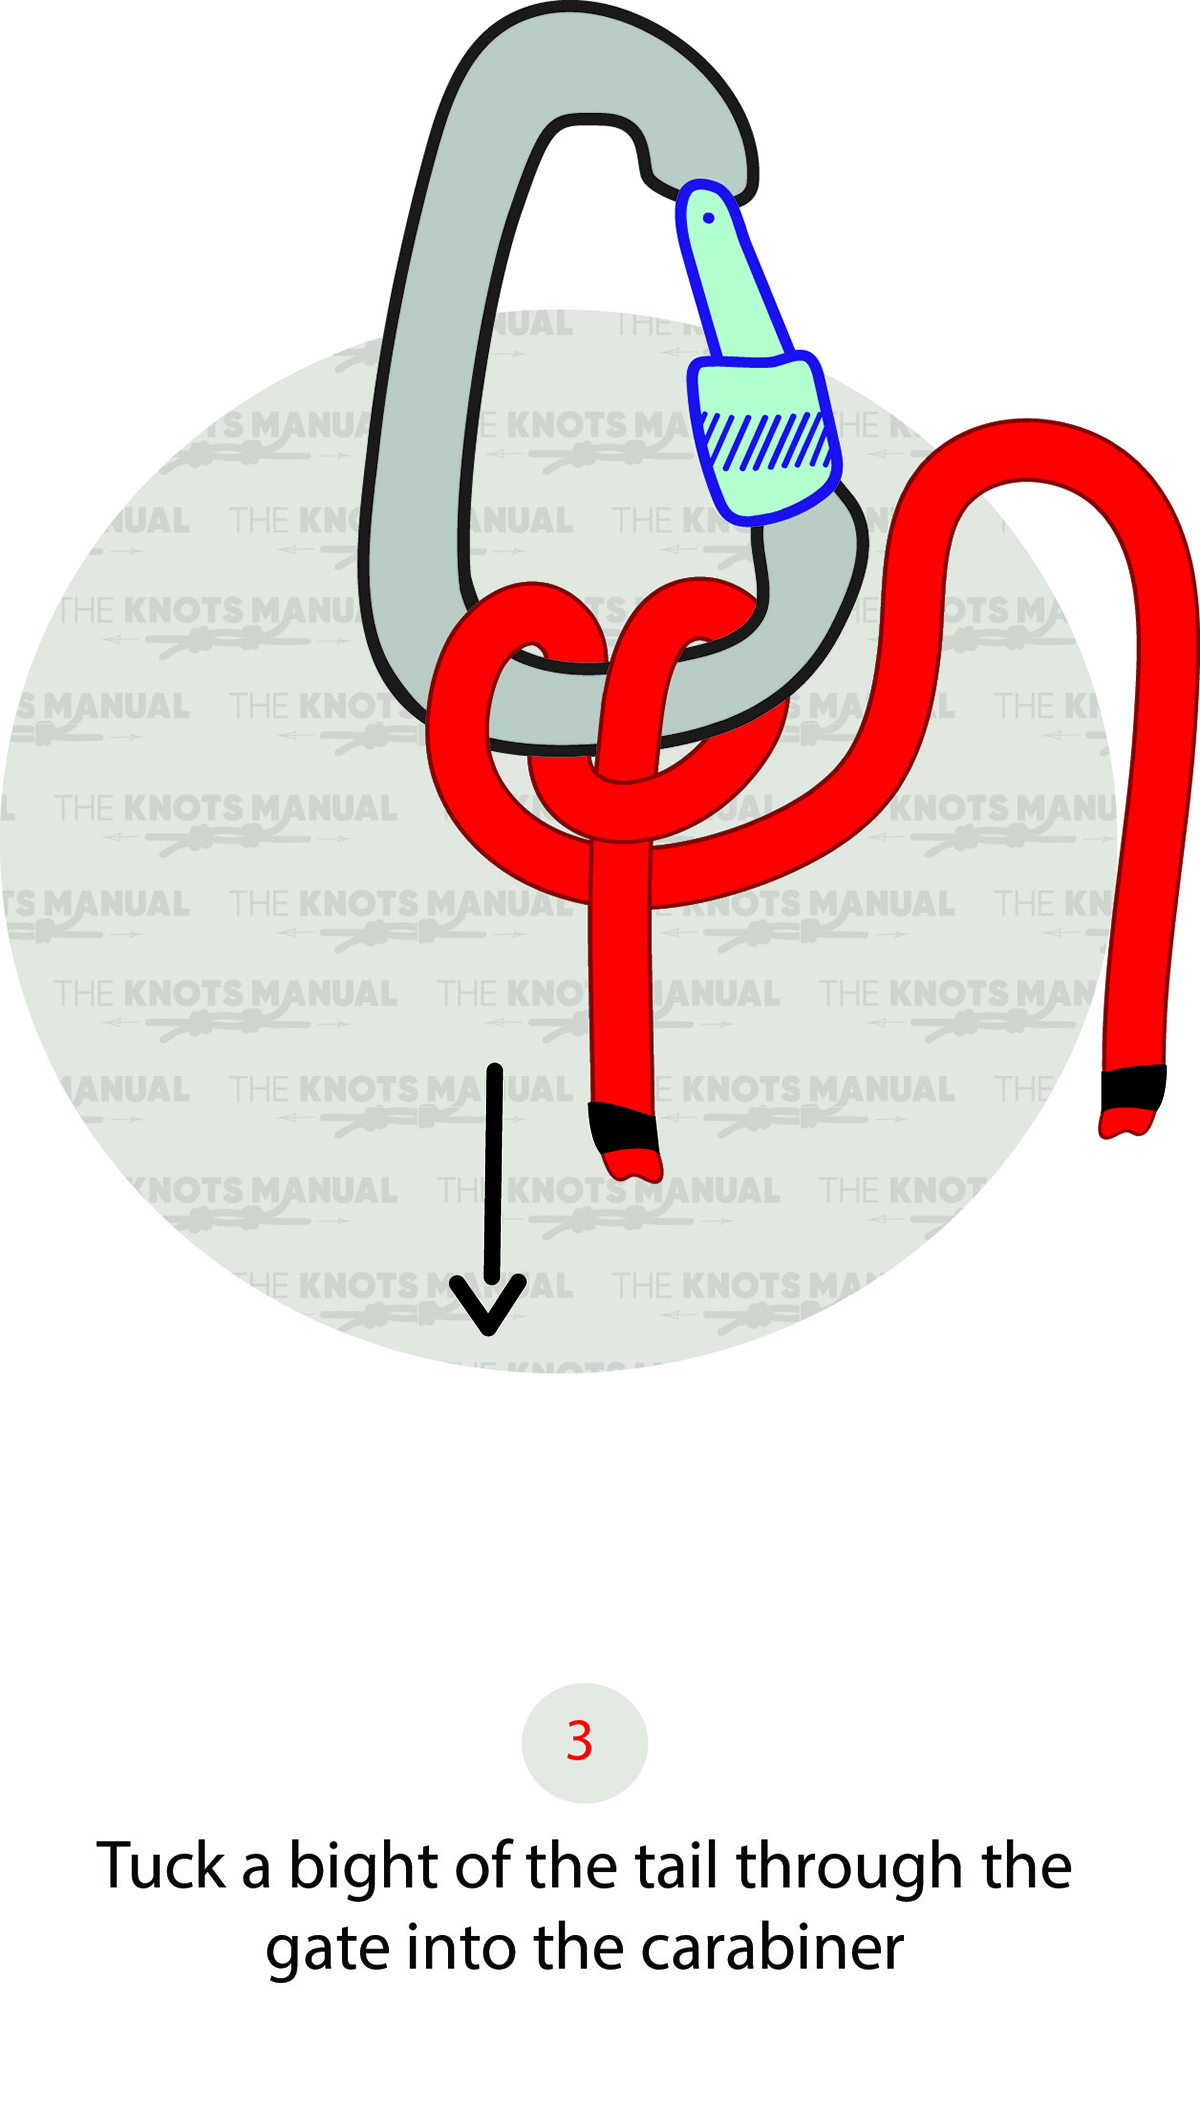
Pass the loaded end through the carabiner as illustrated above.
Step 3a:
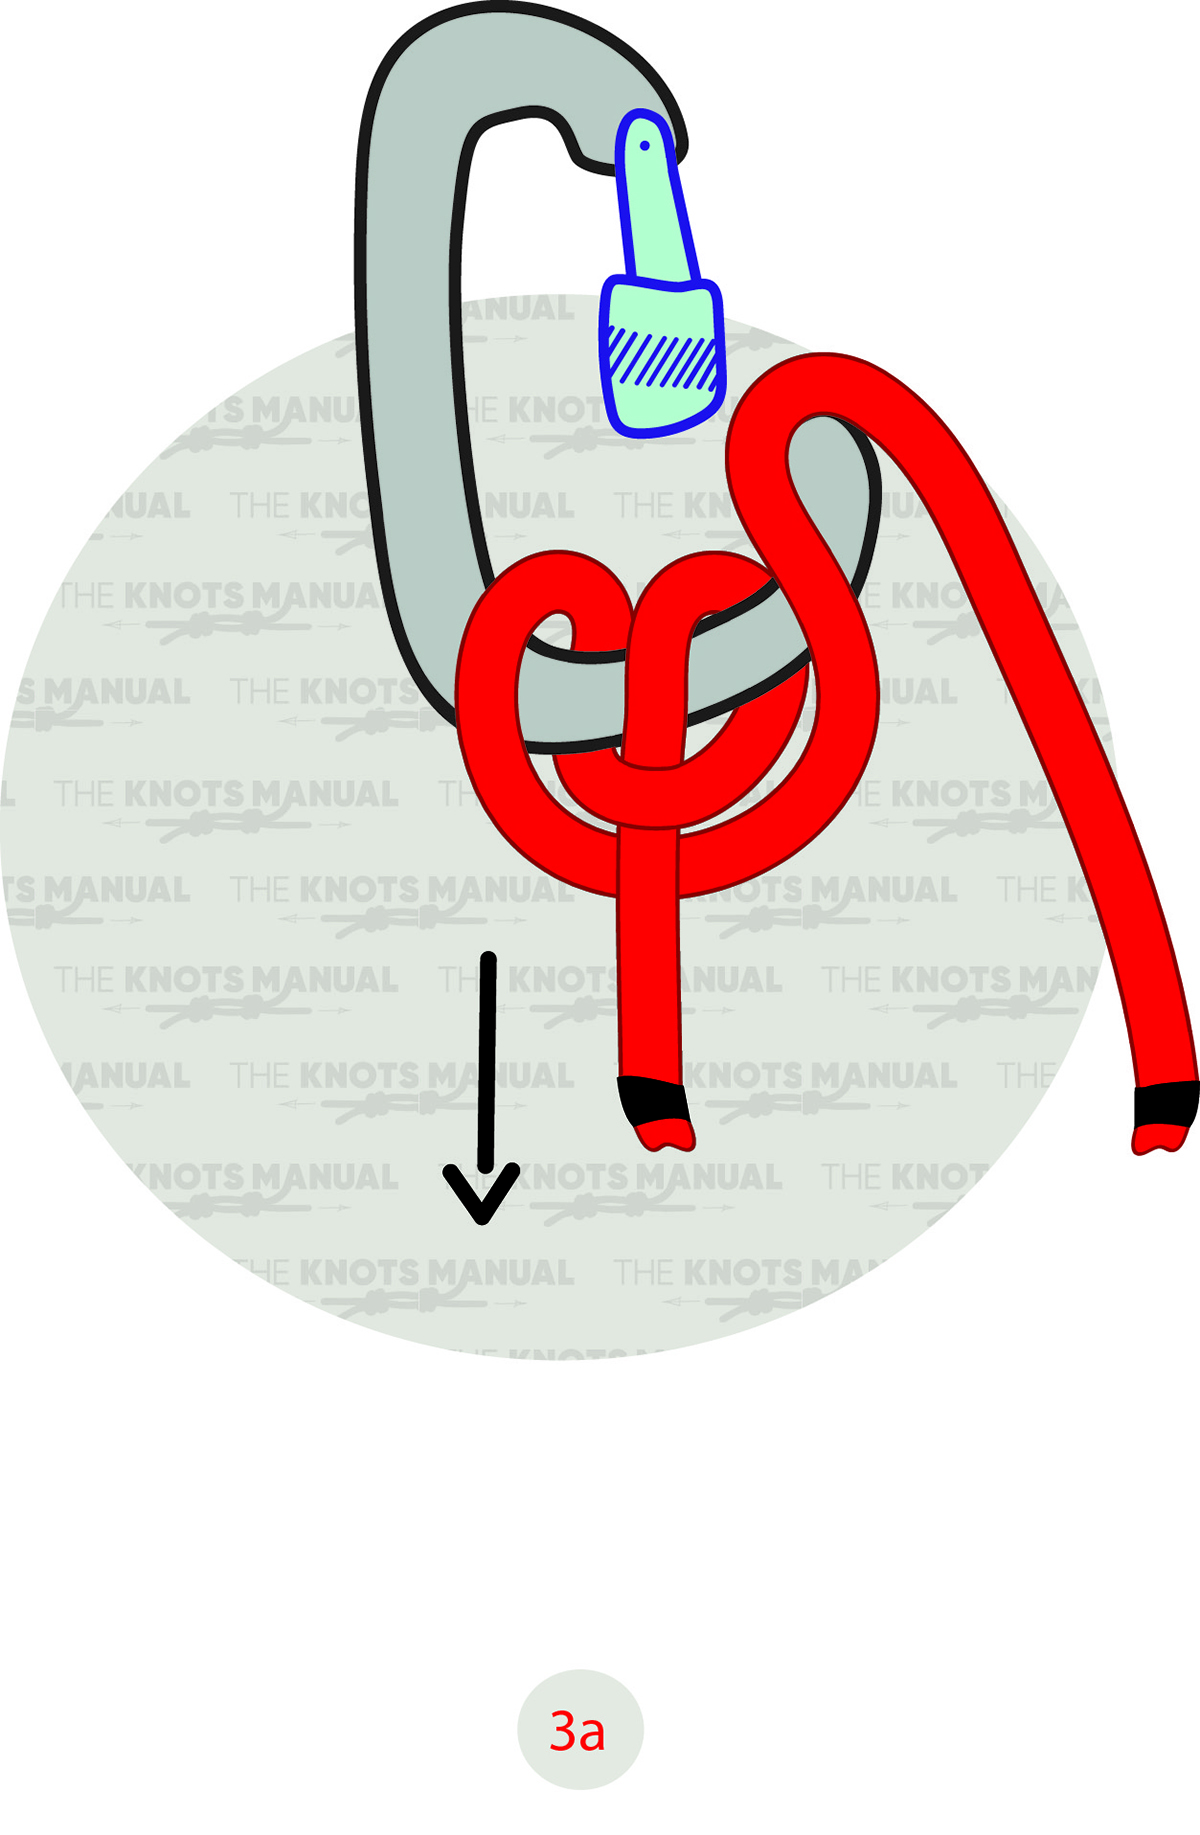
Lock the carabiner.
Step 4:
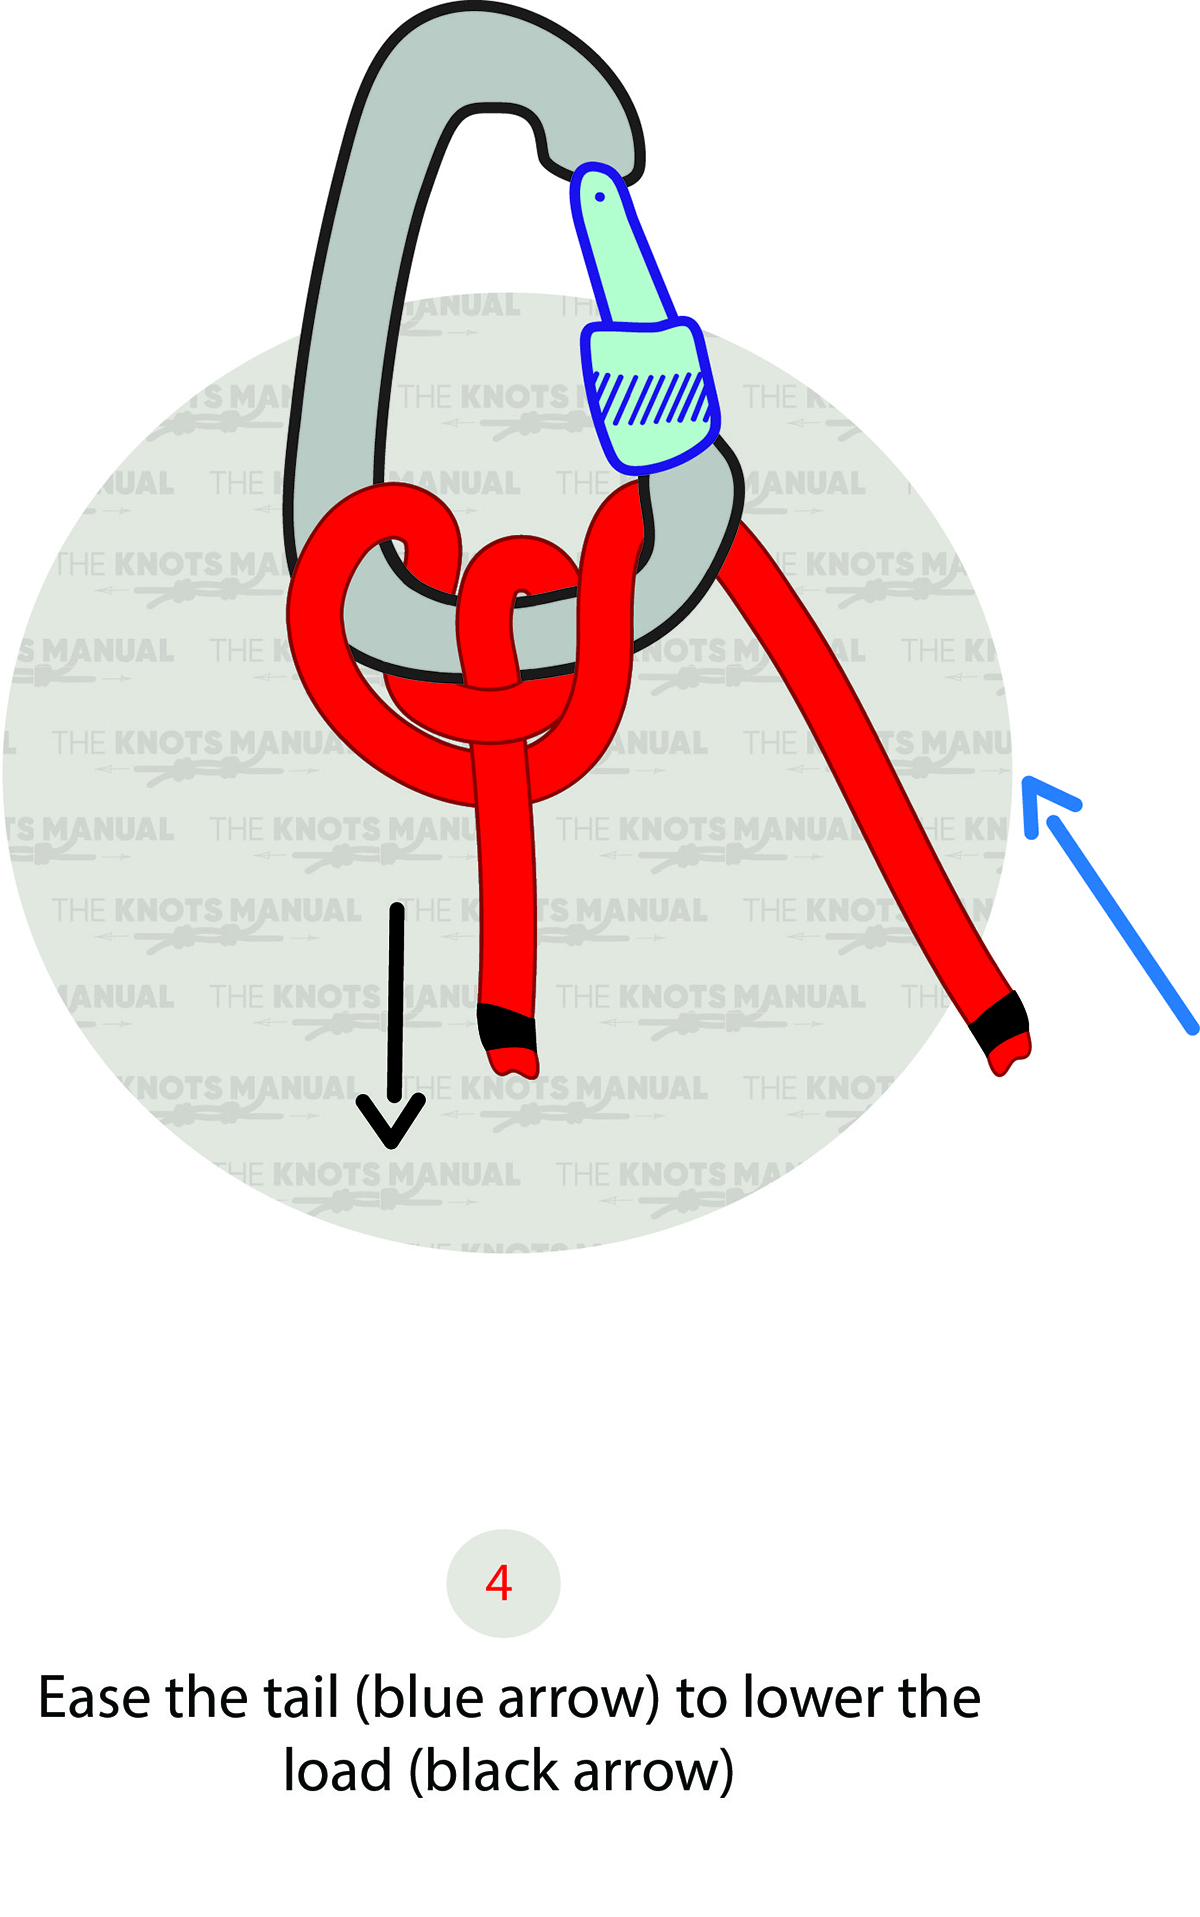
The working end (black arrow) should be attached to your climbing harness and the standing end (blue arrow) used for lowering.

