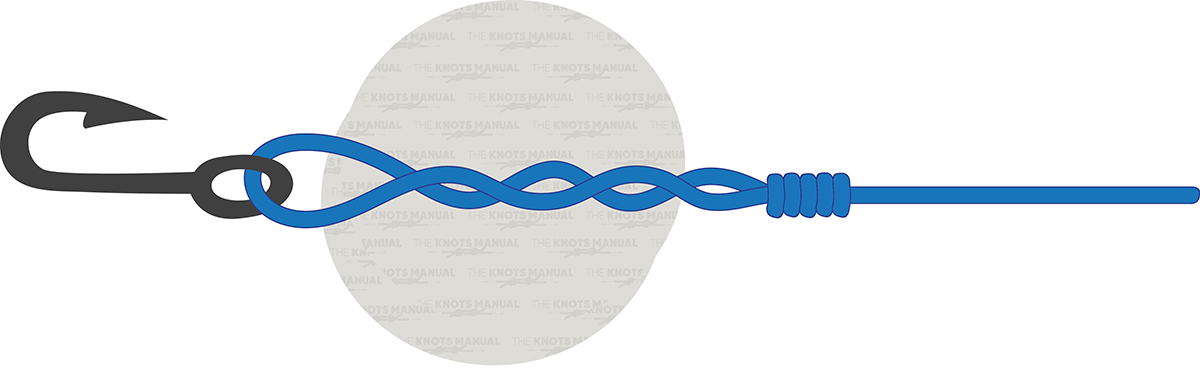
The Haywire Twist is a knot used by fishermen. The knot connects wire leaders to terminal tackle, such as hooks or lures. Known for being strong and slip-resistant, the Haywire Twist is a good choice for big-game fishing in saltwater where wire material is used.
Haywire Twist: Quick Tying Guide
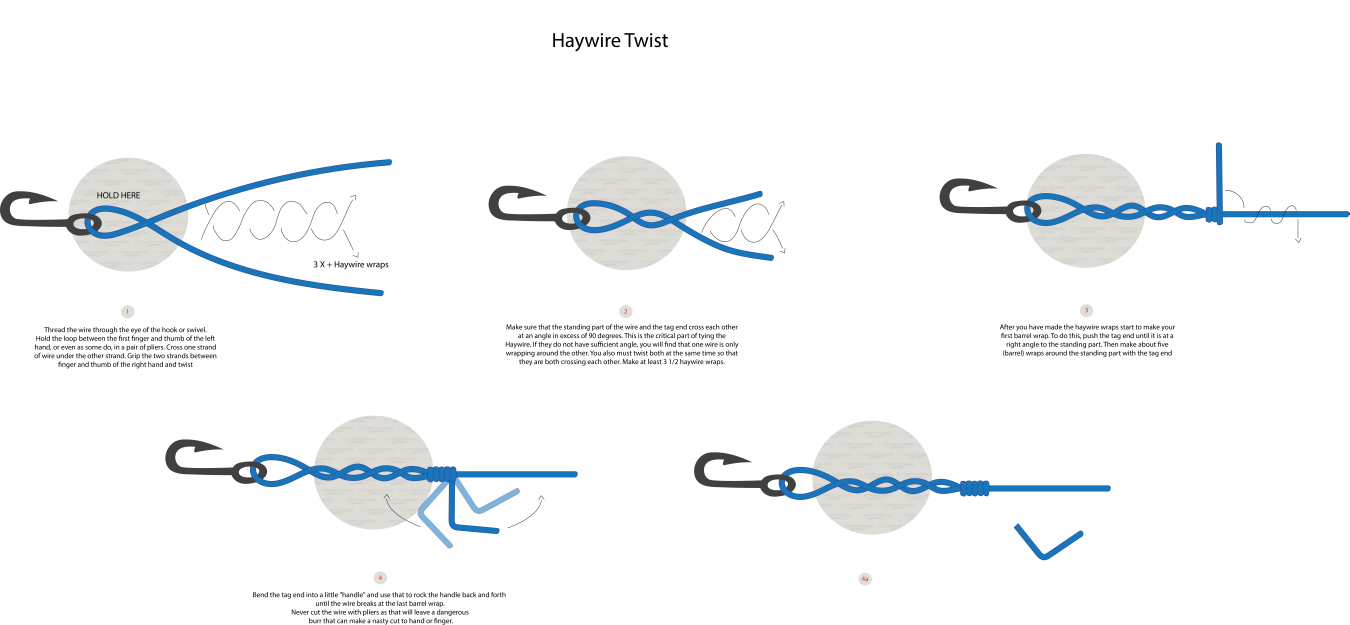
To tie a Haywire Twist knot, thread the wire through the eye of the hook or lure. Leave enough wire to form a twist, about four to six inches. Then twist the two wire ends around each other in tight, consistent loops. Once you’ve made the twists, secure it by wrapping the tag end around the standing wire with several barrel wraps. The wraps will help to lock the knot in place, ensuring it won’t slip under tension. Finish the knot by bending the wire back to create a clean break of the tag end.
Why Use the Haywire Twist Knot?
The Haywire Twist knot should be used when fishing for species with sharp teeth and a more durable knot is needed. Fish like mackerel or barracuda can easily cut through regular fishing lines, and this knot’s design prevents the wire from unwinding.
The knot’s simplicity makes it easy to tie with wire, and it’s much more reliable than using regular fishing knots on wire.
Knots Similar to the Haywire Twist Knot
Albright Knot – This knot is commonly used in saltwater fishing and is versatile for connecting two lines of different materials.
Double Loop Knot – The Double Loop Knot provides extra strength due to its double lines. It’s useful for connecting heavy leaders to hooks or lures and is also common in saltwater fishing.
Uni Knot – The Uni Knot works with most fishing lines, including braided and monofilament. It can be tied as a loop or as a simple line-to-line knot, making it a versatile option.
Palomar Knot – Known for its strength, the Palomar Knot is typically used with braided lines. It’s reliable for connecting hooks, swivels, and lures in both fresh and saltwater fishing.
Step 1:
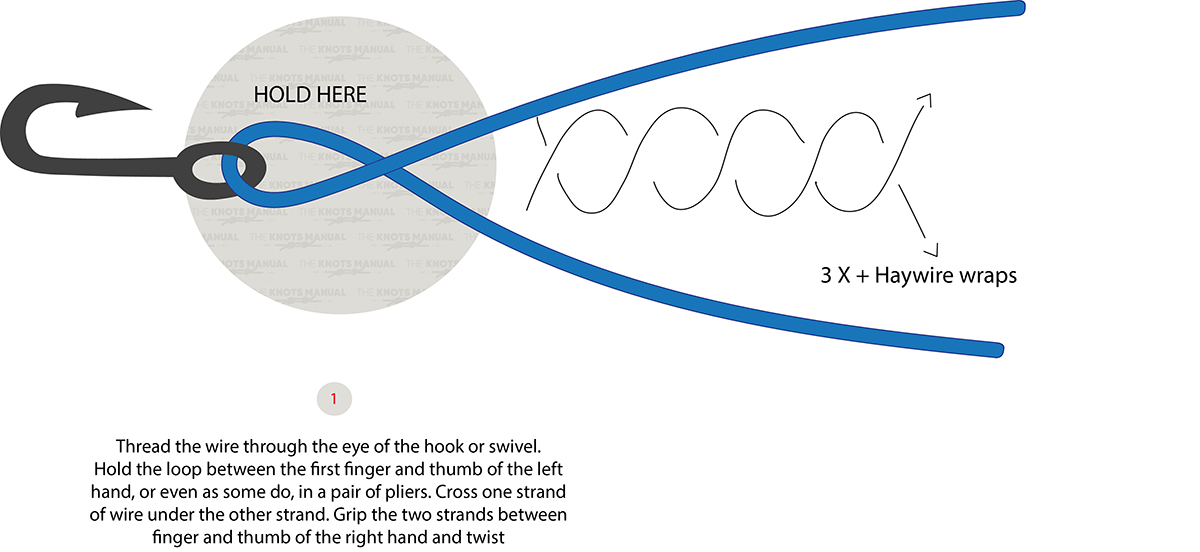
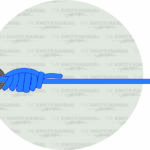
Begin by threading the wire through the eye of the hook or lure. Leave about four to six inches of excess wire for the twists.
Step 2:
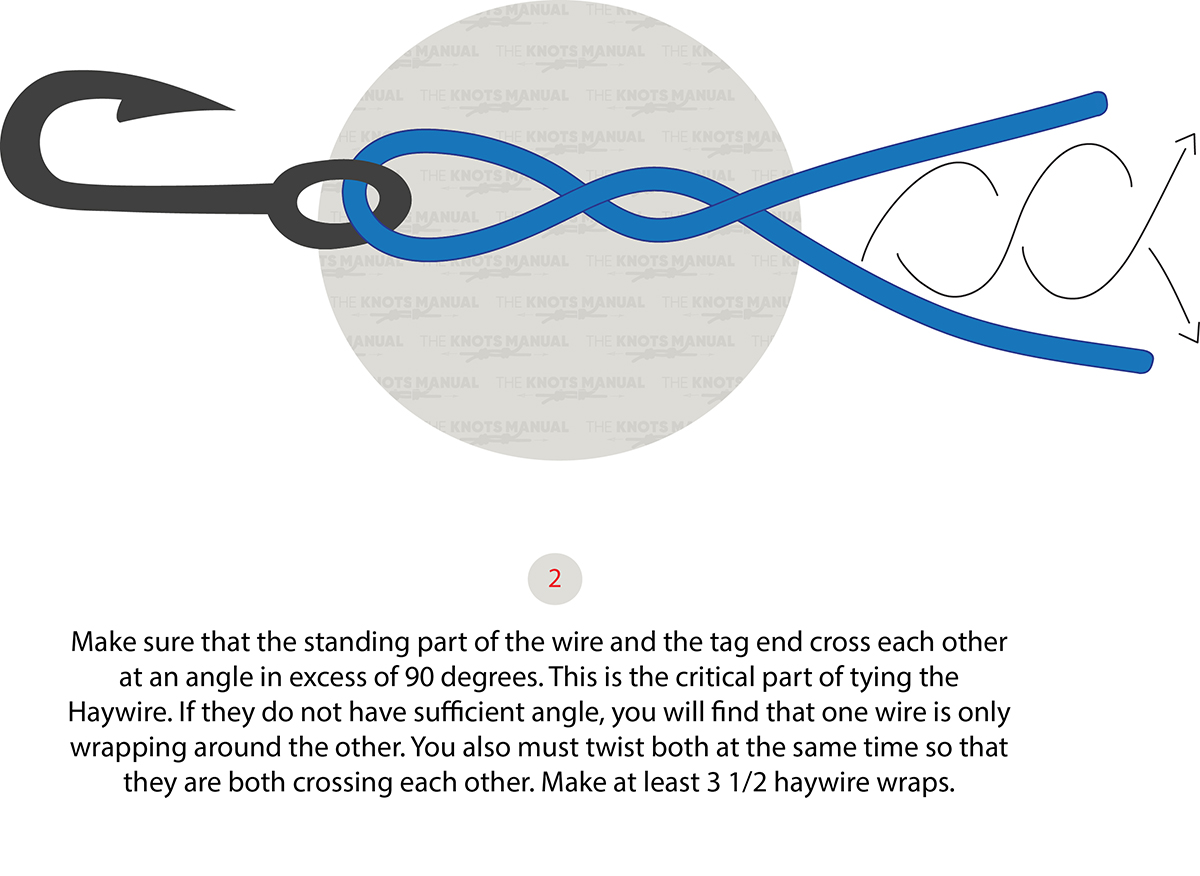
Wrap the two wire ends together in tight loops for approximately 3-4 twists. Ensure that the loops are as consistent as possible to prevent slippage.
Step 3:
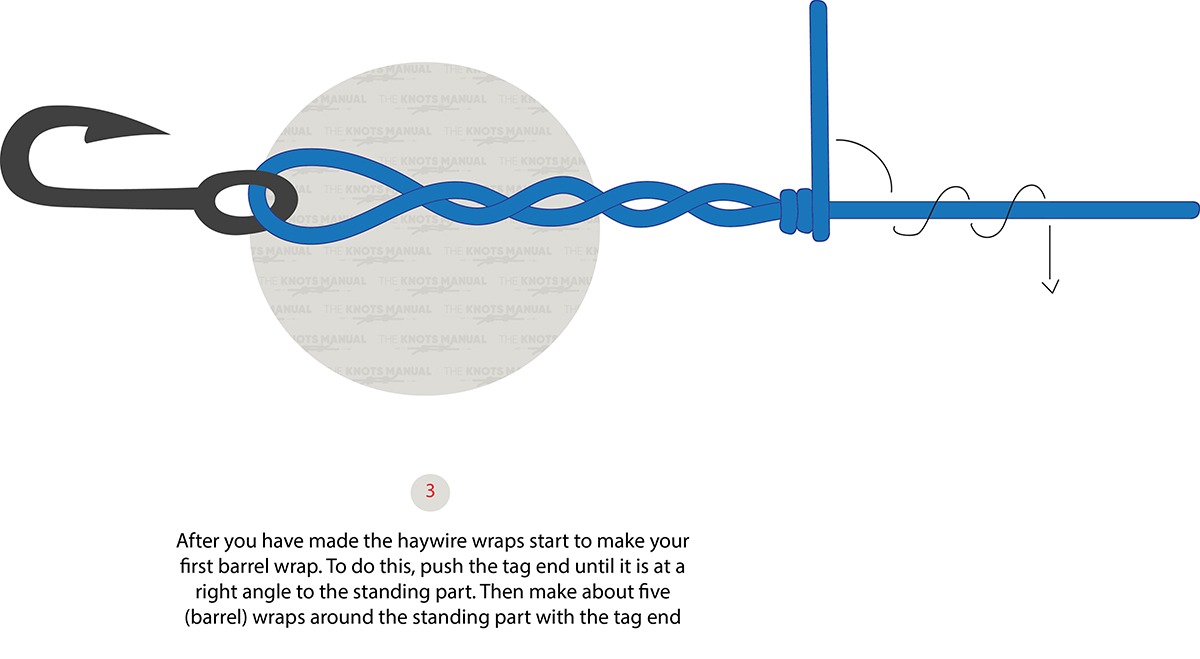
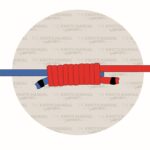
After completing the haywire twists, wrap the tag end around the standing wire several times to secure it with barrel wraps.
Step 3:
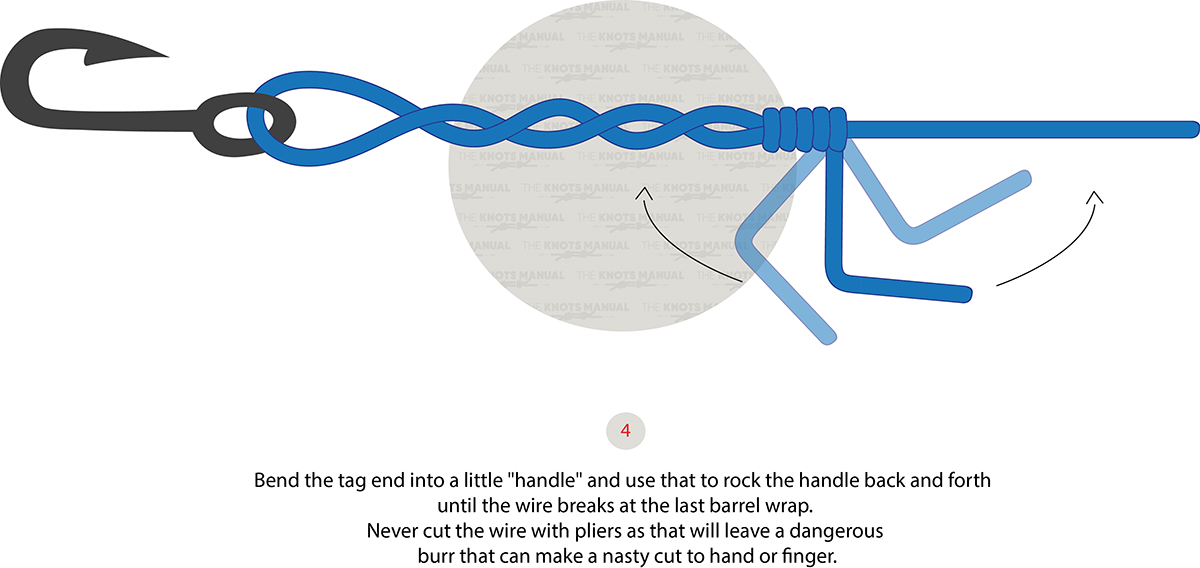
Step 4a:
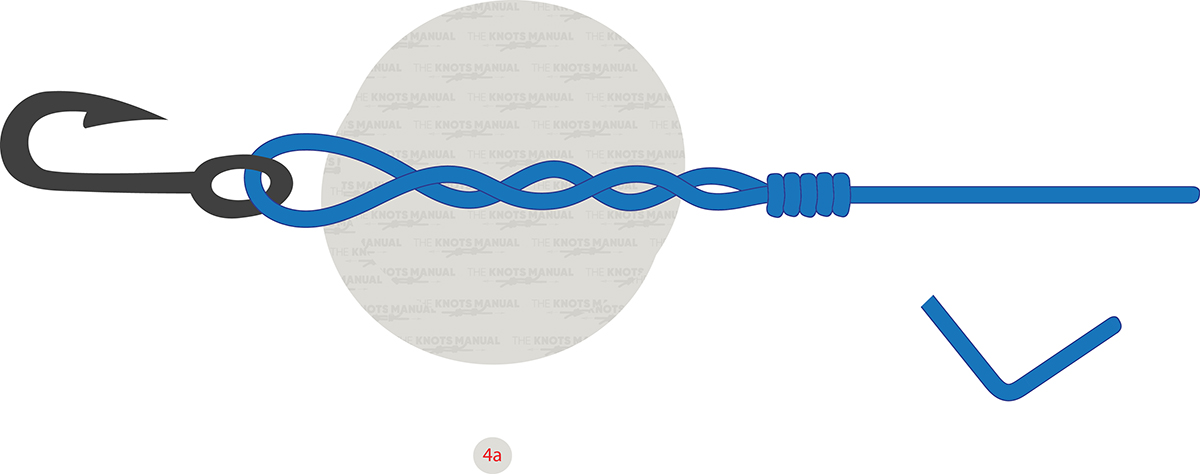
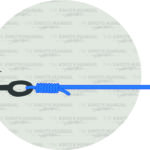
Bend the wire back sharply and rock back and forth to create a clean break of the tag end. This step helps prevent any sharp edges that could snag.