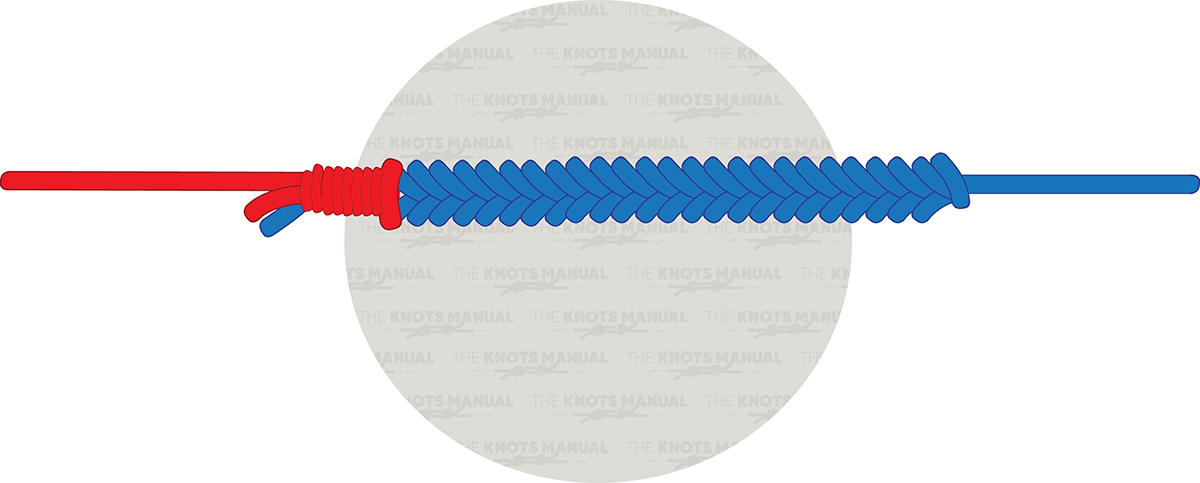
The FG Knot is a secure fishing knot used to connect two lines, like a braided line to a monofilament or fluorocarbon leader. Many saltwater fishermen appreciate this knot for its strength and smoothness that allows it to move through fishing rods without getting stuck. While no one knows who first made the FG Knot, it has become a favorite among experienced anglers worldwide for its strong hold.
FG Knot: Quick Tying Guide
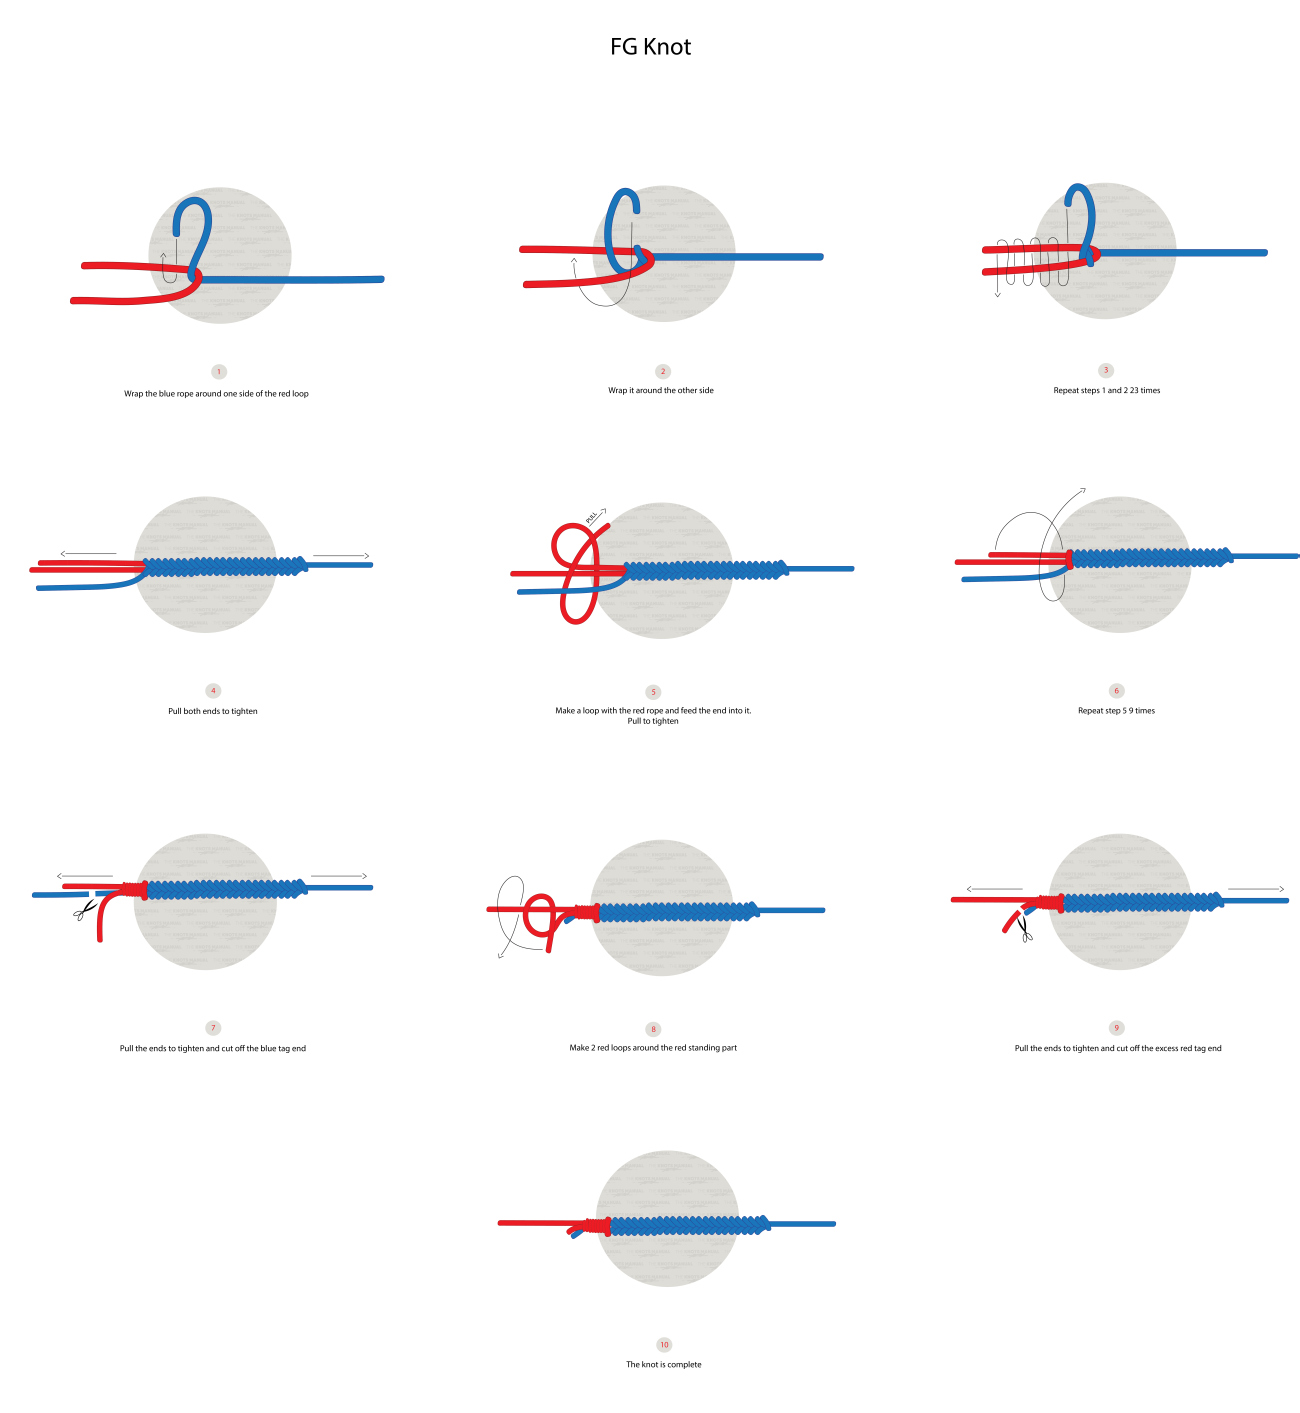
To tie an FG Knot, first fold the leader line to make a small loop. Then thread the main line through the loop, leaving a few inches of extra line for wrapping. Wrap the main line around both strands of the leader in different directions, about 15 to 20 times. After that, secure the wraps with several small knots, pull the knot tight, and trim off any extra ends to finish.
Why Use an FG Knot?
The FG Knot is popular for its ability to tie two lines of different sizes together while still maintaining most of the strength in each line. Ocean fishermen prefer this knot because it can hold up under the high tension of larger fish.
The FG Knot is also slim, so it moves smoothly through rod guides, making it easy to cast. Although it can take some practice to master, the knot’s benefits are worth the effort.
Knots Similar to the FG Knot
Double Uni Knot – Useful for connecting lines of different sizes and a reliable option for both saltwater and freshwater fishing.
Alberto Knot – A strong option for connecting lines of different thicknesses, with similar durability and strength as the FG Knot.
Blood Knot – Great for joining lines of similar thickness, often used in fly fishing for its clean profile and strength.
Surgeon’s Knot – Quick and easy to tie, used for connecting lines of similar diameter in situations where a speedy knot is needed.
Step 1:
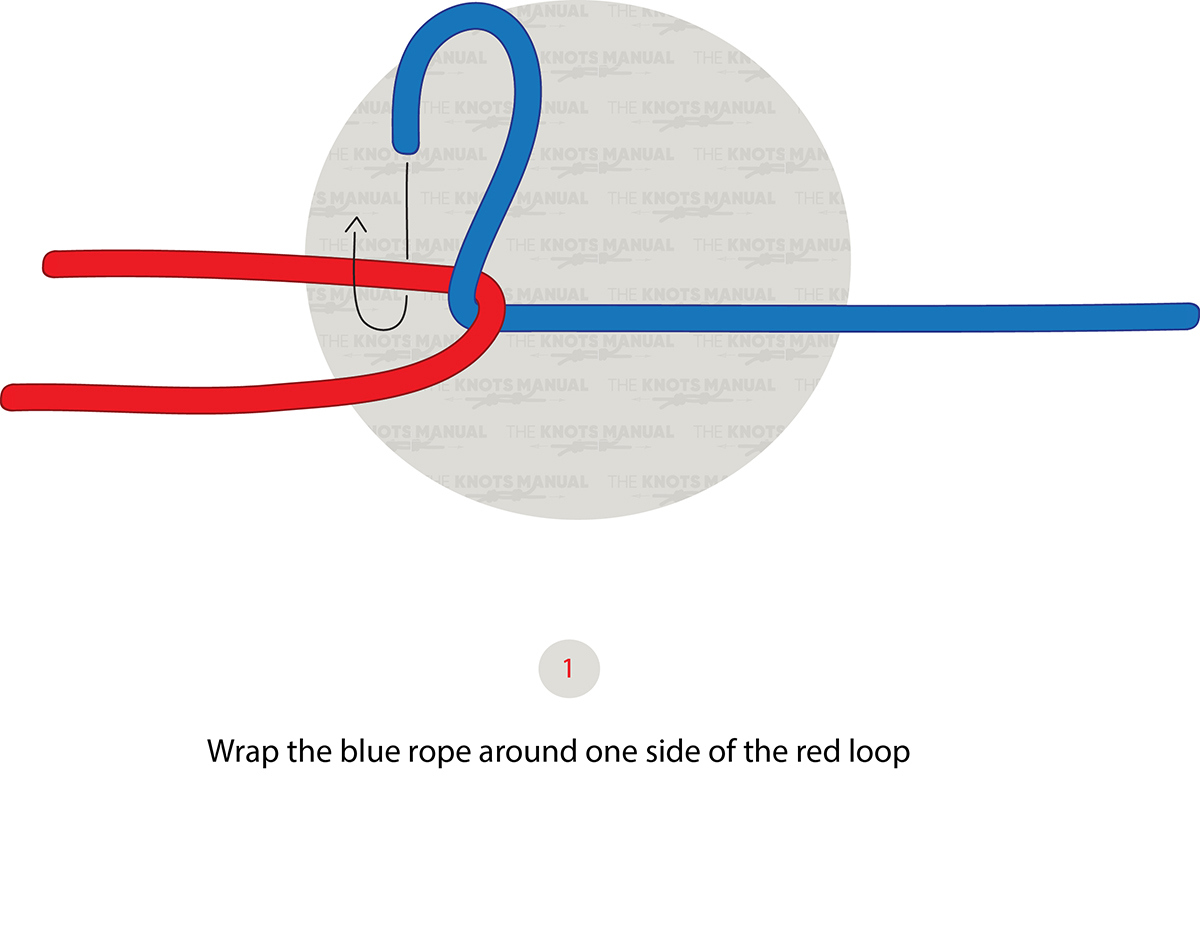
Create a Loop and Thread the Braid: Fold back the leader line to create a small loop with several inches of overlap and pass the main braided line through the leader loop, leaving enough slack to work with.
Step 2:
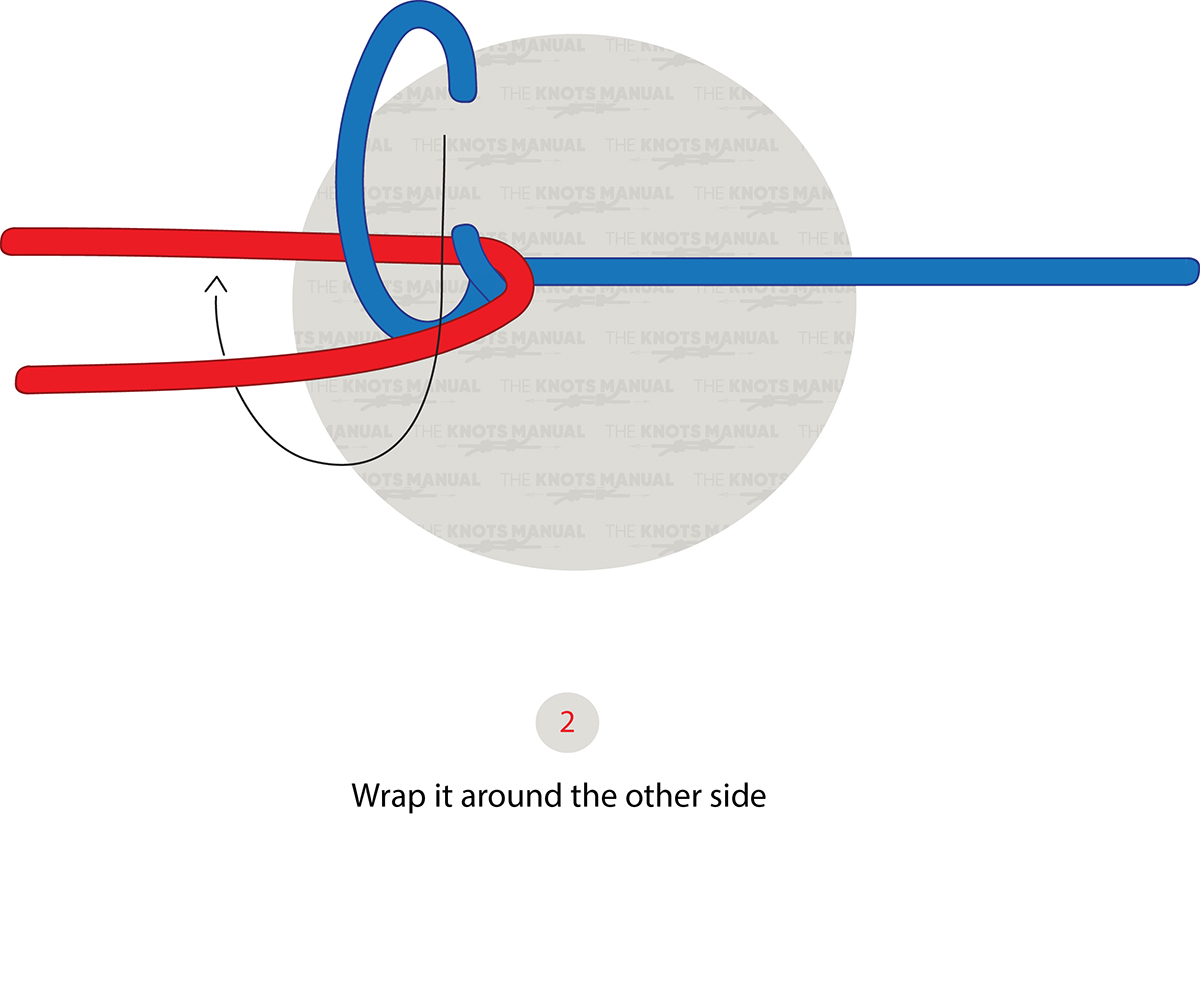
Make a Wrap: Wrap the braided line around both strands of the leader.
Step 3:
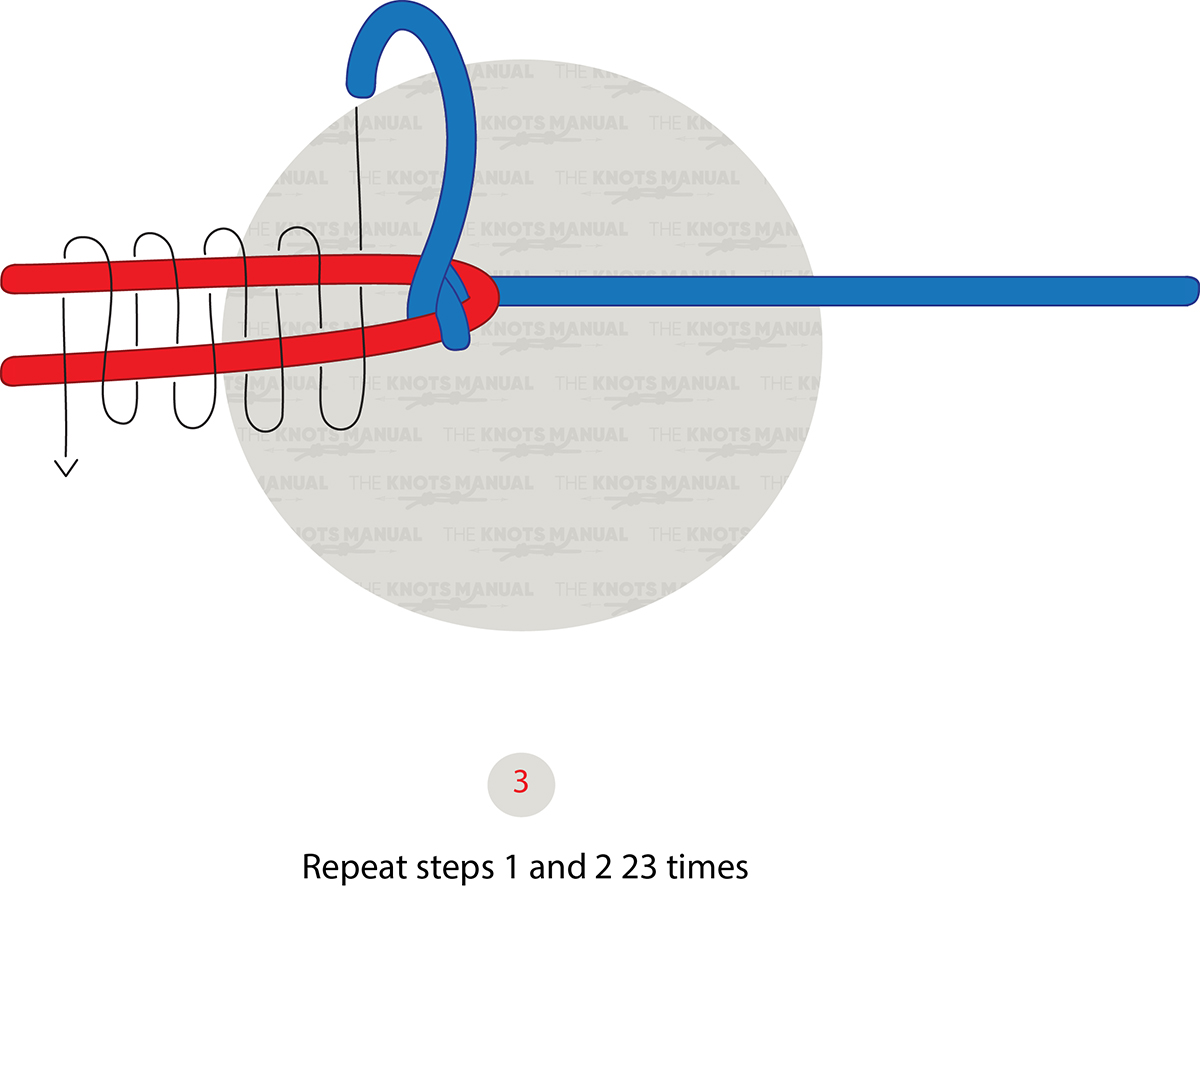
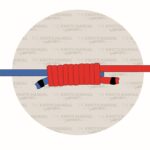
Alternate Wraps: Repeat the wraps, alternating over and under, 23 times.
Step 4:
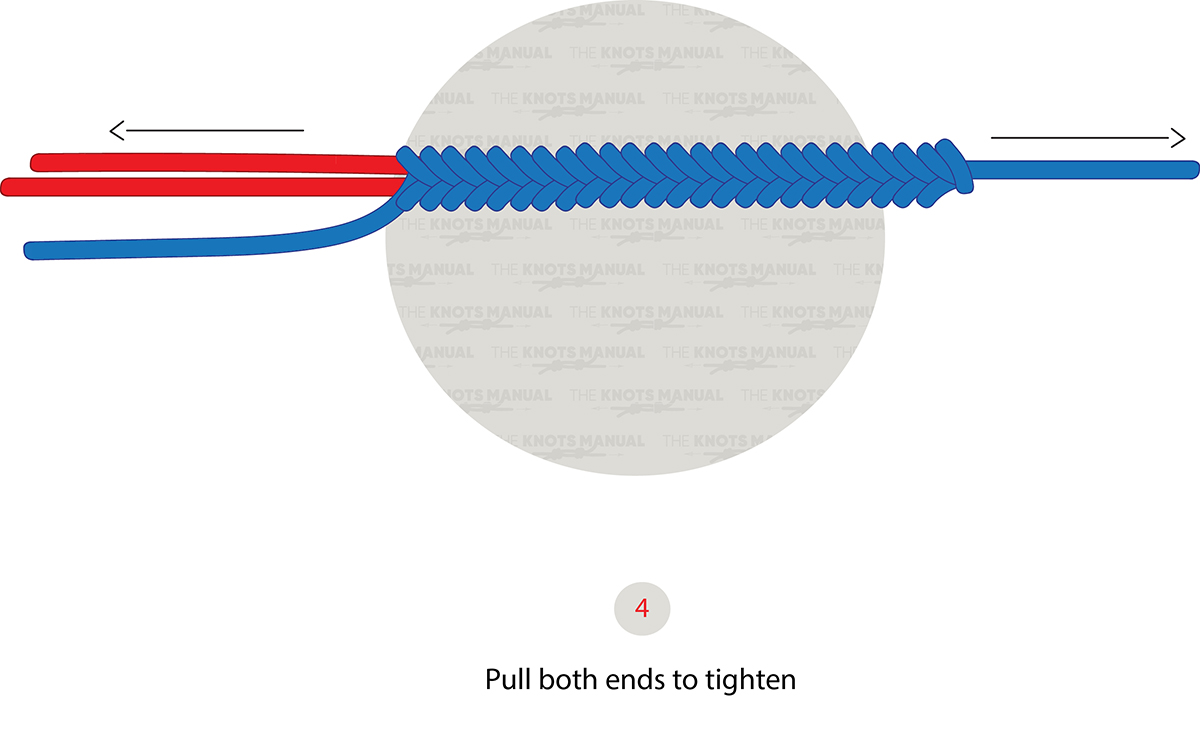
Tighten: Pull both the leader line and the braided line from both ends to tighten.
Step 5:
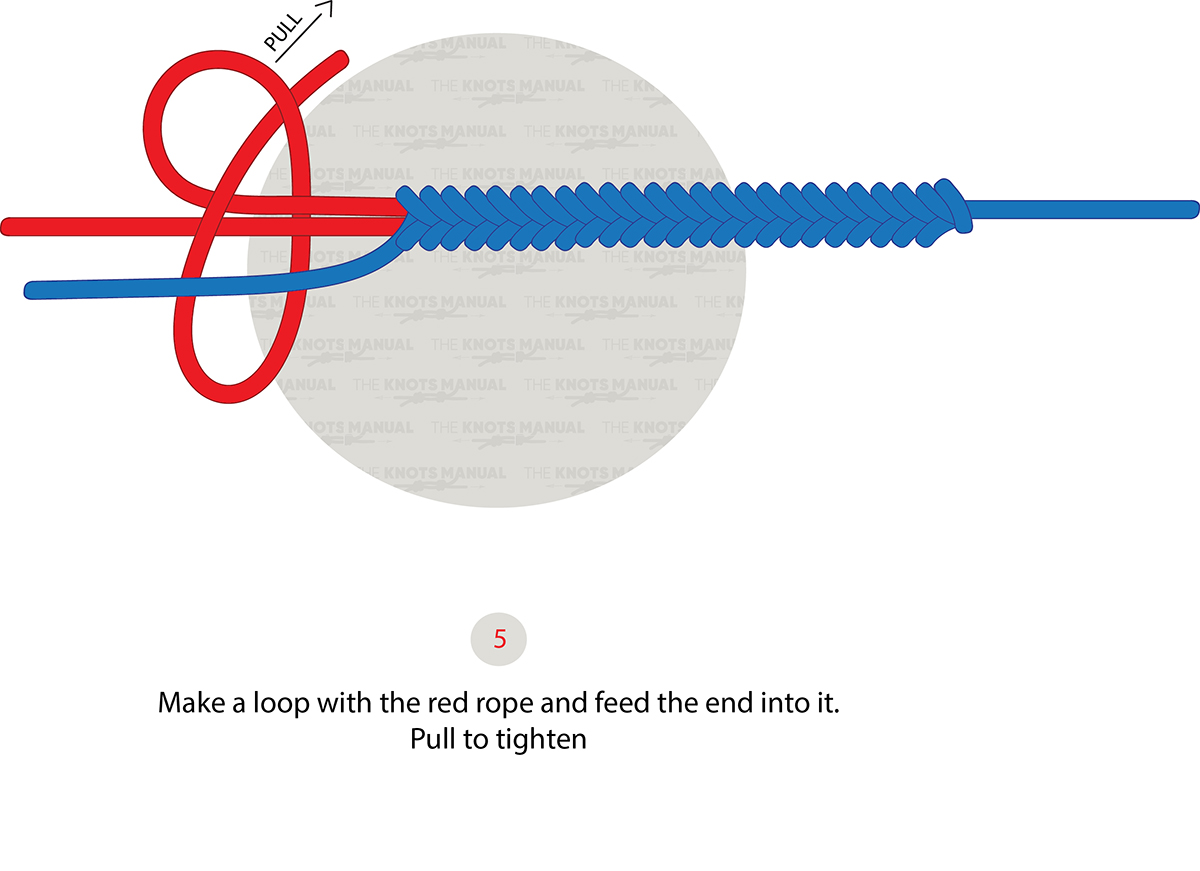
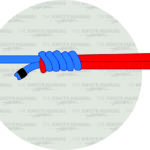
Secure Wraps with a Small Knot: Secure the wraps by making a loop with the leader line and feeding the end into it.
Step 6:
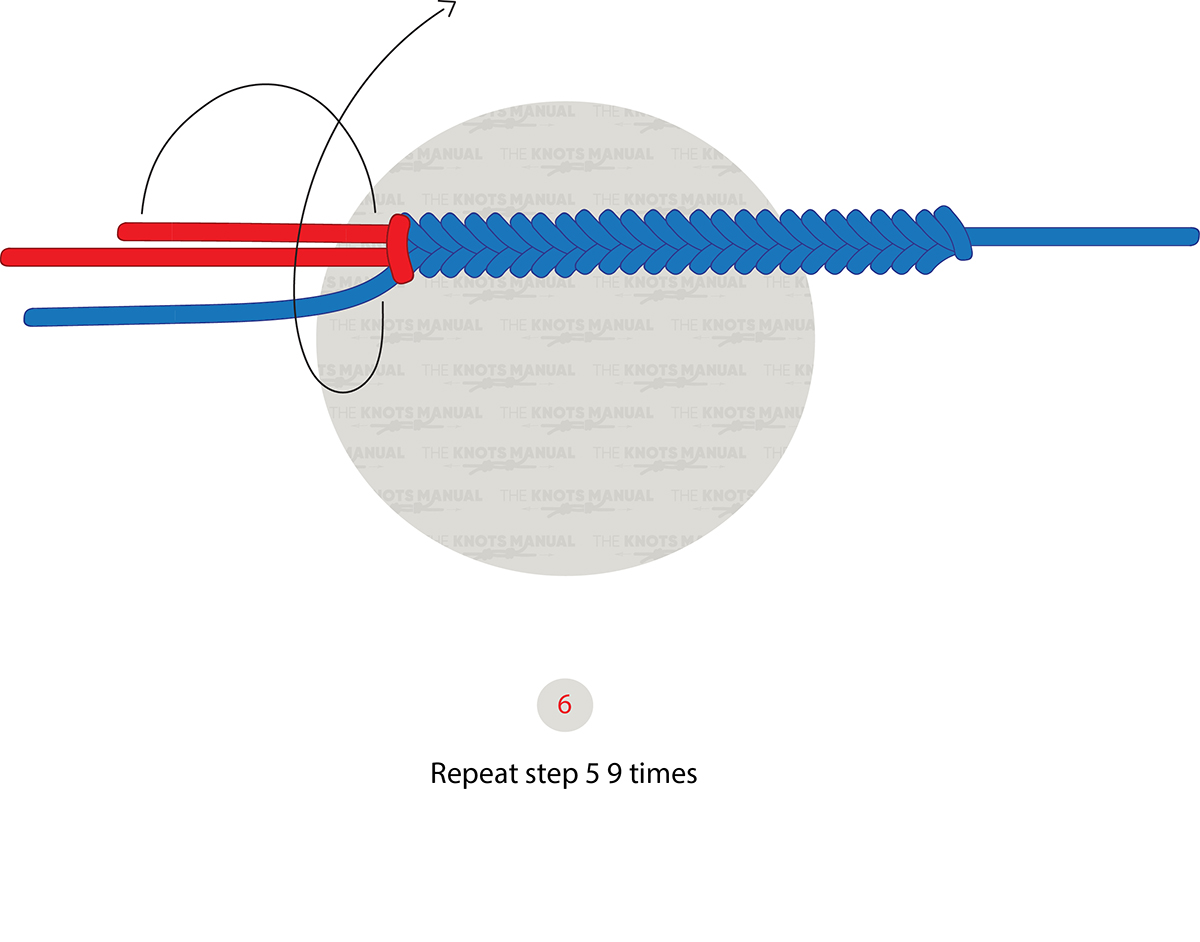
Finish with More Small Knots: Tie nine more small knots for added security.
Step 7:
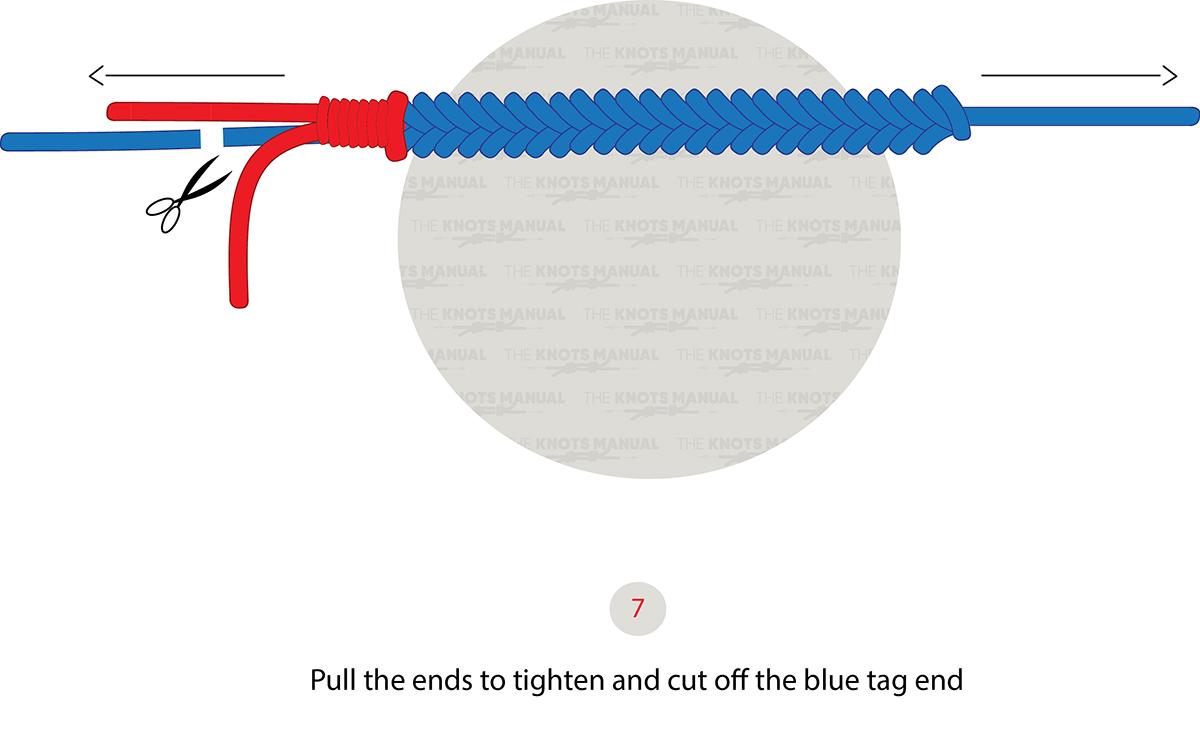
Tighten and Trim the Knot: Pull both ends to tighten the knot and cut off the braided line end.
Step 8:
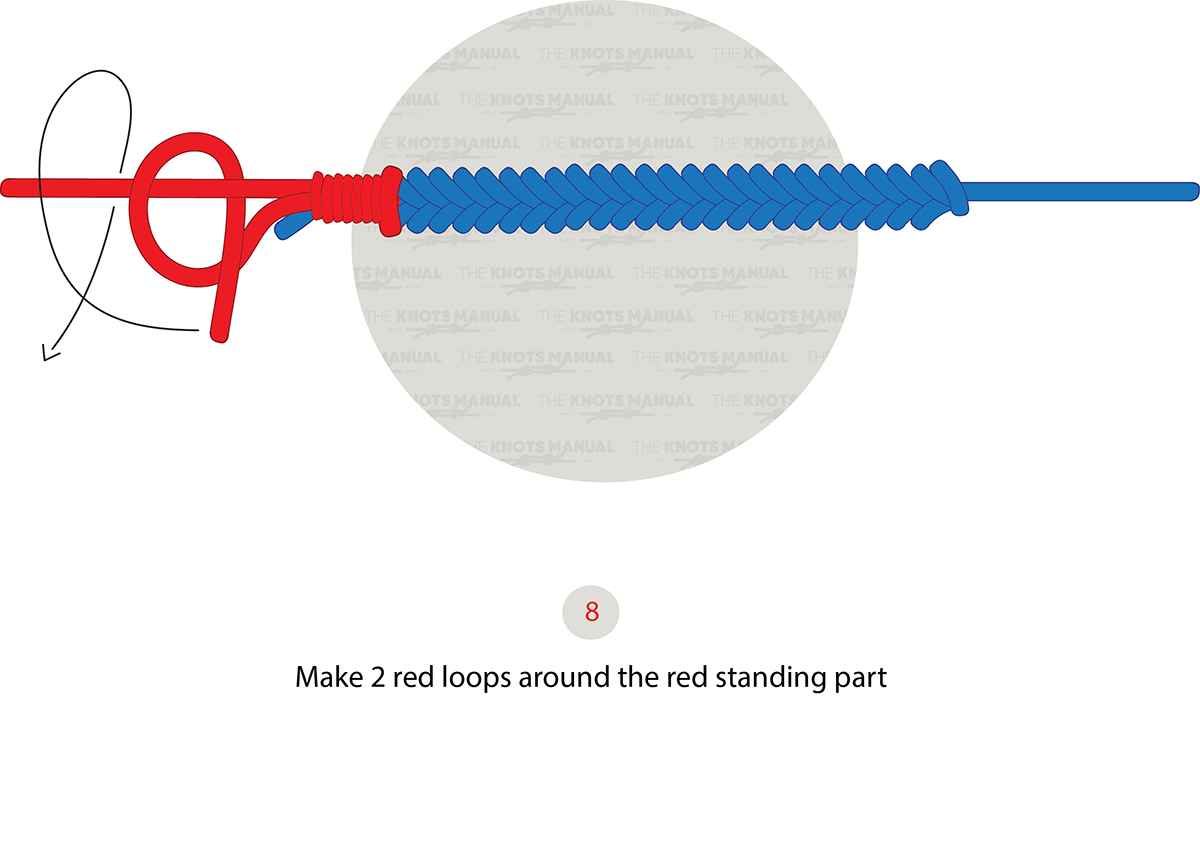
Make Loops: Create 2 more loops with the leader around itself.
Step 9:
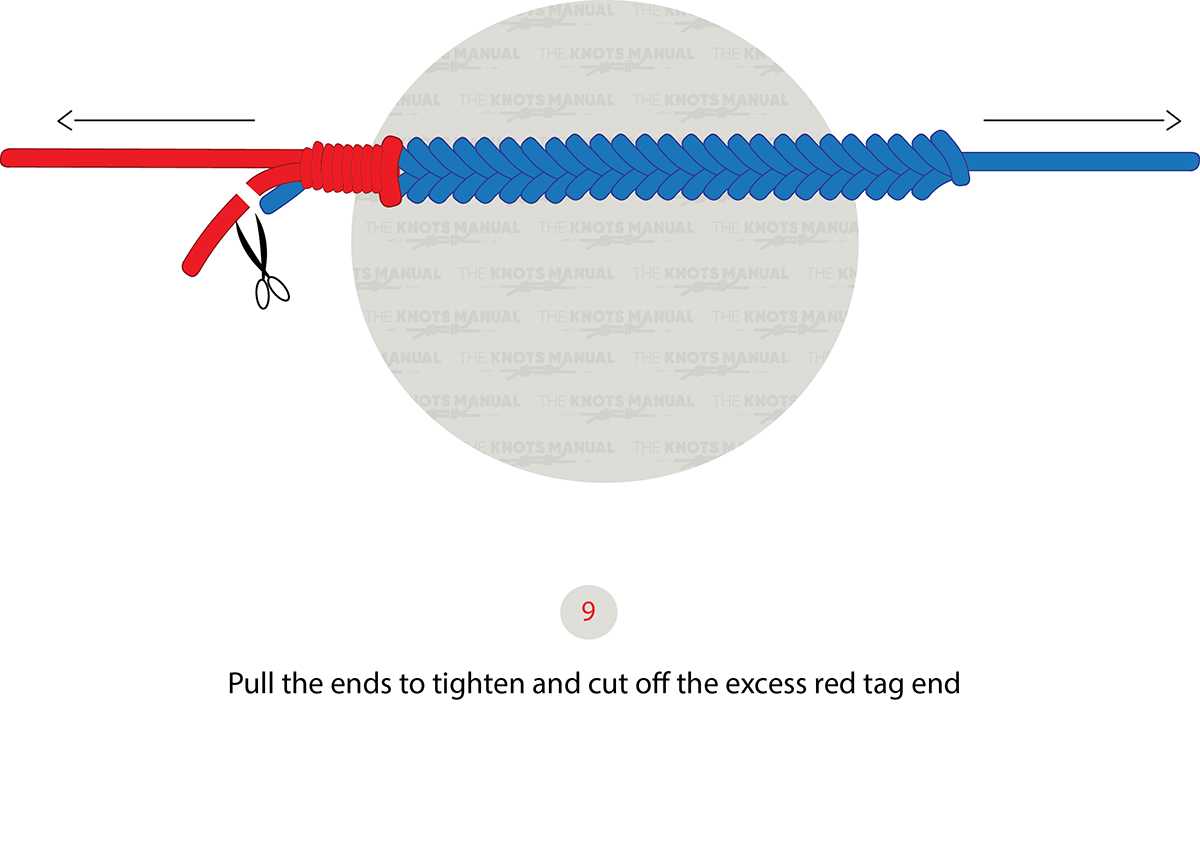
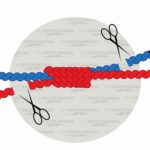
Secure and Cut: Give the knot a strong pull to ensure it’s secure and won’t slip. Trim off the excess leader line.
Step 10:
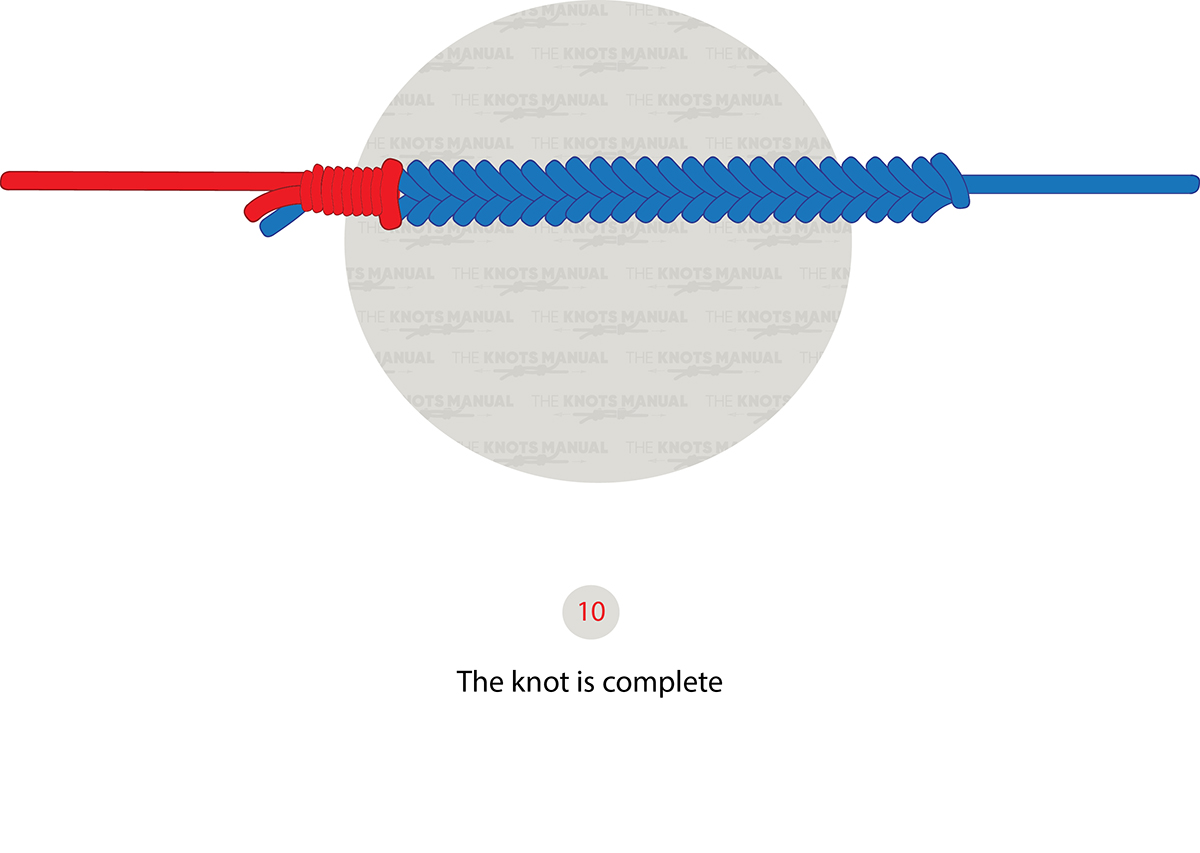
Smooth the Knot: Roll the knot between your fingers to smooth out any bumps, ensuring it will pass through guides with ease.