The Fireman’s Coil Knot is a practical and efficient way to store and transport ropes. Designed for quick deployment and easy handling, this coil method is widely used by firefighters, climbers, and rescue workers. Its simplicity and reliability make it an essential skill for professionals and hobbyists who work with ropes.
Fireman’s Coil Knot: Quick Tying Guide
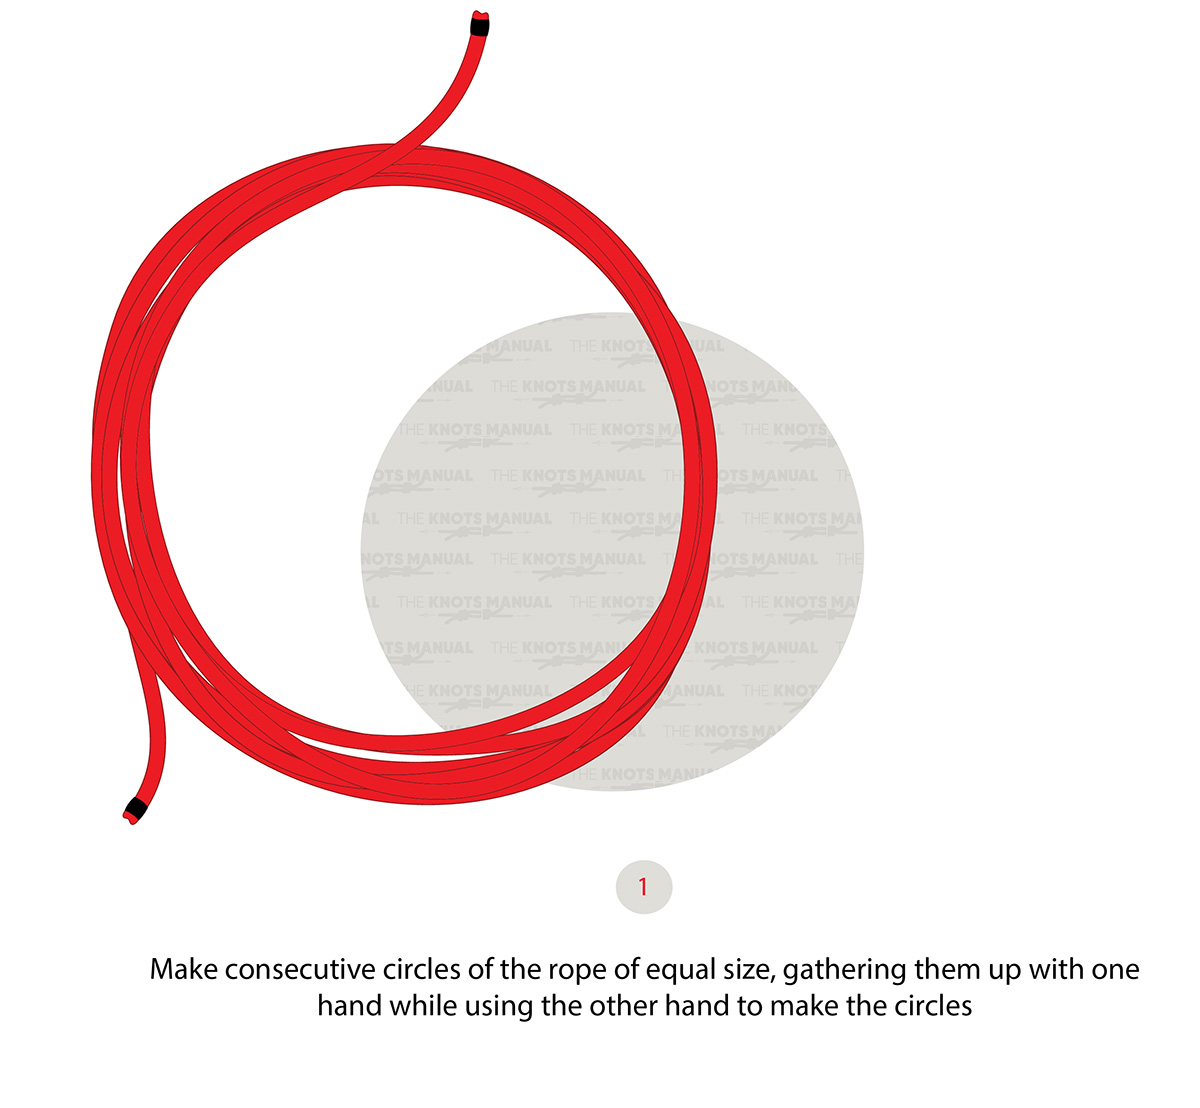
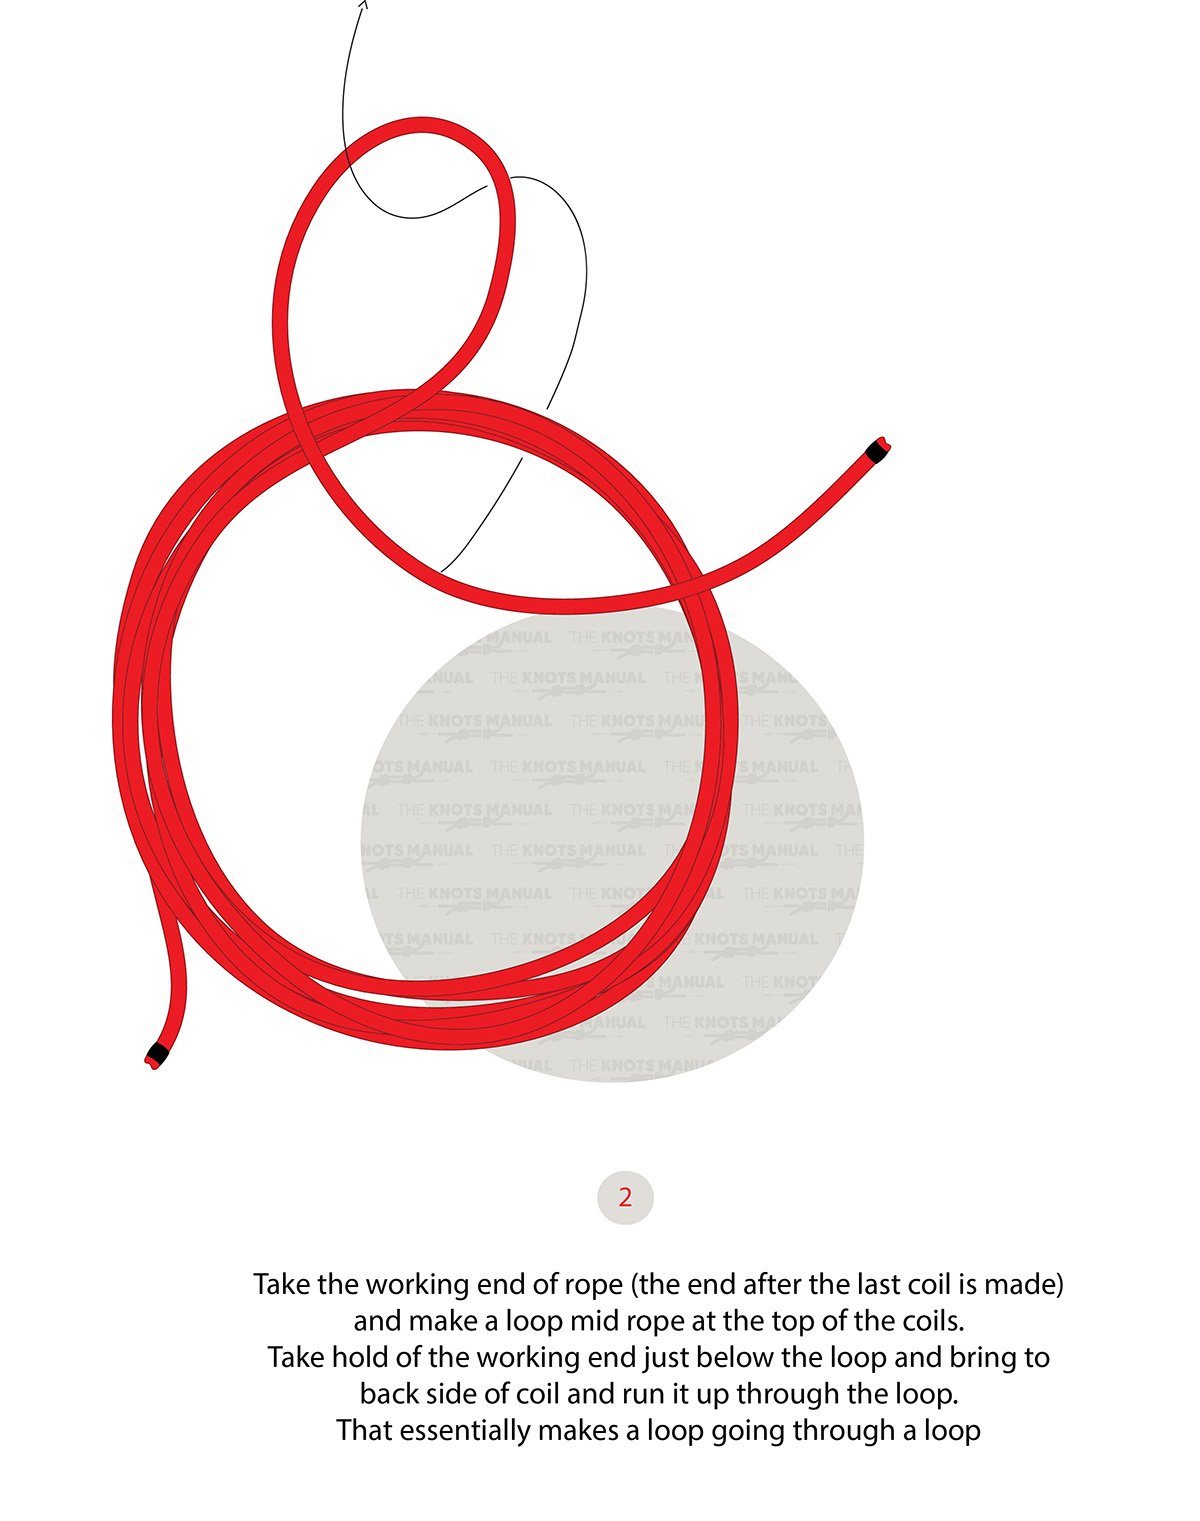
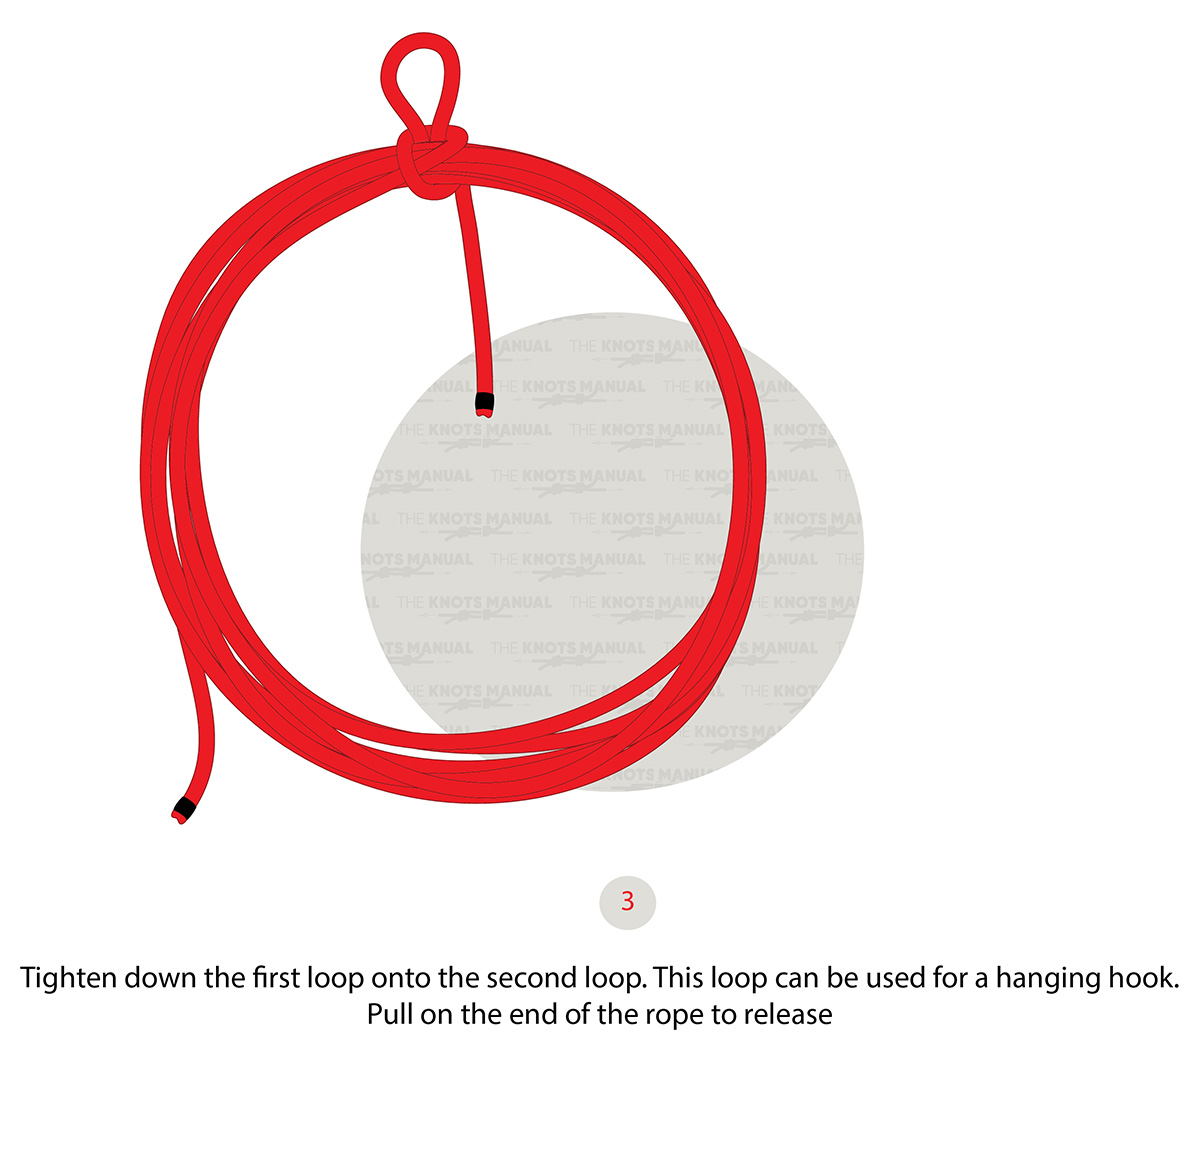
To tie a Fireman’s Coil Knot, start by coiling the rope in your hand or on a flat surface by making consecutive circles of the rope in equal-sized loops. Once the entire rope is coiled, take the working end and create a loop mid-rope at the top of the coils. Then grab the working end of the rope just below the loop and bring it to the back side of the coil and pass it up through the loop. Finally, tighten the first loop onto the second loop, leaving a loop that can be used for a hanging hook. The knot can easily be released by pulling the end of the rope.
Why Use a Fireman’s Coil Knot?
The Fireman’s Coil Knot is a trusted choice for organizing ropes because it keeps them tangle-free and ready for immediate use. Its balanced design ensures the rope unravels smoothly when needed, making it perfect for situations that require rapid action. While the coil method is strong and convenient, it’s best suited for static storage rather than applications involving high tension or dynamic loads.
Knots Similar to the Fireman’s Coil Knot
Sailor’s Coil Knot: A traditional method for coiling and securing ropes, offering a more secure hold than the Quickie Coil.
Figure-Eight Knot: While primarily used for creating loops, this knot can also be used to secure the ends of ropes to prevent unraveling.
Clove Hitch: A versatile knot for temporarily securing ropes to poles or rails, often used alongside the Sailor’s Coil.
Quickie Coil Knot: A faster, simpler option for coiling ropes, ideal for temporary storage.

Step 1:

Coil the rope by making consecutive circles, ensuring the loops are uniform in size and gathering them up with one hand while making the circles with the other hand.
Step 2:

Create a loop going through a loop by taking the working end and making a loop mid-rope at the top of the coils. Then grab the working end of the rope just below the loop and bring it to the back side of the coil and pass it up through the loop.
Step 3:

Tighten the first loop onto the second loop and leave a loop that can be used for a hanging hook. Release the knot by pulling the end of the rope.


