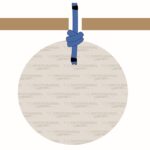
The Double Matthew Walker Knot creates a secure, medium-sized stopper knot that cannot be untied without unraveling the rope. It’s used for decorative purposes, as a stopper knot, or to keep a twisted rope from unraveling.
Quick Guide: Tying the Double Matthew Walker Knot
To tie the Double Matthew Walker Knot in a three-strand rope, intertwine each strand with the next one clockwise to create a Wall Knot. Before tightening it, keep following the path of each next strand until each strand intertwines itself. Finally, tighten and dress it to finish the knot.
The Double Matthew Walker Knot is the largest one in a series of stopper knots. The smallest one is the Wall Knot, where each strand intertwines with the next one. The second largest one is the regular Matthew Walker Knot, where each strand intertwines the strand behind itself (one less than in Double Matthew Walker).
It can also be tied with two, four, five, or more strands. The principle is identical – each strand intertwines the next one clockwise.
It’s also worth noting that the Double Matthew Walker Knot can only be tied with twisted rope. Modern braided ropes cannot be unraveled in the same way.
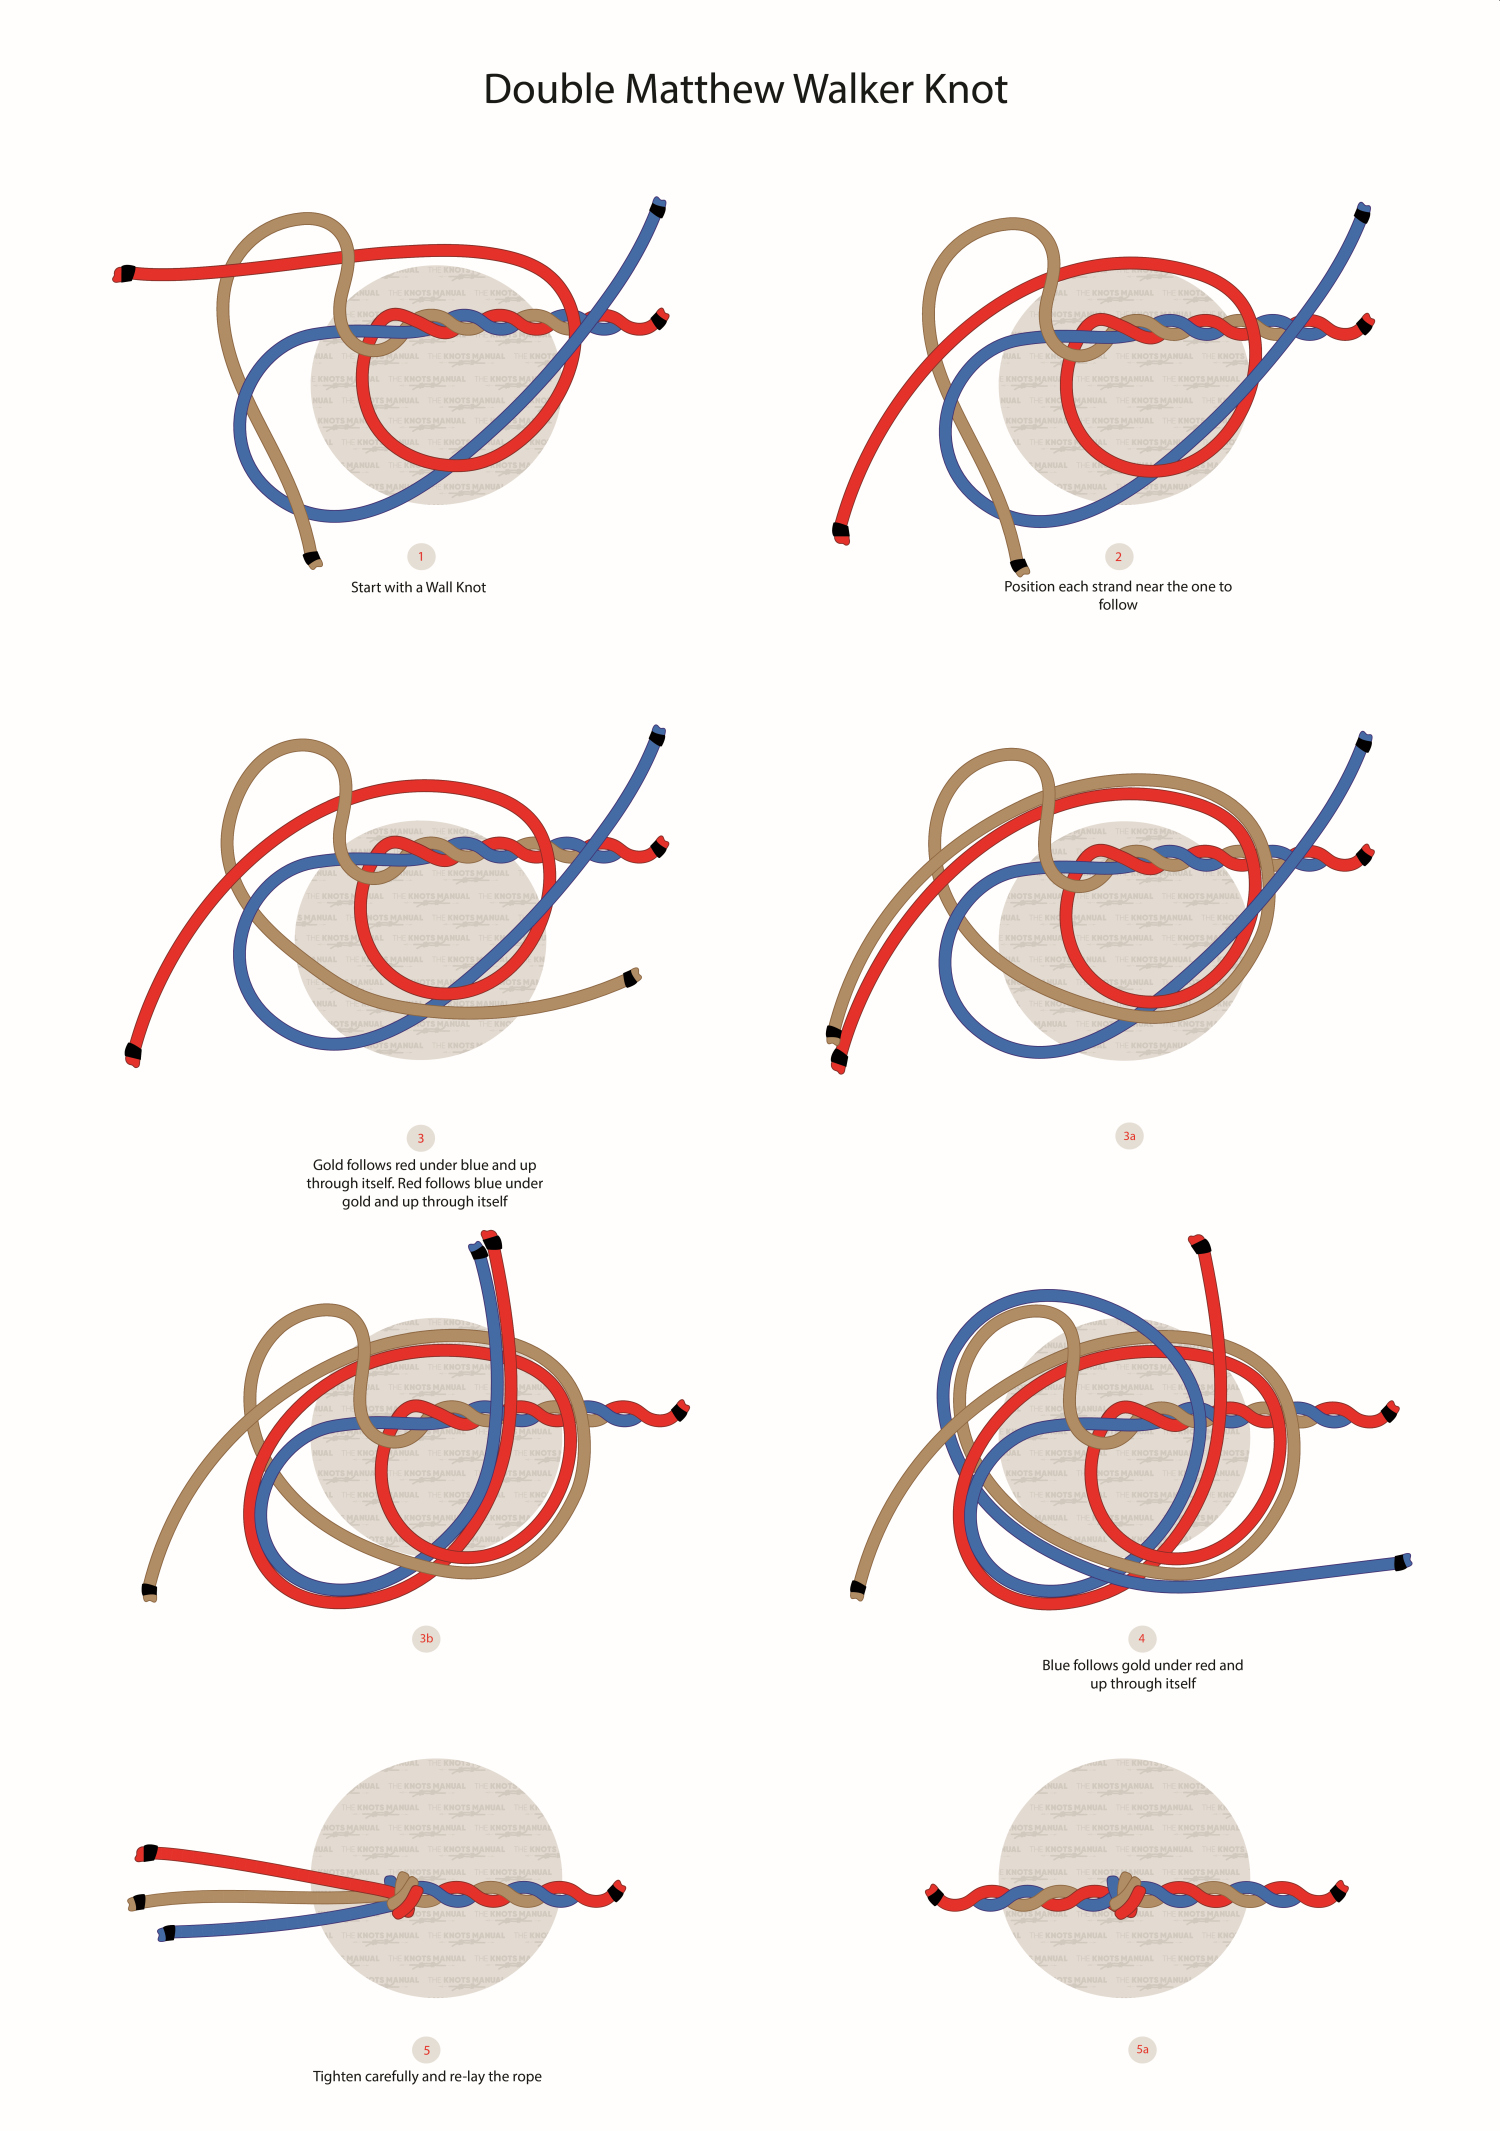
Pros and Cons of the Double Matthew Walker Knot
The main benefit of the Double Matthew Walker Knot is that it is very secure. Once it’s tied, it’s very unlikely to come undone, even after heavy or intermittent loads. If the rope is twisted after it, then it cannot come undone unless the rope is unwinded.
Once you get the gist of it, it’s also easy to tie. The main principle is that each strand intertwines with the next one.
It also has a very large and evenly distributed profile. This makes it ideal to use for permanent solutions where the rope needs to stay inside a ring or a hole.
One downside is that to untie it, you’ll need to unravel all the rope that’s tied after it. That’s why it’s mostly used only for permanent solutions.
And once you unravel it, it’s still very difficult to untie the knot itself because it tends to jam. If loaded with shock loads, then you may even need to cut the rope instead.
Common Uses For the Double Matthew Walker Knot
The Double Matthew Walker Knot was very commonly used in the past as a stopper knot for twisted ropes. It was mostly used for boating purposes, for example, attaching a rope to a Lanyard. Nowadays, it’s less commonly used because ropes come pre-twisted from the factory. And tying it requires unraveling them.
The only instance where it’s still used somewhat commonly as a stopper is with two cords or braided ropes. That’s because it’s more secure and larger than most other stopper knots.
You can also use it as an end knot to keep a twisted rope from unraveling. It does an exceptional job when used for this purpose.
It’s also sometimes used for decorative purposes in Macrame. Tying many Double Matthew Walker Stopper Knots after one another creates an interesting pattern. It can be used to create bracelets and handles.
Knots Like the Double Matthew Walker Knot
Wall Knot: A simpler version of the Double Matthew Walker Knot. Each thread is intertwined through the next one clockwise. It has a smaller profile and is less secure.
Matthew Walker Knot: A stopper knot larger than the Wall Knot but smaller than the Double Matthew Walker Knot. It’s tied by intertwining each second thread clockwise (one less than in the Double Matthew Walker Knot). This also makes it a bit less secure.
Two-Strand Matthew Walker Knot: A more useful stopper knot in the modern days than the (three-strand) Double Matthew Walker Knot. It creates a large, secure stopper knot from ropes, cords, or strands. It’s very useful for cases where a permanent stopper knot is needed.
Crown Knot: A stopper knot that’s tied almost identically to the Wall Knot, except the strands are directed back in the direction of the standing end. It has a much smaller profile than the Double Matthew Walker Knot.
Step-By-Step Guide: How to Tie the Double Matthew Walker Knot
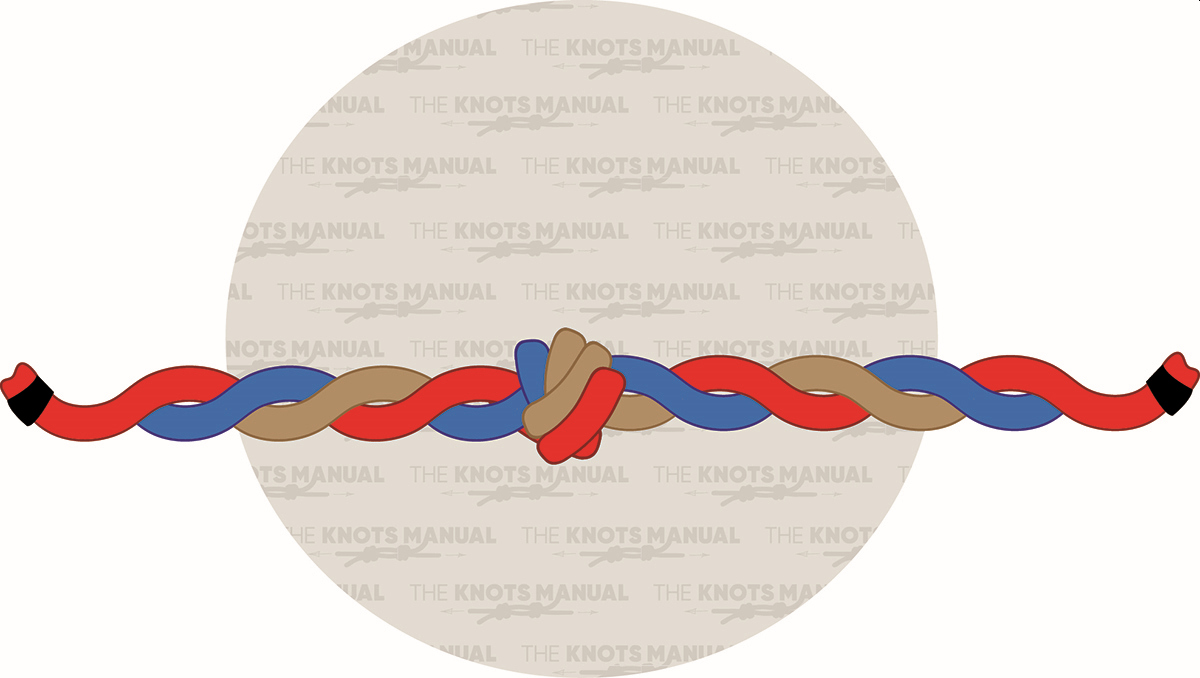
A step-by-step guide on tying the Double Matthew Walker Knot.
Step 1:
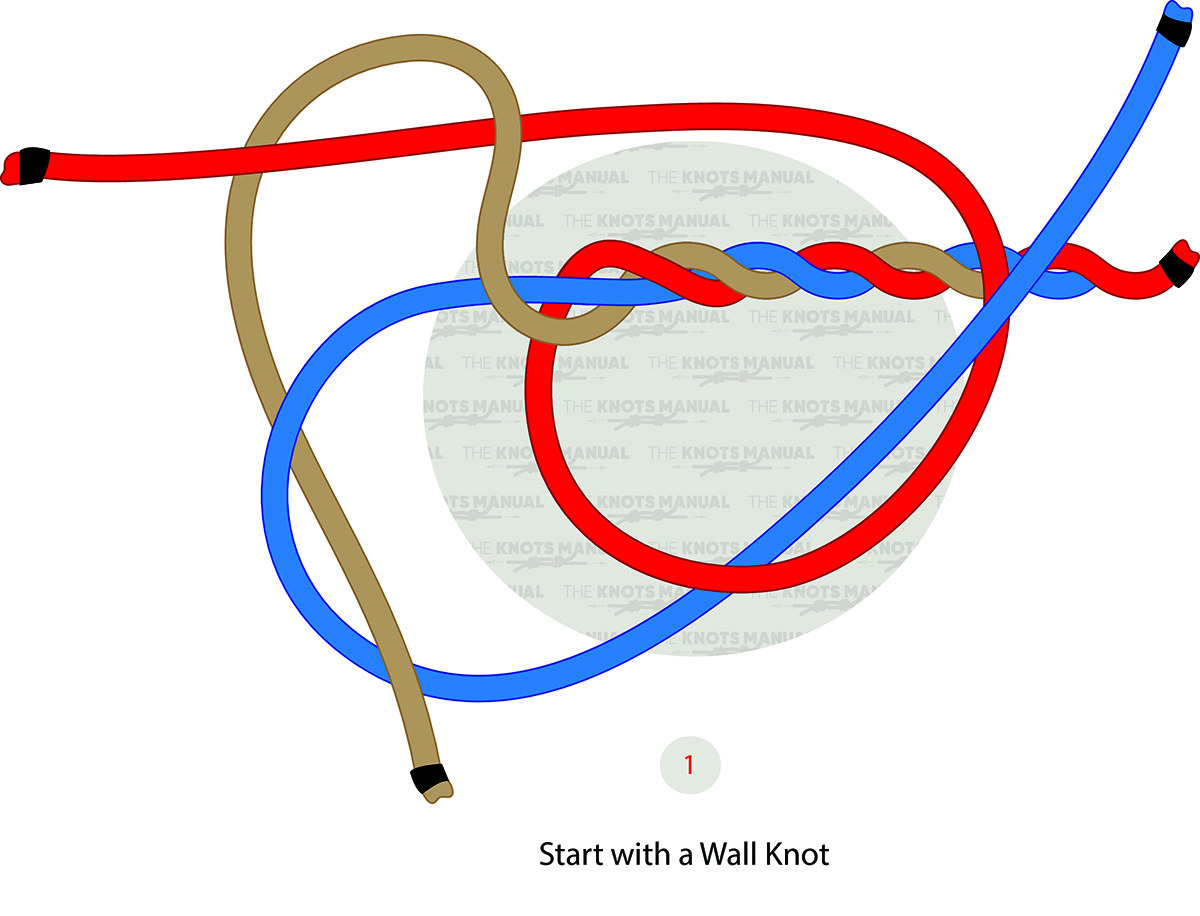
Make a wall knot by intertwining all three strands counterclockwise.
Step 2:
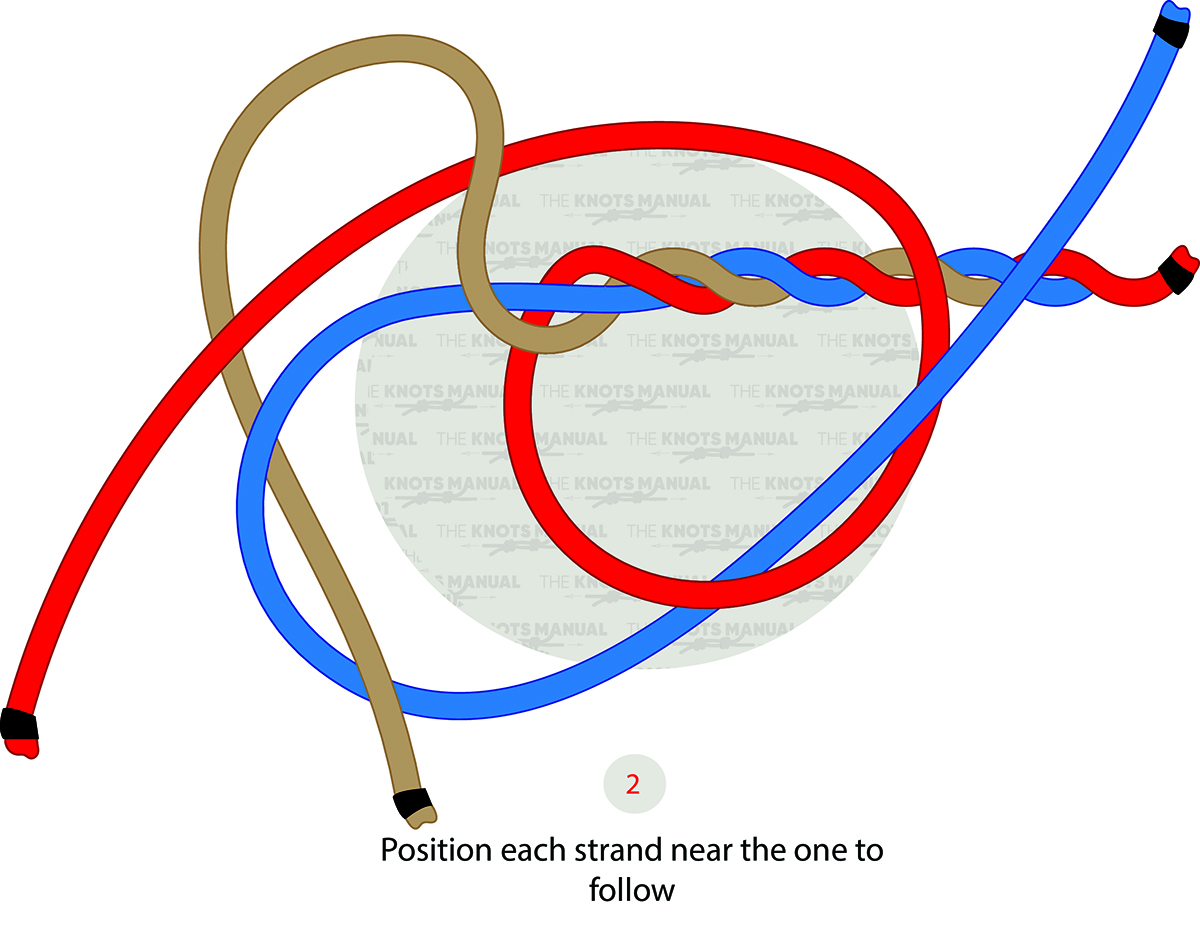
Next, you’ll need to follow the path of each next strand with all of the strands.
Step 3:
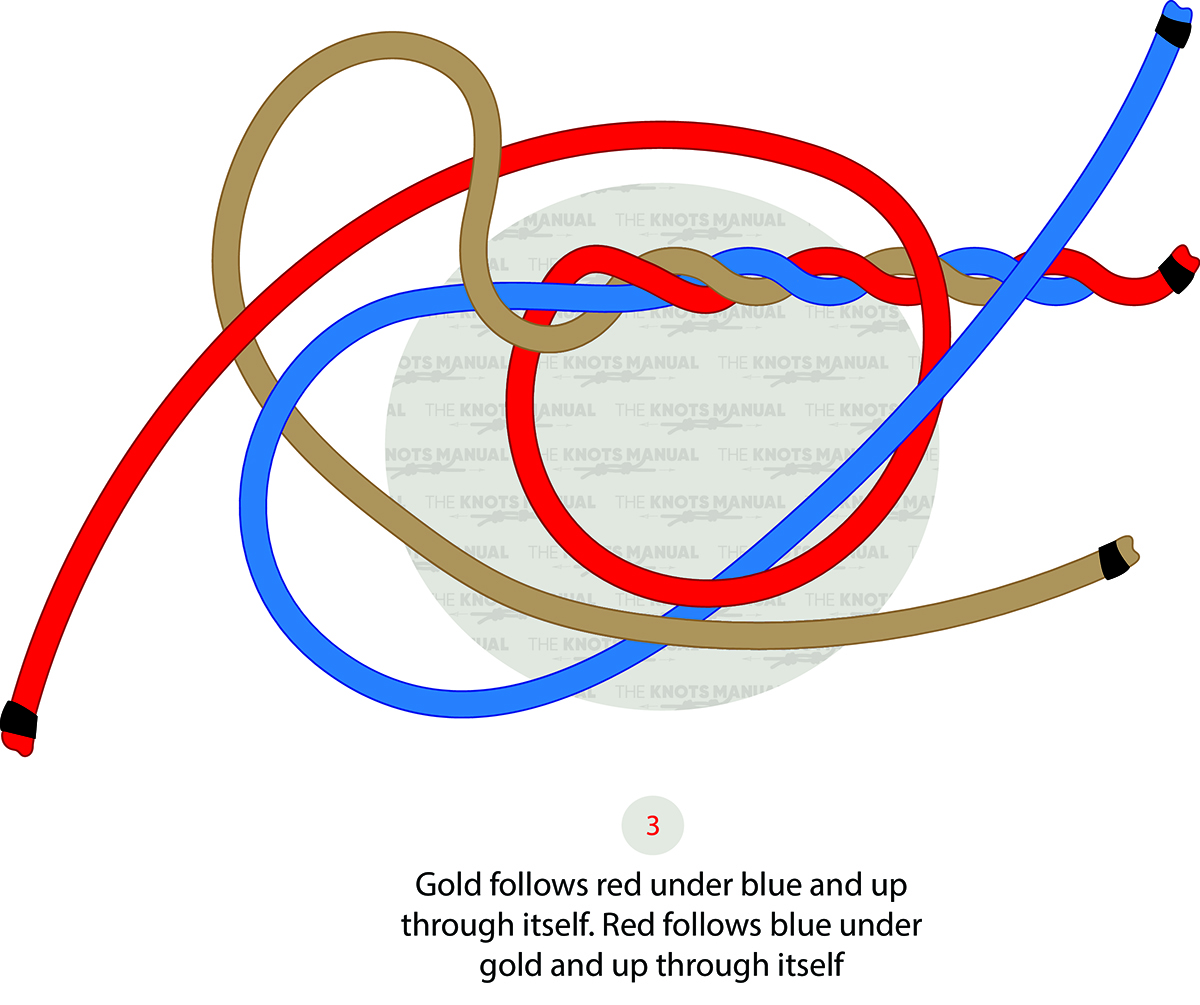
Step 3a:
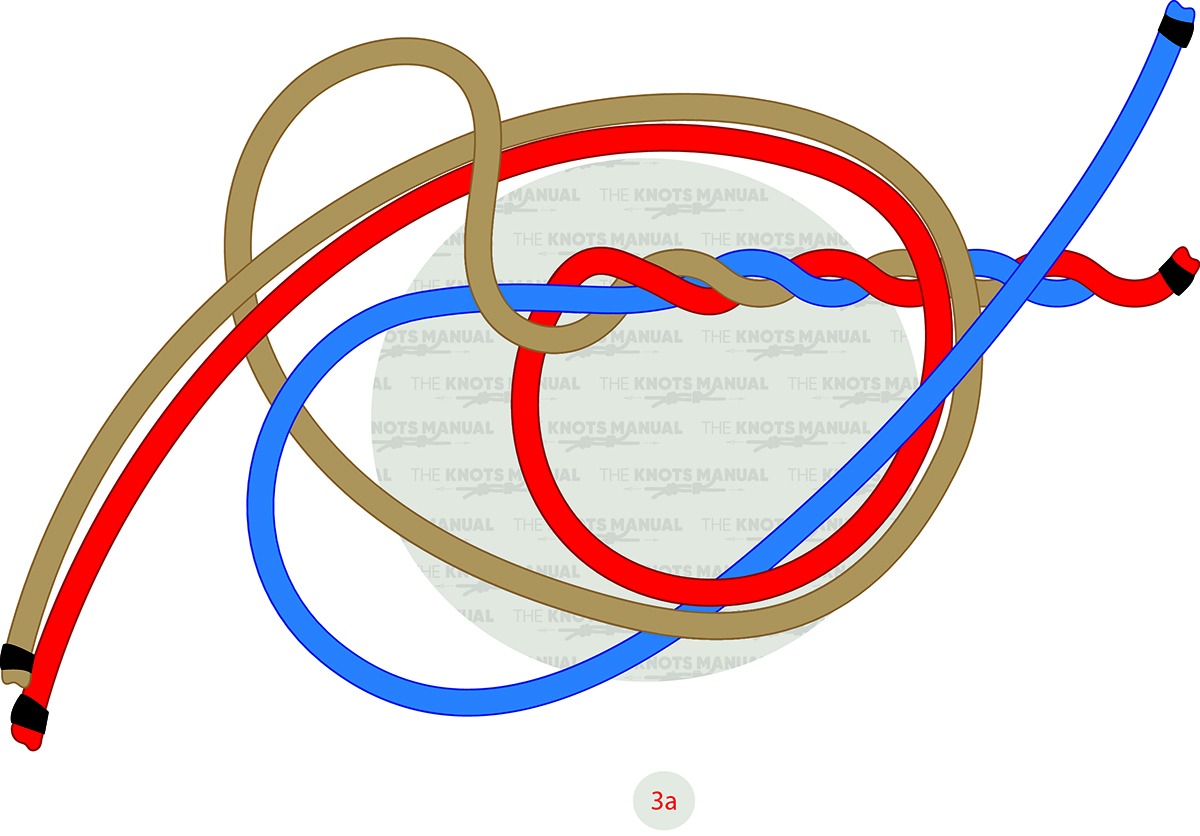
Take the first strand (gold) and follow the path of the next strand which comes out next to (red). In the end, the first strand (gold) should make a full circle by intertwining itself.
Step 3a:
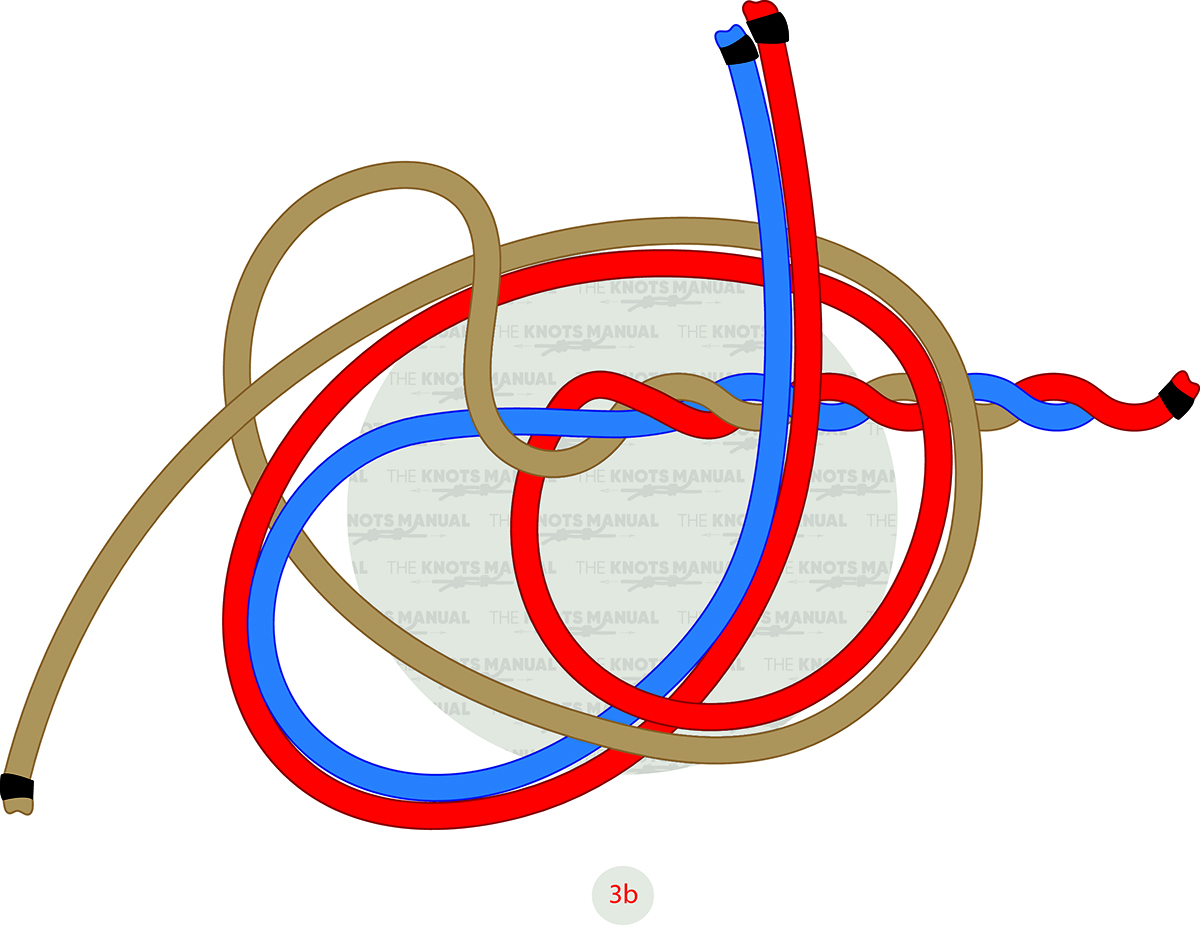
Repeat with the second (red) strand.
Step 4:
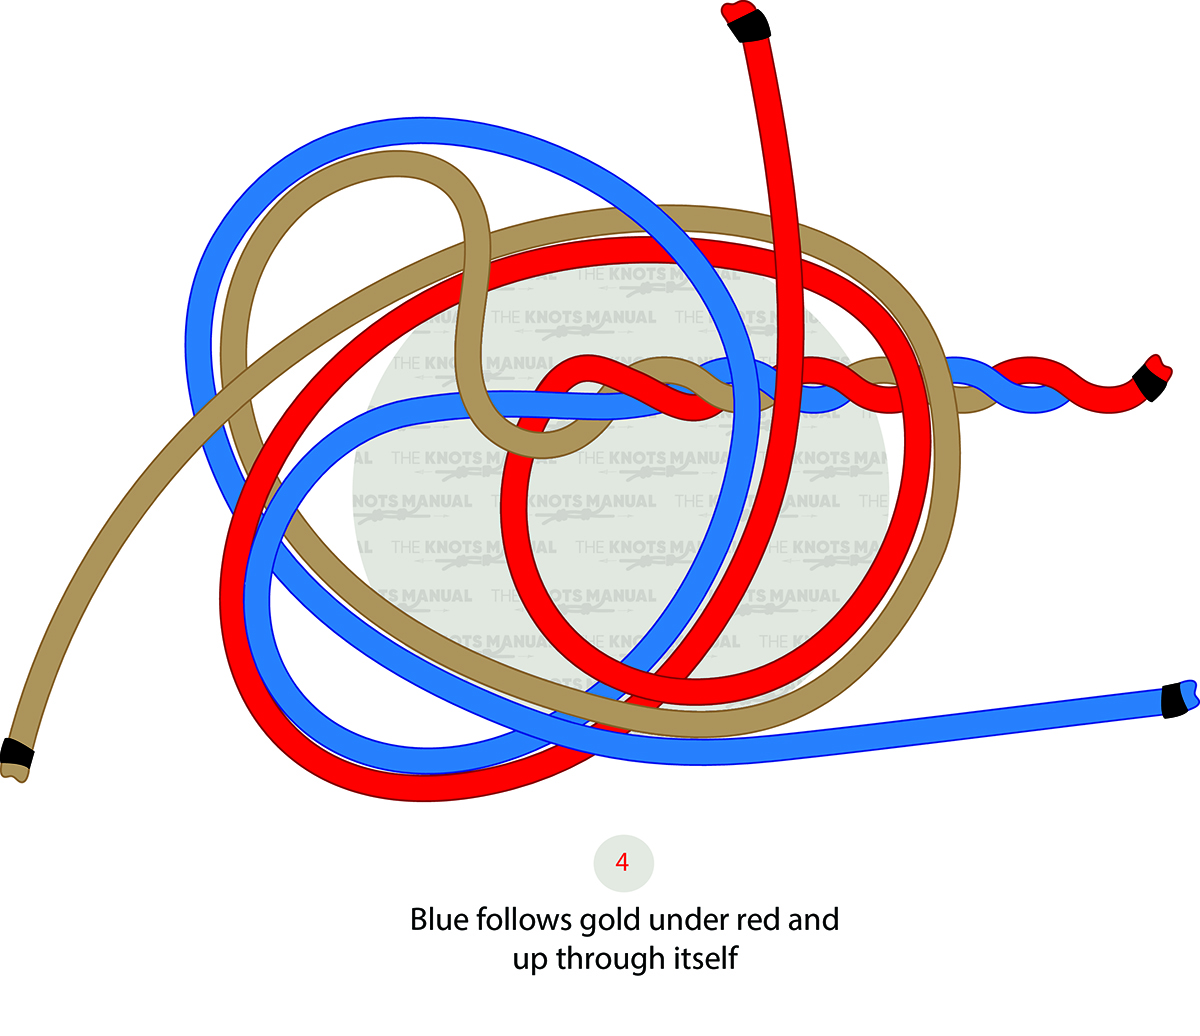
Repeat with the third (blue) strand.
Step 5:
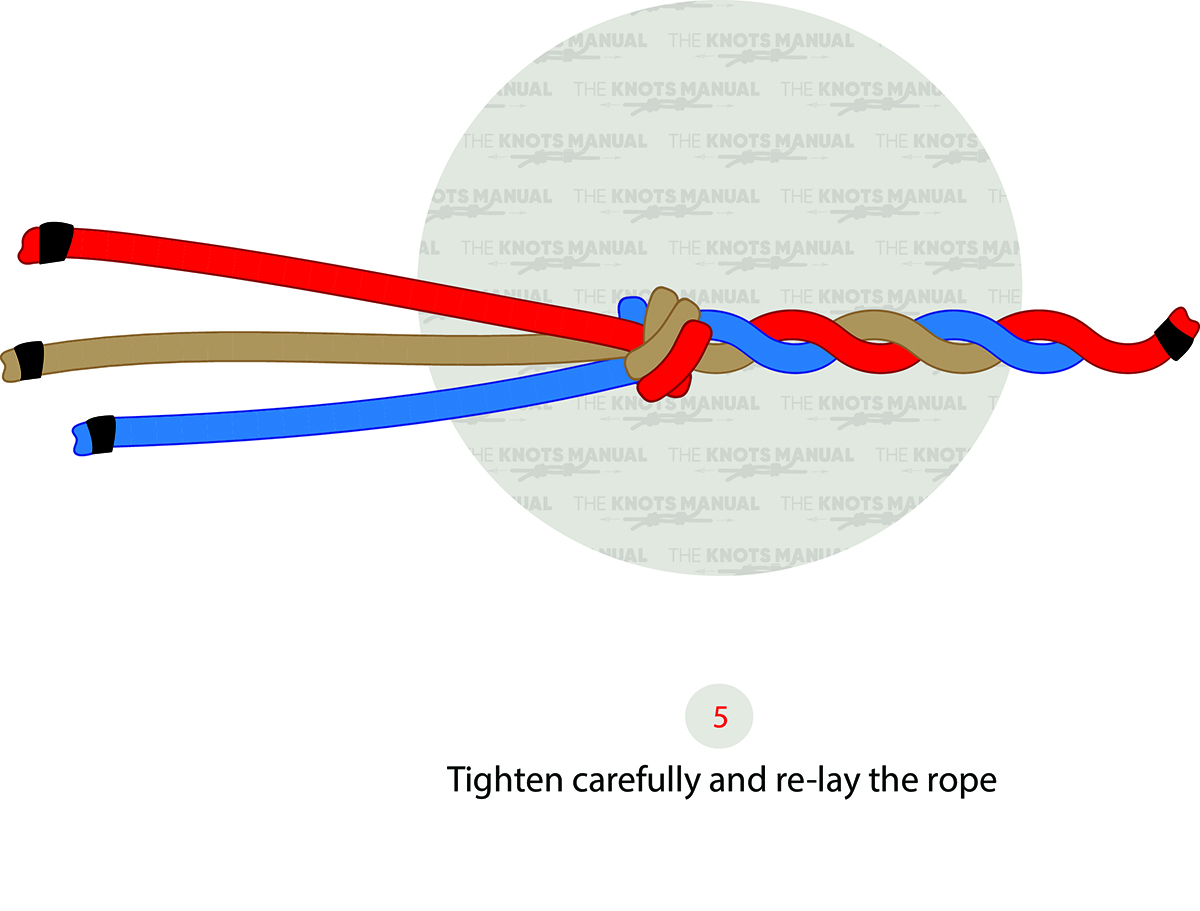
Tighten to finish the knot.
Step 5a:
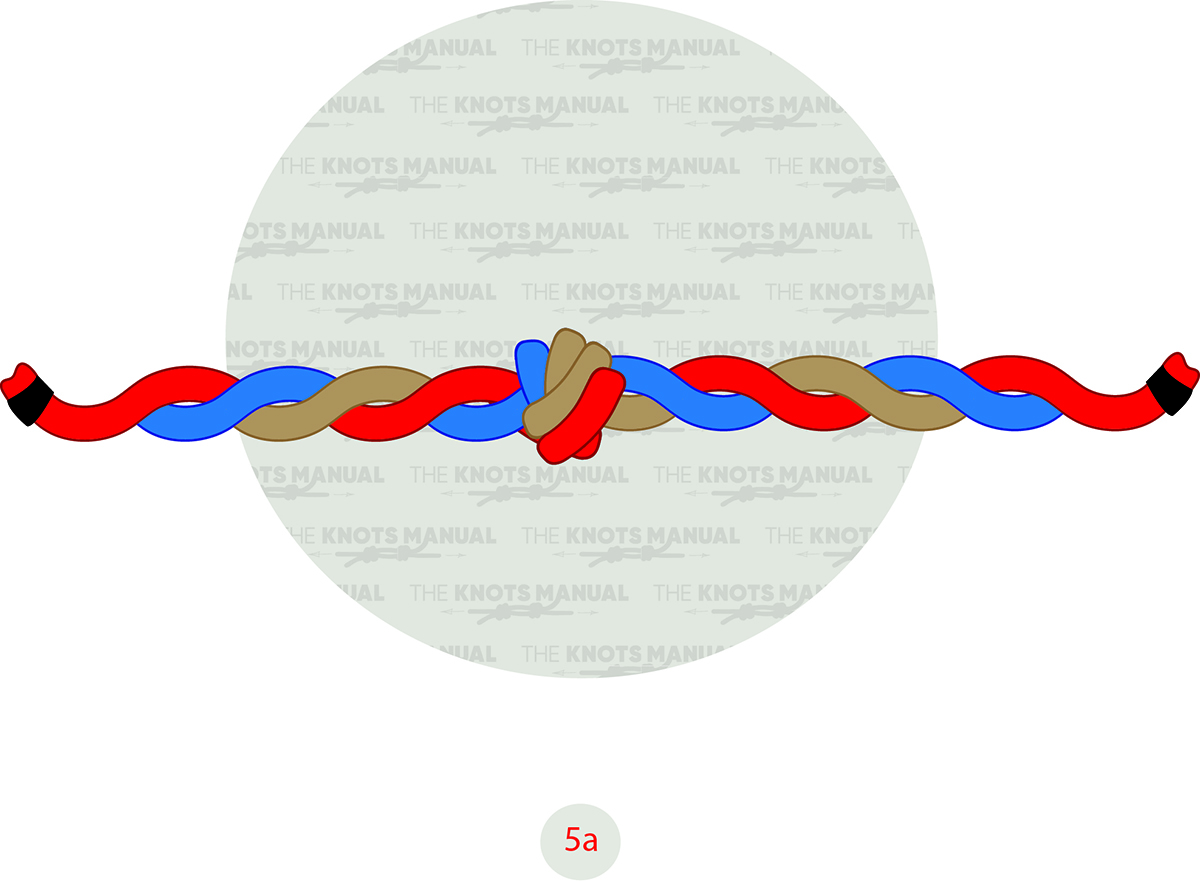
Continue breading the rope.

