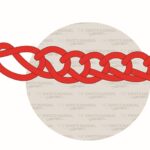
The Crown Sinnet is a pattern of many Crown Knots tied in a row. It’s usually used to create bracelets and keychains.
Quick Guide: Tying a Crown Sinnet
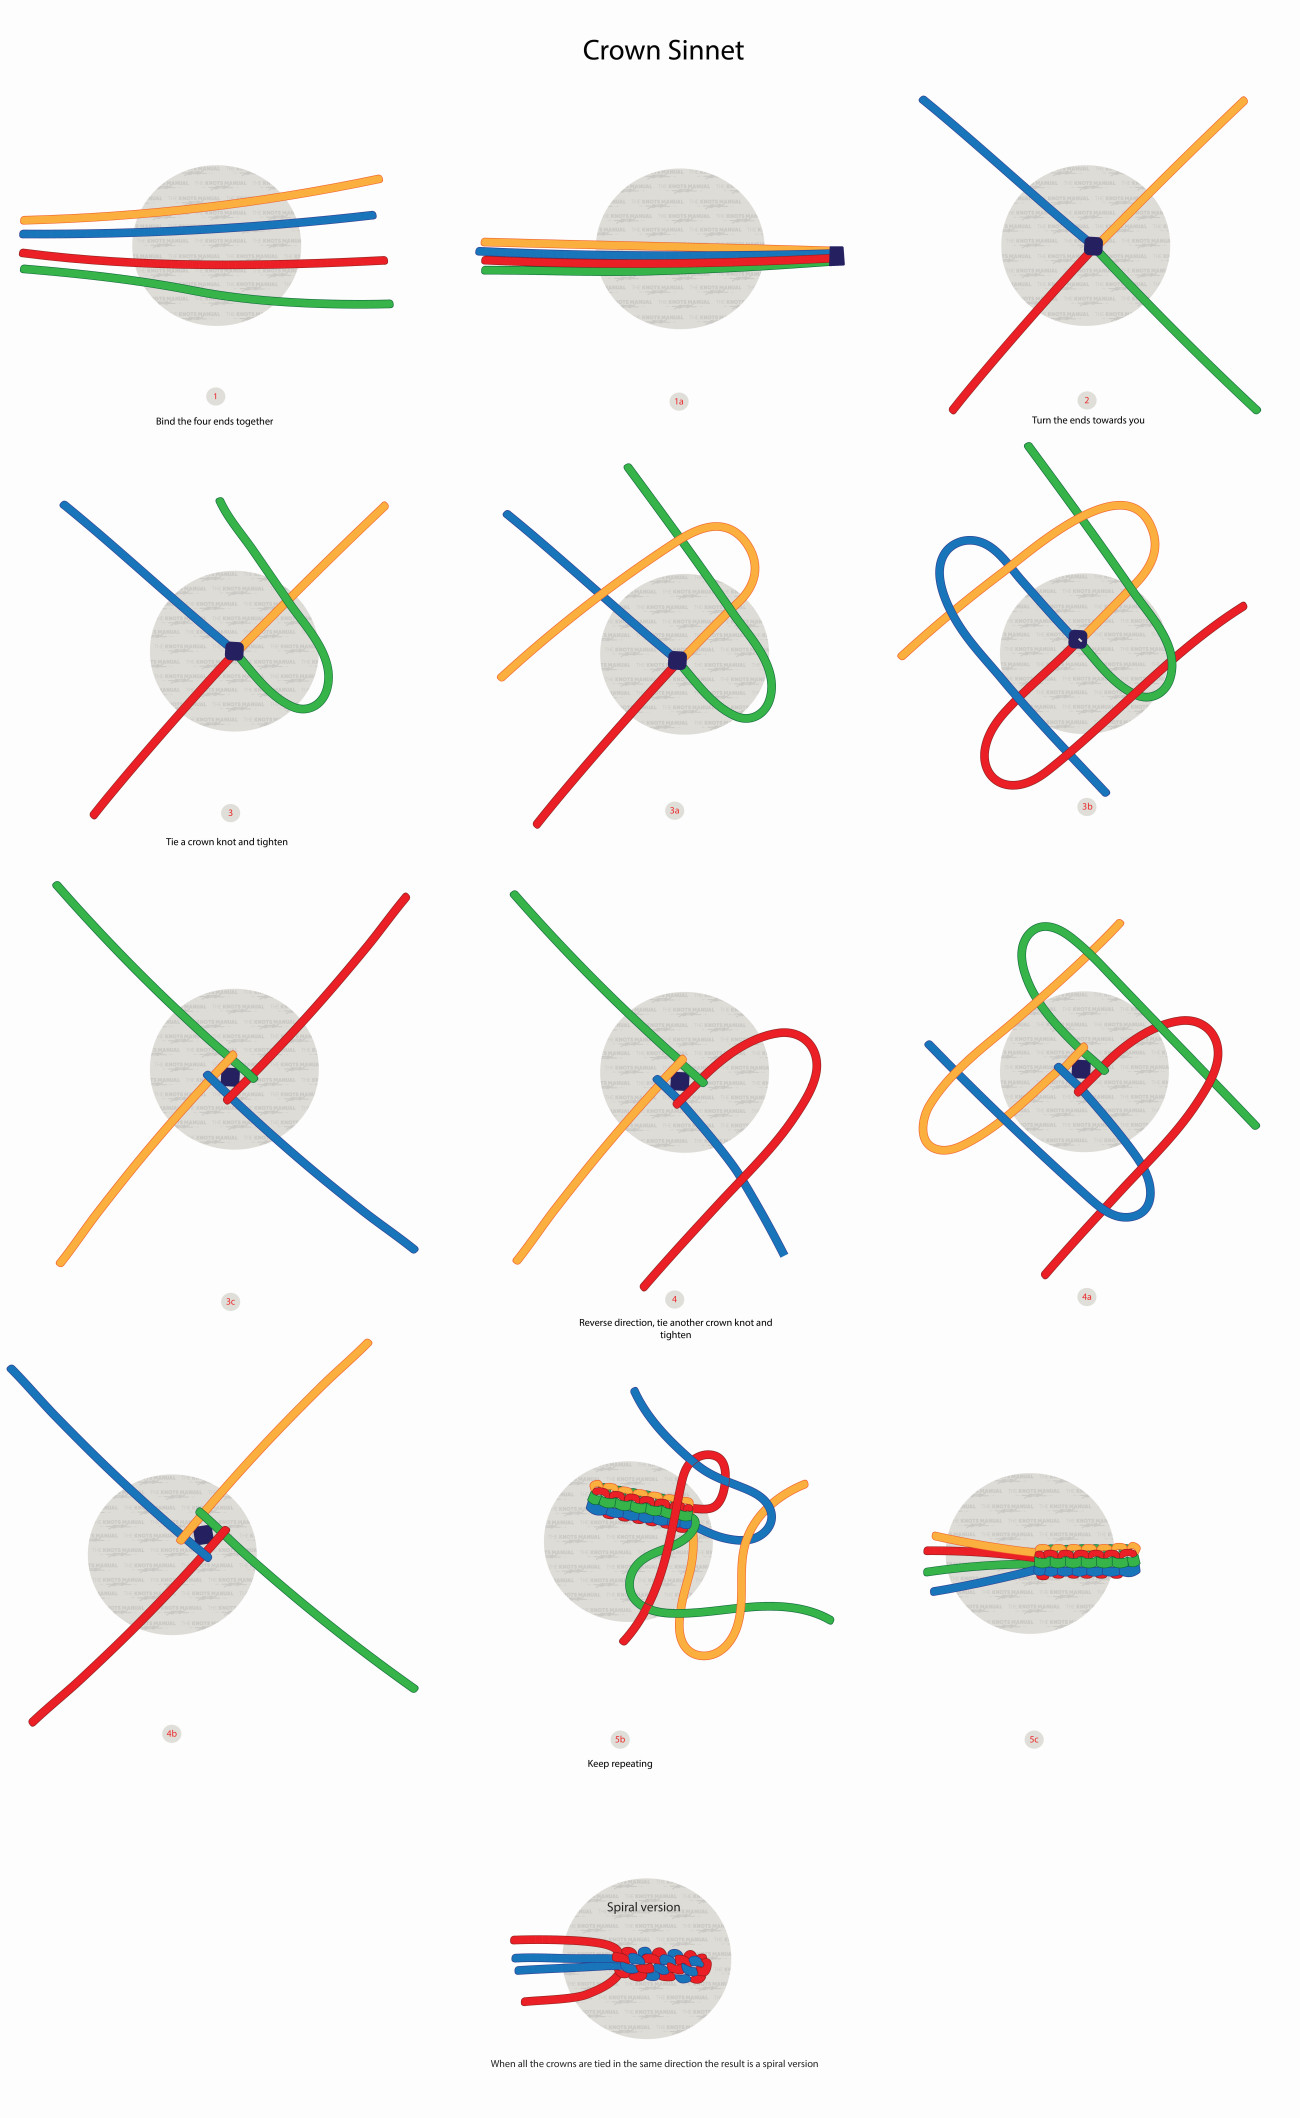
To tie a Crown Sinnet, bind together the ends of four strands using tape. (steps 1-1a). Then spread them out over to each side with the tape facing upwards (step 2). The tape will later be hidden inside the knot.
Tie a Crown Knot by laying each strand over the next one in a counter-clockwise direction (steps 3-3c). After that, tie another Crown Knot, only in a clockwise direction (steps 4-4b). Continue by tying many alternating Crown Sinnet Knots in a row until you reach the desired length.
It’s usually made with 3-5 strands. In our example, we used 4 strands. If you prefer, you can tie it with more strands, but the process will take much longer.
Starting the Crown Sinnet: In our example, we used tape to secure 4 strands together. But you can also tie it with 2 strands by crossing them in the middle (forming an x) and then proceeding by tying a Crown Knot.
Finishing the Crown Sinnet: To finish a Crown Sinnet, usually a Wall Knot is used. It’s tied just like a Crown Knot, only placing each strand under the next one (not over).
Continuous VS Alternating Crown Sinnet: In our example, we show how to tie an Alternating Crown Sinnet. But you can also tie many Crown Knots in a row in the same direction. This will result in a similarly-looking braid, only each color will continue in a spiral pattern (instead of a straight line).
Common Uses for the Crown Sinnet Knot
The Crown Sinnet is most commonly used to make bracelets. But you can also use it to make handles, keychains, necklaces, and other decorative items.
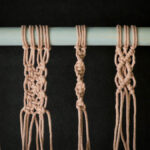
It’s also very commonly used in Macrame. It can be used to create rings for hanging projects or to finish macrame projects.
The Crown Sinnet is also often used to create braided rope. This is most commonly done with three or four smaller strands. Usually, an Alternating Crown Sinnet is used for this purpose.
Knots Like the Crown Sinnet Knot:
Crown Knot: The Crown Sinnet Consists of many Crown Knots tied in a row.
Wall Knot: Tied just like a Crown Knot, only each strand is placed underneath the next one.
Wall and Crown Knot: Essentially, a double Crown Knot. After a single Crown Knot is tied, each strand is looped through the same path another time. This creates a ball-shaped knot at the end of a rope.
Double Matthew Walker Knot: Tied just like the Wall and Crown Knot, except a Wall Knot is used instead of a Crown Knot. It’s essentially a Double Wall Knot. It creates a large and bulky stopper knot.
Chain Sinnet: This knot is usually used for shortening rope for storage or for washing it in a washing machine. It forms a chain-like pattern and is very easily tied with just a single rope.
Step-By-Step Guide: How to Tie a Crown Sinnet Bracelet
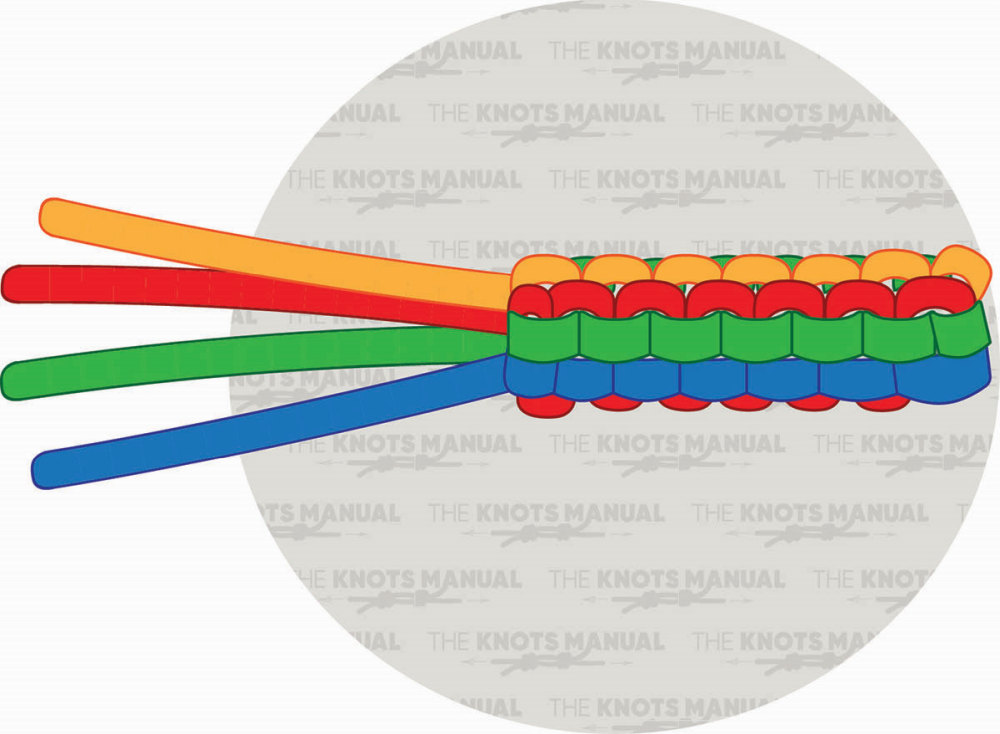
A step-by-step guide on how to tie the Crown Sinnet Knot.
Step 1:
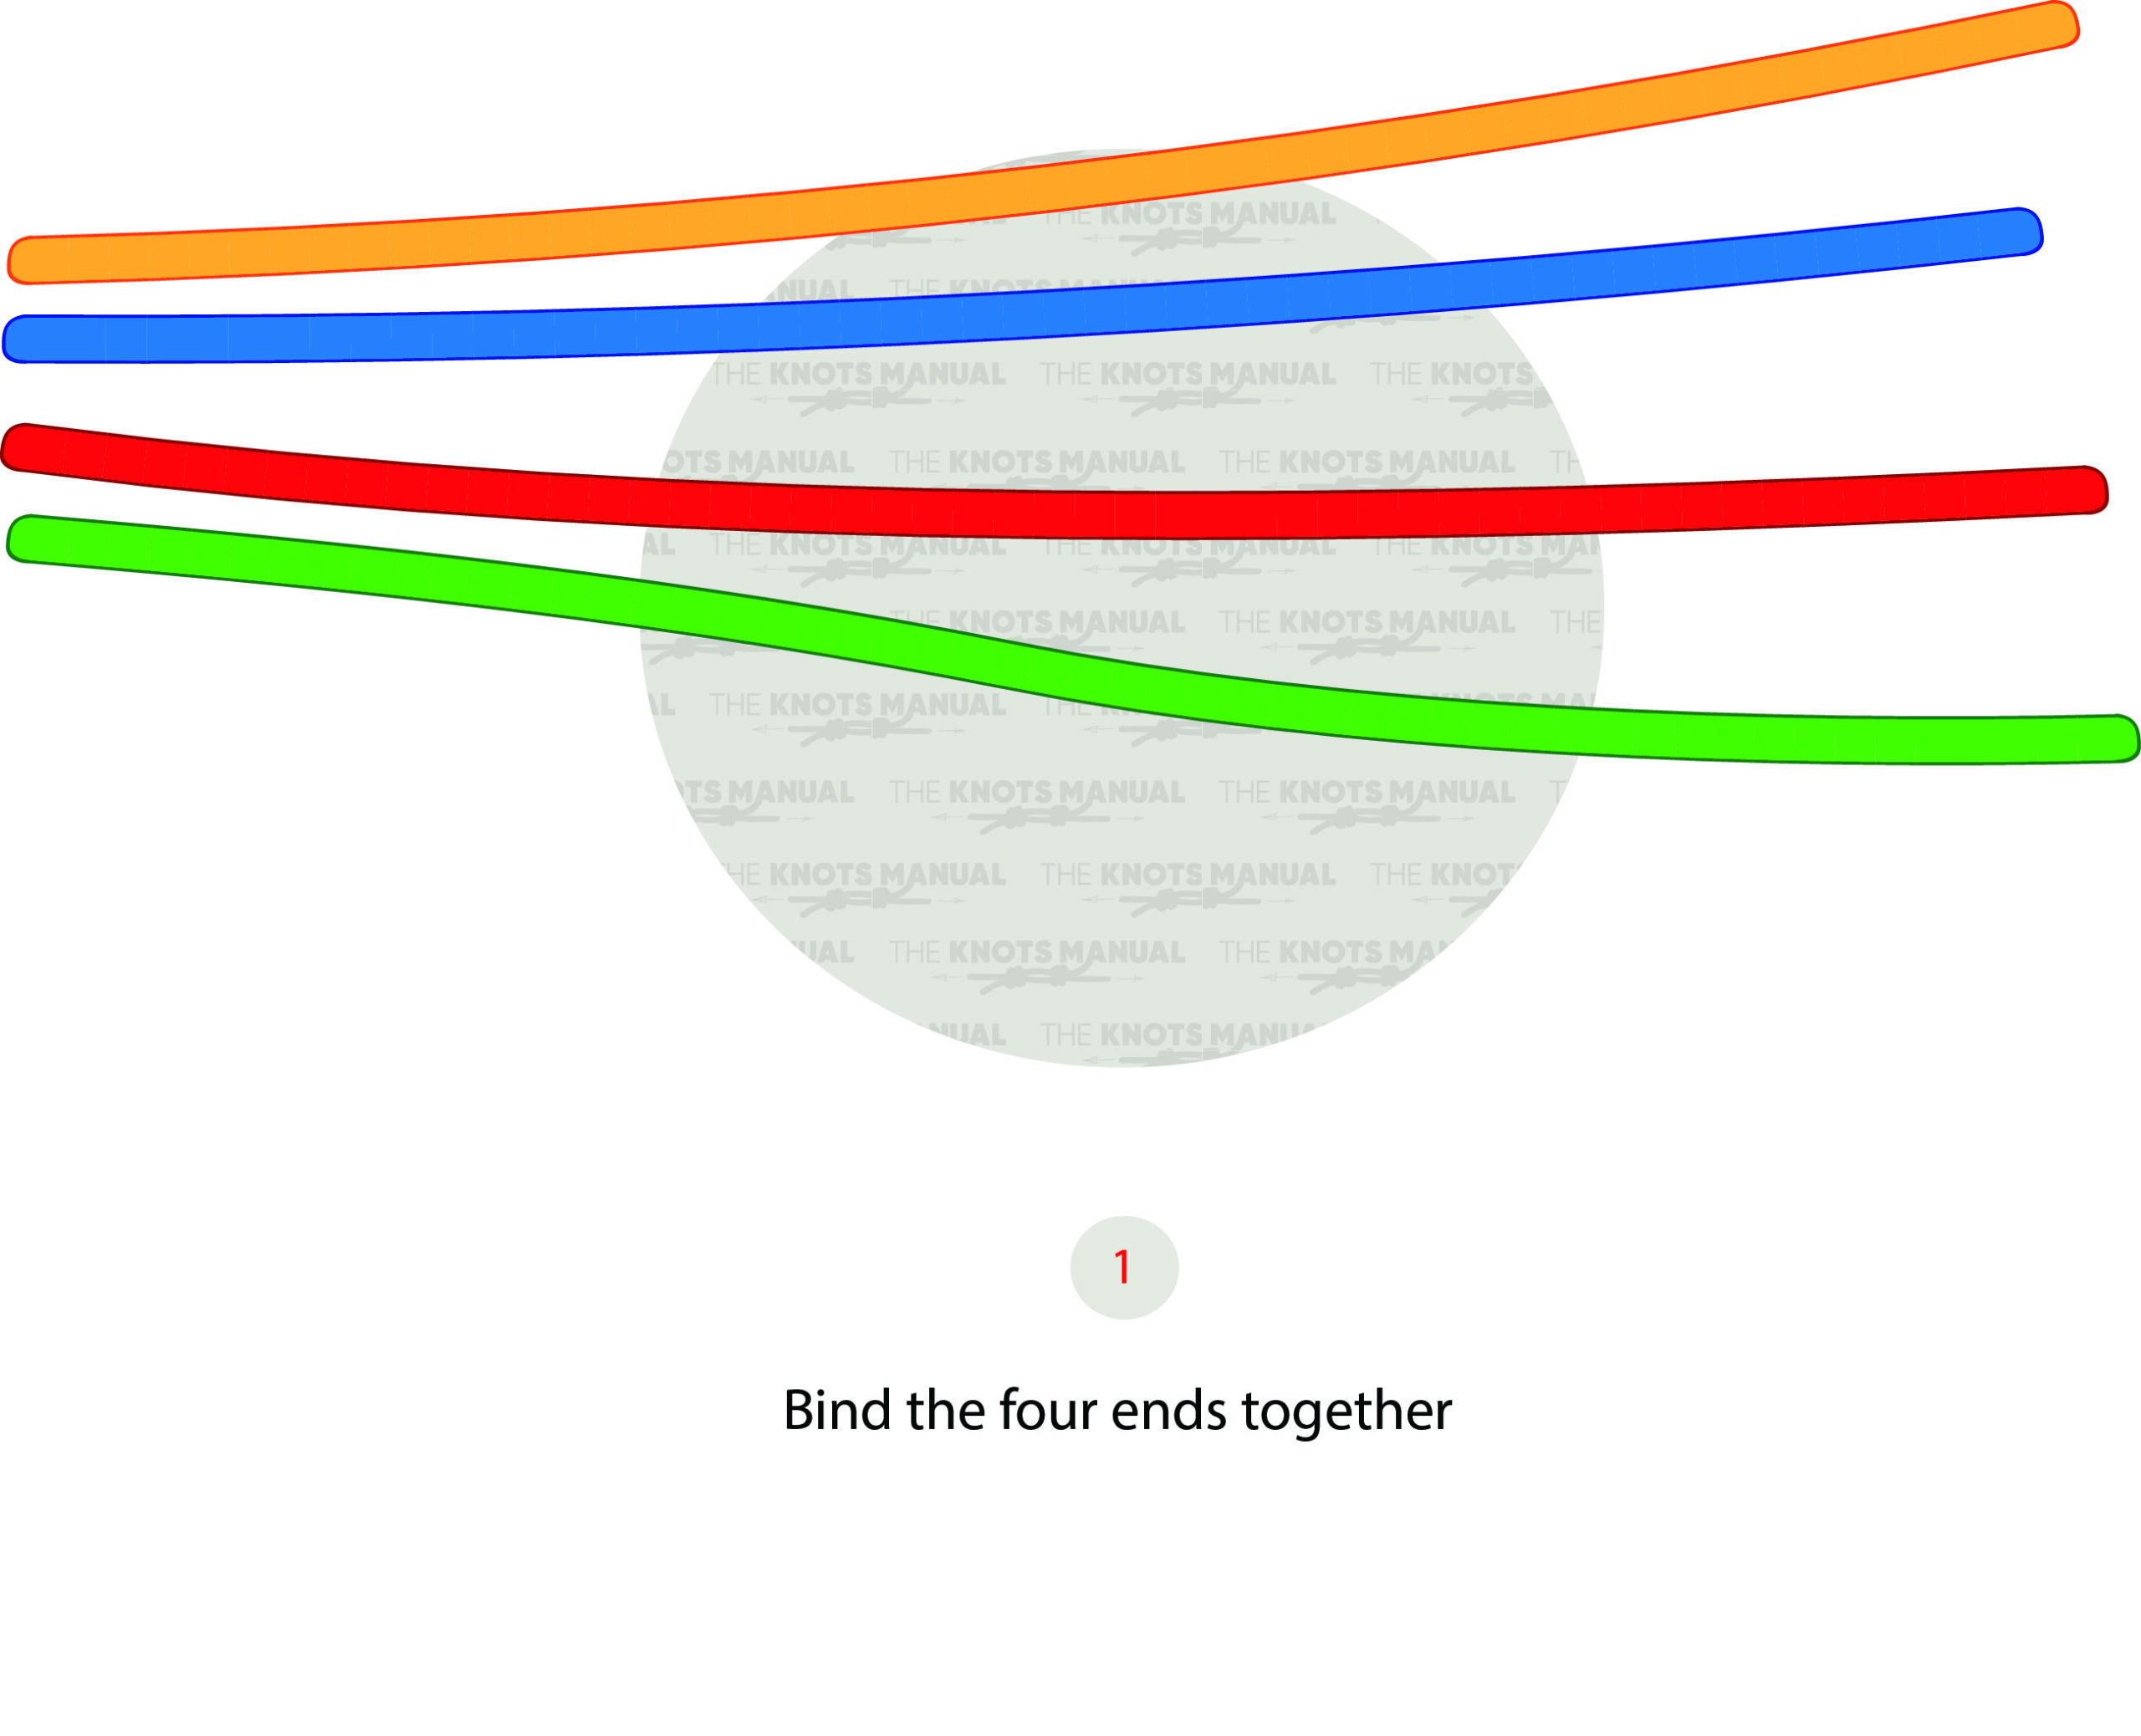
You will need four strands to tie the Crown Sinnet Knot. Bind them together with a piece of tape.
Step 1a:
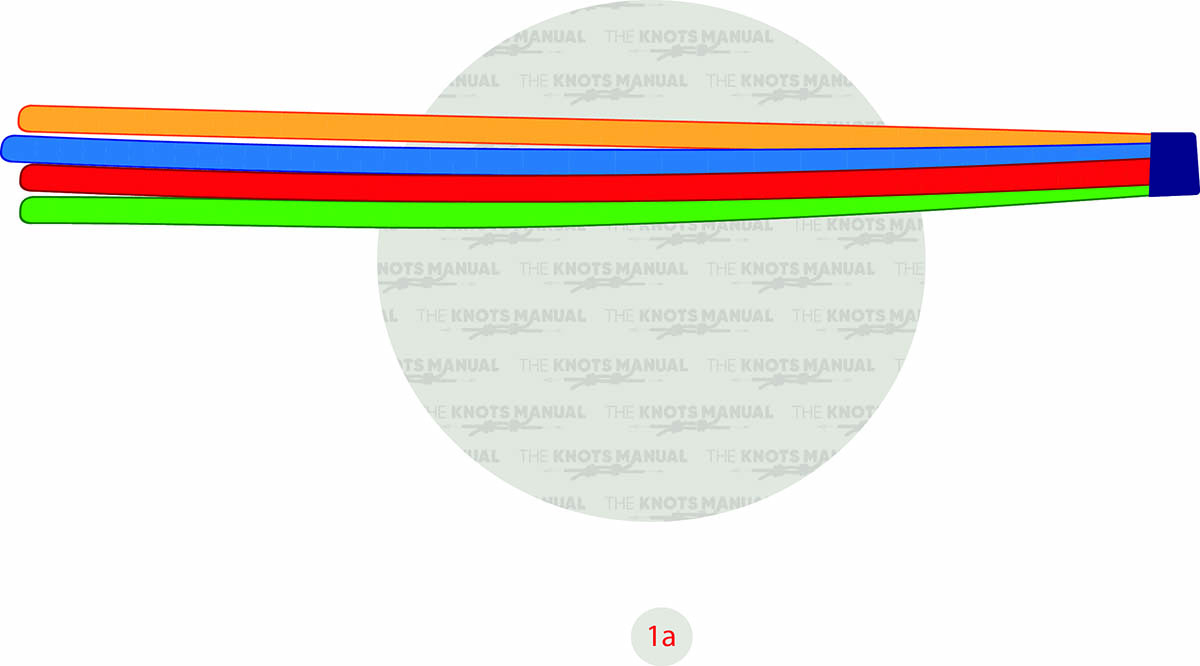
This tape used to bind them together will be hidden inside the knot.
Step 2:

Spread out each strand over to one side with the binding spot in the center facing upwards.
Step 3:
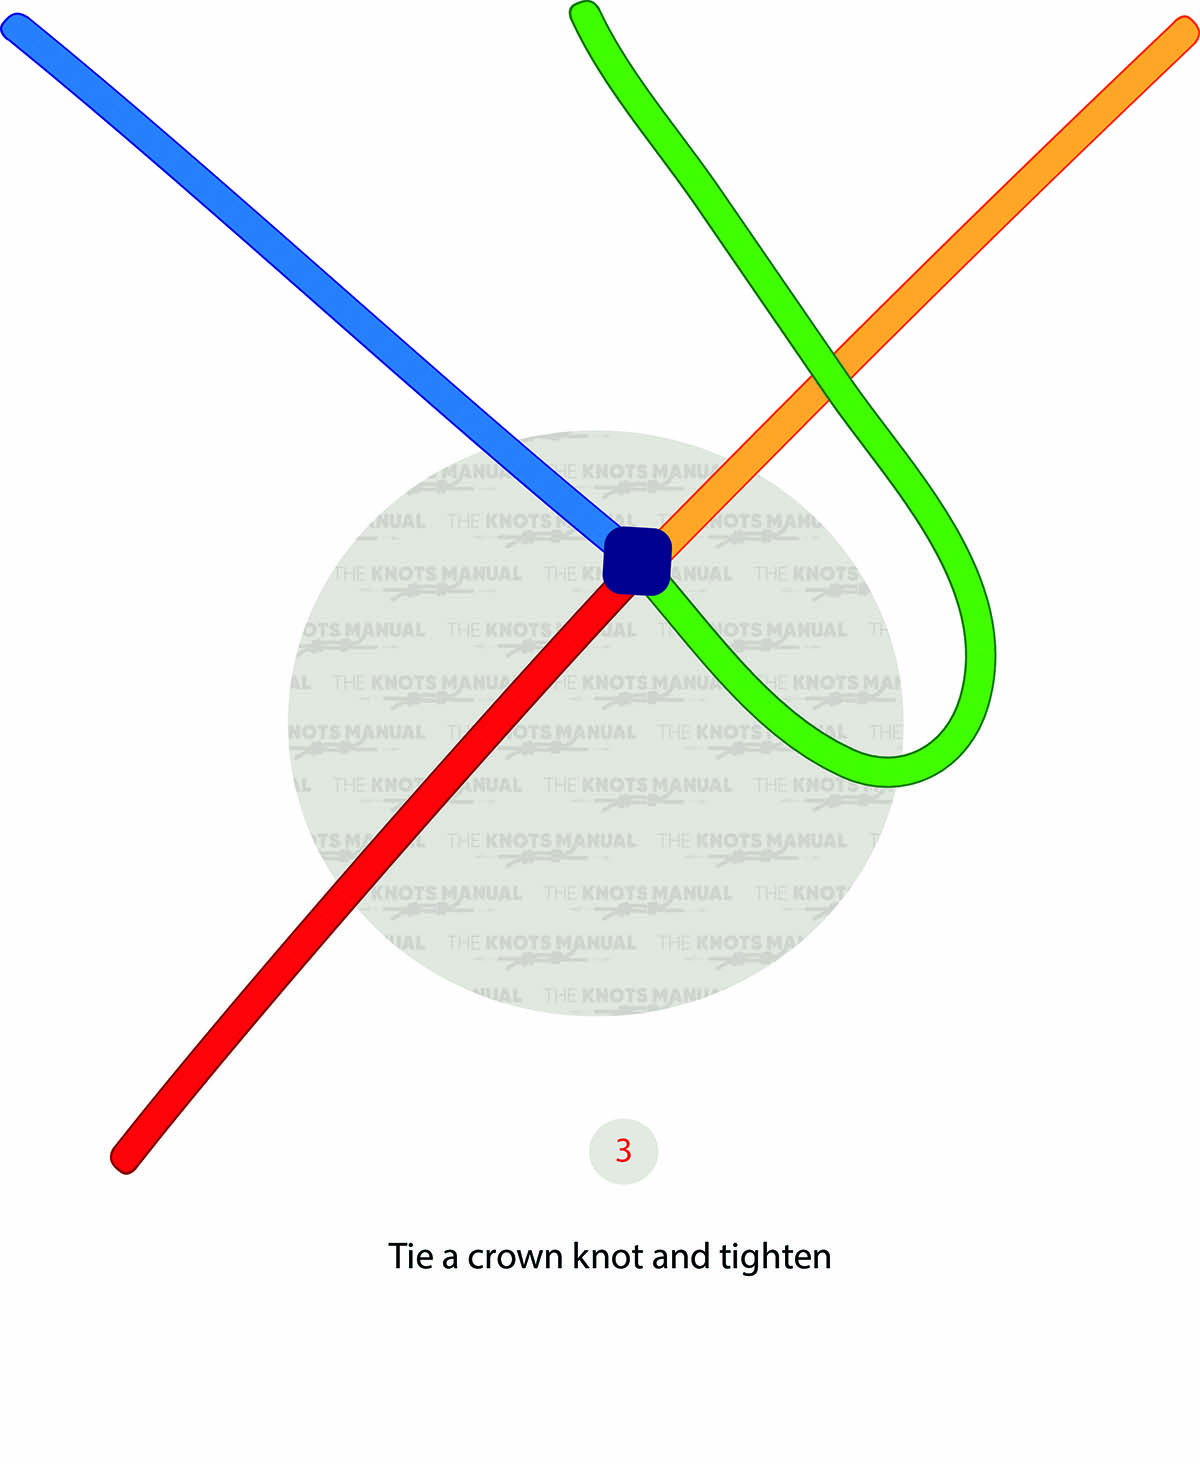
Place the green strand over the yellow one counter-clockwise.
Step 3a:

Pass the yellow strand over the green and blue strands.
Step 3b:

Continue placing each strand over the next one until you reach the end, as illustrated above.
Step 3c:

Tighten the knot around the binding spot, hiding it in the process.
Step 4:
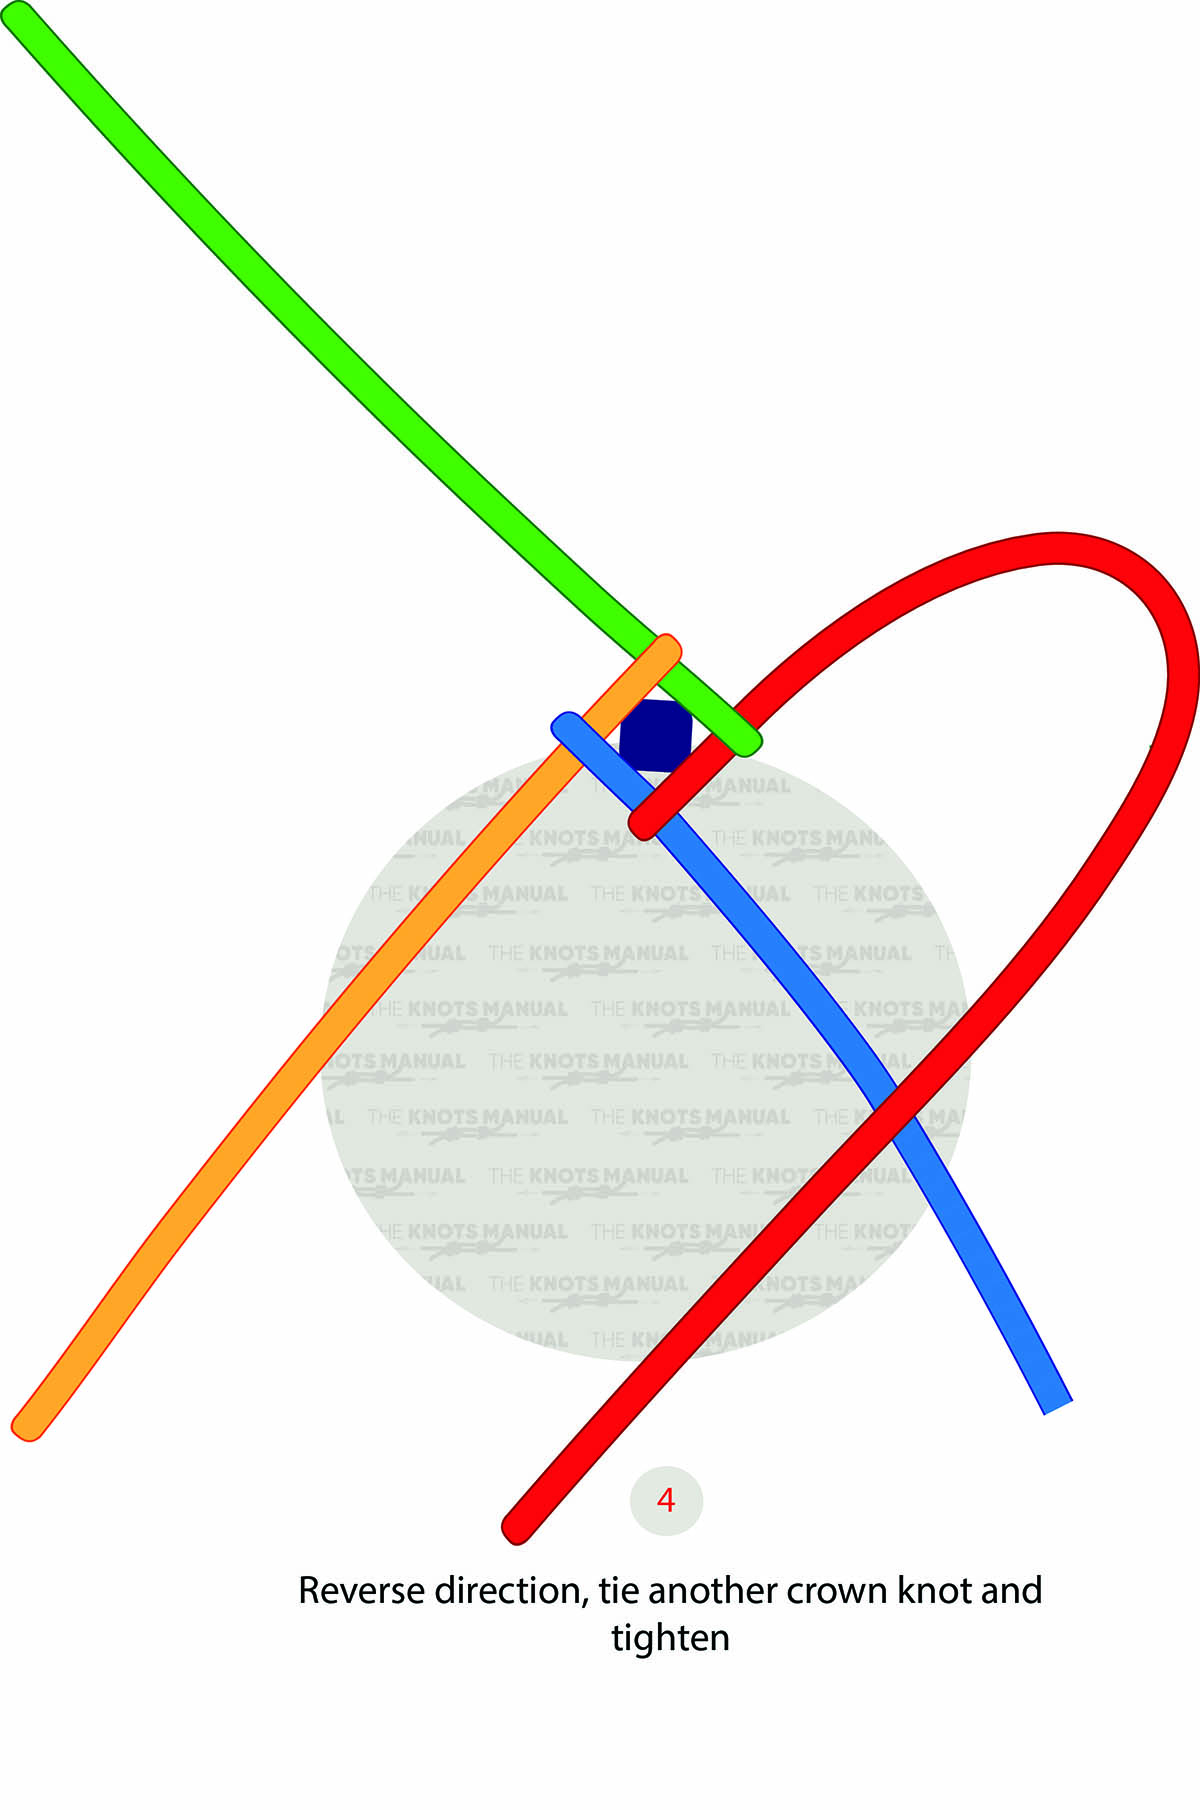
Now you need to repeat the same steps, only clockwise. Take the red strand over the blue one, then the blue one over the yellow one, and so on until you reach the end.
Step 4b:

Tighten it once you finish a full clockwise turn.
Step 5b:
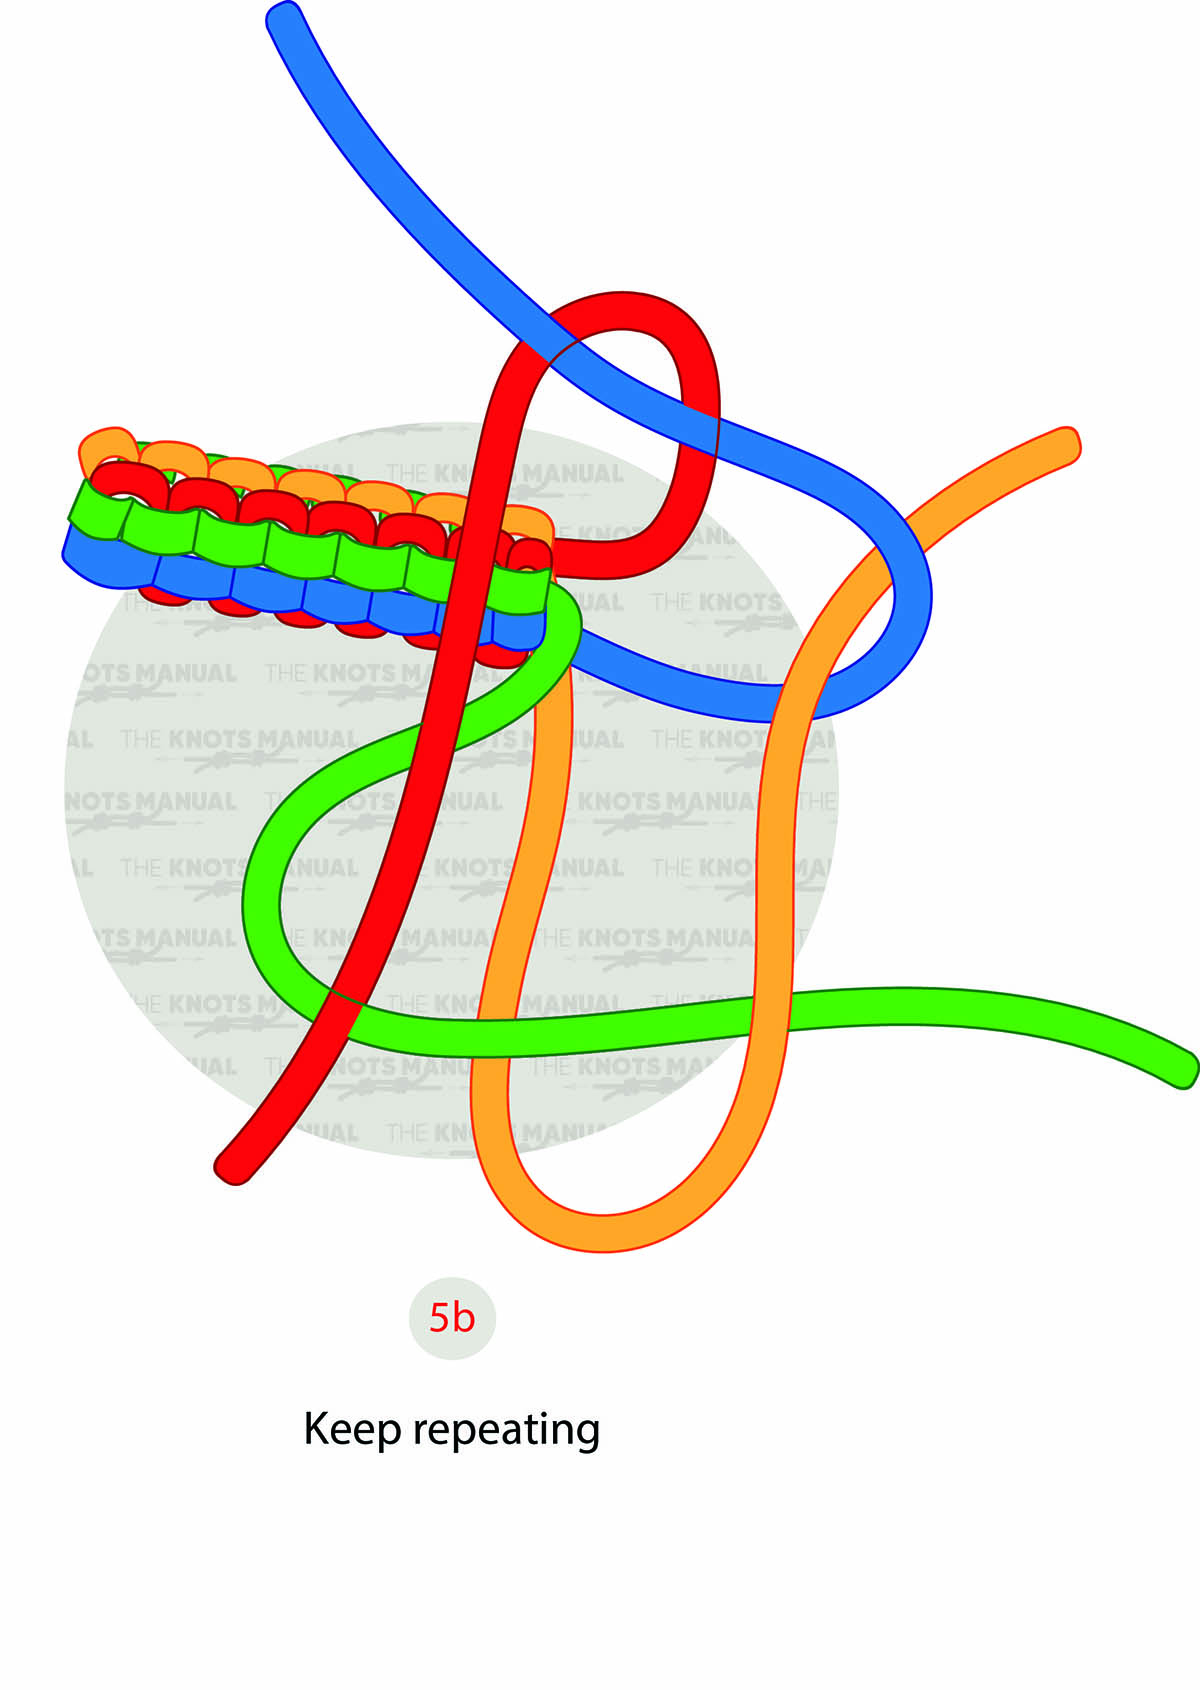
Keep on tying clockwise knots followed by counter-clockwise ones.
Step 5c:
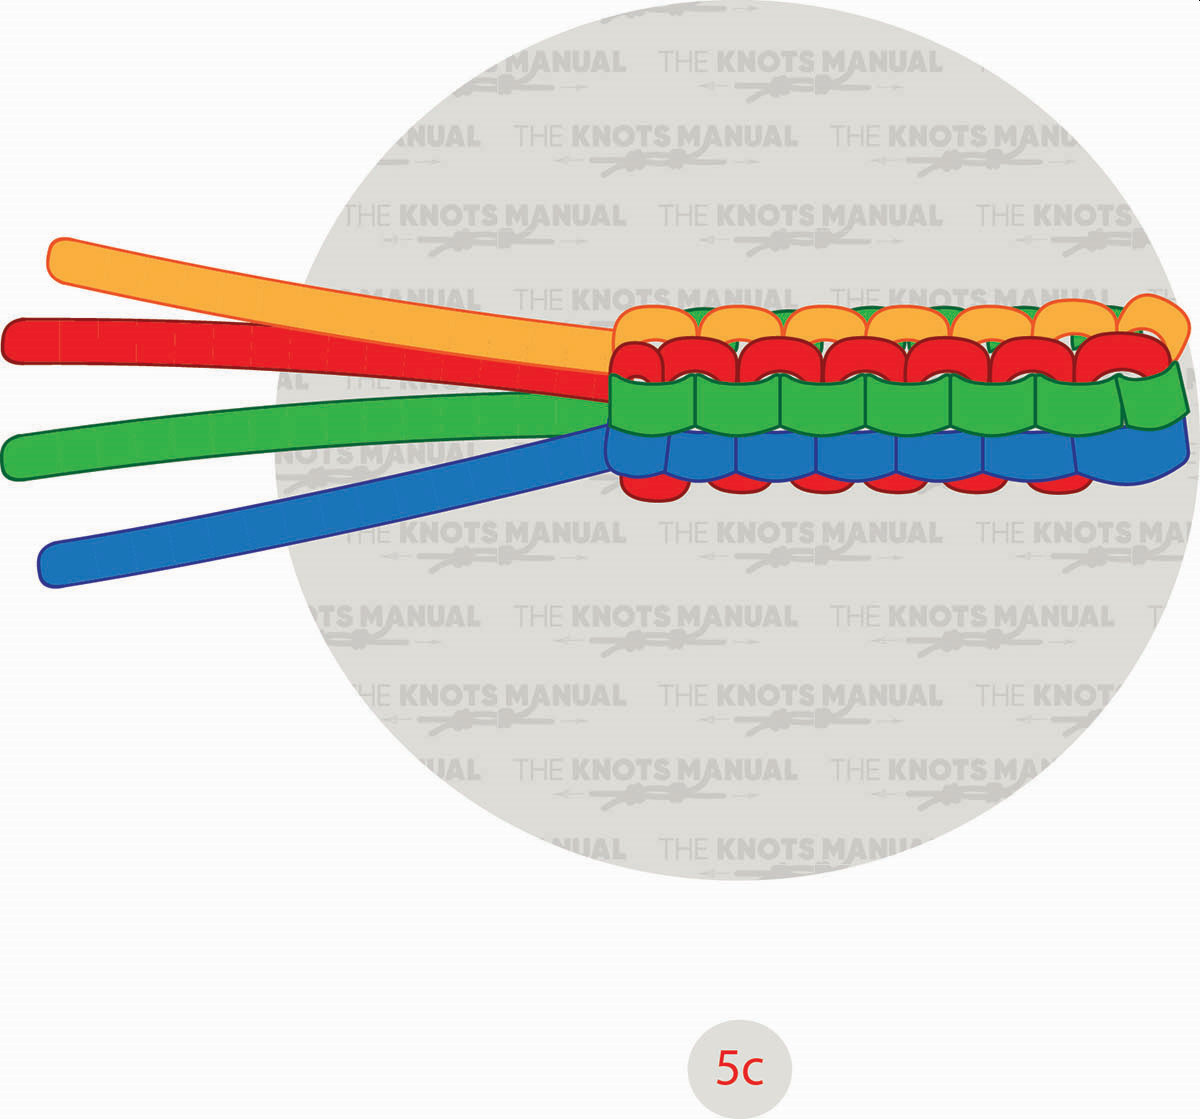
You can tie a nice-looking bracelet by tying many Crown Knots in a row.

