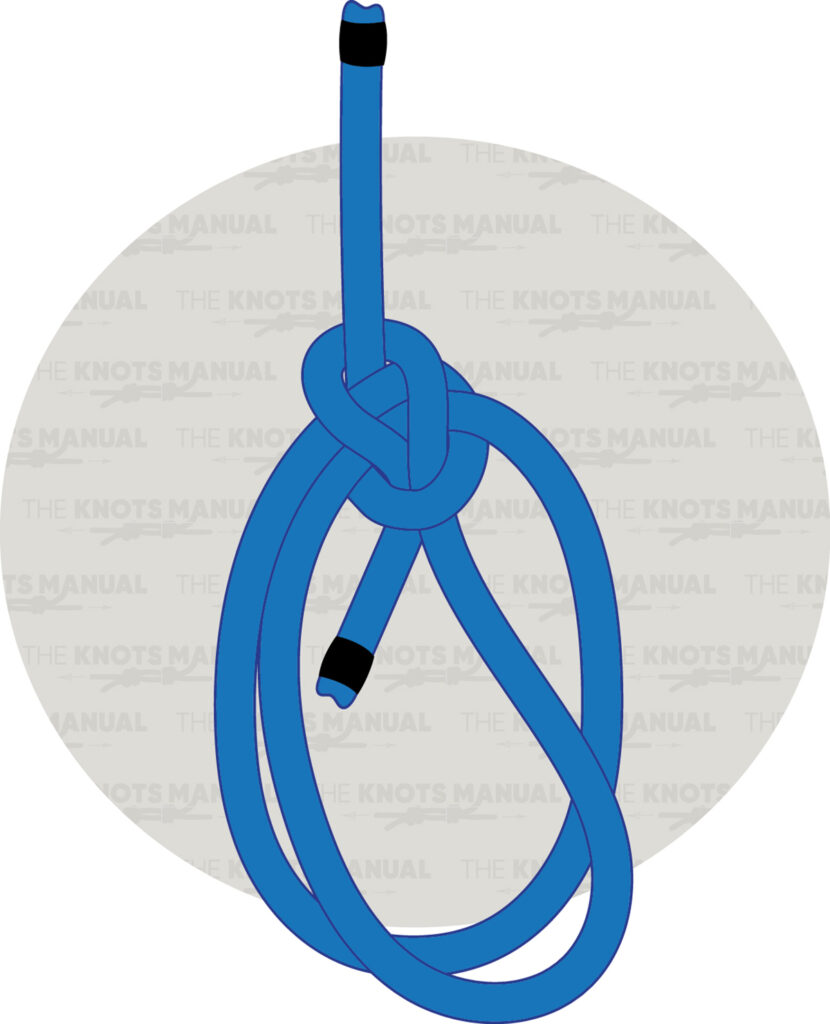
Bowline knots are among the most reliable and versatile knots used in various applications, from sailing to rescue operations. Dating back to ancient times, these knots create secure loops that are easy to tie and untie, even after being under heavy strain. While the standard bowline is widely known, there are several variations that serve specific purposes and improve functionality.
1. Water Bowline

The Water Bowline is a stable knot that is designed to hold securely in wet or slippery conditions where other knots may slip or jam. With an extra loop around the standing part, this variation of a bowline provides extra resistance against slippage. It maintains its strength and durability, even when soaked, so the knot is perfect for nautical environments. Tying and untying this knot is just as simple as the standard bowline, making it a practical choice for water-based activities.
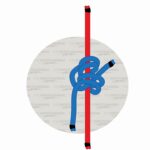
To tie a Water Bowline knot, make sure you have enough rope to form the knot and make a loop in the standing end. Then, make another loop and overlap the two loops as a Clove Hitch. Pass the tail end up through the loops, around the standing end, and back down through the Clove Hitch. Pull the ends to tighten and secure the knot.
2. Portuguese Bowline
With two adjustable loops, the Portuguese Bowline offers greater versatility compared to the standard bowline. This design allows the knot to distribute weight more evenly, making it ideal for rescue operations or securing uneven loads. Many climbers and rescue workers prefer it due to its ability to support multiple points of contact. The knot remains easy to untie even after bearing significant weight.
Tying a Portuguese Bowline knot begins by forming a loop in the rope and crossing the working end over the standing end to create a small overhand loop. Next, pinch to hold the lines together and make a large loop. Cross the working end over the small loop and pinch to hold it in place. Then, moving in the same direction, bring the working end around to make a second loop. Feed it through the small loop from behind, and then pass it around the backside of the standing line and then back down into the small loop. Tighten the knot by pulling the standing line and working end at the same time, making sure the loops remain evenly sized and secure.
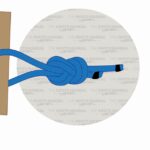
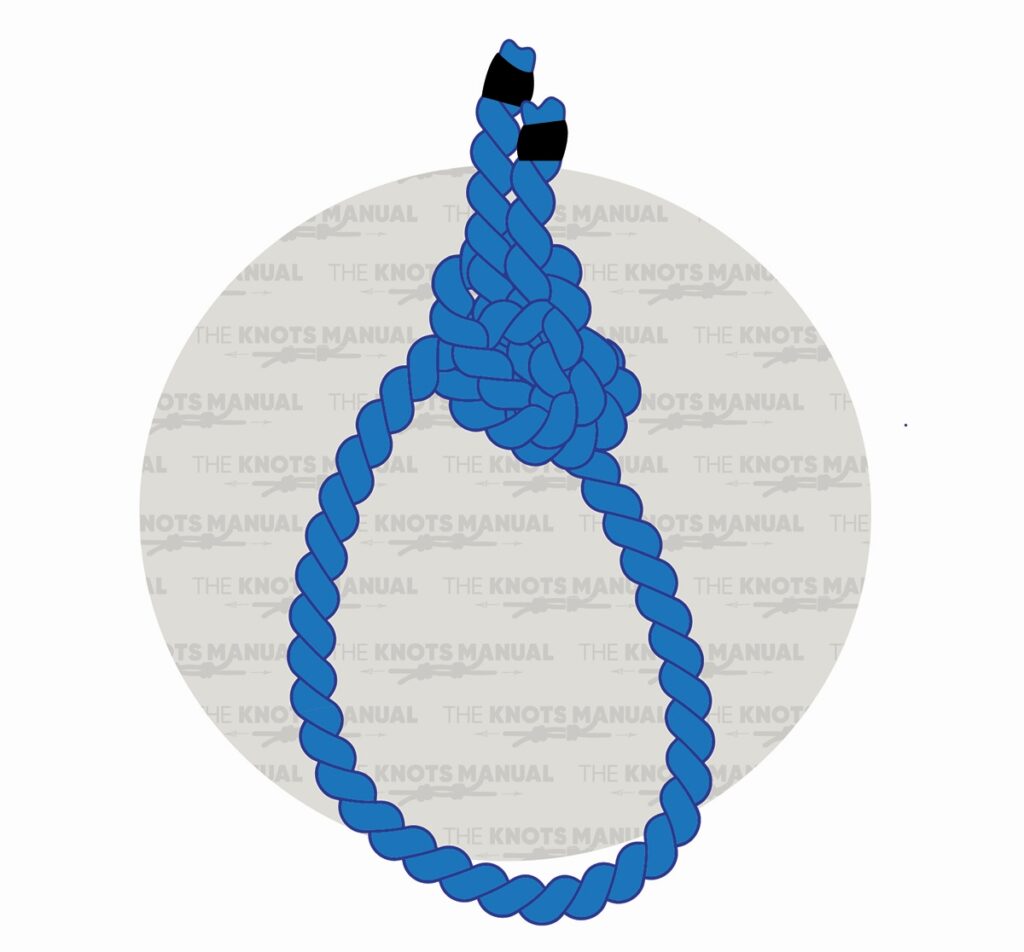
3. Running Bowline

Designed as a noose-like loop, the Running Bowline is often used when a strong, adjustable loop is needed. It tightens around an object under load but remains easy to release when slack is introduced. This makes it a popular choice for retrieving objects, securing loads, or setting up temporary anchors. Sailors, arborists, and rescue professionals commonly rely on this variation due to its strength and adaptability.
In order to tie a Running Bowline knot, double the end of your rope, and wrap the tag end over and under the standing line, bringing it back toward the top of the loop. Twist the line over itself to create a second small loop on the side of the large loop, and then thread the tag end of the rope through the small loop. Wind the tag end around the topside of the large loop and feed it through the small loop. Pull the tag end to tighten and secure the knot.
4. Spanish Bowline

The Spanish Bowline forms two loops that can be used for securing or distributing weight across multiple anchor points. Frequently employed in rescue operations, this knot allows for even pressure distribution when hoisting a person or load. Compared to other bowline variations, it offers increased versatility while maintaining easy adjustability. Learning this variation is beneficial for those involved in emergency response and rigging applications.
When tying a Spanish Bowline, create a closed loop in the middle of the rope. Fold it down to create two loops, and then fold the left loop over to the right. Next, bring the right loop over to the left, forming another loop at the bottom. Tuck each side of the bottom loop through each side loop, and complete the knot by pulling the loops while holding the standing ends in place.
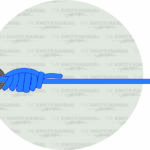
5. French Bowline

The French Bowline differs from other variations by allowing independent adjustment of each loop, making it highly adaptable. It is particularly useful in rescue and climbing scenarios where different-sized loops are needed. When properly tied, it remains secure under tension but can still be untied with ease. This flexibility makes it an excellent knot for dynamic load-bearing situations.
To tie a French Bowline, form a loop in the standing part of a rope and pass the working end through the loop. Next, bring the working end through the loop a second time. Wrap it around the standing end and pass it down through the loop. Hold the standing end with one hand, and with the other hand, pull down on the working end to tighten and finish the knot.
6. Yosemite Bowline
Enhancing the standard bowline, the Yosemite Bowline features an additional tuck for extra security. Rock climbers often prefer this variation because it reduces the risk of the knot working loose under repeated movement. Despite being slightly more complicated to tie, it offers superior reliability in high-stress environments. Unlike some other secure knots, it retains its ease of untying, even after being heavily loaded. This makes it a great alternative for those needing a more secure version of the traditional bowline.
Tying a Yosemite Bowline knot starts by creating a loop in a rope. Pass the working end through the loop and behind the rope’s standing end. Next, thread the working end through the big loop and then also through the smaller loop on top. Hold the larger, lower loop with one hand, and then pull upwards on the standing end to tighten the knot.