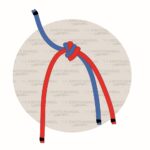
The Ashley Bend Knot is a strong and reliable knot used to join two ropes securely. It’s popular among sailors, climbers, and outdoor enthusiasts because it’s easy to tie and works well in many situations. This knot holds tightly under tension, making it ideal for activities where safety and strength are important. Its versatility makes it a great choice for everything from boating and camping to everyday tasks requiring sturdy rope connections.
Ashley Bend Knot: Quick Tying Guide
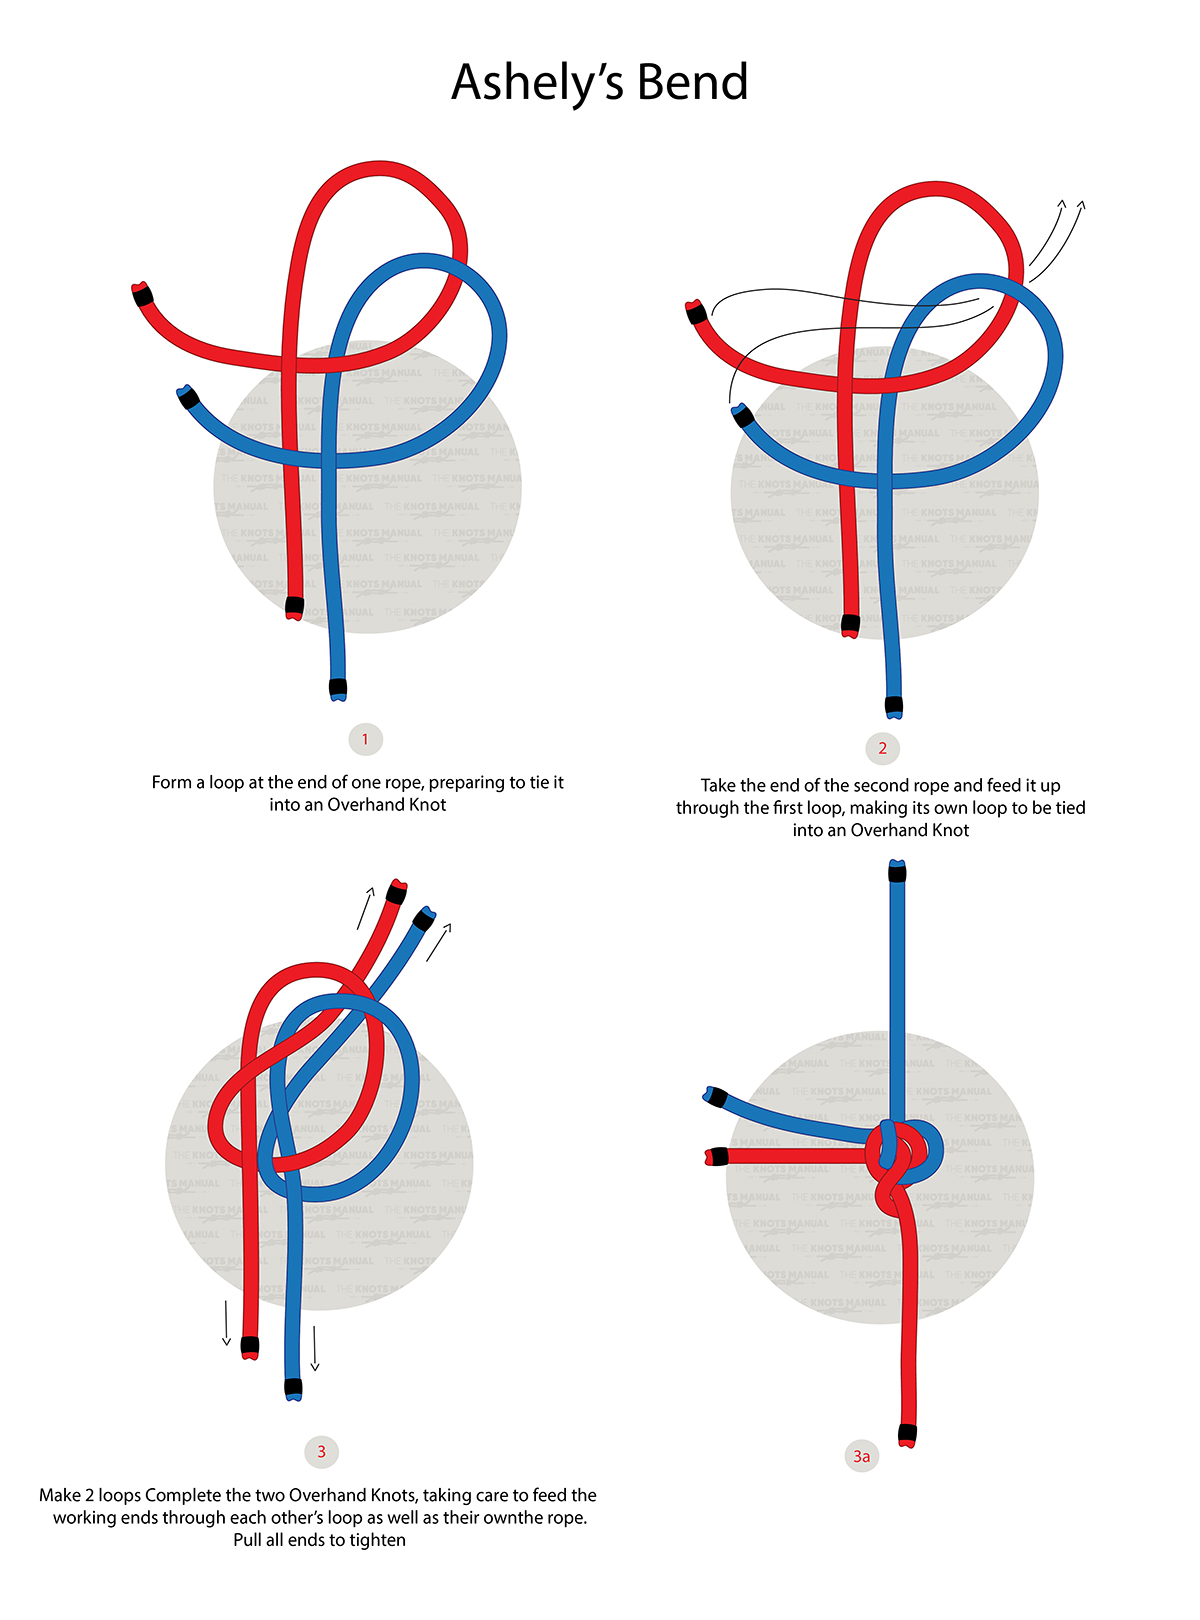
To tie an Ashley Bend Knot, begin by forming a loop at the end of one rope, preparing to tie it into an Overhand Knot. Then take the end of the second rope and bring it up through the first loop, creating its own loop to be tied into an Overhand Knot. Next, complete the two Overhand Knots with the two loops by feeding the working ends through each other’s loop, as well as their own rope. Pull all four ends to tighten and secure the knot.
Why Use an Ashley Bend Knot?
The Ashley Bend Knot is ideal for tasks requiring a dependable connection between two ropes, whether they are the same size or different. It is designed to stay secure and is less likely to slip, even when under heavy pressure. Though this knot is dependable, it can be a bit more difficult to tie compared to simpler options like the Square Knot. With a little practice learning, it is worth the effort for those who need a knot they can count on for a variety of tasks.
Knots Similar to the Ashley Bend Knot
Double Fisherman’s Knot: A secure knot for joining two ropes, commonly used in climbing.
Sheet Bend: Ideal for joining ropes of different thicknesses.
Carrick Bend: Strong and easy to untie, even after heavy loads.
Square Knot: Simple and quick, but less secure than other bends.
Step 1:
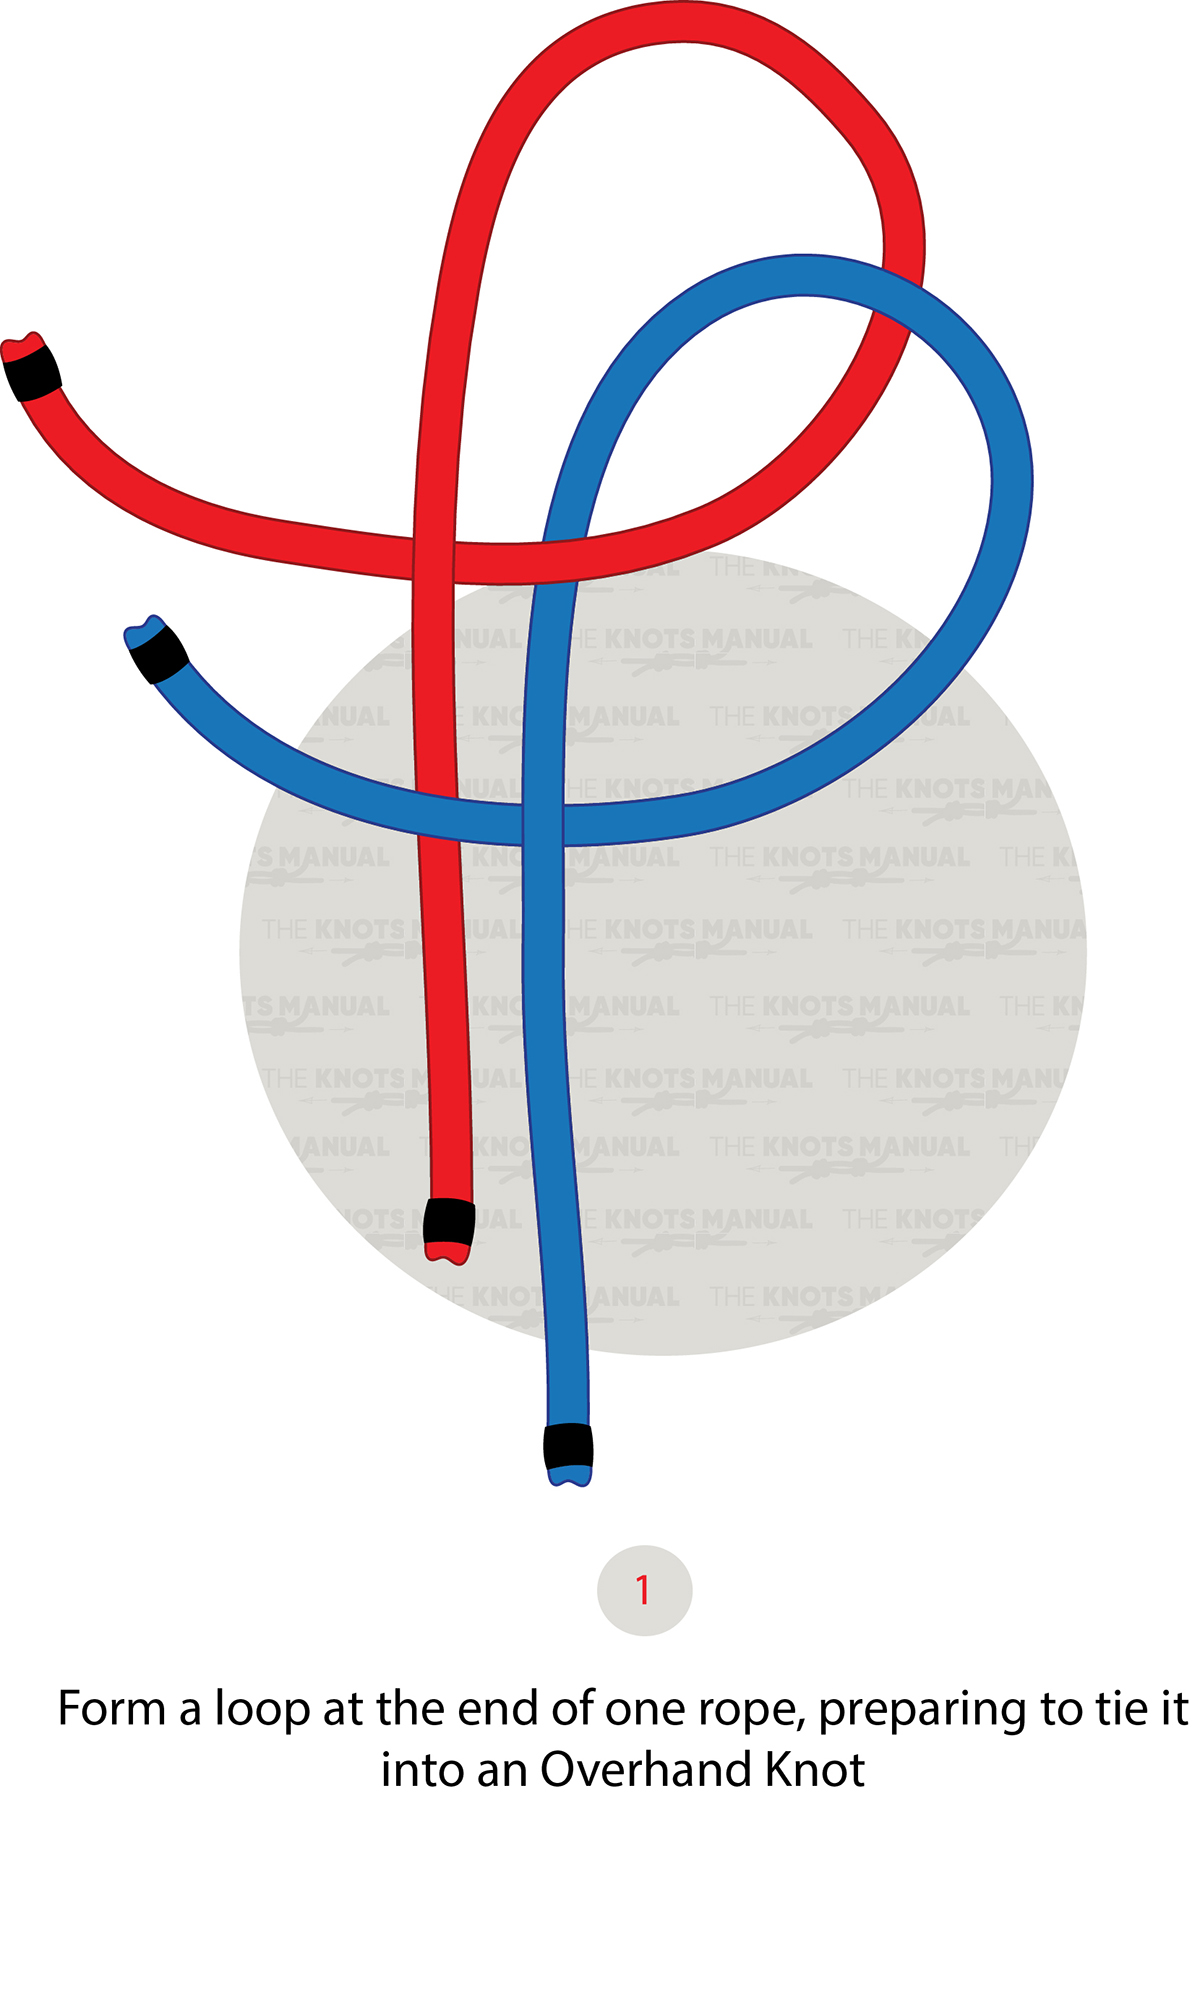
Make a loop at the end of one rope to prepare it for tying into an Overhand Knot.
Step 2:
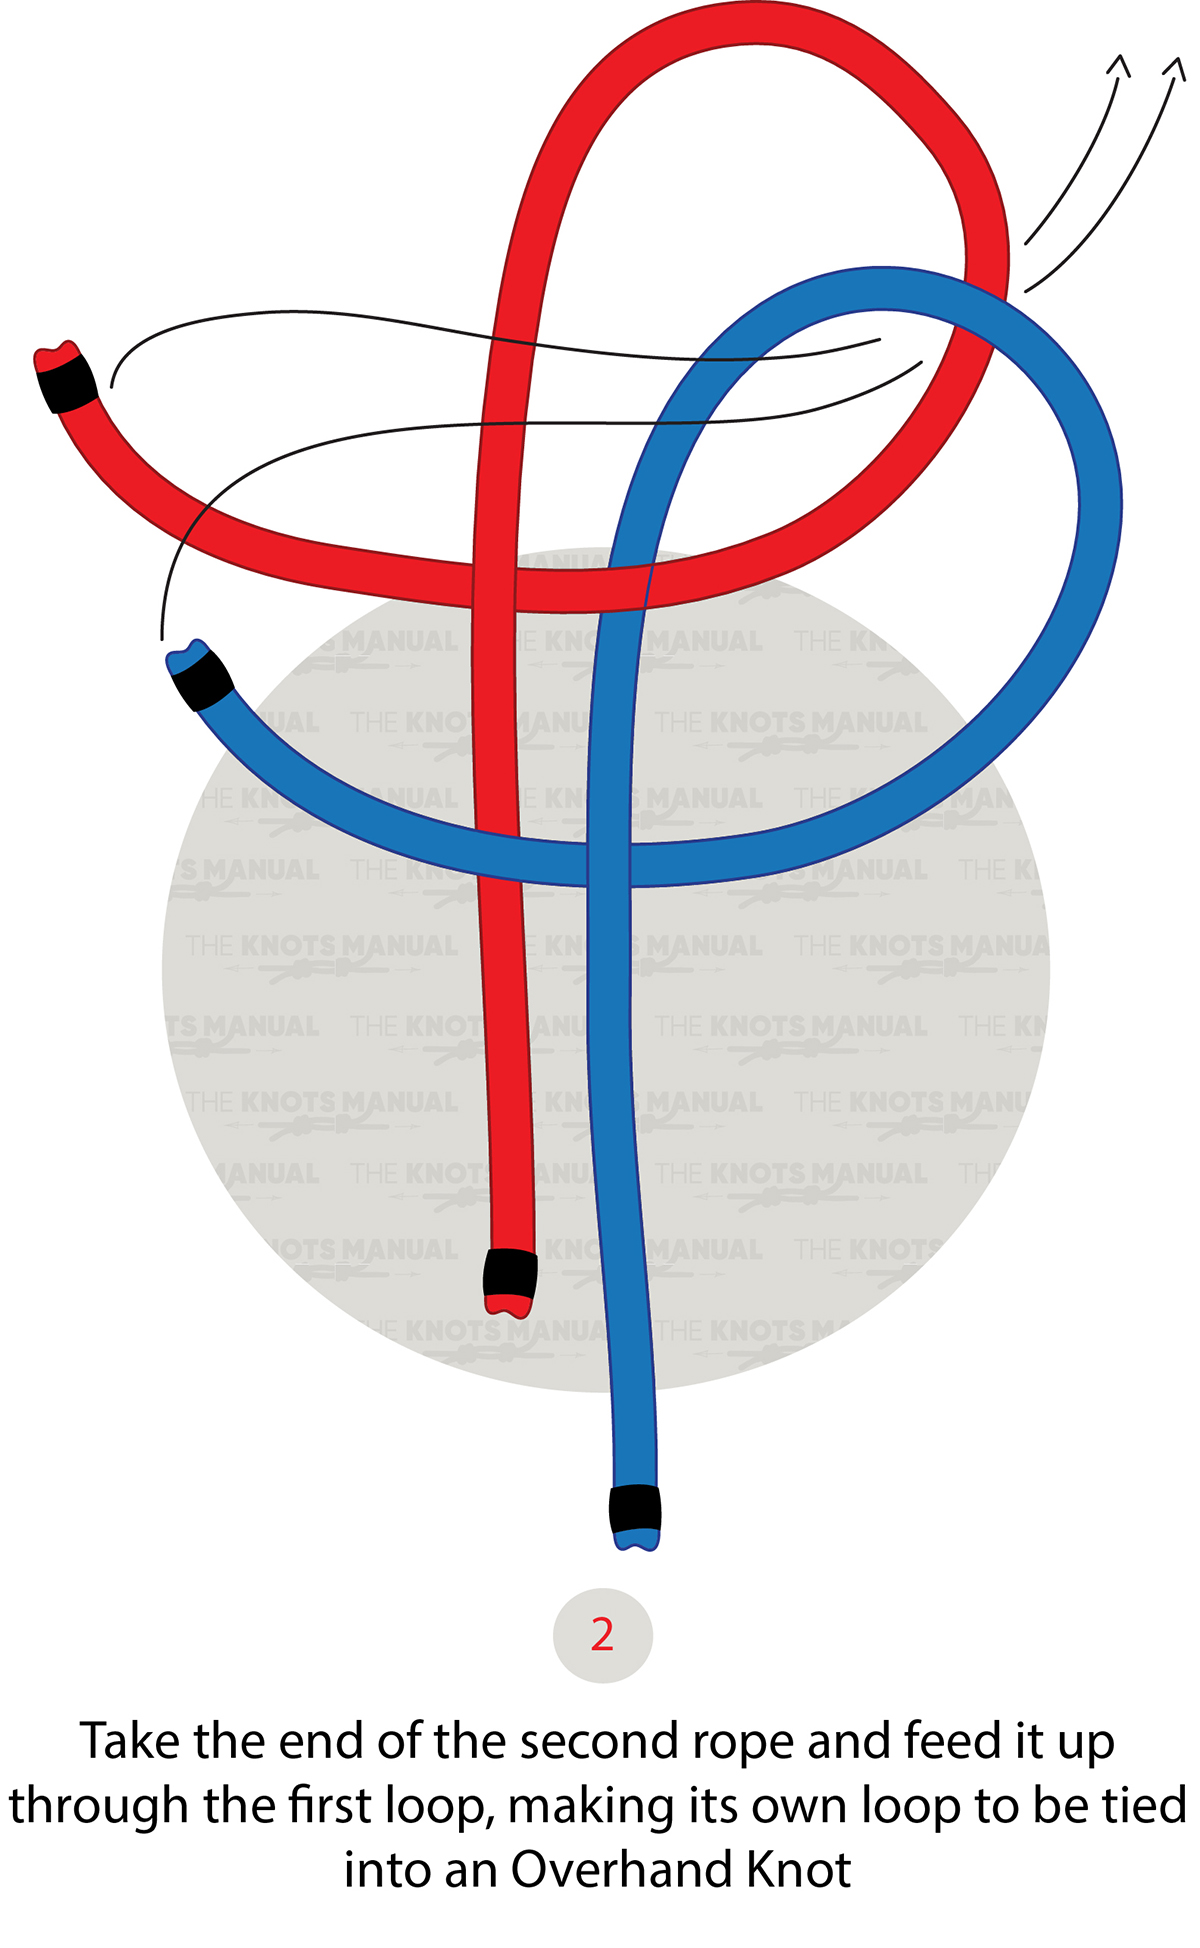
Bring the second rope and feed it up through the first loop, making its own loop that will be tied into an Overhand Knot.
Step 3:
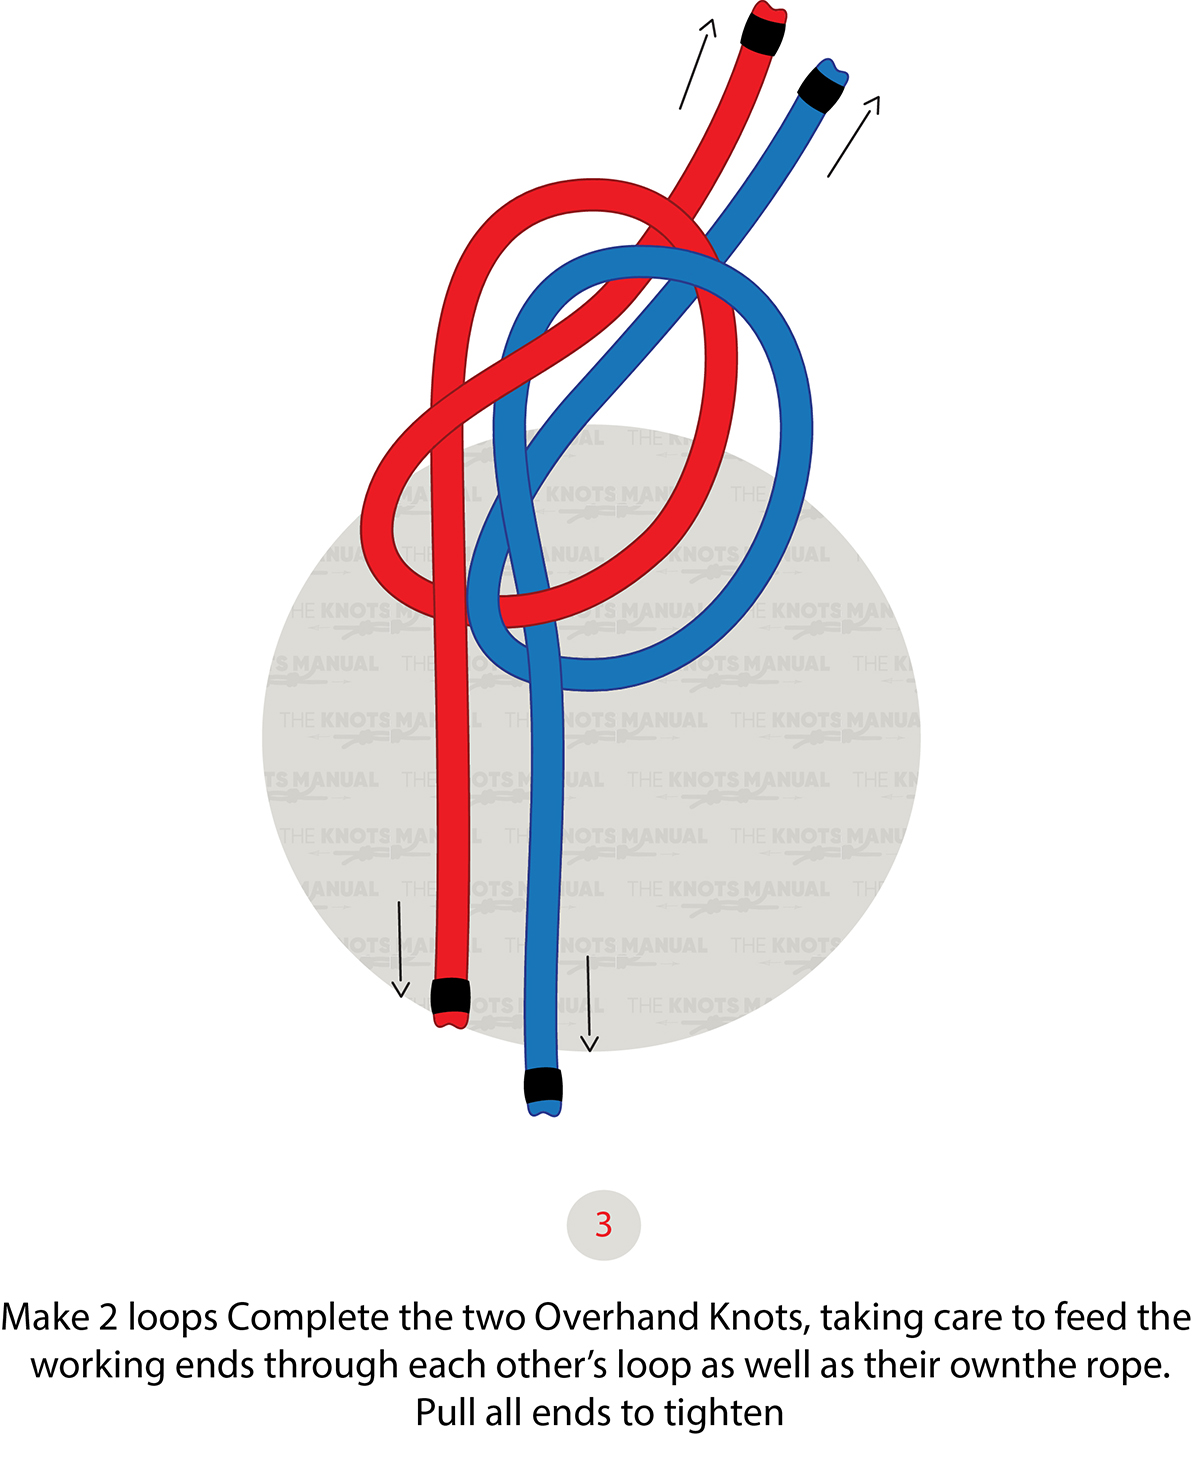
Make the two loops complete the two Overhand Knots by feeding the working ends through each other’s loops and their own rope.
Step 3a:
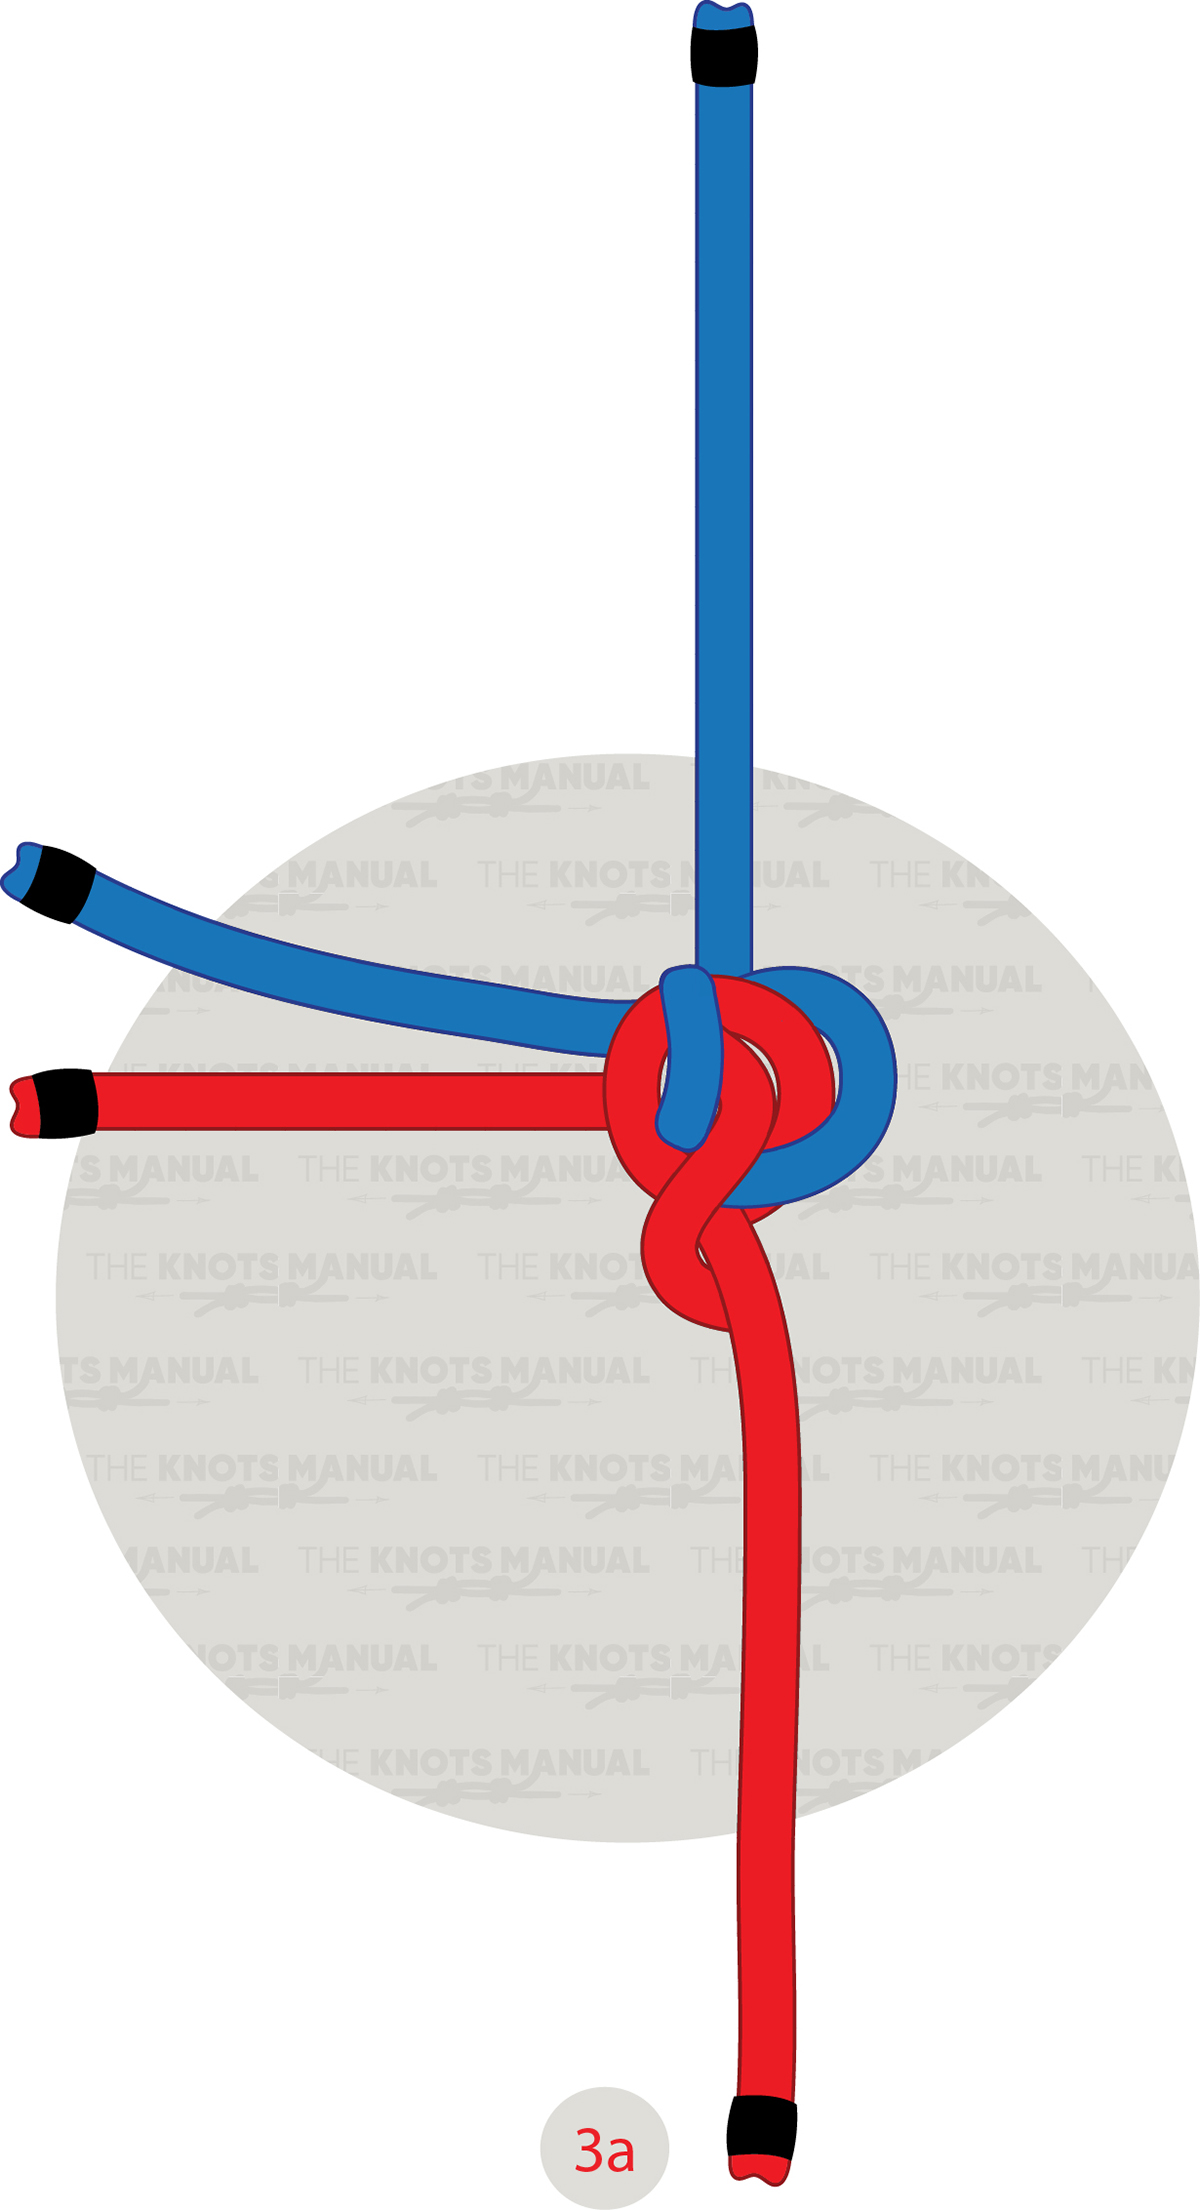
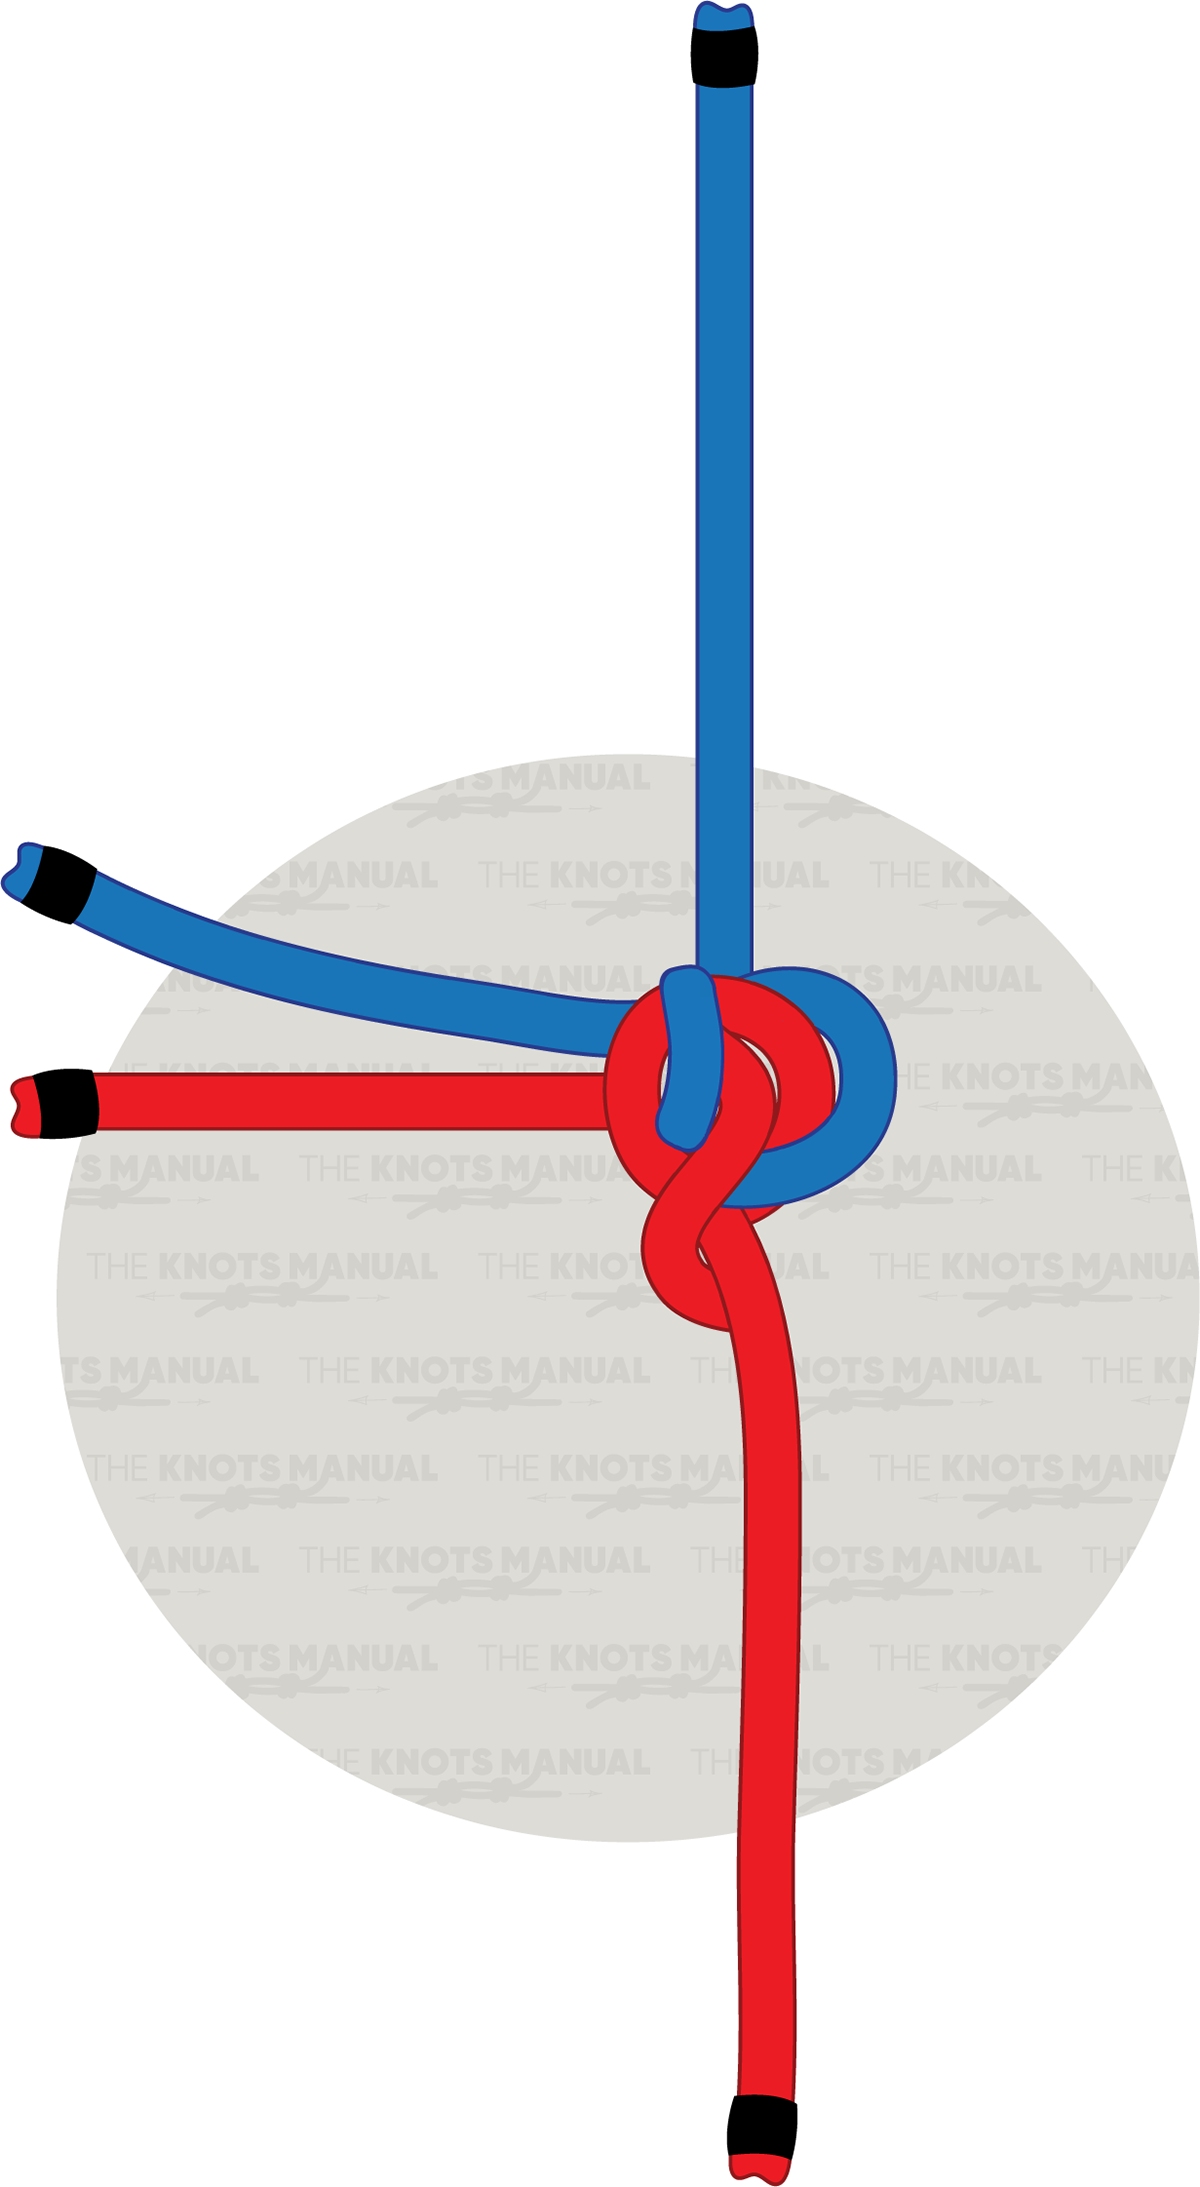
Pull the ends to tighten and complete the knot.


