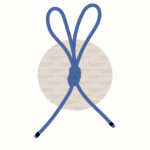
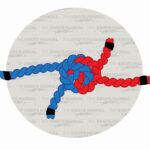
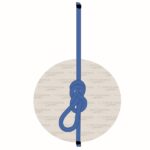
The Alpine Butterfly Bend is a knot that creates a secure connection between two ropes. Its main advantage is that it’s tied almost identically to the Alpine Butterfly Loop. If you know how to tie it, you won’t need to re-learn a new knot for this purpose.
In other sources, it’s also sometimes referred to as the Lineman’s Bend.
Quick Guide: Tying the Alpine Butterfly Bend Knot
The main structure of the Alpine Butterfly Bend is identical to the widely-known Alpine Butterfly Knot. The only difference is that instead of creating a loop, it creates two parallel rope ends exiting from the same side.
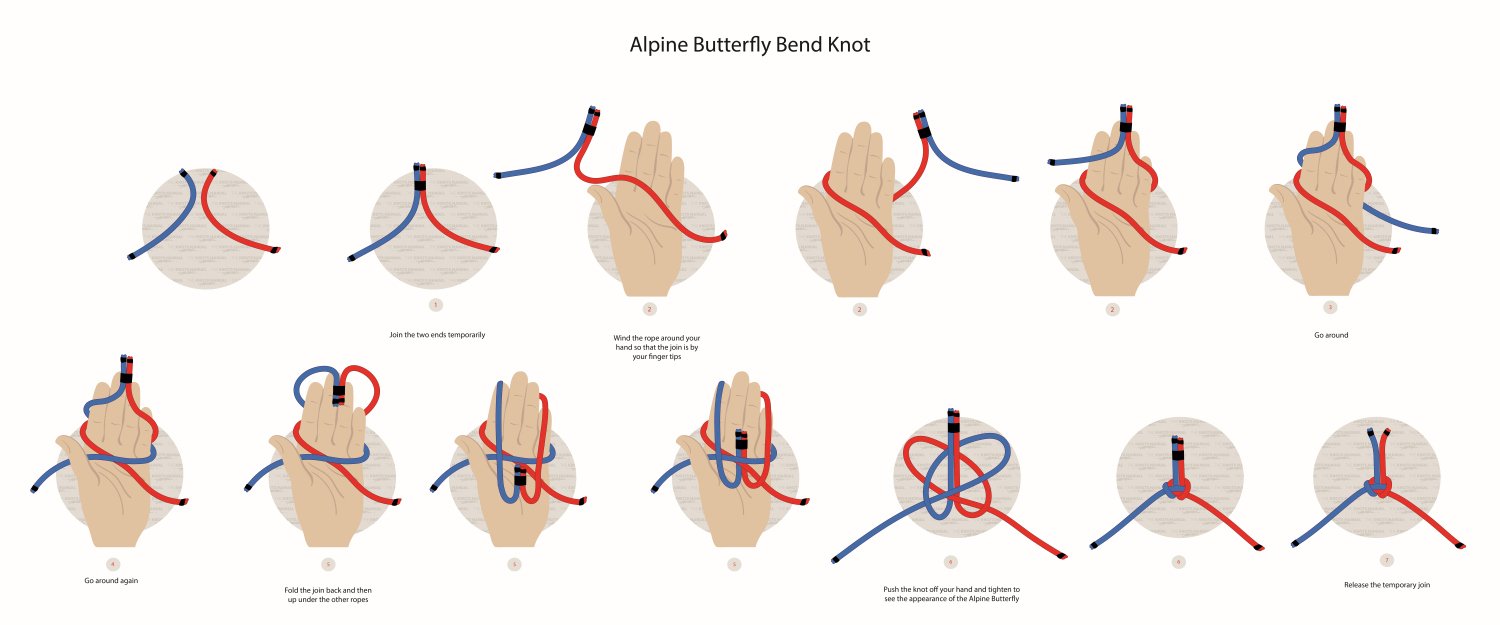
To tie it, temporarily join the ends of both ropes together with tape. You can also hold them together with your hand instead. Place the left (red) rope in front of it and wrap it around clockwise. Then do another full turn with the left (blue) rope in the same direction. Finally, take both rope ends and pass them over and underneath the two bottom strands to finish the knot. Tighten and dress to finish the knot.
You should keep the ends of the Alpine Butterfly Bend Knot at least 10 inches (25 cm) long when used in critical, life-threatening applications. Otherwise, if the knot hasn’t settled, the ends may slip through it.
To check that it’s tied correctly inspect the knot from both sides. On each side, there should be 4 strands forming the knot – 2 parallel ones and another 2 parallel ones perpendicular to them.
Pay close attention to how the strands are placed on your hand and tied. If you do something wrong, then you could tie an incorrect version, which won’t be as secure.
It should also be used only with ropes that are of similar diameters. Otherwise, the thinner rope is more likely to slip through.
Pros and Cons of the Alpine Butterfly Bend
The Alpine Butterfly Bend is a very easy knot to tie. Especially if you already know how to tie the Alpine Butterfly Loop. That’s why it’s often taught to climbers as the go-to knot for connecting 2 ropes.
Another benefit is that both rope ends exit in the same direction, perpendicular to the main rope. This is beneficial in rock climbing because as the rope moves up and down, it may catch against rocks. With this knot, this is much less likely to happen.
The Alpine Butterfly Bend is a very secure bend. It’s similar in strength to the Zeppelin and the Hunter Bend Knots. In fact, the Alpine Butterfly Loop (which is identical to the bend version) is often used to isolate a damaged section of a climbing rope.
One downside to the Alpine Butterfly Bend is that it jams when loaded with shock weights. But even then it can be untied with a bit of patience without cutting the rope.
Another downside is that it can be tied incorrectly. This happens if you don’t do enough turns around the hand or don’t pass both ends through the bottom strands correctly. In this case, the knot can turn out to be lethal when used in critical applications.
Common Uses for the Alpine Butterfly Bend
Most commonly, the Alpine Butterfly Bend is used in climbing, mountaineering, caving, and search and rescue. It’s used to connect two ropes that are shorter in length. It’s advantageous over other knots because it’s very secure and both ends come out in the same direction. The Flat Overhand Bend is often used because of this reason, but it’s much weaker than the Alpine Butterfly Bend.
But it can be used in any universal situation where you need to connect two ropes. If you already know the Alpine Butterfly Loop, then you don’t need to learn other bend knots.
Knots Like the Alpine Butterfly Bend
Flat Overhand Bend: Another common climbing knot used to connect two ropes. Like in the Alpine Butterfly Bend, both ends also exit perpendicularly, parallel to one another. It has an even slimmer profile, so it’s less likely to catch on rocks but it’s also much weaker.
Figure 8 Bend: A very secure way of connecting two ropes. It’s even more secure than the Alpine Butterfly Bend. It’s a bit more difficult to tie, but it doesn’t jam when loaded with shock loads.
Double Fisherman’s Knot: This knot is one of the most secure bend knots. It’s also easy to tie and has a slimmer profile than the Alpine Butterfly Bend. Its main downside is that it is near-impossible to untie when loaded with shock loads.
Zeppelin Bend: A knot that can be used as an alternative to the Alpine Butterfly Bend. It’s easy to tie, secure, and doesn’t jam.
Alpine Butterfly Loop: An identical knot to the Alpine Butterfly Bend. The only difference is that it creates a loop instead of two parallel rope ends exiting from the same side. It’s tied a bit differently (but on the same principle) because of this reason.
Double Alpine Butterfly Loop: A version of the Alpine Butterfly Loop with one extra turn. It creates two loops instead of one. It’s similar in strength and in nearly all other aspects.
Step-By-Step Guide: How to Tie the Alpine Butterfly Bend Knot
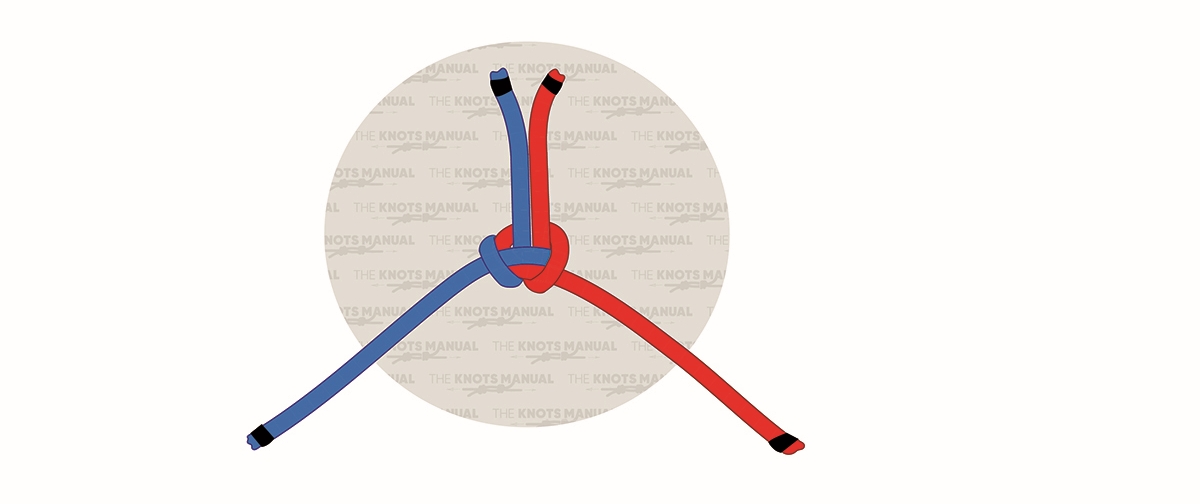
A step-by-step guide on tying the Alpine Butterfly Bend Knot.
Step 1:

Place the working ends of both ropes next to each other.
Step 2:
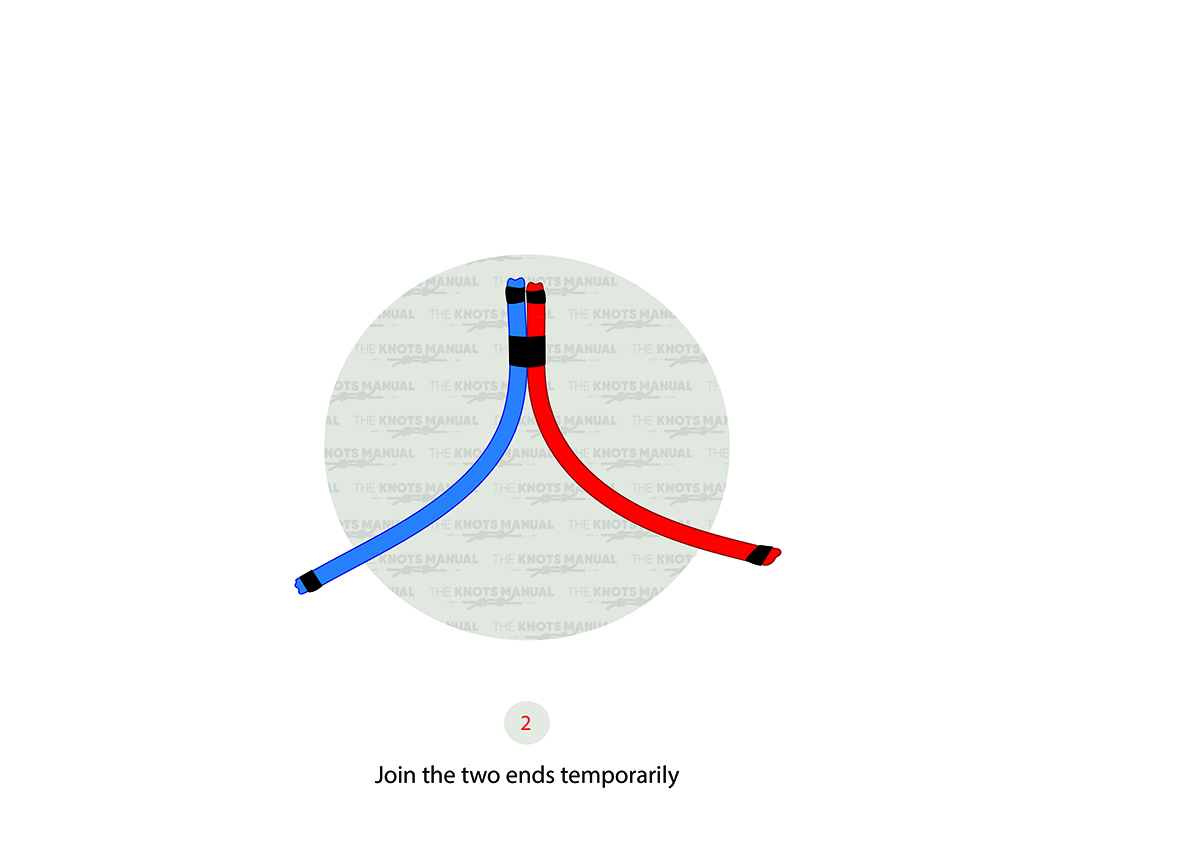
Join them temporarily. You can also hold them with your hand.
Step 2a:
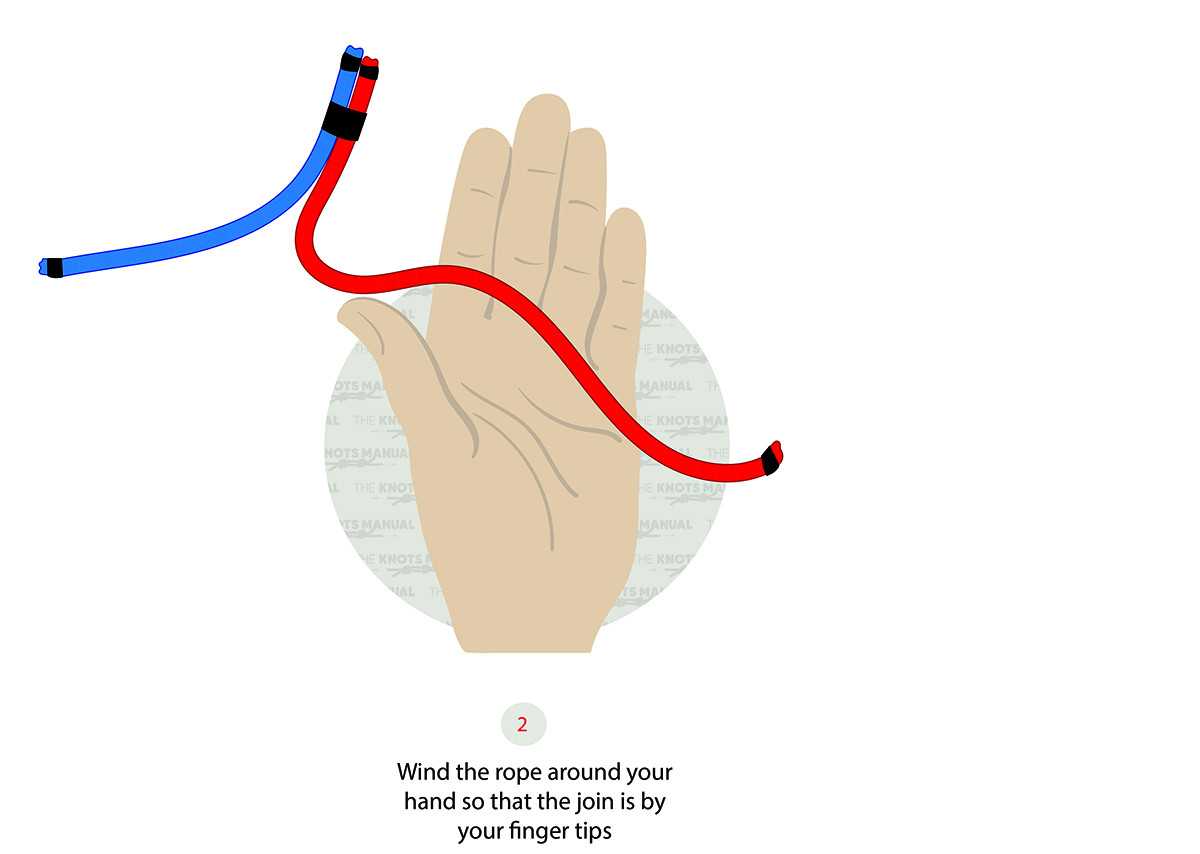
Place the right (blue) rope in front of your left palm as illustrated.
Step 2b:
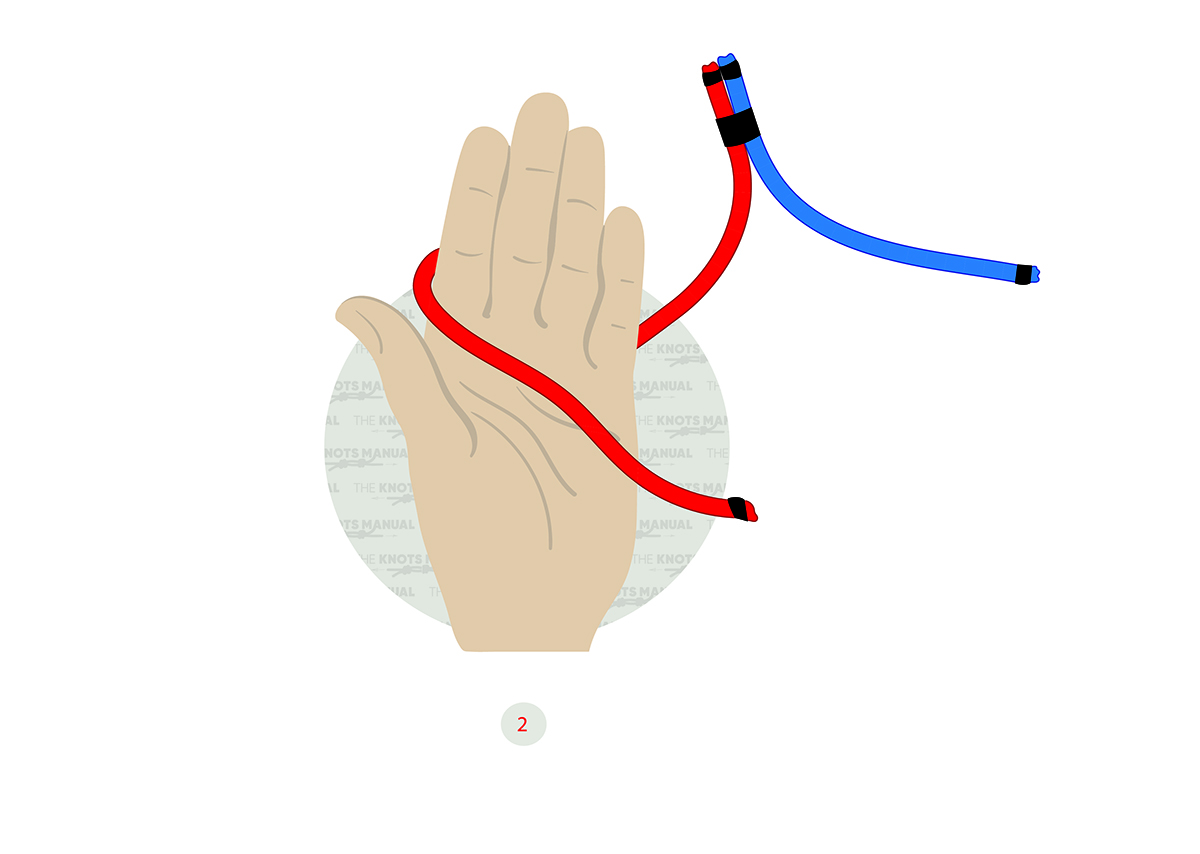
Wrap it around your palm clockwise.
Step 2c:
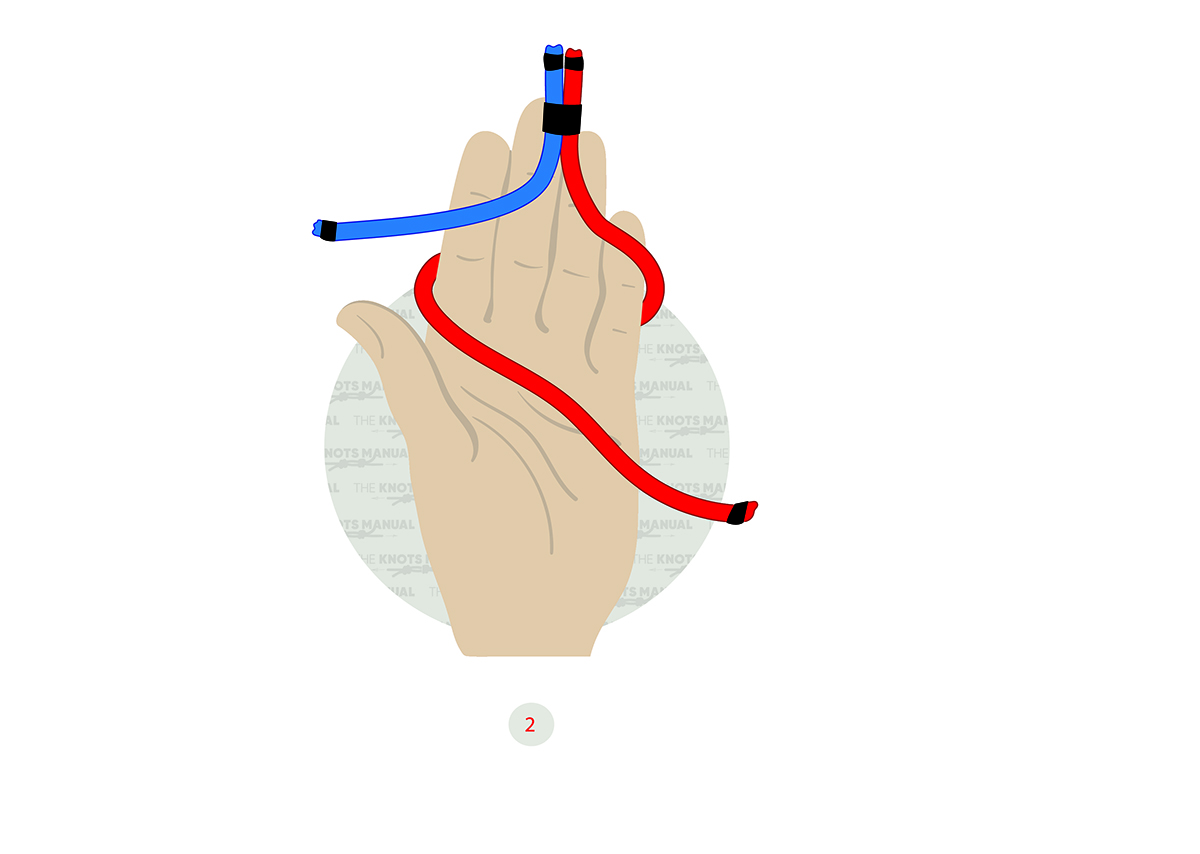
Finish a single full turn.
Step 3:
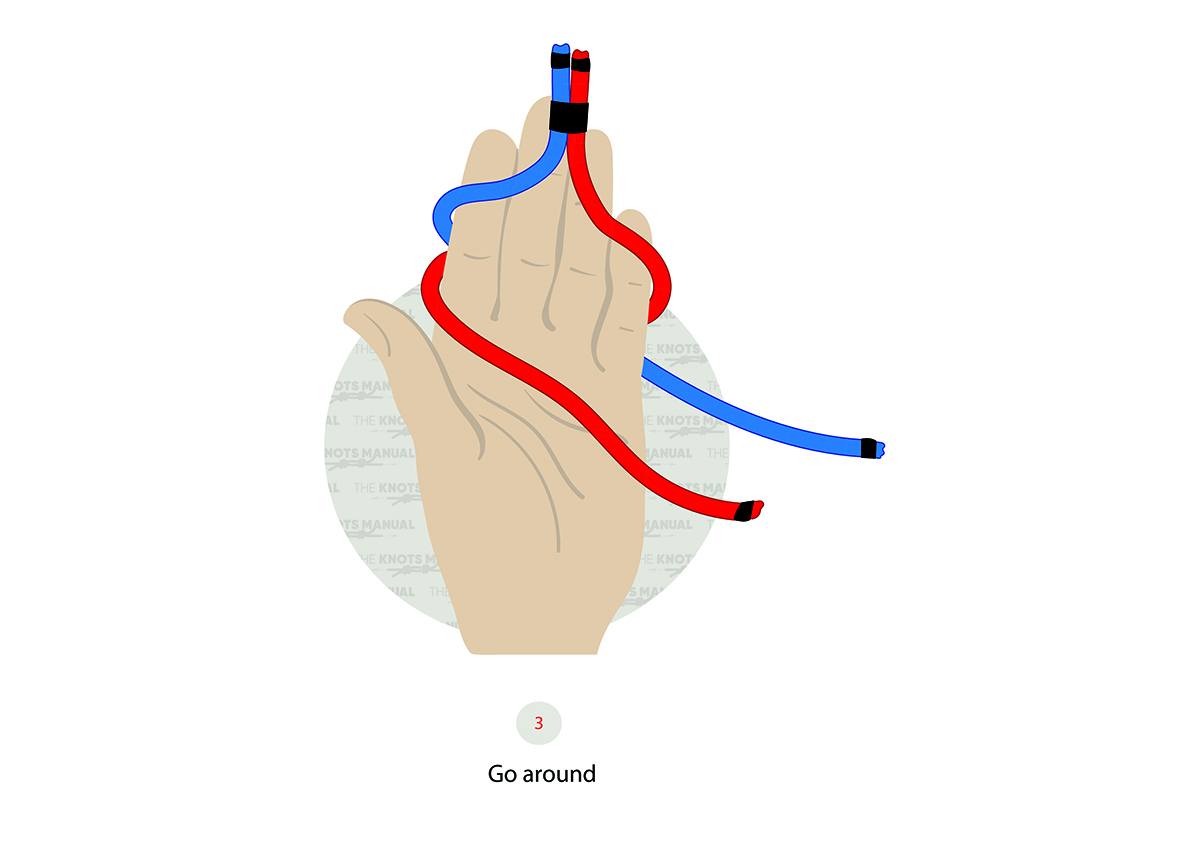
Now wrap the left (blue) rope in the same direction.
Step 4:
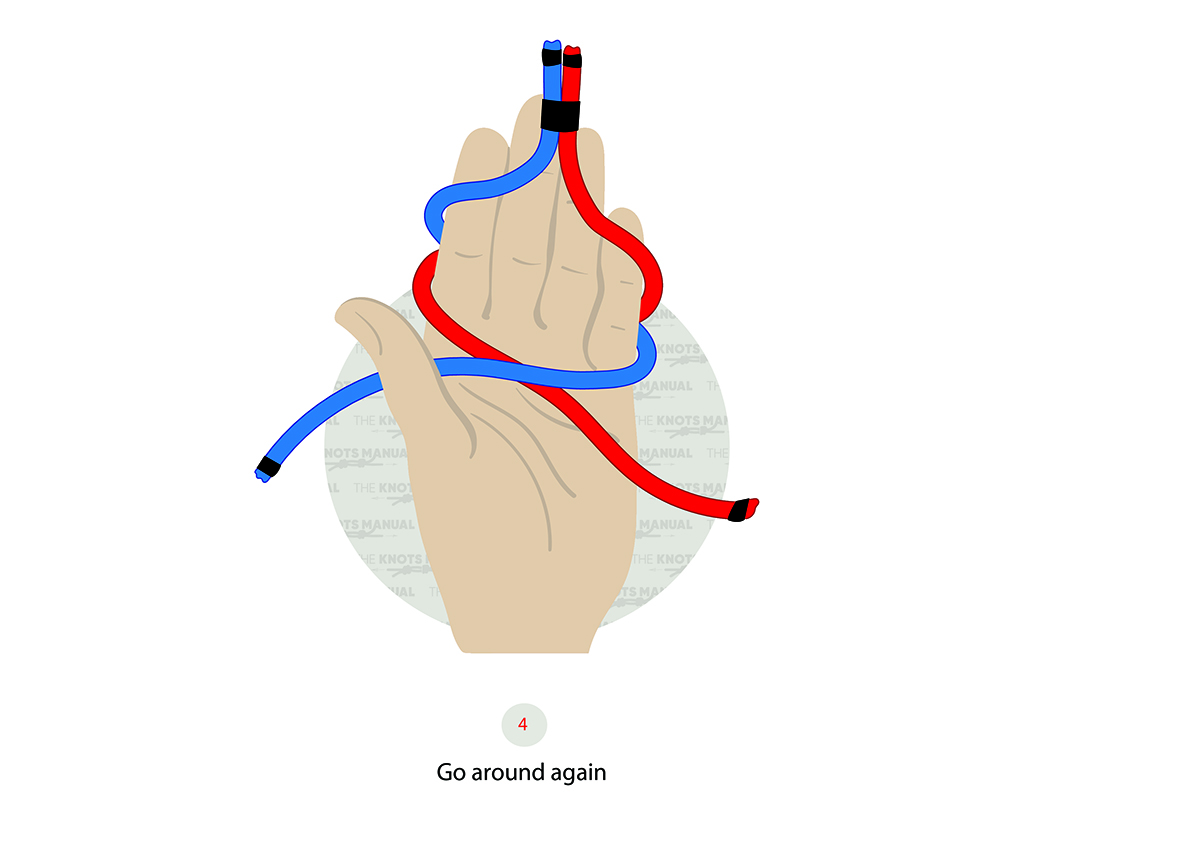
Finish one full turn with the left (blue) rope.
Step 5:
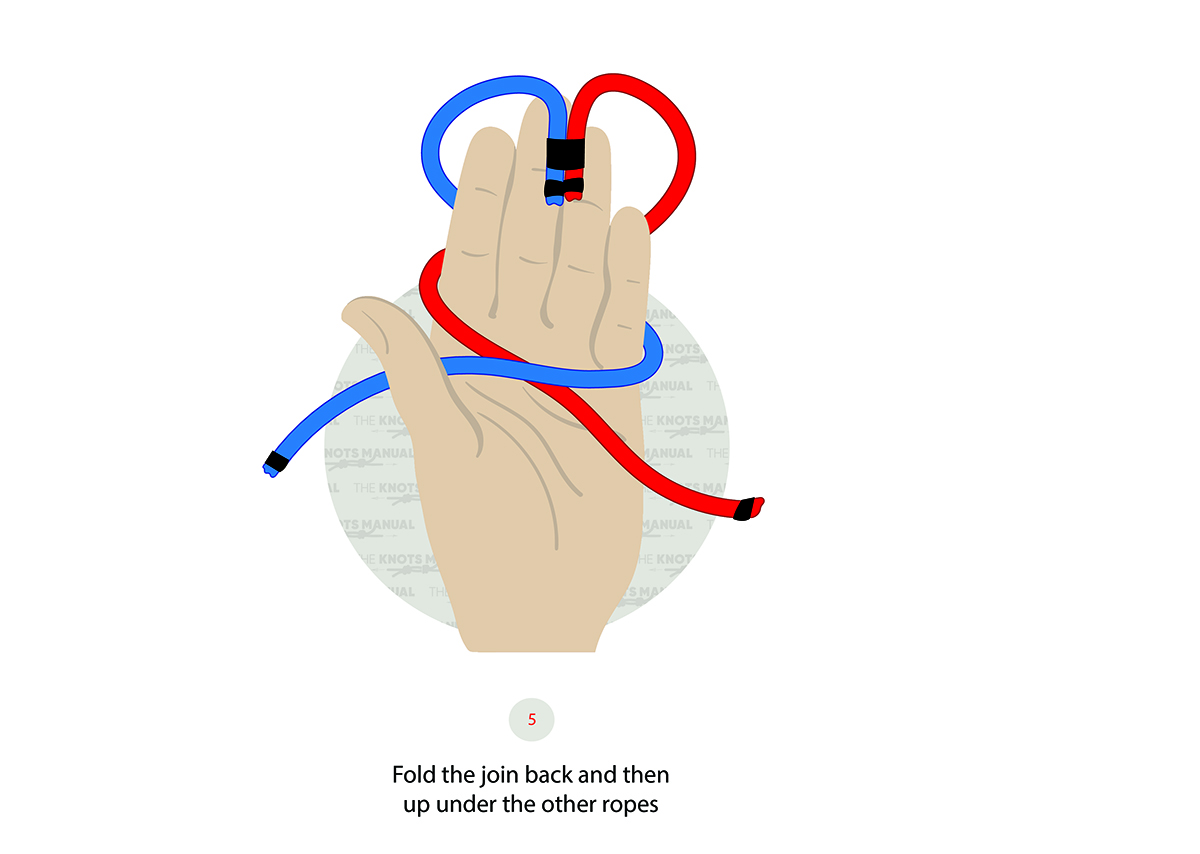
Take the working ends of both ropes in your other hand.
Step 5a:

Pass them over the two bottom strands.
Step 5b:
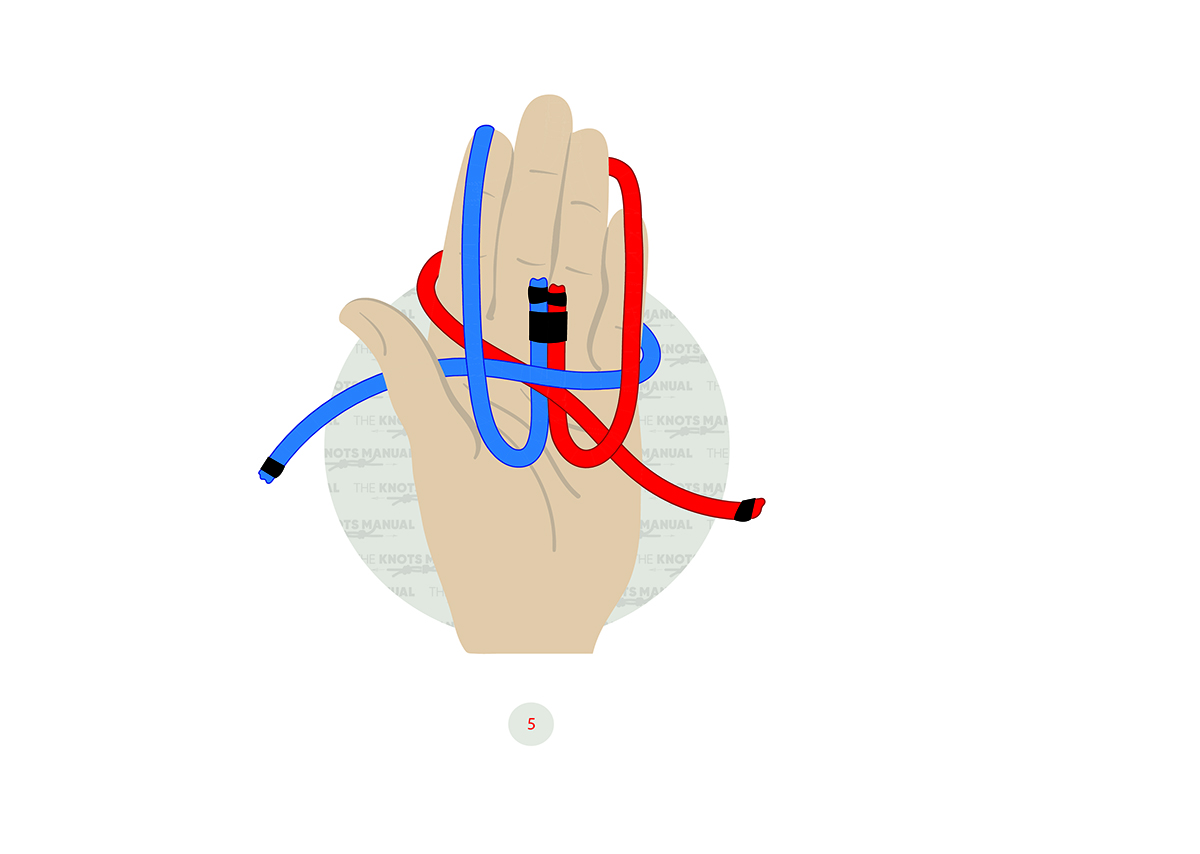
Pass them underneath the two bottom strands.
Step 6:
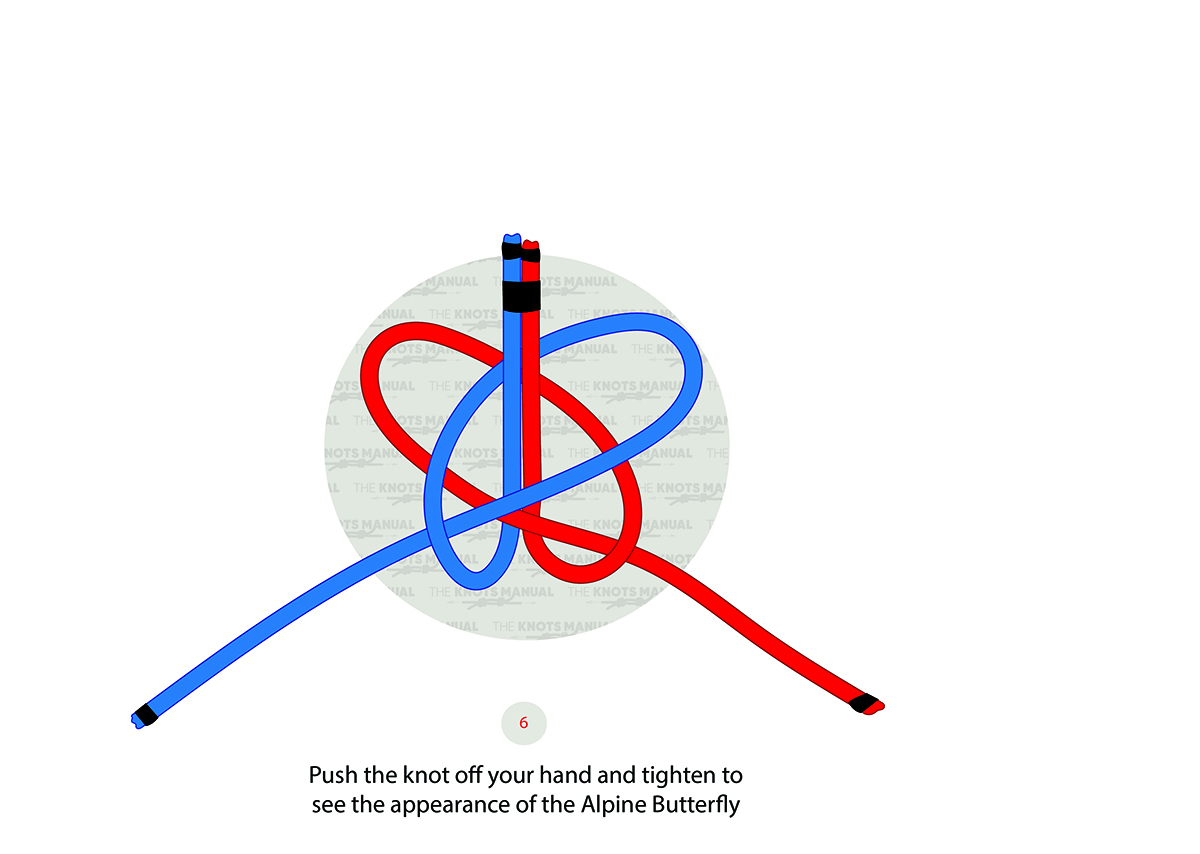
Take out your hand. The resulting knot should look like a butterfly.
Step 7:

Tighten the knot.
